Excel gridlines, those light gray lines that delineate cells, are incredibly helpful for on-screen navigation and data organization. However, by default, Excel doesn’t print these gridlines, which can sometimes make your printed spreadsheets harder to read. If you’ve ever printed an Excel sheet and found your data floating on a blank page, this guide is for you. We’ll show you exactly how to print gridlines in Excel, ensuring your printed documents are as clear and organized as they are on your screen.
There are a couple of simple methods to ensure your gridlines appear on your printed Excel sheets. Using borders is one approach, but it can be time-consuming to apply them manually to your entire dataset. For a much quicker and more efficient solution, Excel provides built-in options to print gridlines with just a few clicks. Let’s explore these straightforward methods to get those helpful lines onto your paper copies.
Method 1: Enabling Print Gridlines from the Page Layout Tab
This is the quickest and most direct way to instruct Excel to print gridlines. It involves a simple checkbox in the Excel ribbon, making it incredibly easy to toggle gridline printing on or off.
-
Navigate to the Page Layout Tab: In your Excel ribbon at the top, locate and click on the “PAGE LAYOUT” tab.
-
Find the Sheet Options Group: Within the “PAGE LAYOUT” tab, look for the “Sheet Options” group. It’s usually positioned towards the left side of the ribbon.
-
Check the “Print” Box under Gridlines: In the “Sheet Options” group, you’ll see a “Gridlines” section with two checkboxes: “View” and “Print.” To enable gridlines for printing, simply check the box next to “Print.”
 Choose the Print option from the FILE menu to preview spreadsheet with gridlines
That’s all there is to it! With this single checkbox ticked, Excel will now include gridlines when you print your worksheet.
To verify that gridlines will be printed, you can easily preview your document before sending it to the printer. Go to FILE > Print or press Ctrl + P. The Print Preview pane will display exactly how your worksheet will appear on paper, now with the gridlines clearly visible.
Method 2: Printing Gridlines Through Page Setup Options
If you’re already in the Print Preview area or prefer to manage print settings through the Page Setup dialog, you can also enable gridline printing from there. This method is just as simple and offers another convenient way to control gridline printing.
- Access the Page Setup Dialog: When you are in the Print Preview pane (FILE > Print or Ctrl + P), look for the “Page Setup” link located under the “Settings” options. Click on this link to open the Page Setup dialog box.
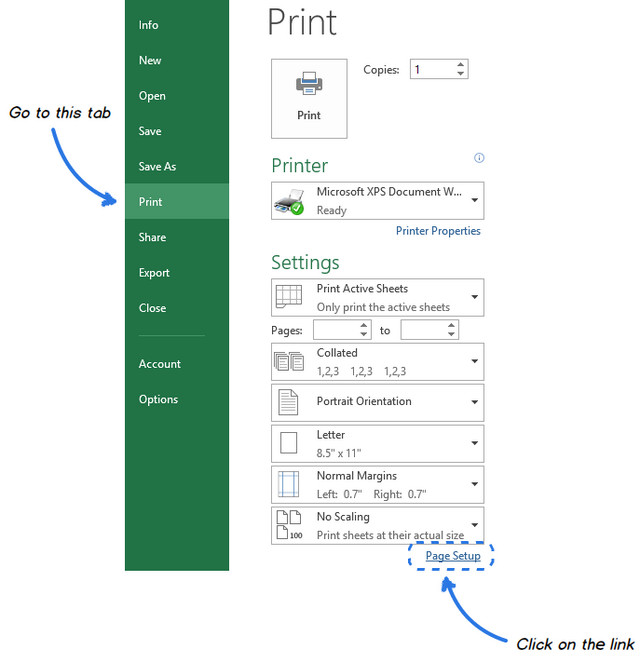 Click on the Page Setup link under the Print Settings list to open the Page Setup dialog
-
Go to the Sheet Tab: In the Page Setup dialog box, navigate to the “Sheet” tab. It’s typically the last tab on the right.
-
Enable Gridlines in the Print Section: Within the “Sheet” tab, find the “Print” section. You will see a “Gridlines” checkbox. Check this box to instruct Excel to print gridlines.
-
Click “OK”: After checking the “Gridlines” box, click the “OK” button at the bottom of the Page Setup dialog.
Immediately, the Print Preview pane will refresh, and you’ll see your spreadsheet displayed with gridlines, confirming that they will be printed.
Important Note: Excel will only print gridlines for cells that contain data or formatting. Empty cells without borders will not have gridlines printed around them. If you need to include gridlines for blank areas, you can define a Print Area that encompasses the desired range, including the blank cells.
Customizing Gridline Color for Printing
While the default light gray gridlines are functional, you might want to make them more prominent on your printed sheets, especially if you are using a color printer. Excel allows you to change the gridline color, making them darker or choosing a different color altogether for better visibility.
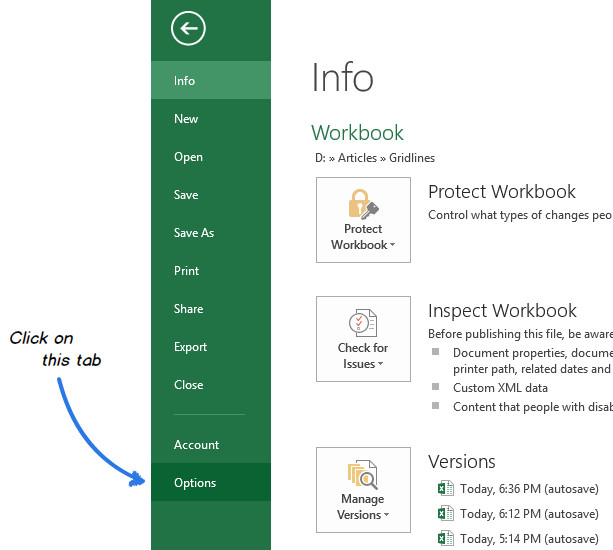
- Open Excel Options: Click on the FILE tab in the ribbon, and then select Options from the menu. This will open the Excel Options dialog window.
 Choose Options from the FILE menu to open the Excel Options dialog window
-
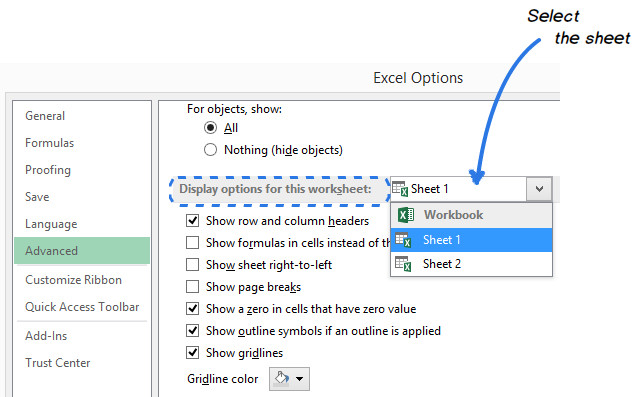
Navigate to the Advanced Category: In the Excel Options dialog, click on the Advanced category in the left-hand pane.
-
Scroll to Display Options for this Worksheet: Scroll down the right-hand pane until you find the section labeled “Display options for this worksheet.”
-
Select the Worksheet: If you have multiple worksheets in your workbook, use the dropdown list within this section to choose the specific sheet for which you want to change the gridline color.
-
Ensure “Show gridlines” is Checked: Make sure the “Show gridlines” checkbox is selected. This ensures that gridlines are visible on your screen, which is a prerequisite for changing their printed color.
-
Change Gridline Color: Click on the dropdown arrow next to “Gridline color.” This will open a color palette.
 Go to the Display options for this worksheet section to change the gridlines color
- Choose Your Desired Color: Select the color you want for your gridlines from the palette. You can choose a darker shade of gray for better contrast or even a completely different color like black or blue.
 Open the Gridline color drop-down list to pick the color you want
- Apply Changes: Click OK at the bottom of the Excel Options dialog to save your changes.
 Click OK to display the changes in the worksheet
Now, your worksheet will display gridlines in the color you selected, and these colored gridlines will also be printed. Using a darker or more distinct color can significantly improve the readability of your printed spreadsheets, making it easier to follow rows and columns of data.
By mastering these simple techniques, you can effortlessly print gridlines in Excel and even customize their color to enhance the clarity of your printed documents. This ensures that your hard copies are as easy to interpret and use as your on-screen spreadsheets, improving data presentation and collaboration. You can further enhance your Excel documents by learning how to print row and column headers on every page, creating even more professional and readable printouts.