
Do you need to print a large image but only have access to a standard-sized printer? Printing a single image across multiple sheets of paper, also known as tile printing or poster printing, is a fantastic solution. This technique allows you to create large format prints at home, perfect for artwork, presentations, or even just to display a favorite photo in a bigger size. Whether you’re an artist working on encaustic projects or simply want to enlarge an image, this guide will show you two straightforward methods to print your large image on multiple pages using readily available software.
Here are two easy methods to split your image and print it across several sheets of paper, which you can then assemble into a larger print.
Method 1: Utilizing Adobe Reader for Poster Printing
Adobe Reader, a free and widely used program for viewing PDF files, offers a built-in “poster” option specifically designed for printing large images across multiple pages. This method is simple and effective for achieving tiled prints.
- Convert Your Image to PDF: First, you need to convert your image into a PDF file format.
- Open Adobe Acrobat Reader on your computer.
- Navigate to the top menu and click “File,” then select “Create,” and choose “PDF from File.”
- Locate the image file on your computer that you want to print and click “Open.” Adobe Reader will convert your image into a PDF.
- Access Print Settings and Select Poster Option: Once your image is open as a PDF, proceed to the print settings.
- Click “File” in the menu and then select “Print.” This will open the print dialog box.
- Within the print settings, find the “Page Sizing & Handling” section. Here, you will see the “Poster” option. Select “Poster.” This tells Adobe Reader to divide your image for printing on multiple sheets.
- Adjust Tile Scale for Desired Size: The “Tile Scale” setting is crucial for determining the final size of your printed image.
- Adjust the “Tile Scale” percentage to enlarge or reduce the printed output. Experiment with different percentages to achieve the desired size for your project. You can preview how the image will be tiled in the preview pane of the print dialog.
- Ensure the tiled image size suits your needs, such as fitting it to the dimensions of your panel or display area.
- Print Your Tiled Image: Once you are satisfied with the tile scale and preview, you are ready to print.
- Click the “Print” button. Adobe Reader will now print your image across multiple pages according to your specified settings.
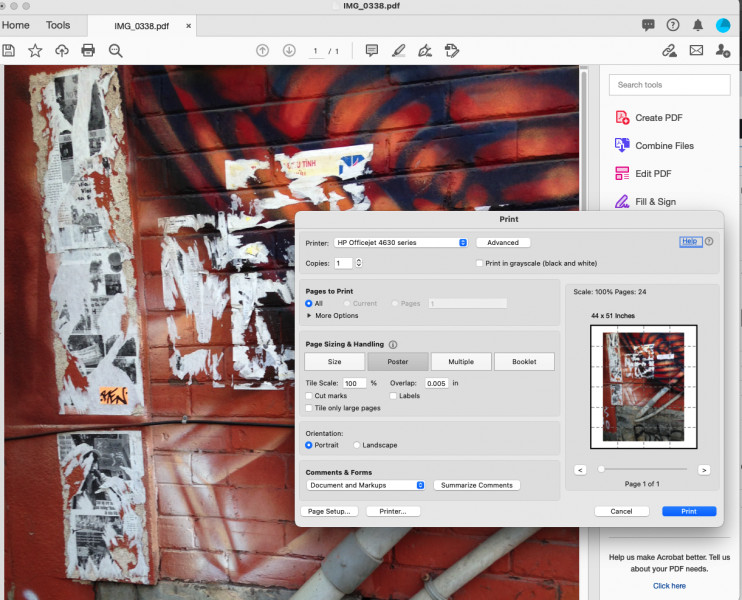 Adobe Reader Print Poster Settings: Tile Scale adjustment for printing large images on multiple pages.
Method 2: Employing Spreadsheet Software (Excel, Google Sheets, or Apple Numbers)
Another versatile method to print large images on multiple pages involves using spreadsheet software like Microsoft Excel, Google Sheets, or Apple Numbers. This technique provides flexibility in resizing and positioning your image across pages.
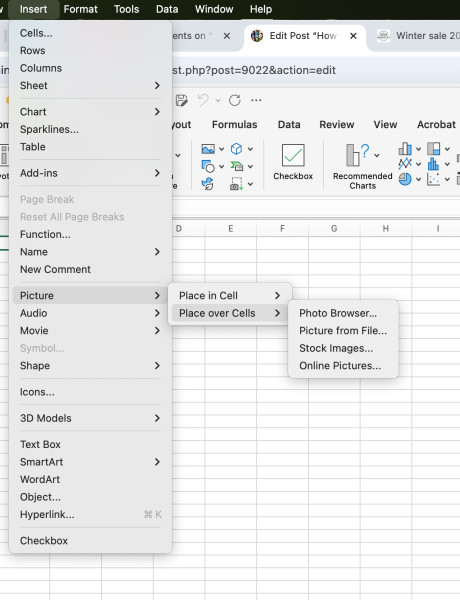
- Create a New Spreadsheet and Insert Image: Start by opening a new spreadsheet and inserting your image into the first cell.
- Open a new blank spreadsheet in your chosen software (Excel, Google Sheets, or Apple Numbers).
- Place your cursor in cell A1, the top-left cell of the spreadsheet.
- Navigate to the “Insert” menu, find the “Pictures” option, and select “Place over cells” (or similar, depending on your software version) and then “Picture from file.”
- Browse your computer to locate your flipped image file (if you need it flipped for a transfer) and click “Insert.” The image will be inserted into the spreadsheet.
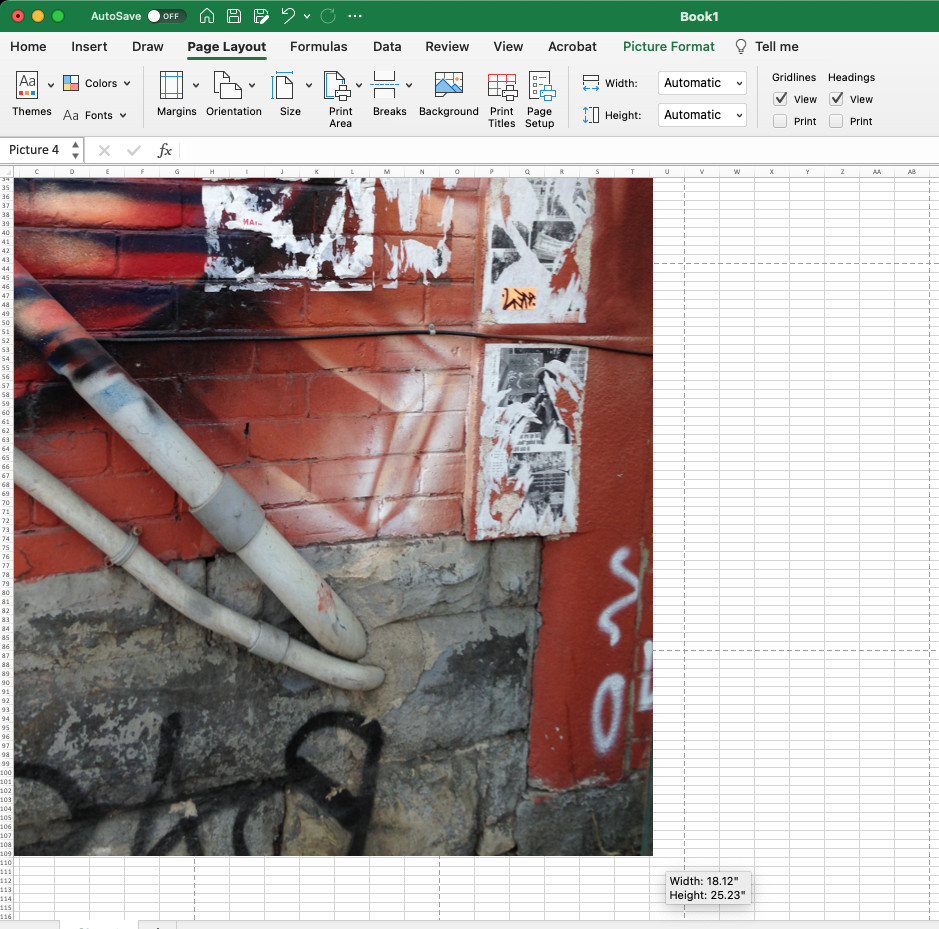
- Resize the Image by Dragging: Adjust the size of your image to span across multiple pages as needed.
- Click on the inserted image to select it.
- Drag the corner handles of the image to resize it. As you drag, most spreadsheet software will display a tooltip showing the image dimensions in inches or centimeters, helping you size it accurately.
- Observe Page Breaks (Dashed Lines): Spreadsheet software visually indicates page breaks with dashed lines.
- As you resize your image, notice the dashed lines appearing in the spreadsheet. These lines represent the boundaries of each page when printed. Position and size your image so that it is divided across the desired number of pages, guided by these dashed page break indicators.
- Print Your Tiled Image from the Spreadsheet: With the image sized and positioned across the page breaks, you are ready to print.
- Go to “File” and select “Print.”
- Ensure your print settings are configured to print the entire spreadsheet.
- Print the document. Each section of your image, as defined by the page breaks, will print on a separate sheet of paper.
 Spreadsheet method for large image printing: Using Excel, Google Sheets, or Apple Numbers to tile images across pages.
 Excel Spreadsheet View: Dashed lines indicating page breaks when sizing a large image for multi-page printing.
Assembling Your Multi-Page Print
Once you have printed your image using either the PDF or spreadsheet method, you will have multiple sheets of paper that form parts of your larger image. You can then carefully piece these pages together, aligning the edges to reconstruct your full-sized image. This method is particularly useful for creating larger encaustic photo transfers or any large format print needed for artistic or display purposes. For encaustic photo transfer techniques, you can explore methods like the parchment paper method or the regular printer paper transfer method to further enhance your projects.
By using these simple techniques, you can easily overcome the limitations of standard-sized printers and bring your large image printing ideas to life.