3D printing technology empowers creators to bring digital designs into the physical world. However, raw 3D prints, especially those made from PLA, often lack the polished look many desire. Painting your 3D prints is a crucial step to achieve a professional and visually appealing finish. While it might seem straightforward, simply applying any paint directly onto a PLA print can lead to disappointing results like uneven coverage, chipping, or poor adhesion. Achieving a truly stunning painted finish on your 3D prints requires understanding the right techniques and, most importantly, choosing the Best Paint For 3d Prints.
This comprehensive guide will walk you through a step-by-step process for painting PLA 3D prints, ensuring a smooth, durable, and vibrant finish. We’ll explore the best types of paint for 3D prints, essential preparation steps, and expert painting techniques to elevate your 3D printing projects from functional prototypes to artistic masterpieces.
Recommended reading: PLA vs ABS: Which filament should one use?
Choosing the Best Paints for PLA 3D Prints
Before diving into the preparation process, it’s essential to understand what types of paint work best with PLA and other thermoplastic filaments. Fortunately, PLA is quite receptive to paint when properly prepared. A variety of paints can adhere effectively to PLA surfaces, giving you ample creative freedom. From user-friendly acrylics to durable enamels and smooth lacquers, there are suitable options for every project and desired finish. You can choose to apply these paints using traditional brushes or achieve a more uniform finish with spray paints.
Although many types of paint can be used on PLA, acrylic and enamel paints are consistently highlighted as the top choices within the 3D printing community. Let’s examine why these paints are considered the best paint for 3D prints:
Acrylic Paint: The User-Friendly Choice
Acrylic paint is a water-based medium composed of pigment, an acrylic polymer binder, and water. This emulsion is easy to apply and manipulate. As the water evaporates, the acrylic polymer solidifies, creating a stable and permanent paint layer. [1] Acrylics are celebrated for their ease of use, rapid drying time, and simple cleanup with water while wet. Once dry, acrylics become water-resistant and durable, adhering well to various materials, including thermoplastics like PLA. Acrylic paints typically offer a matte finish, which can be desirable for many projects or serve as a base for further detailing.
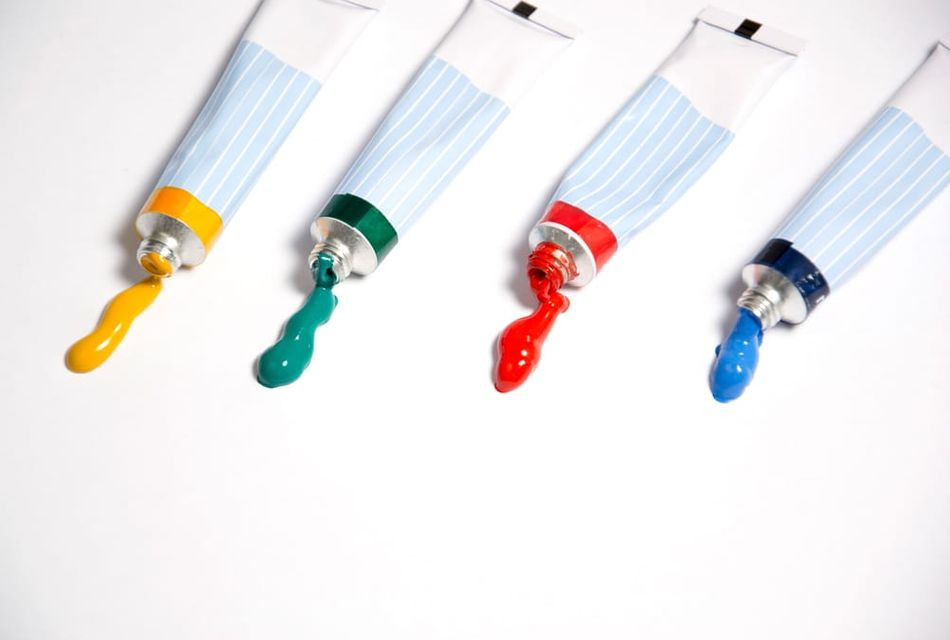 Various tubes of vibrant acrylic paint, the best paint for 3D prints, showcased against a clean white backdrop, ideal for adding color and detail to PLA models.
Acrylic paints are considered a safe and beginner-friendly option for painting PLA 3D prints, making them a popular choice for hobbyists and makers.
Enamel Paint: For a Durable and Glossy Finish
Enamel paint represents a category of solvent-based paints, often oil-based, renowned for their characteristic glossy finish. Enamel paints are known to create a hard, thin, and stain-resistant coating. [2] This durable shell can enhance the longevity and weather resistance of painted objects. Similar to acrylics, enamel paints are available in liquid form for brush application and aerosol form for spray painting. Enamel paints generally dry more slowly than acrylics and may emit a stronger odor due to the solvents they contain. However, their robust and glossy finish makes them a compelling option when seeking a more resilient and visually striking result for your 3D prints.
Preparing Your PLA 3D Prints for Painting: Laying the Foundation for Success
Proper preparation is paramount to achieving a professional-looking paint job on your 3D prints. These steps ensure optimal paint adhesion and a smooth, flawless finish.
Step 1: Support Removal – Clearing the Way for a Smooth Surface
The first step after removing your PLA print from the build plate is to carefully remove any support structures. (If your 3D model was designed to print without supports and requires minimal cleanup, you can proceed directly to Step Two).
In Fused Deposition Modeling (FDM) 3D printing, supports are essential for printing geometries with overhangs exceeding 45 degrees or bridging sections. These structures provide temporary support to extruded filament layers that would otherwise collapse under gravity. If supports are printed using the same material as your model (non-soluble supports), manual removal is necessary. In some cases, particularly with low-density supports weakly bonded to the print surface, supports can be snapped off by hand.
For intricate parts or delicate features, using tools is recommended to minimize damage during support removal. Tools like knives, needle-nose pliers, or flush cutters offer greater precision and control. The goal is to remove supports cleanly, leaving minimal traces on the model’s surface. Gentle and patient work is key to successful support removal. Heating the blade of a knife can soften the PLA at the support interface, facilitating easier separation.
Consideration of build orientation and part design can significantly impact support complexity and removal. Orienting your 3D model on the print bed to minimize overhangs can drastically reduce the amount of support needed. Modifying designs to eliminate challenging overhangs altogether is another effective strategy. Exploring different support types, such as tree supports, can also simplify the removal process and reduce material waste.
Recommended reading: How to Remove Supports from 3D Prints
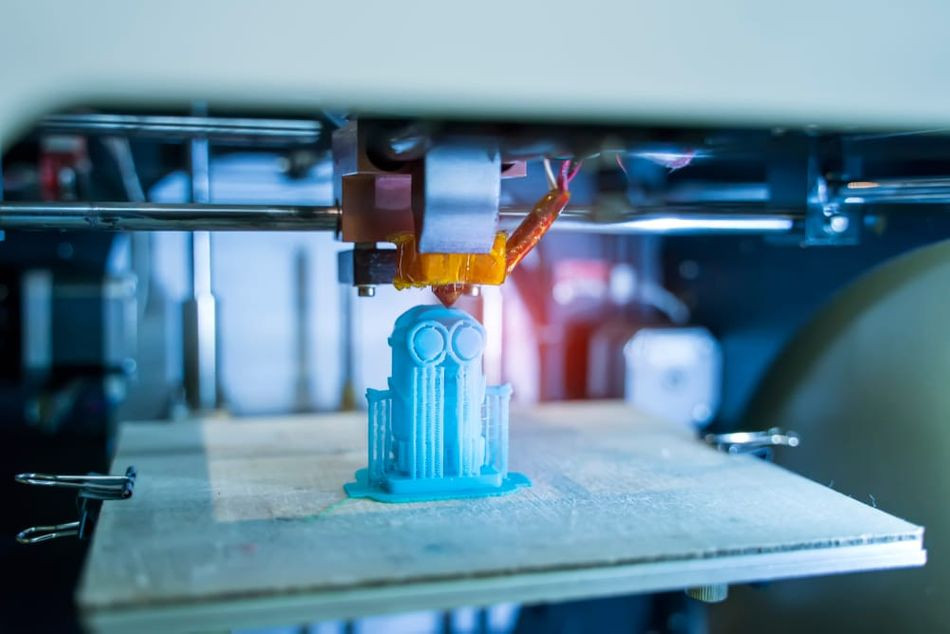 A Minion 3D print still attached to its support structures, illustrating the need for careful removal before painting to achieve the best finish.
Carefully remove support structures from your 3D prints either by hand or with tools such as knives, pliers and flush cutters.
Step Two: Smoothing – Achieving a Flawless Canvas
After successfully removing supports, the next crucial step is smoothing the surface of your 3D print. This process aims to eliminate any remaining blemishes from support removal and minimize the visibility of layer lines inherent to the FDM printing process.
Sanding is the most widely adopted technique for smoothing PLA 3D prints. It is cost-effective, safe, and highly efficient in removing surface imperfections. The main drawback is that sanding can be time-consuming, especially for larger or more complex models. Various sanding tools can be used, including sanding blocks, sandpaper sheets, and nail files. Sanding blocks are ideal for smoothing larger, flat surfaces. Nail files are particularly useful for refining intricate details. Traditional sandpaper is versatile and suitable for most areas.
When sanding PLA, use small circular motions against the print layer lines. This gradually removes thin layers of plastic, leveling out surface irregularities. For optimal results, employ a progressive sanding approach using different grit levels. Start with coarser grits (lower numbers) to remove larger imperfections and layer lines, then gradually move to finer grits (higher numbers) to refine the surface. Many makers conclude the sanding process with wet sanding. This involves using fine-grit sandpaper dampened with water. Wet sanding minimizes dust and creates an exceptionally smooth, polished surface without removing significant material.
For faster smoothing, power sanders can be used. However, exercise caution to avoid overheating the PLA, which can lead to melting or warping. Use lower speeds and avoid prolonged sanding in one area. [3] Always wear gloves and a dust mask when sanding PLA, and work in a well-ventilated and easy-to-clean workspace. After sanding, thoroughly clean your 3D print to remove all plastic particles before proceeding.
While chemical smoothing with solvents is possible for PLA, it requires careful consideration. Acetone, commonly used for ABS smoothing, is ineffective on PLA. Alternative solvents exist, but they often pose safety risks. Always prioritize personal protective equipment (PPE), adequate ventilation, and fire safety measures when using solvents.
Recommended reading: PLA and Acetone? Here are Better Ways to Smooth PLA 3D Prints
Step Three: Priming – Creating the Ideal Base for Paint Adhesion
Although sanding creates a smoother surface, applying a primer is essential to take your 3D print to the next level of finish quality. Primer further evens out any remaining surface roughness, fills minor gaps, and, most importantly, acts as a bonding layer to significantly improve paint adhesion to the PLA. Priming is a critical step if you aim for a professional, durable, and long-lasting paint finish on your 3D prints.
Primer fillers, such as Rust-Oleum Filler Primer, are highly recommended for FDM 3D prints. These primers are typically formulated as spray paints for easy and even application. They often have a neutral gray color, providing an excellent base for subsequent color coats. Primer fillers are readily available at most hardware stores.
Before using aerosol primer filler, thoroughly mix the contents by gently swirling the can for a few minutes, rather than vigorously shaking, which can introduce air bubbles. Always consult the instructions on the primer can for specific recommendations.
For optimal coverage, suspend your 3D model and spray the primer from a distance of approximately 10-12 inches (25-30 cm). Apply the primer in smooth, consistent strokes, overlapping slightly with each pass to ensure even coverage. Avoid applying too much primer in one coat, which can lead to drips and pooling. Work in a well-ventilated area and wear appropriate respiratory protection.
Allow the first coat of primer to dry completely. Once dry, inspect the surface and perform any necessary touch-up sanding. Typically, two or more coats of primer are recommended for PLA 3D prints to achieve a uniformly smooth base before painting. Ensure the primer is fully dry (usually around 40 minutes, but check product instructions) before applying the first color coat.
Painting Your 3D Prints: Bringing Your Creations to Life with Color
With your 3D print properly prepared—sanded and primed—it’s now ready for the exciting stage of painting. Here, you’ll make choices about the type of paint and application method to best suit your project and desired aesthetic. As discussed earlier, acrylic and enamel paints are excellent choices for PLA. You’ll also need to decide between spray painting and hand painting, each offering distinct advantages.
Spray painting is a popular method for achieving a consistent, smooth, and professional finish on 3D prints.
Spray Painting: Achieving a Uniform and Smooth Finish
Spray painting is an ideal method for achieving a consistently smooth and even surface finish on 3D prints. It excels at applying thin, uniform layers of paint, which is particularly beneficial for parts requiring tight tolerances or dimensional accuracy, as it minimizes paint buildup compared to hand painting. Always adhere to the instructions provided on your chosen spray paint regarding shaking, application distance, and storage.
For optimal spray painting results, suspend your 3D print using a thin wire in a well-ventilated area. This allows for complete 360-degree access and ensures no areas are missed. Maintain a consistent spraying motion, moving the can smoothly back and forth and up and down, with overlapping strokes to cover the entire print surface. This technique ensures even paint distribution across the model. [4]
Allow each coat to dry for 15-20 minutes before applying subsequent coats. Repeat this process until you achieve the desired color saturation and finish. After the final coat, let the painted 3D print cure for at least 24 hours before applying any clear coat or polishing compounds. Remember to always wear appropriate personal protective equipment, including gloves, goggles, and a respirator mask, when spray painting.
Hand Painting: Precision and Detail for Intricate Models
Hand painting is typically the preferred method for 3D prints that demand fine details, such as figurines, miniatures, or models with intricate surface features. Use high-quality brushes and paints to carefully apply color to your 3D print. For base coats, multiple thin, even layers may be necessary to achieve the desired opacity and color consistency. Once the base layers are dry, switch to finer brushes to add intricate details and highlights. It’s generally recommended to start with lighter colors and gradually progress to darker shades for layering and depth.
Acrylic paint is particularly well-suited for brush painting due to its ease of use and affordability. However, be aware that lower-quality acrylic paints may offer less coverage and require more coats compared to higher-grade paints. Investing in quality acrylics will often save time and yield better results.
Clear Coat: Protection and Enhanced Finish
Once you are satisfied with the color paint application, applying a clear coat is an optional but highly recommended step. A clear coat is a transparent protective layer that safeguards the underlying paint and allows you to modify the final finish. For instance, if you used matte acrylic paints, a glossy clear coat can impart a desirable shine. Clear coats can be applied using brushes or spray cans, employing the same techniques as color painting. Clear coats not only enhance the aesthetics but also provide added durability and protection to your painted 3D prints.
Masking and Detailing: Elevating Your Paintwork to the Next Level
Mastering masking and detailing techniques unlocks advanced painting possibilities, allowing you to create crisp lines, intricate patterns, smooth gradients, and refined accents that significantly enhance the visual appeal of your painted PLA 3D prints.
Masking tape is an invaluable tool for creating sharp, clean lines and patterns. Apply masking tape firmly to ensure a tight seal and prevent paint bleed. For complex designs, layer tape to build up shapes. Remove tape carefully to avoid lifting underlying paint. Reverse masking or faded masking techniques can be used to create gradients by gradually blending colors with overlapping tape or adjustable spray guns.
Fine brushes are essential for adding small details and accents that bring realism and visual interest. Invest in high-quality, fine-tipped brushes and practice steady brush control for precise lines and shapes. Stencils, custom-made or pre-purchased, are excellent for adding repeating patterns and details. Secure stencils firmly and use a stippling motion for paint application to prevent bleed-under.
Liquid masking fluid provides protection for complex areas or intricate details during painting. Apply with a brush or precision applicator and let it dry completely before painting over it. Once the paint is dry, gently rub off the liquid mask to reveal the protected area. This is particularly useful for intricate patterns, masking small features, or preserving unpainted sections of the PLA surface.
Conclusion: Mastering the Art of Painting 3D Prints
Painting is a transformative process that elevates 3D prints from simple objects to finished, professional-quality pieces. Whether you’re creating product prototypes, decorative items, or functional parts, a well-executed paint job adds significant value. Achieving a high-quality painted finish on PLA 3D prints does require attention to detail and proper technique.
Here are key takeaways for painting PLA 3D prints effectively:
- Acrylic and enamel paints are the best paint for 3D prints made from PLA, offering ease of use and durability.
- Preparation is key: Always remove supports and thoroughly smooth the print surface using sandpaper before painting.
- Priming is essential for sealing the surface, enhancing smoothness, and ensuring optimal paint adhesion.
- Spray paint is recommended for achieving smooth, uniform coats of paint on larger areas. Hand painting excels at adding fine details and intricate work.
- Suspend or mount your 3D print during painting to access all angles and ensure even coats for a blotch-free finish.
- Prioritize safety: Work in a well-ventilated area and always use appropriate personal protective equipment during post-processing and painting.
By following these guidelines and practicing these techniques, you can master the art of painting your 3D prints and consistently achieve stunning, professional results.
Frequently Asked Questions (FAQs)
Q: What types of paint are compatible with PLA material for 3D prints?
A: Most paint types, including acrylics, enamels, and lacquers, are compatible with PLA 3D prints. Acrylic and enamel paints are generally favored for their ease of use and excellent results.
Q: Is sanding necessary before painting a 3D print?
A: Yes, sanding is highly recommended. Sanding your PLA 3D print smooths the surface, removes support marks and layer lines, creating a better surface for paint adhesion and a more professional finish. Use circular motions with sandpaper against the print grain for best results.
Q: Do I really need to prime my 3D print before painting?
A: While not strictly mandatory, priming significantly improves the final paint quality. Primer fills minor surface imperfections, creates a uniform base, and promotes much better paint adhesion to the plastic, resulting in a smoother, more durable, and professional-looking paint job.
Q: Can I use spray paint on PLA 3D prints?
A: Absolutely. Spray painting is an excellent method for painting PLA 3D prints, particularly for achieving smooth, even coats over larger areas. Suspending the print allows for complete coverage. Use consistent, sweeping motions with the spray can to apply thin, even layers of paint.
References
[1] What is Acrylic Paint? [Internet]. Liquitex, 2024. Available from: https://www.liquitex.com/us/knowledge/what-is-acrylic-paint/
[2] Lewis, Charlene. Enamel vs Acrylic – The Difference Between Acrylic and Enamel Paint [Internet]. Acrylgiessen, February 2021. Available from: https://acrylgiessen.com/en/enamel-vs-acrylic/
[3] MakerBot. MakerBot Learning – Post-Processing: Sanding [Internet]. Youtube, September 20, 2016. Available from: https://www.youtube.com/watch?v=0KU0lgoC42Q
[4] MakerBot. MakerBot Learning – Post-Processing: Painting [Internet]. Youtube, September 20, 2016. Available from: https://www.youtube.com/watch?v=Jz_s7sJOlMU