
3D printers, once the stuff of futuristic dreams, are now surprisingly accessible. The core technology isn’t rocket science: it’s a blend of stepper motors, sensors, a controller, a heater, and a nozzle. The real revolution came from software advancements and the expiration of key patents, driving down the 3D printer price dramatically.
But the question remains: how low can the 3D printer price go before functionality is completely compromised? iNSTONE dared to ask this question, and they believe the answer is under $100. Let’s delve into the reality of ultra-cheap 3D printing with the iNSTONE Desktop DIY, a printer that pushes the boundaries of affordability.
 iNSTONE Desktop DIY 3D Printer
This printer is undeniably the most affordable DIY kit you can find. Is it good? Objectively, no. Is it fascinating and a testament to budget engineering? Absolutely. Should you rush out to buy it? Probably not, unless you thrive on challenges and have very low expectations.
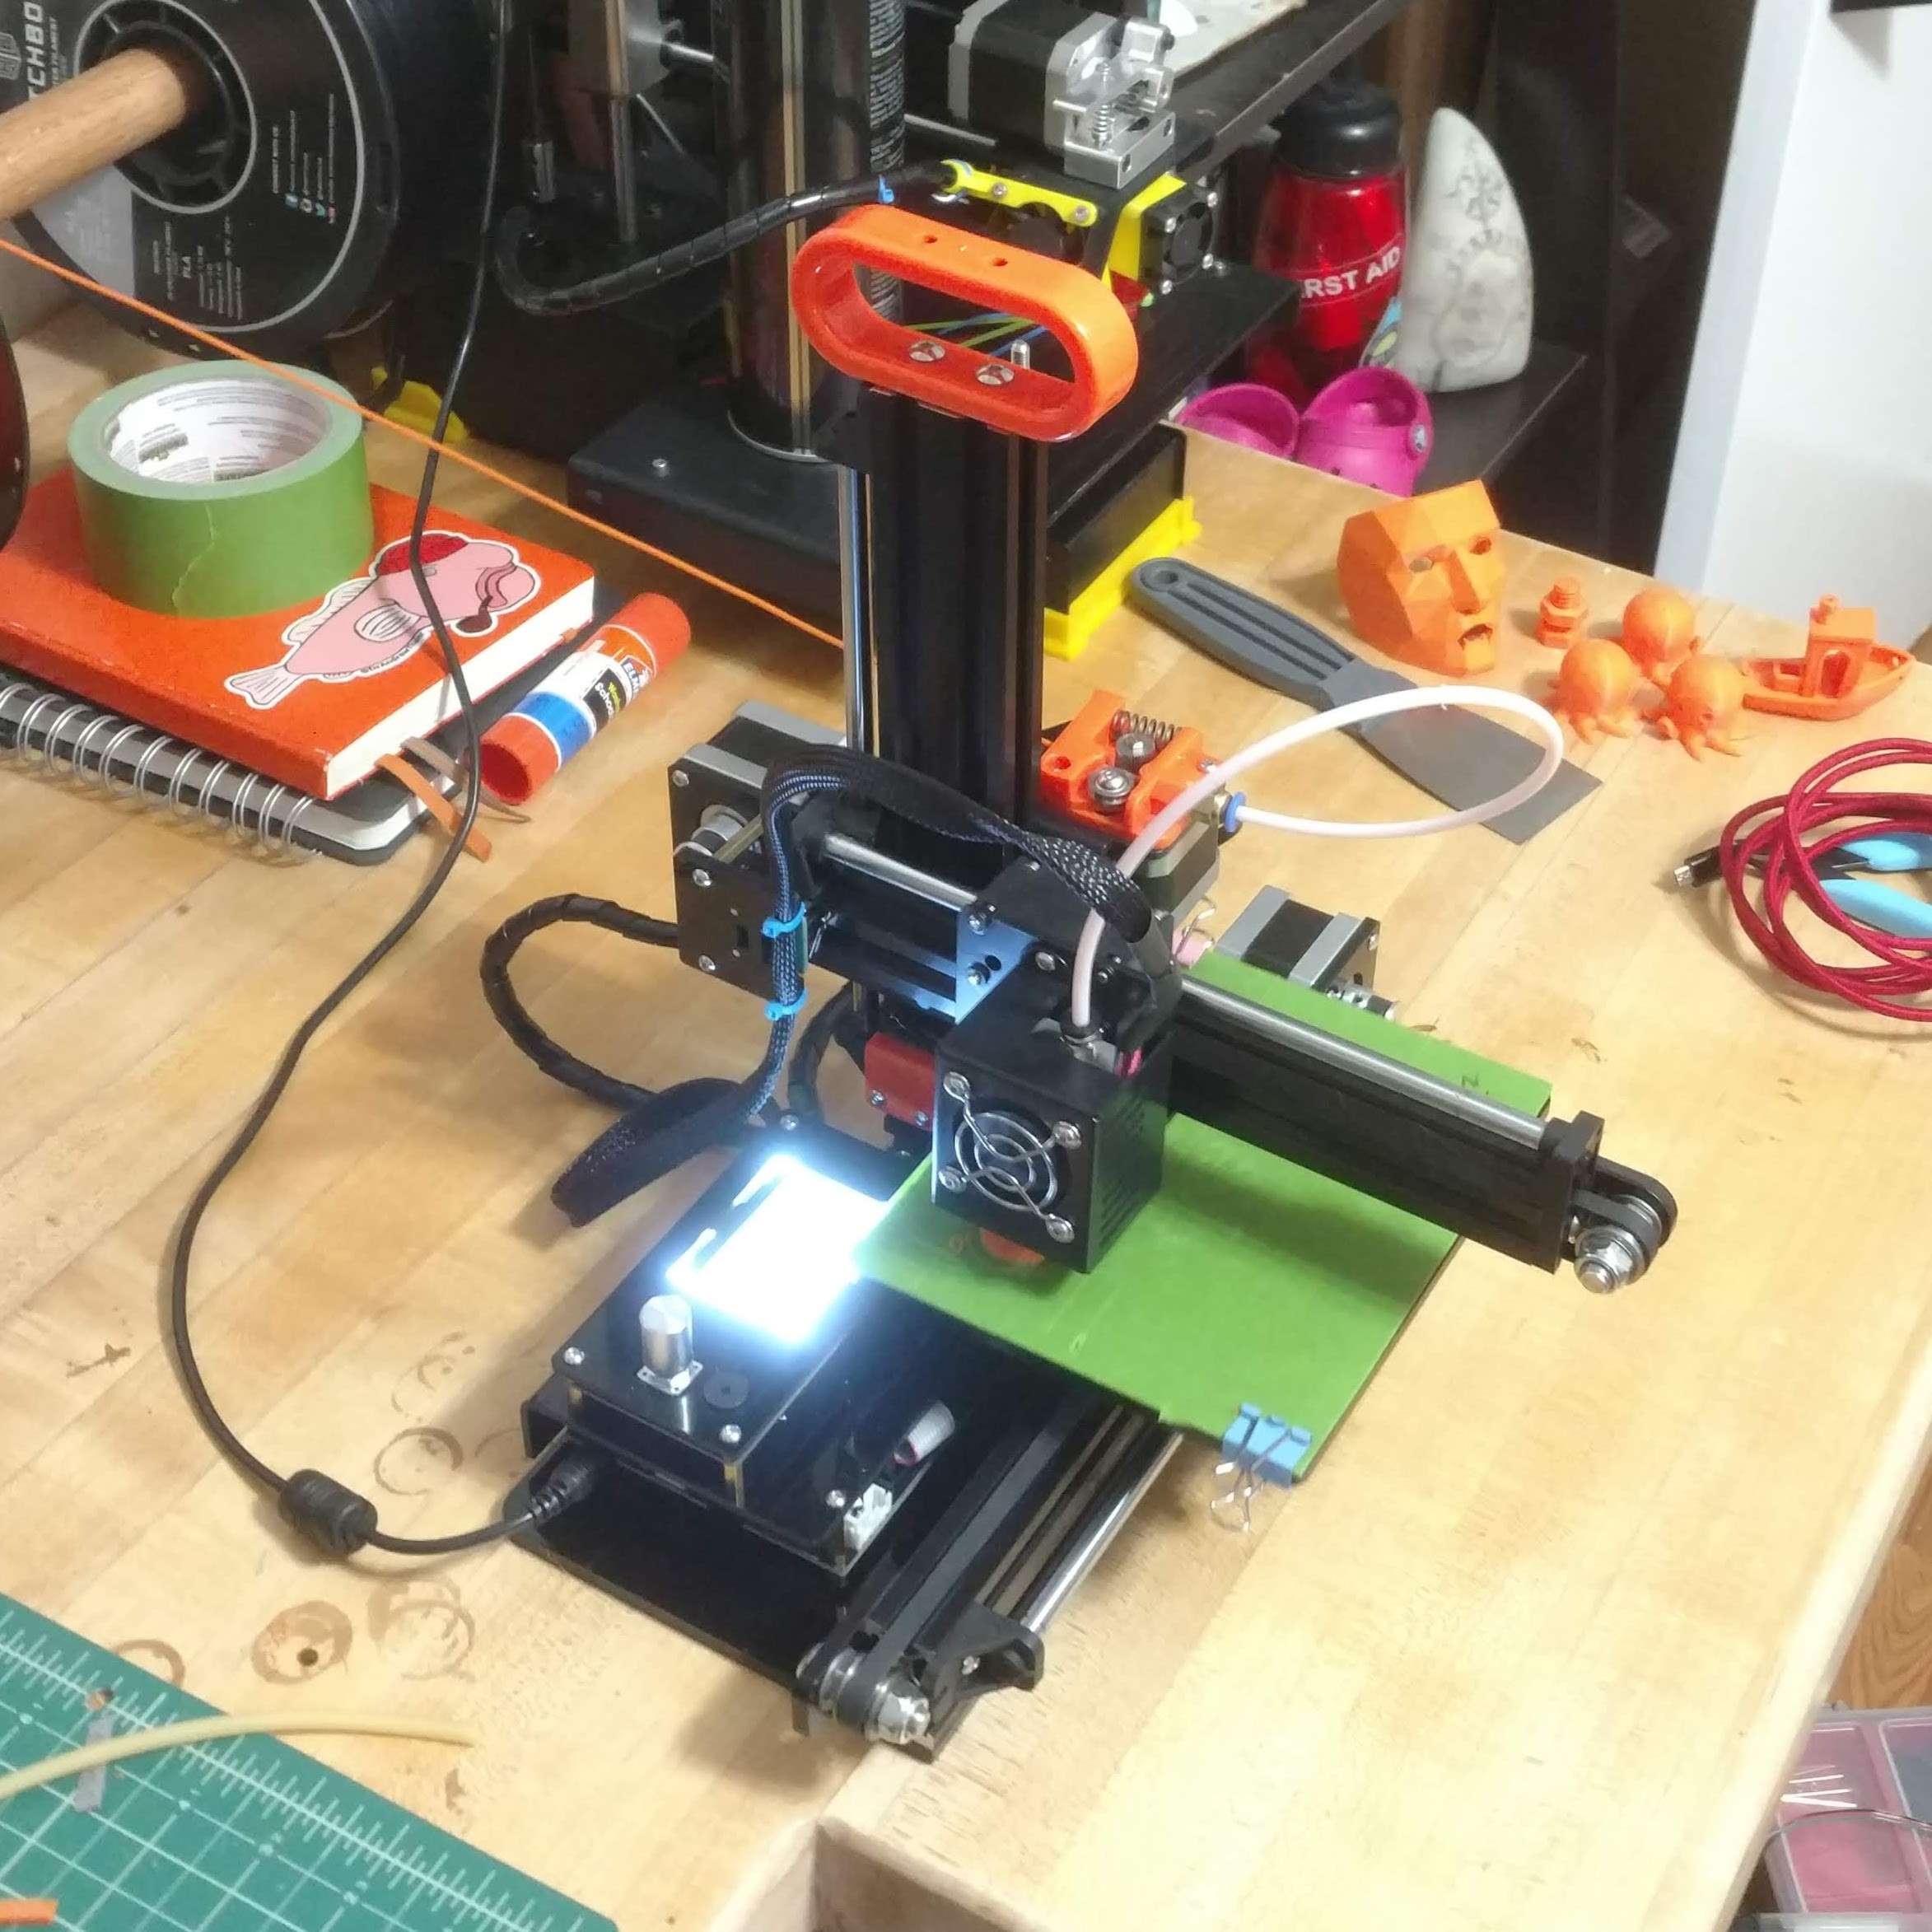
The iNSTONE Desktop DIY is a cantilever-style printer, meaning its print head is supported on only one side. It features a small build area, lacks a heated bed (crucial for printing many materials), and uses a somewhat outdated Type-B USB connection – a blast from the past in consumer electronics. The included power supply is as basic as it gets.
If the Anet A6 aimed to deliver the most 3D printer for around $200, iNSTONE’s goal seems to be maximizing functionality for under $100. Incredibly, they arguably succeeded in hitting that rock-bottom 3D printer price. Despite its tiny build volume, the iNSTONE boasts more metal components than some pricier models. Its frame is constructed from extruded aluminum, the stepper motors are surprisingly decent, and the hot end is based on a budget-friendly E3D clone. The Bowden extruder mechanism is made from robust injection-molded plastic. The printer feels relatively solid; you can move it without fearing immediate recalibration chaos.
Notably, it includes a rotary encoder on the control board, a feature absent in the Monoprice Mini Delta, another budget contender. The kit also comes with a more comprehensive toolset than other kits, including useful snippers and a collection of wrenches – some of which, humorously, don’t actually fit the printer’s bolts.
If you were challenged to source parts and assemble the best possible 3D printer for a mere $100, you’d be hard-pressed to beat the iNSTONE Desktop DIY. It’s packed with clever design choices, reflecting considerable ingenuity in making such a cheap 3D printer functional. This machine is a testament to what’s possible at an incredibly low 3D printer price point, earning a place in the workshop as a curiosity and engineering marvel.
A post shared by Andrew David Thaler (@drandrewthaler) on Instagram
However, let’s be clear: the iNSTONE Desktop DIY is objectively a poor performer. Unless you’re a dedicated 3D printing aficionado seeking a unique project and a challenging build experience, this printer is not recommended. For those seeking practical, reliable 3D printing, the incredibly low 3D printer price doesn’t compensate for its significant limitations.
For context on the testing methodology, refer to: We’re gonna beat the heck out of these machines: The search for the best dirt-cheap 3D printer for fieldwork.
The Burn In: Assembly and Initial Use
Assembling the iNSTONE Desktop DIY was an enjoyable process, especially for those familiar with 3D printer construction. The instructions are reasonably clear for experienced builders but might be confusing for absolute beginners. The printer utilizes T-nuts to attach components to the extruded aluminum frame, creating a surprisingly robust structure. While the kit was missing a few minor parts (easily replaced from a workshop stash), the overall assembly was straightforward.
The printer includes basic adjustment mechanisms for each axis. The Z-axis, however, features a peculiar coupler – instead of a standard machined or 3D-printed part, it uses a short section of PVC tubing (more on the implications of this design choice later).
Beyond these elements, the design is minimalist. There’s no heated bed and no cooling fan for printed layers. The fiberglass build plate is held down with simple binder clips.
A post shared by Andrew David Thaler (@drandrewthaler) on Instagram
Achieving acceptable prints from this machine demands considerable patience. Leveling the build plate is a frustrating task, relying on three thumbscrews, one of which is awkwardly positioned. The three-point leveling system is inherently unstable, and the build plate frequently loses its alignment, sometimes mid-print. It took nearly a week of daily adjustments and calibrations to reach a point where the printer could consistently lay down a first layer and begin printing reliably.
Z-axis wobble caused most initial test prints to fail (again, more on that Z-axis later). Eventually, after persistent effort, a somewhat presentable print emerged from the provided sample g-code: a vaguely spooky mask.
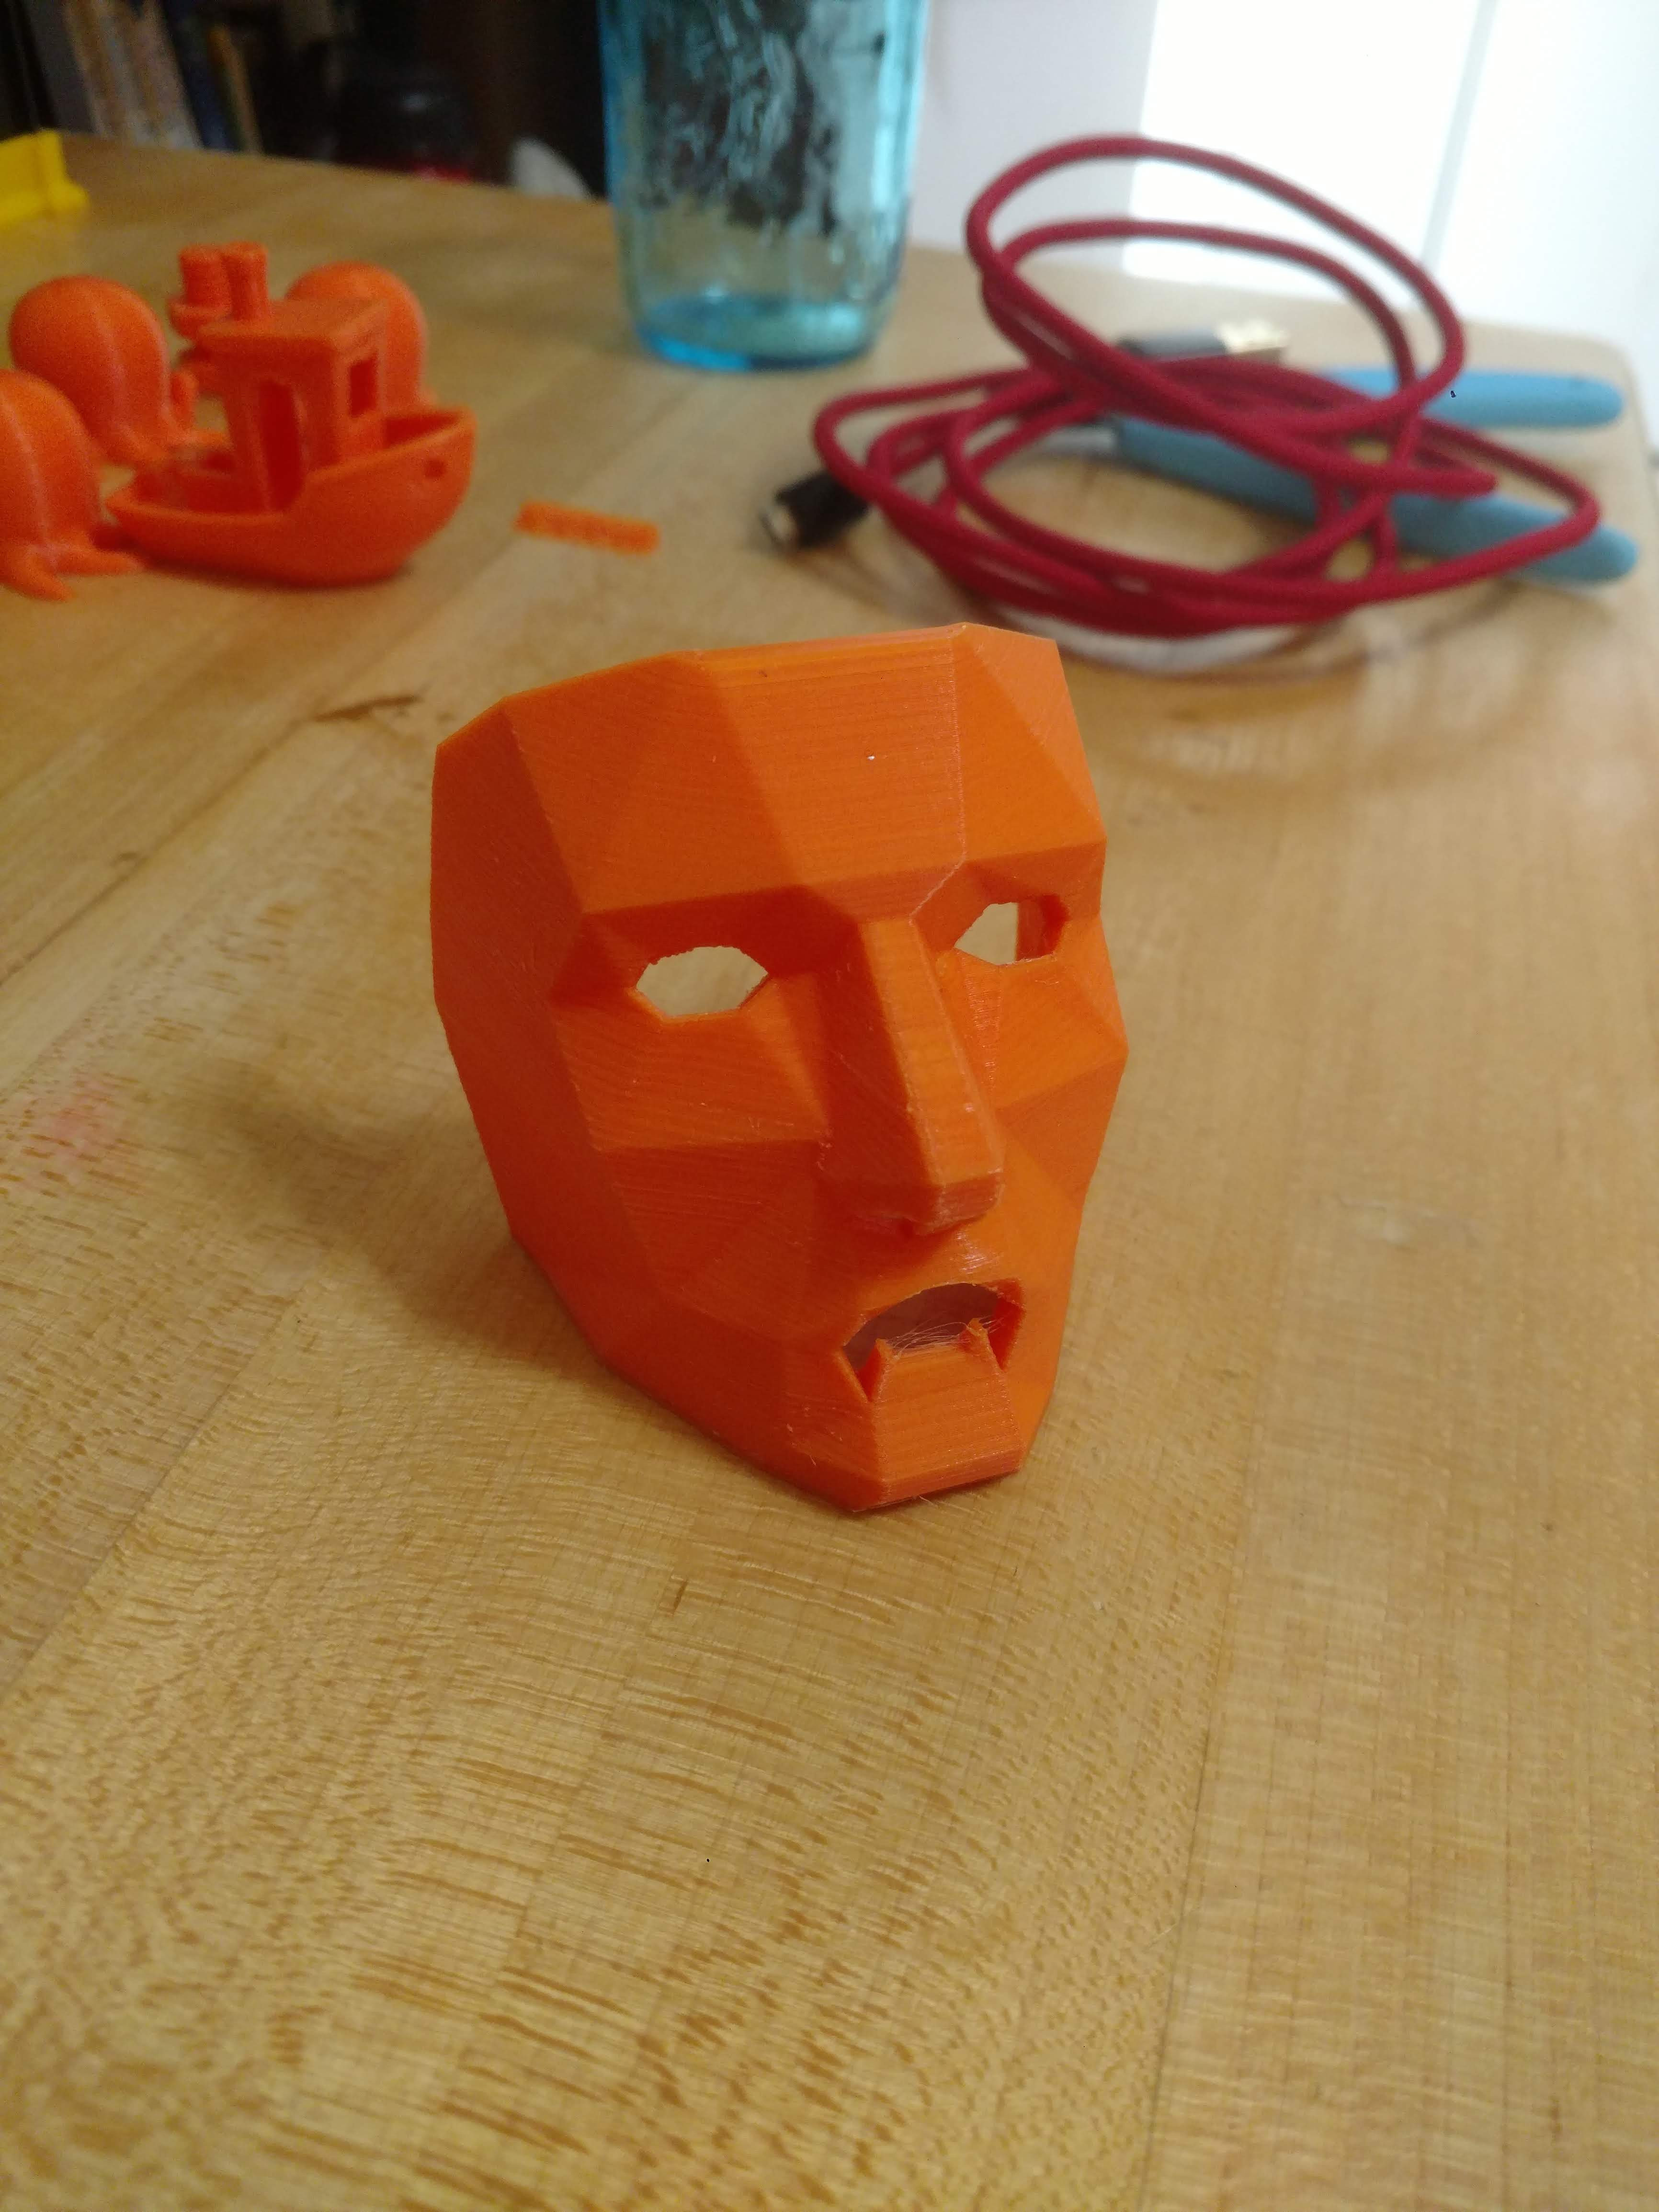 Spooky Mask 3D Print
Burn-in Score: C
The Benchmark Test: Benchy
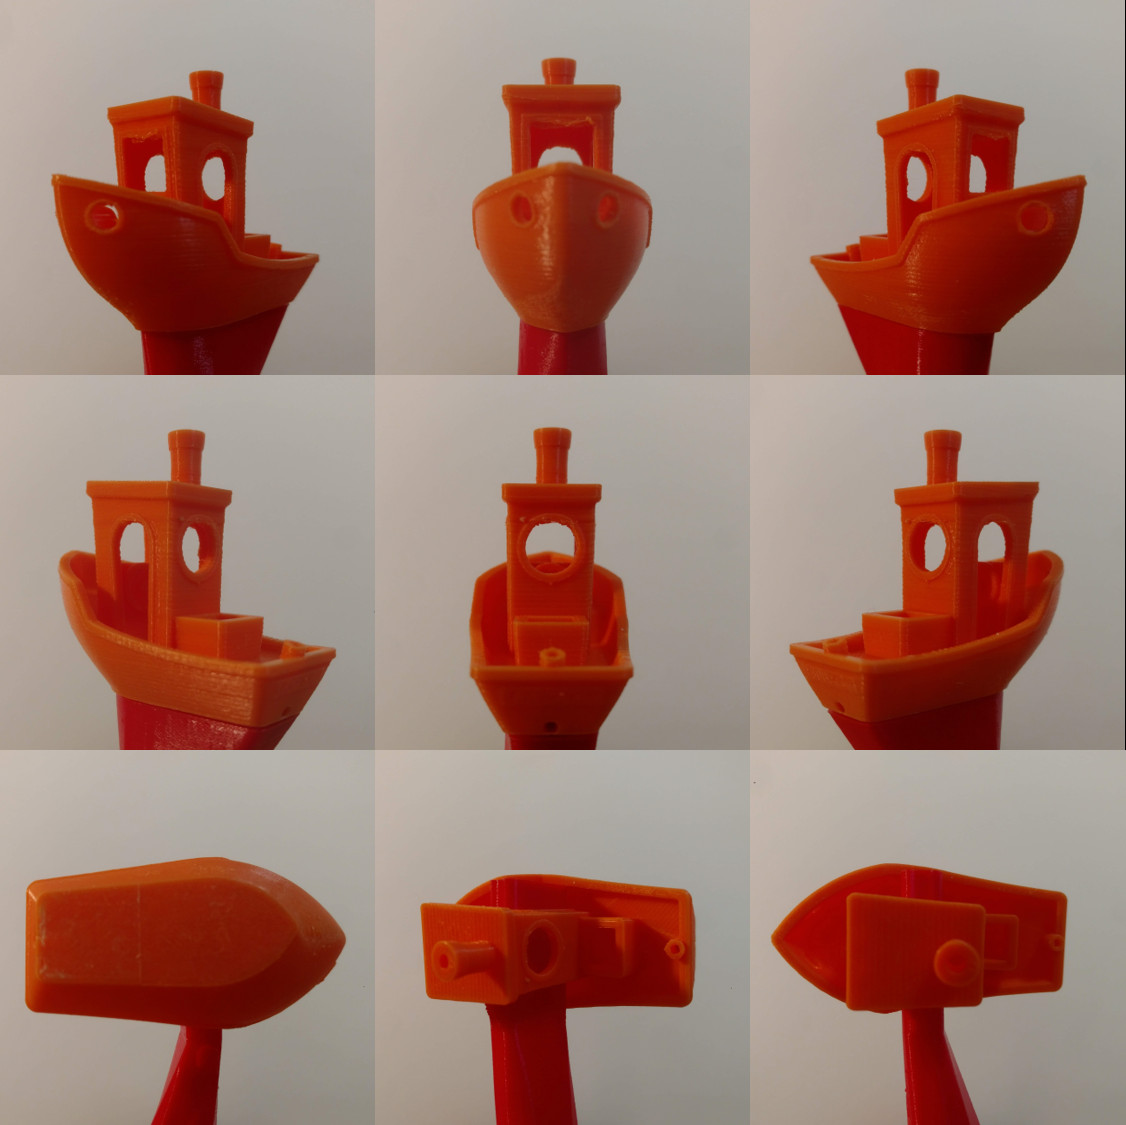 3D Benchy Print
Oh, Benchy, the torture test of 3D printers. This Benchy print isn’t disastrous, but the pervasive wobble is evident throughout. It did print, which is a minor victory. Over-extrusion and the unstable build plate obscure details on the bottom, and slight elephant’s foot is present. A significant vertical shift near the top indicates Z-axis slippage (yes, more on that Z-axis issue). Overall, nothing is catastrophic, but everything is just a bit… sloppy.
Benchmark Score: C
The Replication Test: Cute Octos
The replication test aims to assess consistency across multiple prints, not just print one object acceptably. The lack of cooling, the unstable build plate, and the absence of a heated bed resulted in each Cute Octo warping and deforming in unique ways.
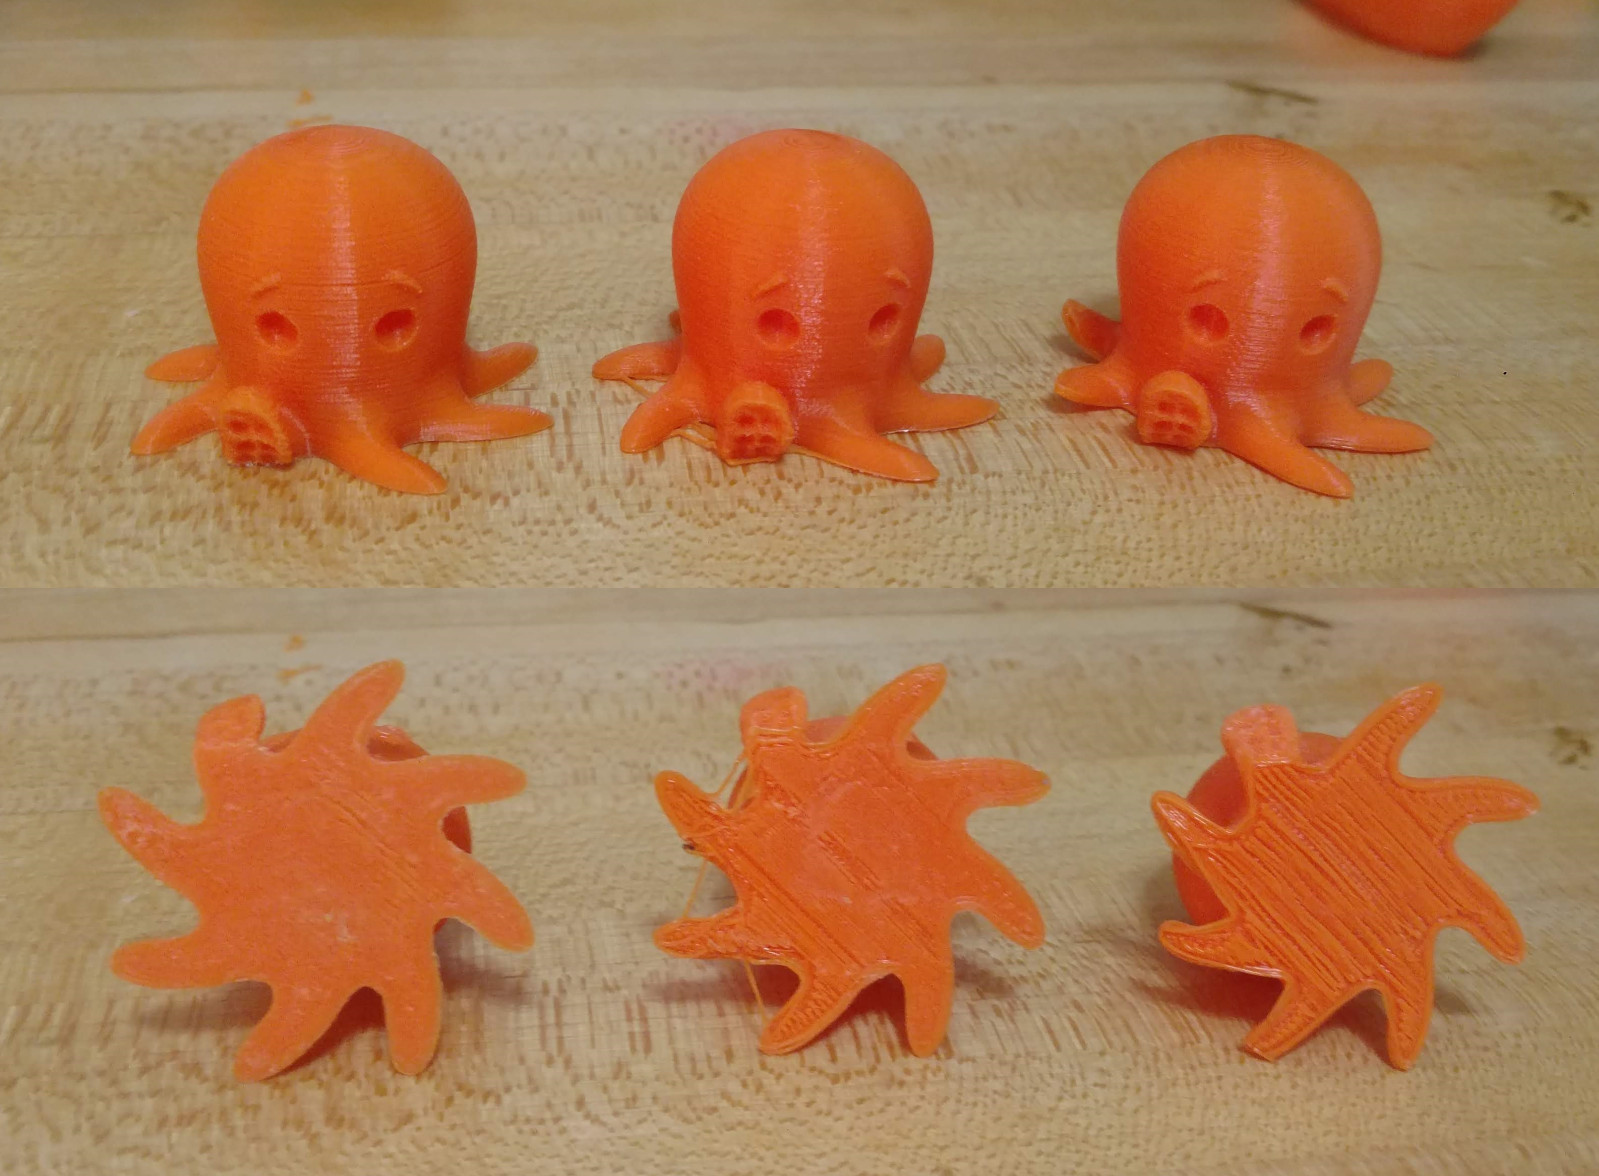 Failed 3D Octo Prints
This test was a clear failure. Consistent, reliable replication is simply not achievable with this printer in its stock configuration.
Replication Score: F
The Functional Parts Test: Screw Threads
Printing functional parts, especially those with threads, demands precise Z-axis control. And this is where the iNSTONE printer falters significantly (predictably, more on the Z-axis). The printed threads were loose and imprecise. Significant wobble between the mating parts meant they didn’t hold together firmly. They technically functioned, but barely, and not to a degree that would be practically useful.
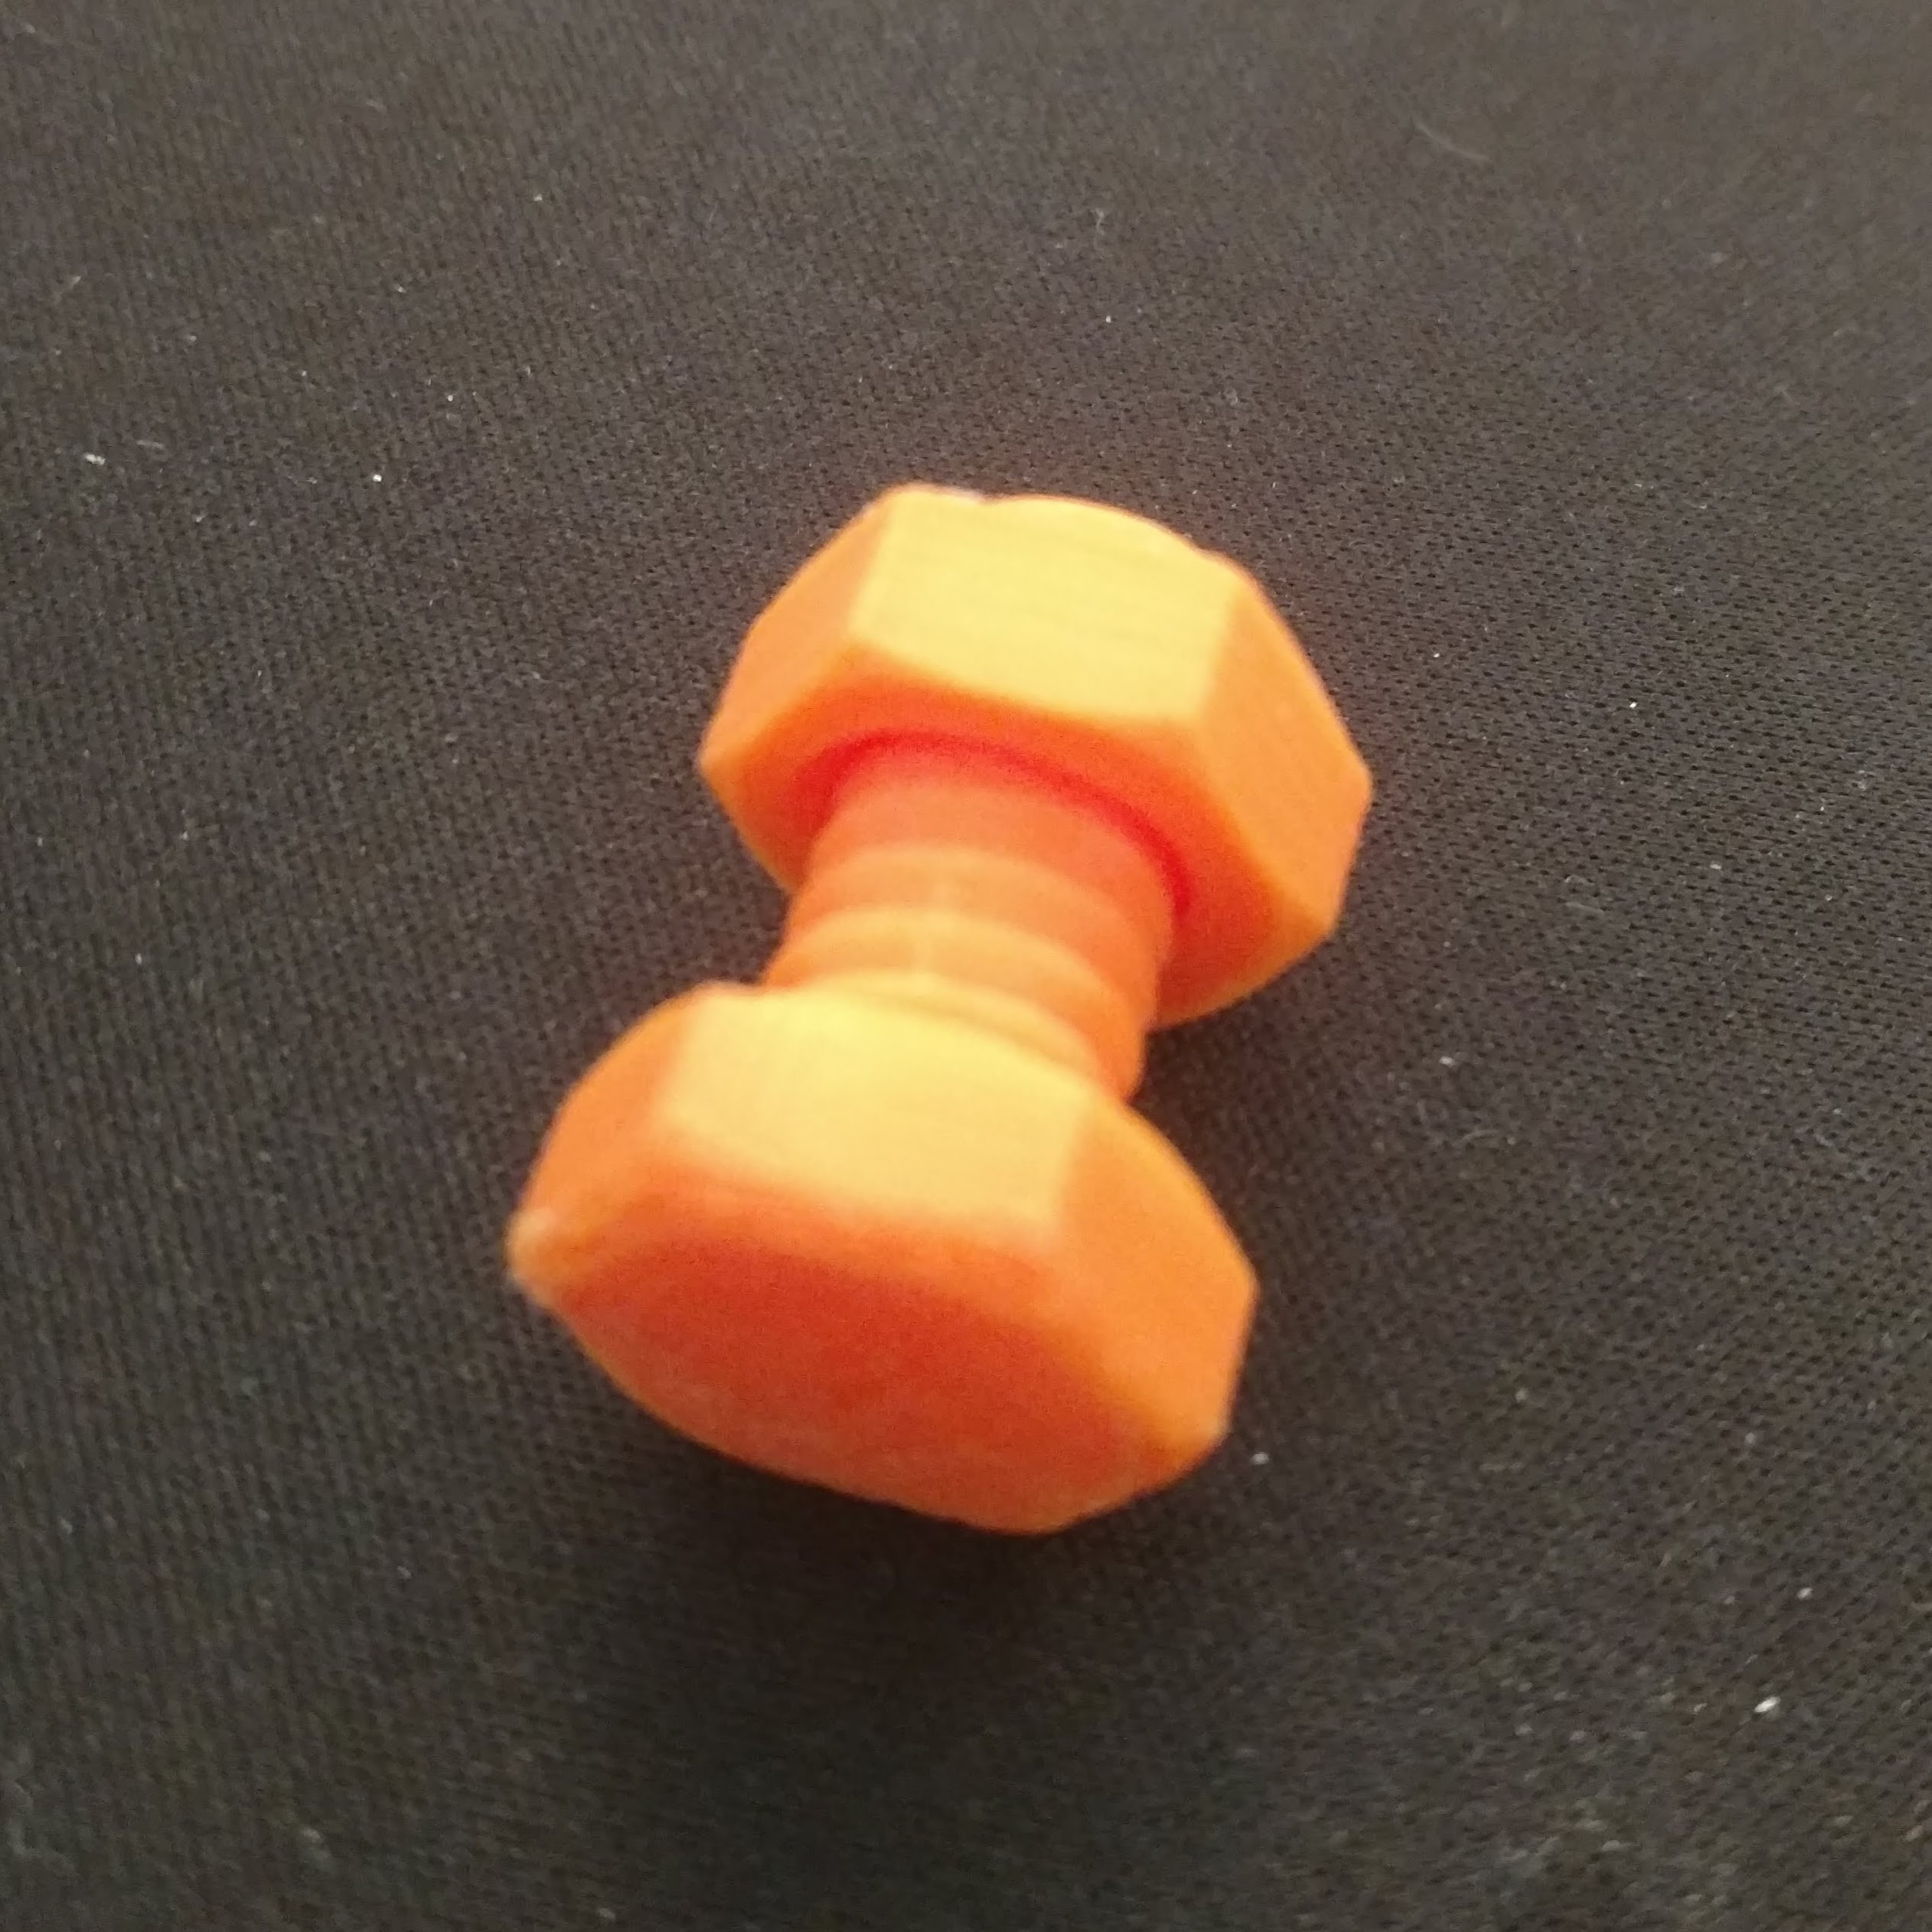 3D Printed Screw Threads
Functional Part Score: D
The Complex System Test: Niskin Bottle
It’s time to confront the elephant in the room – or rather, the PVC tubing on the Z-axis. While flexible couplers on other budget printers were problematic, the iNSTONE takes Z-axis coupling to a new low (price, that is). The Z-axis motor connects to the lead screw via… a piece of PVC tubing held by friction.
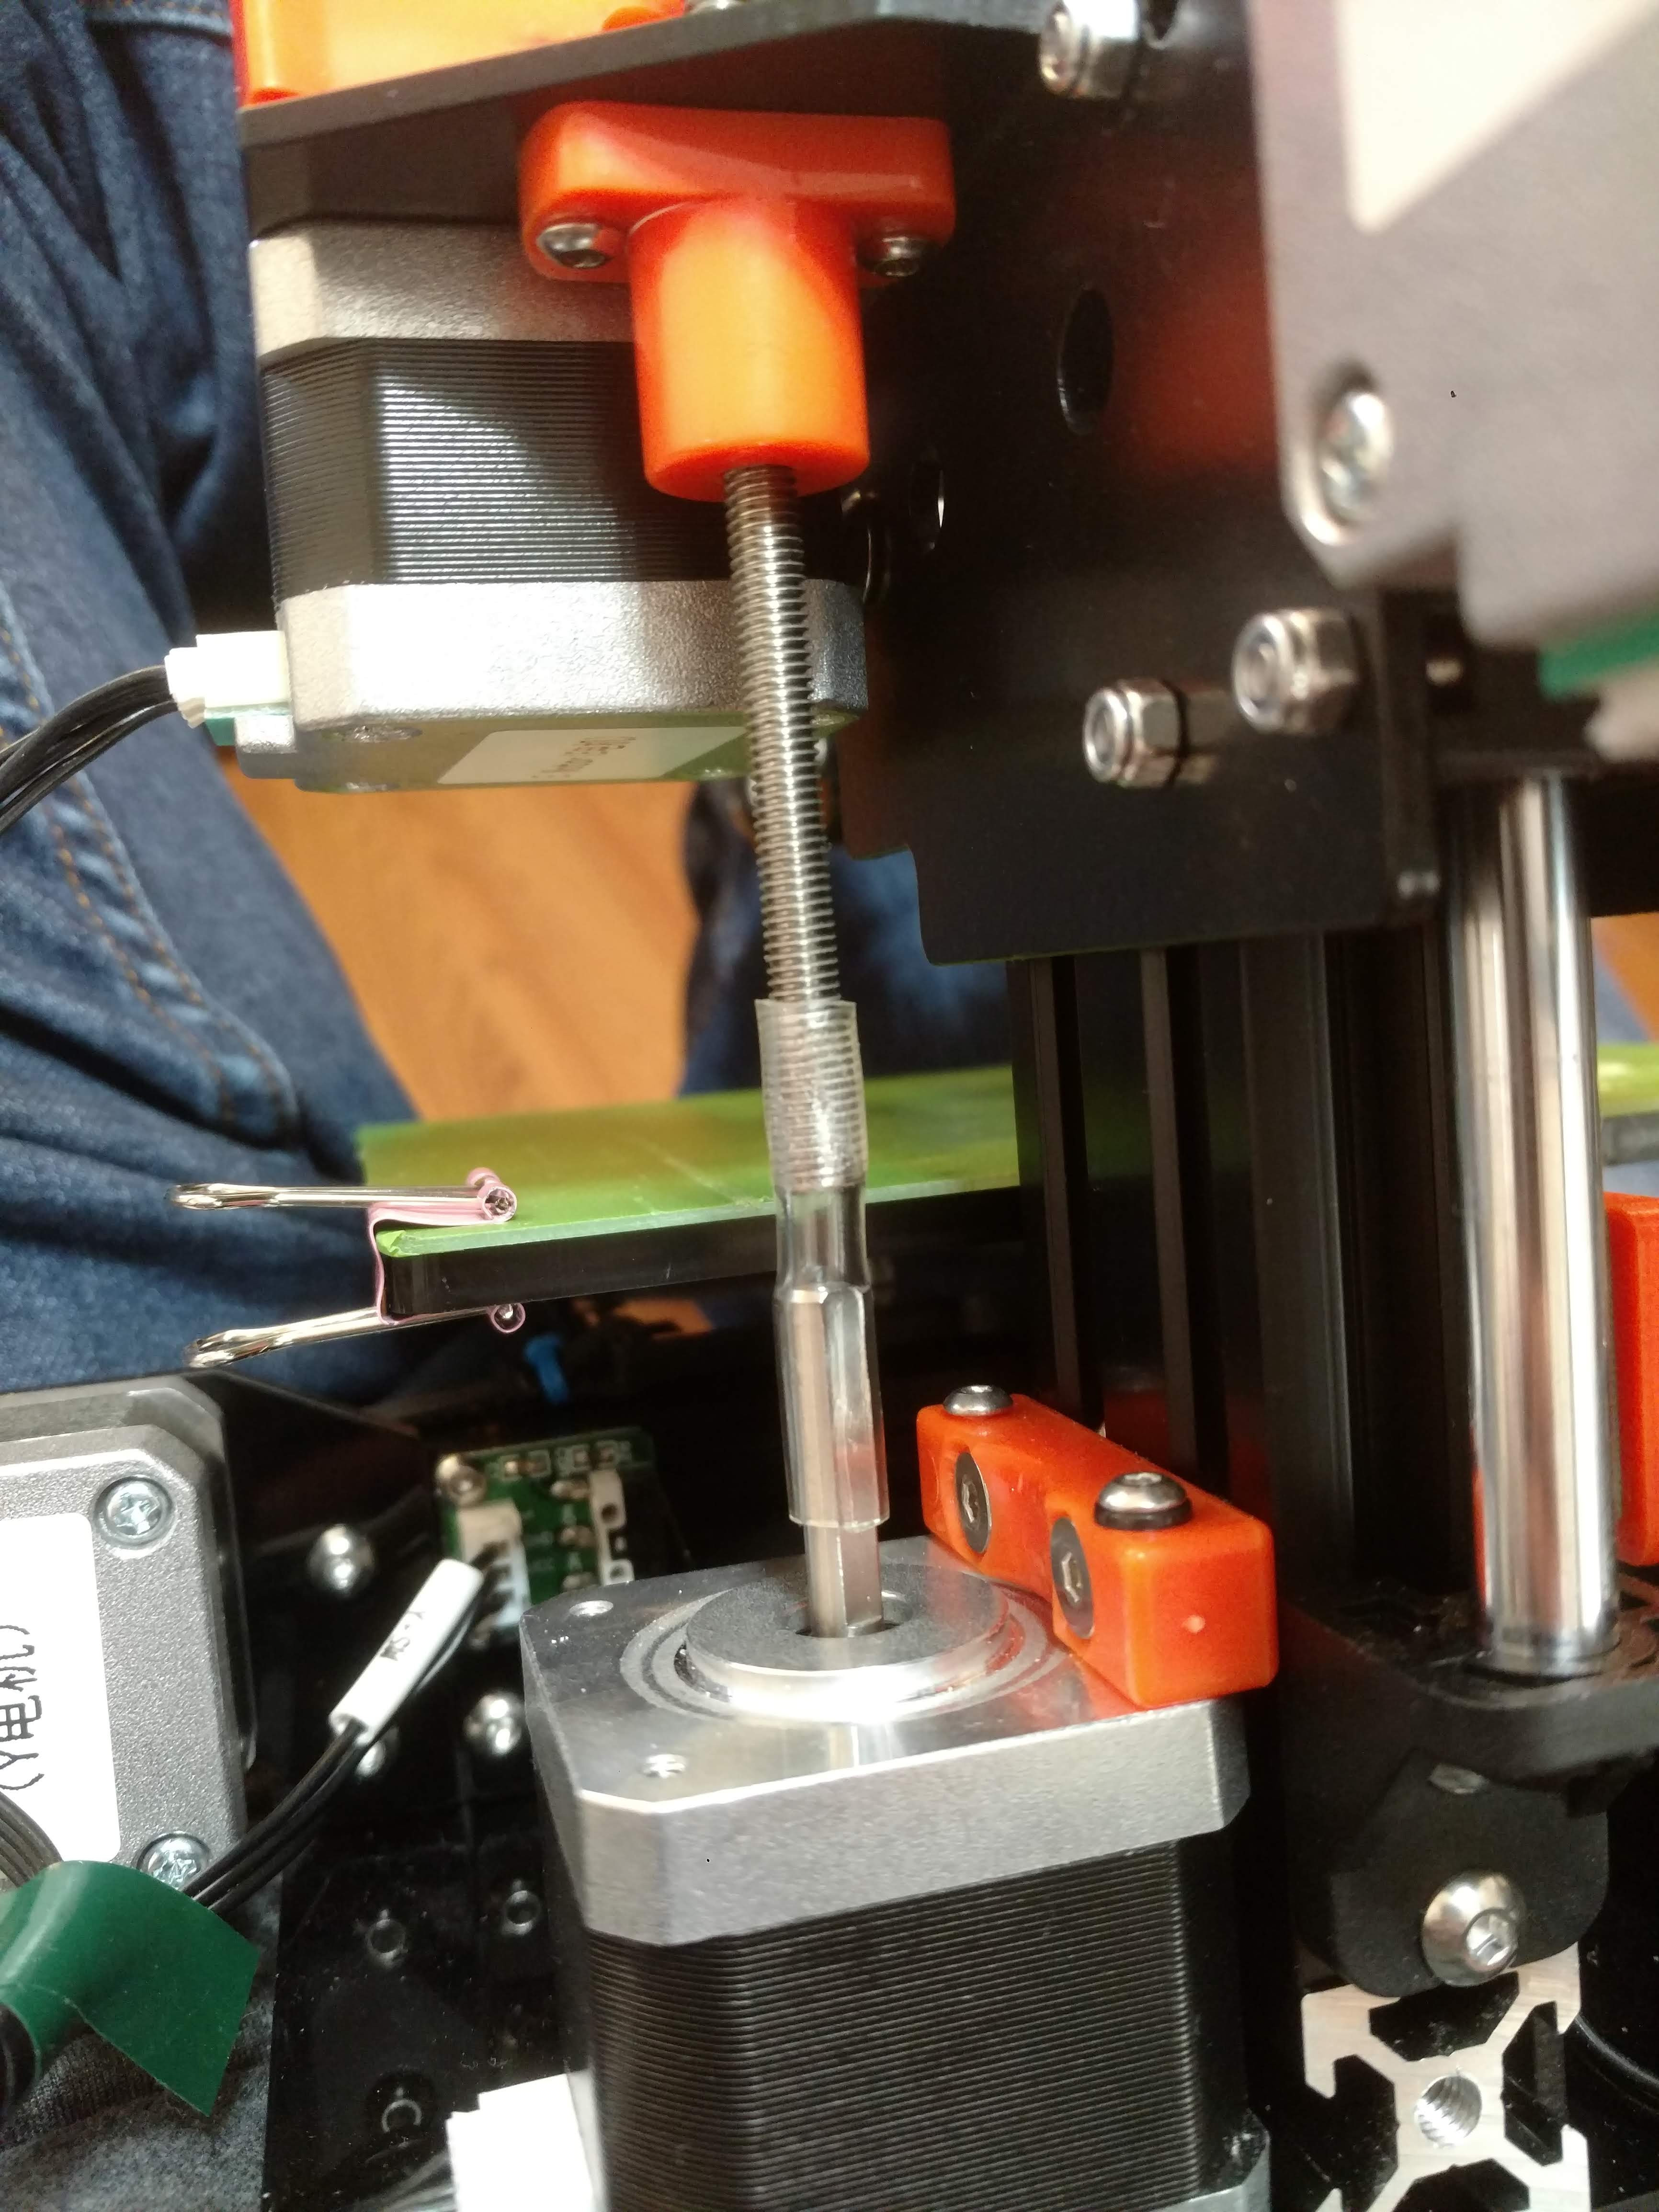 PVC Z-Axis Coupler
Yes, PVC tubing. For a printer that initially impressed with some clever engineering, this Z-axis coupler is incredibly disappointing. This flimsy connection is the root cause of the printer’s Z-axis instability, leading to gaps in vertical surfaces and severely compromised print quality, especially at finer resolutions. Attempting a 200-micron print results in a chaotic, uneven mess.
 Failed High Resolution Print
At 100 microns, printing a Niskin bottle receiver (part of the Niskin3D open-source project) took 11 hours – significantly longer than the 2-4 hour average on other tested printers. The resulting part was flimsy, the servo motor didn’t fit properly, and all components had excessive play. Despite the brilliance of the Niskin3D design, the water sampler barely functioned and felt incredibly fragile, precluding any in-water testing.
A post shared by Andrew David Thaler (@drandrewthaler) on Instagram
Complex System Score: D
The Precision Instrument Test: Navigational Scale
Can a $99 3D printer produce a precision scale suitable for a navigational instrument, printed at a 50-micron resolution?
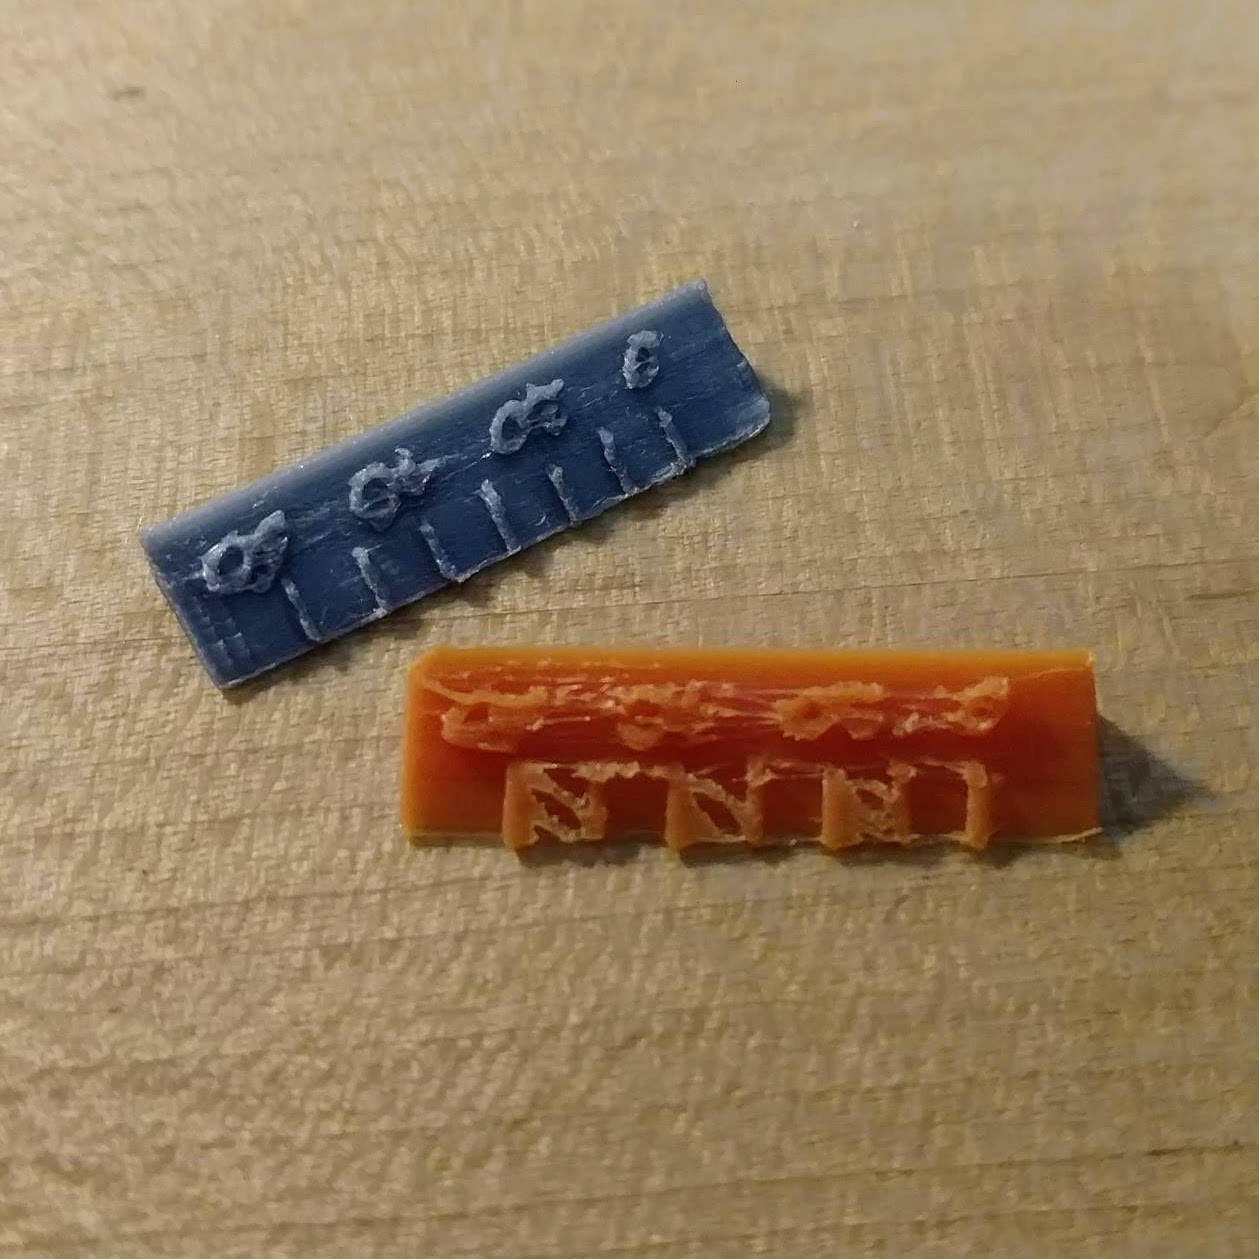 Precision Scale Print Comparison
No. Unsurprisingly, precision is beyond the capabilities of this machine.
Precision score: F
The Educator’s Test: Isopod Model
Hope remained for the Educator’s Test. This was the final print of the review, printer settings were as optimized as possible, and the Isopod model is designed to be printable even on basic machines.
A 3D printed Isopod model from the iNSTONE Desktop DIY, revealing significant Z-wobble and layer inconsistencies, demonstrating the limitations of the printer even for educational models due to its cheap 3d printer price.
Z-axis wobble strikes again. Vertical layers are inconsistent with large gaps, much of the fine detail is lost, the base is messy, and warping is evident on the telson (tail). While recognizable as an isopod, the print quality is far from ideal for educational purposes.
Educator’s Score: D
The Tear-down: Internal Inspection
Like the Anet A6, the iNSTONE Desktop DIY has an open design, making tear-down straightforward. After extensive testing, a close inspection reveals the printer’s internal condition. Despite its limitations, the iNSTONE is surprisingly well-designed and constructed for its incredibly low 3D printer price. The Bowden extruder shows minor stress from filament movement, but no significant wear, rubbing, or major issues were observed.
It’s well-engineered for what it is, but “what it is” is fundamentally limited by its ultra-cheap 3D printer price.
Note: Burn-in and Tear-down tests are often interconnected. Kit printers like the iNSTONE receive extensive Burn-in analysis and briefer Tear-downs, while pre-built printers tend to have the reverse. The overall assessment balances out.
Tear-down Score: A (for build quality relative to price)
The Trash Test: Filament Waste
This printer generated significantly more waste filament than any other printer tested. This doesn’t even include the numerous failed prints during the initial burn-in and calibration phase.
Total mass of waste filament: 27.71g
Reviewer’s Discretion: Potential Improvements
Numerous improvements could enhance this printer’s performance. An all-metal (or even a well-designed 3D-printed) Z-axis coupler would drastically improve Z-axis stability. Redesigning the build plate and adding a heated bed would be transformative. A cooling fan directed at the print area is also desperately needed.
However, these upgrades would fundamentally alter the spirit of the machine. The iNSTONE Desktop DIY is a $99 3D printer, not a “$99 3D printer + a week of modifications + expert 3D printing knowledge.”
You don’t build a hundred-dollar 3D printer because it’s a practical choice; you build it because you can. It’s a testament to engineering ingenuity at the absolute lowest 3D printer price.
Final Assessment: Stop. Don’t.
Honestly, assigning a numerical score to this printer feels inadequate. You should not buy it as your primary or even secondary 3D printer. The incredibly low 3D printer price is undeniably attractive, but the performance compromises are too significant for practical use.
Final Score: Stop. Don’t.
The Rankings So Far:
Only one printer remains in this budget 3D printer review series: the highly recommended $194 Creality Ender 3. Stay tuned for the final results and a comparison of budget 3D printer options.
If this project resonates with you and you’d like to see reviews of printers in the $200-$400 price range, please support Southern Fried Science by using the Amazon Affiliate links in this post for your purchases, or by signing up for Patreon to directly support our work.