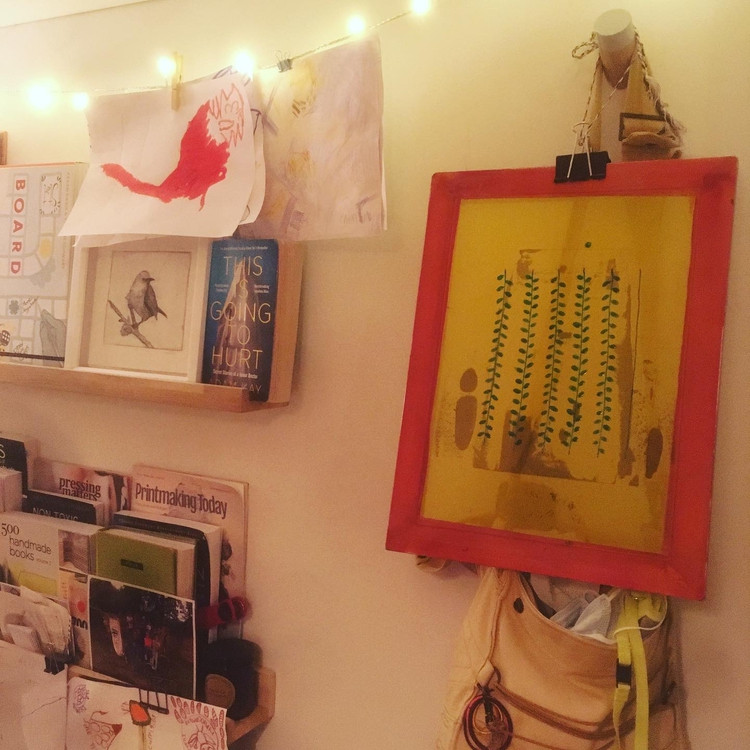
Screen printing is a fantastic way to bring your designs to life, whether you’re printing on fabric, paper, or other materials. While photo emulsion methods are popular, the screen filler and drawing fluid technique, especially when using Speedball products, offers a wonderfully accessible and artistic entry point. Often underestimated as a beginner’s method, it’s capable of producing high-quality, unique prints with a charmingly organic, hand-drawn aesthetic. If you’re looking for a screen printing method that’s straightforward, less reliant on specialized equipment, and yields beautifully imperfect, painterly results, then Speedball Screen Printing with screen filler and drawing fluid is for you.
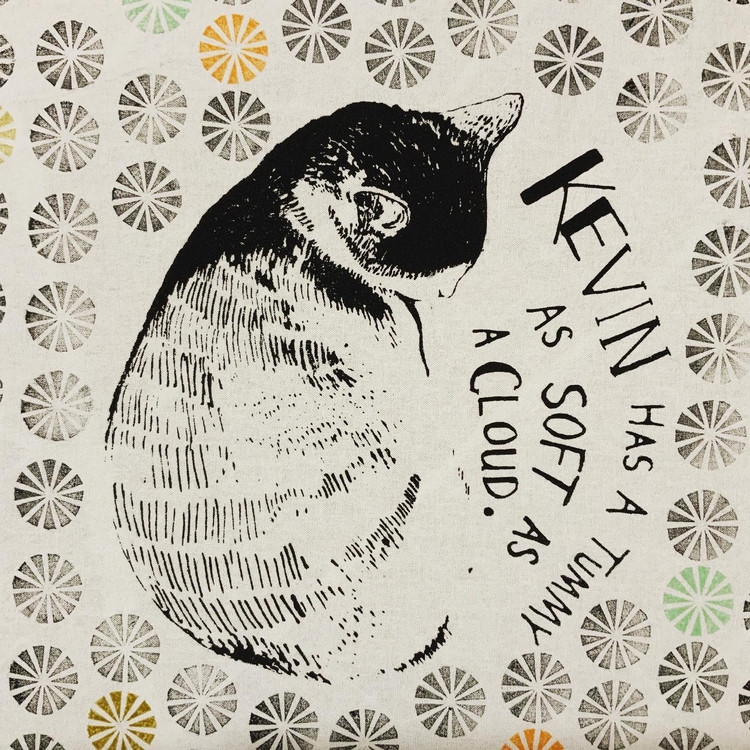
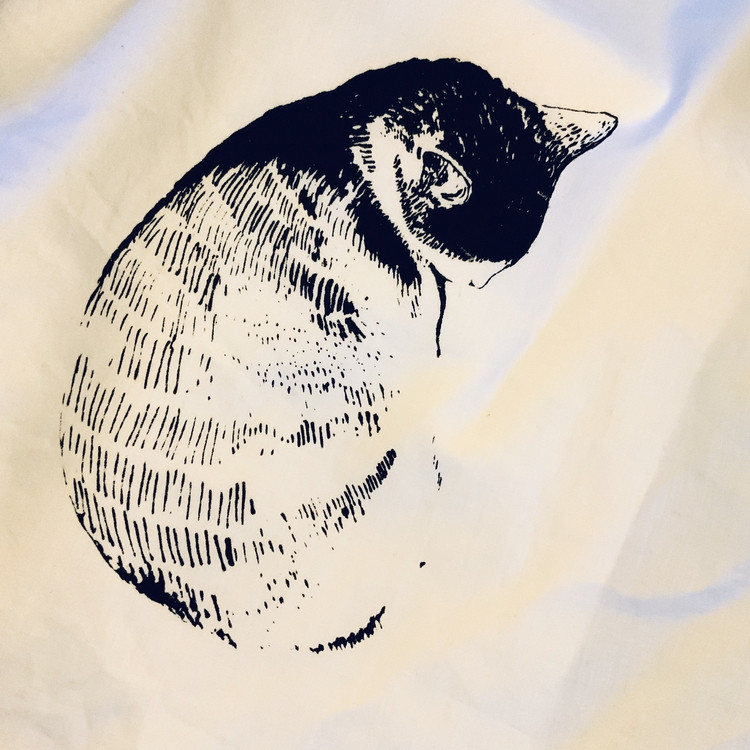 Kevin screen printed onto fabric using screen filler and drawing fluid
For those drawn to the craft of fabric printing, this method is particularly appealing. Imagine the creative freedom of designing and printing your own fabrics for home décor, clothing, or unique craft projects. For hobbyists working from home, without the space and advanced equipment of professional studios, screen printing with screen filler and drawing fluid presents a compelling option alongside block printing and stencil methods.
While techniques like Diazo photo emulsion screen printing are achievable at home, they involve a steeper learning curve and more specialized equipment. My own ongoing experiments with photo emulsion are a testament to this complexity, and I’ll share those insights in due course. However, for now, let’s delve into the rewarding world of screen filler and drawing fluid. This method shines in its simplicity and ability to create prints with an appealingly handmade character. The slight imperfections inherent in the process only add to its unique charm.
Understanding the Speedball Screen Printing Process: How It Works
The beauty of the screen filler and drawing fluid method lies in its ingenious yet simple masking technique. Here’s a concise overview:
- Drawing Your Design: You begin by directly painting your design onto the mesh screen using a specialized drawing fluid. Think of this fluid as a liquid masking agent.
- Applying Screen Filler: Once the drawing fluid is completely dry, you apply a thin, even layer of screen filler over the entire screen surface, covering your design.
- Revealing Your Stencil: The magic happens when you wash the screen with cold water. The water-soluble drawing fluid dissolves and washes away, leaving behind the areas where you drew. The screen filler, being water-resistant when dry, remains intact everywhere else, effectively creating a stencil of your design on the screen.
- Ready to Print: Your screen is now ready for printing! The open mesh areas where the drawing fluid was removed allow ink to pass through, transferring your design onto your chosen surface.
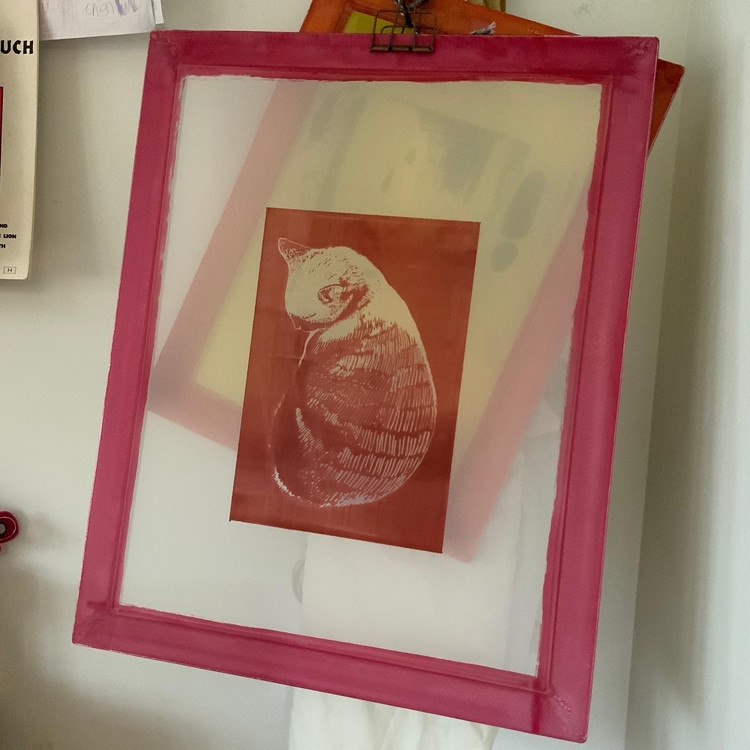 Screen printing stencil created with drawing fluid and screen filler
Gathering Your Speedball Screen Printing Supplies
To get started with Speedball screen printing using screen filler and drawing fluid, you’ll need to assemble a few key materials. Using quality Speedball products, designed specifically for this method, can significantly enhance your success and printing experience.
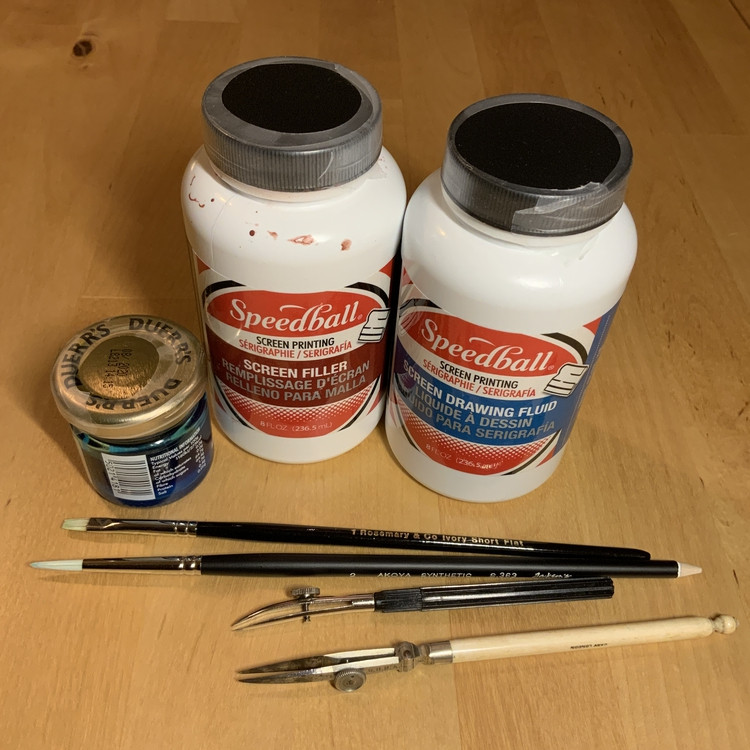 Speedball screen filler and drawing fluid with brushes and ruling pens
Here’s a breakdown of the essential supplies:
Speedball Drawing Fluid
This is a crucial component. Speedball drawing fluid is a viscous, water-based liquid, often tinted blue for visibility. It’s specifically formulated to be used with screen filler. You’ll use this fluid to paint your positive image directly onto the screen mesh. Other brands like Daler Rowney System 3 also offer drawing fluid, but Speedball is a widely trusted and readily available option.
Speedball Screen Filler (or Screen Block)
Speedball screen filler, sometimes referred to as screen block, is another essential material. This is a liquid solution that dries to form a durable, water-resistant stencil. Applied thinly over the screen and drawing fluid, it creates the negative space in your stencil. Speedball screen filler is designed to withstand water-based inks and cleaning with cold water, allowing for multiple prints from a single stencil. When you’re ready to reclaim your screen, Speedball also provides a compatible screen filler remover.
Speedball Speed Clean (or Screen Filler Remover)
While Speedball screen filler is designed to be durable for print runs, you’ll eventually want to remove the stencil to reuse your screen. Speedball Speed Clean is specifically formulated to dissolve and remove Speedball screen filler. While some screen fillers might be removable with hot water or abrasive cleaners, Speed Clean significantly simplifies and speeds up the screen reclaiming process, ensuring you can efficiently prepare your screens for new projects.
Silkscreen
The screen itself is the foundation of screen printing. Screens come in various sizes and mesh counts. Mesh count refers to the density of threads in the screen fabric, affecting ink flow and detail resolution. For fabric printing, a lower mesh count like 43T is often recommended, especially for thicker fabrics like t-shirts. For finer detail and thinner fabrics such as cotton calico, higher mesh counts like 77T or 90T are preferable. Higher mesh counts also tend to be easier to work with when applying screen filler, minimizing drips. Choose a screen size slightly larger than your design, allowing for a border around your image.
Squeegee
A squeegee is essential for both applying screen filler and pushing ink through the stencil during printing. Select a squeegee that is slightly wider than your design to ensure even coverage in a single pass. Make sure the squeegee fits comfortably within the frame of your screen, allowing for smooth movement across your design area.
Screen Printing Ink
For fabric printing, water-based screen printing inks are ideal for ease of use and cleanup. Permaset Aqua is a popular, high-quality water-based ink option. Many other brands and budget-friendly inks are available online; however, Permaset Aqua is known for its vibrant colors, durability on fabric, and ease of use.
Fabric
Pre-washed cotton calico is a great fabric to start with for screen printing practice and projects. Pre-washing removes sizing and potential shrinkage, ensuring your prints adhere well and maintain their shape.
Drawing Tools
Brushes are the most common tool for applying drawing fluid, allowing for varied line widths and painterly effects. Ruling pens, traditionally used for technical drawing, can also be excellent for creating fine, consistent lines and hatching effects in your screen printing designs. When using ruling pens, ensure the tips are smooth to avoid damaging the delicate screen mesh.
 Ruling pens for applying drawing fluid
Step-by-Step Instructions: Creating Your Speedball Screen Printing Stencil
Now, let’s walk through the process of creating your stencil using Speedball screen filler and drawing fluid:
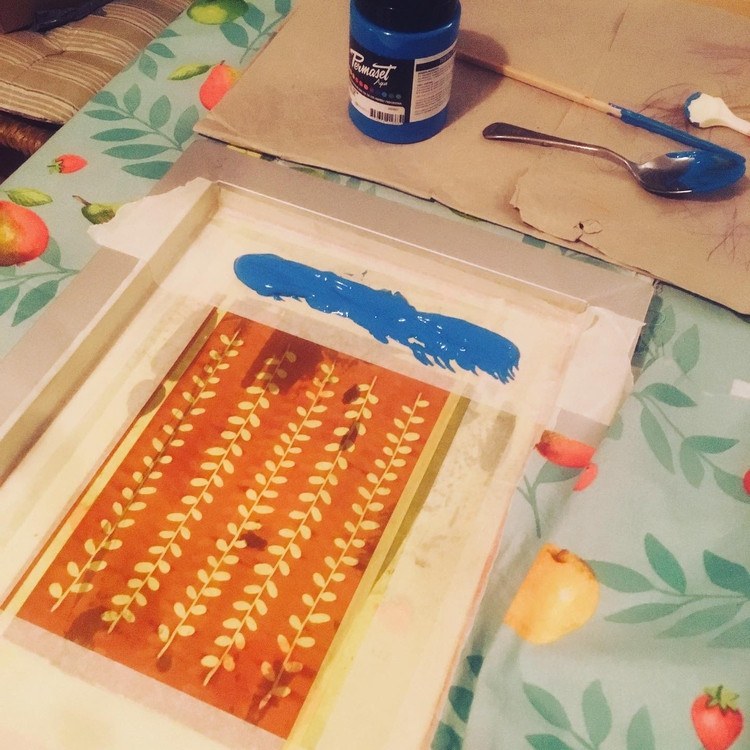
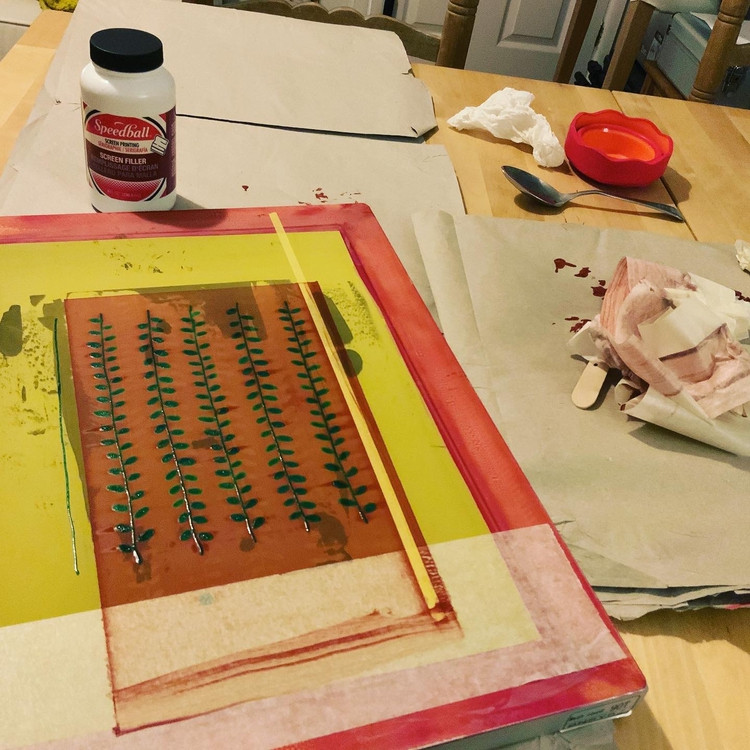 Screen filler applied over drawing fluid on a screen
Step 1: Sketch Your Design
While you can correct mistakes in the drawing fluid, planning your design beforehand is always recommended. Sketch your artwork on paper to refine your composition and details before transferring it to the screen. You can even place your sketch underneath the screen as a guide during the drawing fluid application.
Step 2: Apply Drawing Fluid to the Screen
Using a brush or ruling pen, carefully apply the Speedball drawing fluid to the squeegee side of your screen (the underside, which will be in contact with your print surface during printing). Painting on this side ensures a smoother printing surface and prevents reversed lettering if you are incorporating text into your design.
Step 3: Allow the Drawing Fluid to Dry Completely
Let the drawing fluid dry thoroughly. It’s best to allow ample drying time, ideally around 24 hours, to ensure it’s completely set before proceeding to the next step.
Step 4: Apply Speedball Screen Filler
Using a squeegee, apply a thin, even coat of Speedball screen filler over the same side of the screen where you applied the drawing fluid. Ensure you cover the entire design area and extend slightly beyond it. Crucially, only apply screen filler to this one side. Applying it to both sides will prevent the drawing fluid from being washed out, and you won’t be able to create your stencil.
Step 5: Allow the Screen Filler to Dry Completely
Similar to the drawing fluid, allow the screen filler to dry completely. Another 24-hour drying period is recommended to ensure the screen filler is fully cured and water-resistant.
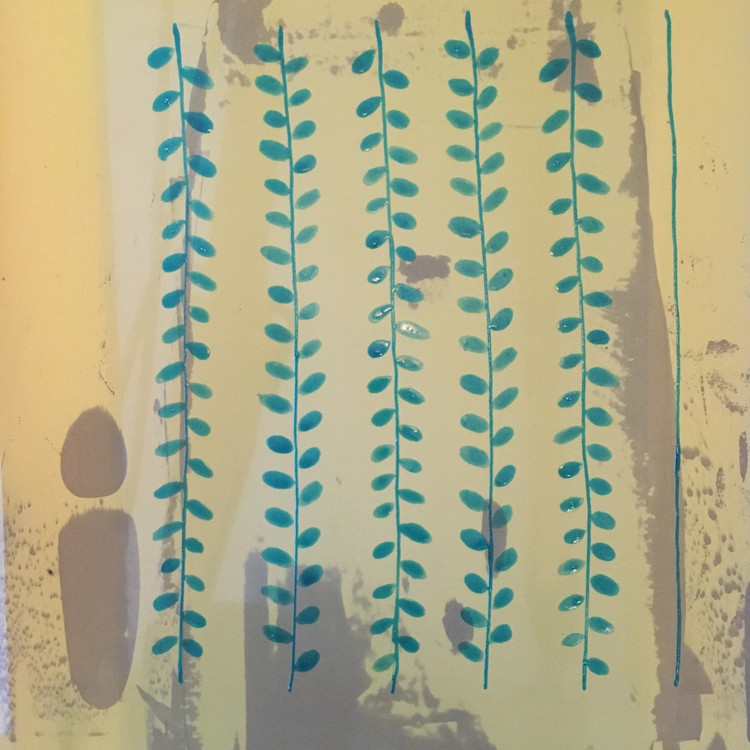 Drawing fluid design on a screen
Step 6: Wash Out the Drawing Fluid with Cold Water
Once the screen filler is dry, gently wash the screen with cold water. Avoid hot water, as this could soften or remove the screen filler. As you rinse, the drawing fluid will dissolve and wash away, revealing your stencil design in the open mesh areas of the screen. Continue rinsing until all traces of the blue drawing fluid are gone and your stencil is clearly defined.
Step 7: Begin Printing!
Your screen is now ready for printing! After each print run, you can clean the screen with cold water to remove ink, and the stencil can be reused multiple times. However, keep in mind that the longer the stencil remains on the screen, the more challenging it can be to reclaim the screen later.
Step 8: Reclaim Your Screen
When you no longer need the stencil, reclaim your screen using hot water and Speedball Speed Clean (or another screen filler remover). Hot water helps to soften the screen filler, and Speed Clean effectively dissolves it, allowing you to wash the stencil completely from the mesh and prepare the screen for future projects. A regular shower hose is sufficient for reclaiming screens at home; you don’t need specialized high-pressure equipment.
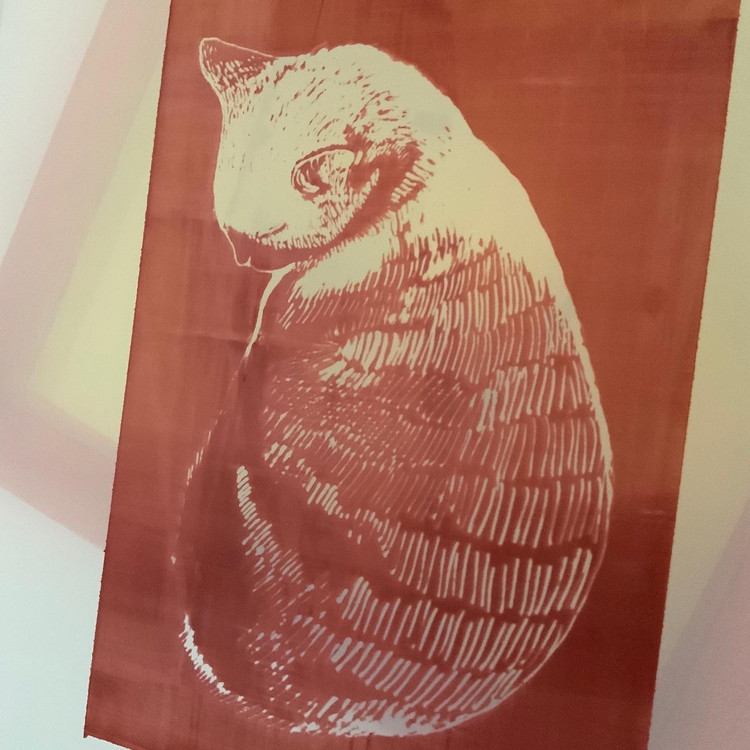
 Screen ready for printing after stencil creation
 Example of hatching detail using drawing fluid and ruling pen
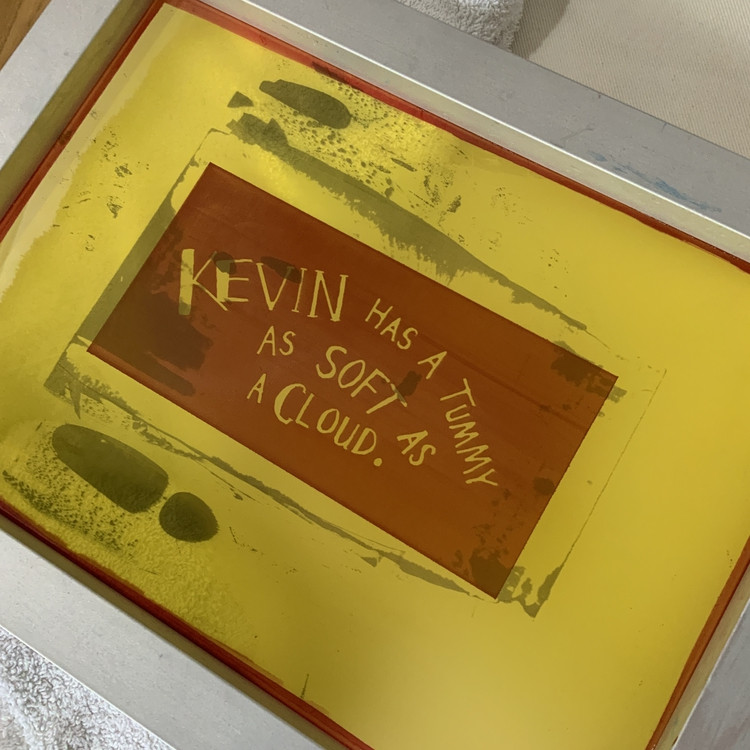 Lettering created with ruling pen and screen filler technique
Expert Tips for Using Drawing Fluid
- Squeegee Side Application: Always apply drawing fluid to the squeegee side of the screen. This creates a smoother printing surface and avoids reversed images for lettering.
- Reference Drawings: Use your paper sketch as a reference by taping it beneath the screen. Elevate the paper slightly (e.g., using a coin as a spacer) to prevent smudging the drawing fluid.
- Avoid Pooling: Prevent thick pools of drawing fluid, which can create uneven screen filler application. Blot excess fluid with a dry brush or tissue before it dries.
- Keep Tools Clean: Drawing fluid can dry on brushes and ruling pens. Keep a jar of water nearby to rinse your tools periodically during use.
- Decant Drawing Fluid: Pour a small amount of drawing fluid into a smaller container for easier brush or ruling pen dipping, and to avoid contaminating the entire bottle if you need to dilute it slightly with water.
- Practice Ruling Pen Technique: If using a ruling pen, practice on paper first to get comfortable with the technique. Hold the pen parallel to the gap between the tips and be gentle to avoid tearing the screen mesh.
- Correcting Mistakes: Mistakes in drawing fluid can be erased with a damp cloth or tissue. For major errors, wash the entire screen and start again once dry.
 Screen drying after drawing fluid application
Expert Tips for Screen Filler Application
- Tape the Screen: Tape the top and bottom edges of your screen to create “staging areas” for the screen filler. This prevents the filler from seeping through the mesh when you pause during application.
- Apply Thinly: Avoid applying screen filler too thickly. Thick layers can pool on the underside of the screen and compromise stencil sharpness.
- Limit Squeegee Passes: Minimize squeegee passes (around 3 is often sufficient) to prevent the screen filler from dissolving the drawing fluid and losing design details.
- Control Screen Coverage: You don’t need to fill the entire screen with filler. You can tape off borders during printing to confine your print area.
- Stir Screen Filler: Thoroughly stir the screen filler before use to ensure a consistent mixture, but avoid shaking, which can create bubbles.
- Reuse Excess Filler: Excess screen filler can be returned to the bottle for future use, similar to screen printing inks.
Get Creative with Speedball Screen Printing!
Speedball screen printing using screen filler and drawing fluid offers a wonderfully accessible and artistically rewarding way to explore screen printing at home. Its forgiving nature and painterly aesthetic make it perfect for beginners while still allowing for creative exploration and unique results. Experiment with different designs, fabrics, and ink colors to fully unlock the creative potential of this fantastic method.
 Fabric screen print with Speedball screen printing method
Dive into the world of Speedball screen printing and bring your artistic visions to life! Happy printing!