
Mobility Print is a powerful solution designed to simplify the printing experience for bring your own devices (BYOD) and user-managed devices within your network. Whether your users are on smartphones, tablets, laptops, or Chromebooks, Mobility Print ensures a seamless and efficient printing process, regardless of their operating system or printer brand. This innovative tool empowers end users to effortlessly discover and set up printers themselves, eliminating complexities and reducing the burden on IT support.
Mobility Print provides secure network print services across a wide range of platforms, including iOS, Windows, macOS, Android, and Chrome devices. Its user-friendly setup means individuals can print from their personal devices without needing assistance from system administrators. This self-service approach not only enhances user autonomy but also significantly cuts down on IT support requests related to printing.
Scalability is a key feature of Mobility Print. It is designed to adapt to environments ranging from small, single-subnet networks to large, intricate enterprise networks supporting tens of thousands of users. This adaptability makes Mobility Print a robust choice for organizations of any size looking to optimize their printing infrastructure.
Setting Up Your Mobility Print Server
The Mobility Print Server operates as a separate application accessible via the PaperCut NG/MF Admin web interface. Its separate installation allows for deployment on multiple servers, enhancing flexibility and scalability. For advanced configurations, refer to the detailed guide on Setting up multiple Mobility Print Servers.
-
Navigate to Enable Printing > Mobile & BYOD in your PaperCut NG/MF Admin interface. This action will display the Mobile & BYOD settings page.
-
Locate the Print Mobility section.
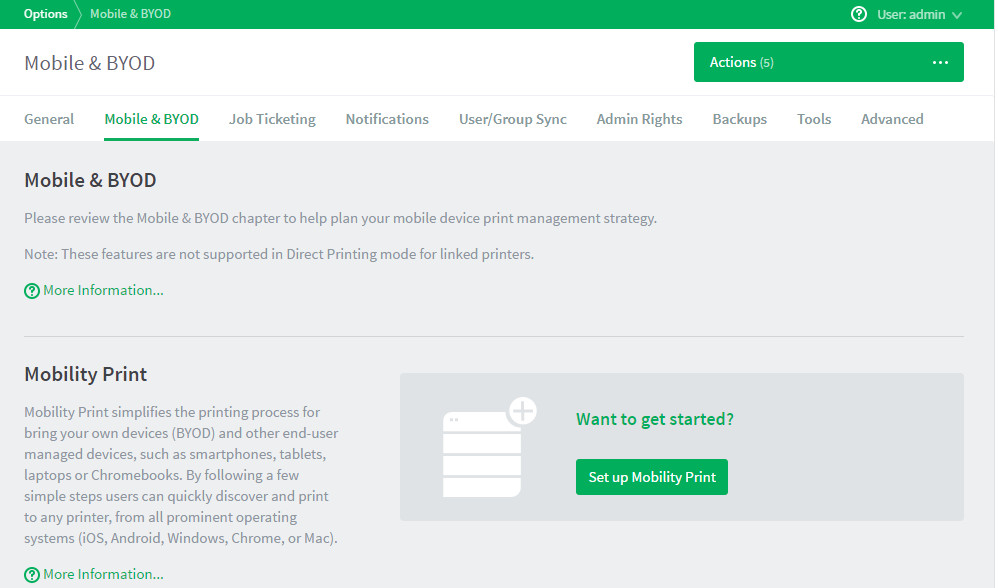 PaperCut NG/MF Admin interface highlighting the 'Set up Mobility Print' button within the Mobile & BYOD settings. Mobility Print server setup initial view.
Initially, before any Mobility Print server is configured, this area will only show a Set up Mobility Print button. Once a server is set up, this section becomes your central dashboard for monitoring and managing your Mobility Print servers. For more details on monitoring, see Viewing Mobility Print server status.
-
Click the Set up Mobility Print button. This will direct you to the Mobility Print Help Center for comprehensive setup instructions.
-
Click Set up Mobility Print again within the Help Center to access detailed, step-by-step guidance on server setup. During installation, Mobility Print automatically detects all available printers, prompting you to select which ones to make accessible to your users. Upon completion, your newly configured Mobility Print server will be visible within the PaperCut NG/MF Admin web interface on the Mobile & BYOD page.
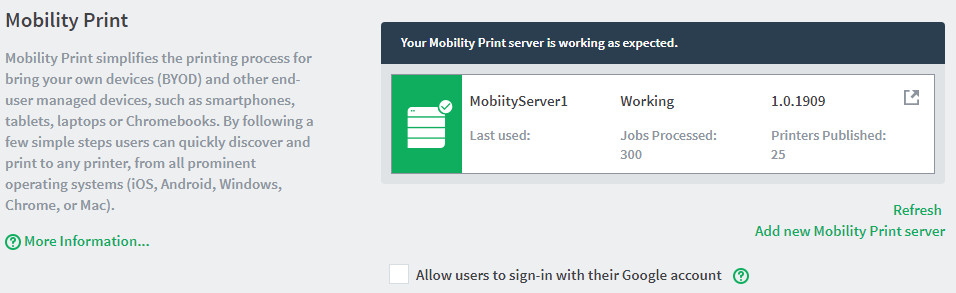 PaperCut NG/MF Admin interface showing a successfully configured Mobility Print server in the Mobile & BYOD settings. Single Mobility Print server setup view.
 -
For organizations utilizing Google Workspace, you have the option to streamline user login by selecting Allow users to sign-in with their Google account. This simplifies the user experience for those who primarily use Google accounts.
Configuring Multiple Mobility Print Servers
For larger deployments or to enhance redundancy, Mobility Print supports the setup of multiple servers. To add additional Mobility Print servers, follow these steps:
-
Copy the Mobility Print Server installer to the designated print server where you intend to install it.
-
Proceed with the Mobility Print setup as outlined in the Mobility Print Help Center. All configured Mobility Print servers will be centrally listed in the PaperCut Admin web interface, under the Mobile & BYOD section, providing a unified management view.
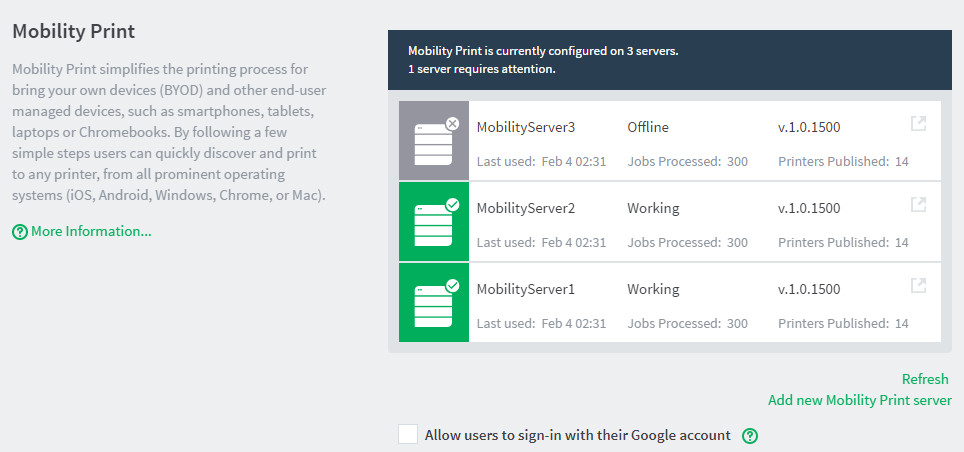 PaperCut NG/MF Admin interface displaying multiple configured Mobility Print servers in the Mobile & BYOD settings. Multiple Mobility Print server setup view.
Integrating Mobility Print with Site Servers
In environments employing Site Servers, Mobility Print should be installed on each print server at every site. This includes both the Application Server and all Site Servers to ensure comprehensive print management across distributed locations. By installing Mobility Print on each server, all printers at a specific site are made available to devices within that site, optimizing local printing performance. For details on Mobility Print’s functionality during Application Server downtime, consult the Offline operations documentation.
Monitoring Mobility Print Server Status
The PaperCut NG/MF Admin web interface provides real-time status updates for all your Mobility Print servers. To check the status:
-
Go to Enable Printing > Mobile & BYOD. This will bring you to the Mobile & BYOD settings page.
-
Scroll down to the Print Mobility area.
PaperCut NG/MF Admin interface displaying multiple configured Mobility Print servers in the Mobile & BYOD settings. Multiple Mobility Print server setup view.
Here, you will find a detailed status list for each Mobility Print server, including:
- Server Name and Current Status: Quickly identify the operational status of each server.
- Mobility Print Server Version: Ensure consistency across your server deployment by verifying version numbers.
- Last Used (Minutes Ago): Monitor server activity and usage frequency.
- Jobs Processed: Track the total number of print jobs handled by each server.
- Printers Published: See how many printers are currently made available through each server.
For environments with more than ten Mobility Print servers, the interface displays the first ten initially. Scroll down to view the complete list. Servers experiencing errors or warnings are prioritized at the top of the list, making it easy to identify and address potential issues promptly.
If a server is flagged with an error, clicking on it in the list will open the Mobility Print Admin interface, providing deeper insights and tools to troubleshoot and resolve the issue efficiently.
Mobility Print offers a robust, user-friendly, and scalable solution for managing printing in BYOD environments. Its ease of setup, broad platform support, and comprehensive management features make it an invaluable asset for modern organizations seeking to optimize their print infrastructure and empower their users.