Heat transfer paper opens up a world of possibilities for crafters and DIY enthusiasts. If you’re looking to personalize apparel, home décor, or accessories with vibrant designs, but don’t have a sublimation printer, a Transfer Paper Printer is your perfect solution. This guide will walk you through everything you need to know about using transfer paper printers to bring your creative visions to life.
Understanding Transfer Paper and Printers
Transfer paper allows you to transfer printed images onto various materials using heat. Unlike sublimation, which requires specialized inks and polyester-coated items, heat transfer paper works with standard inkjet or laser printers and can be applied to a wider range of fabrics, including cotton and dark-colored materials.
What is Transfer Paper?
Heat transfer paper consists of a printable side and a carrier sheet. When heated, the ink on the paper is released and transferred onto the target surface. There are different types of transfer paper designed for specific printers and fabric colors:
- Inkjet Transfer Paper: Designed for use with inkjet printers, which are common in most homes. Inkjet transfer paper is available for both light and dark fabrics. For dark fabrics, it often includes a white opaque layer to ensure colors appear vibrant against darker backgrounds.
- Laser Transfer Paper: Compatible with laser printers. Laser transfer paper generally offers sharper image quality and better durability, especially for intricate designs. Like inkjet options, laser transfer paper also comes in versions for light and dark fabrics.
Choosing the right type of transfer paper is crucial for achieving the best results. Always check the manufacturer’s recommendations to ensure compatibility with your printer and project materials.
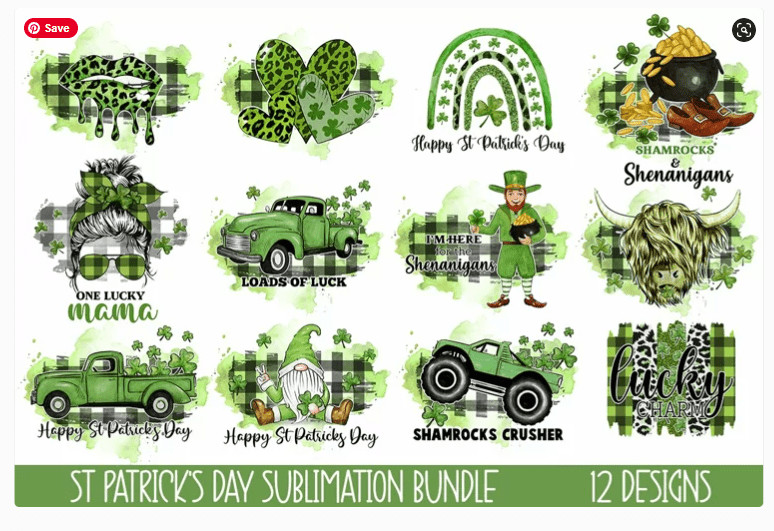
A design file ready to be used for printing on transfer paper. Choosing vibrant and high-resolution designs is key for impactful transfer results.
Choosing the Right Printer for Transfer Paper
While the term “transfer paper printer” isn’t specific to a particular type of printer, it refers to using your existing inkjet or laser printer with heat transfer paper. Here’s what to consider when using your printer for transfer paper projects:
- Inkjet Printers: Most home inkjet printers work well with inkjet transfer paper. For best results, use high-quality ink and select appropriate print settings (more on this later). Inkjet printers are generally more affordable for home use and offer excellent color reproduction for transfer paper projects.
- Laser Printers: Laser printers are suitable for laser transfer paper. They use toner instead of ink, which can offer advantages in terms of durability and resistance to fading, especially for detailed designs. Laser printers can be a good choice for businesses or individuals who require more robust transfers and have access to a laser printer.
Printer Compatibility: Always verify that your chosen transfer paper is compatible with your printer type (inkjet or laser). Using the wrong type of paper can lead to poor print quality or damage to your printer.
Step-by-Step Guide: Printing and Cutting with Transfer Paper
Let’s delve into the process of using transfer paper to create your own custom designs. We’ll cover printing, cutting (if desired), and applying your design to your chosen material.
Materials You’ll Need
- Design: Choose or create your design. PNG files work well, but you can also use other image formats.
- Transfer Paper: Select the appropriate transfer paper for your printer (inkjet or laser) and fabric color (light or dark).
- Printer: Your home inkjet or laser printer.
- Cutting Machine (Optional): A Silhouette, Cricut, or similar cutting machine is helpful for creating precise cuts around your design for a professional finish. Scissors or a craft knife can also be used, but may be less precise.
- Heat Press or Iron: A heat press is recommended for consistent heat and pressure, but a household iron can also work, especially for smaller designs.
- Parchment Paper or Teflon Sheet: To protect your design and heat press/iron during application.
- Fabric or Item to Decorate: T-shirts, tote bags, cushions, etc.
Setting Up Your Design
- Open Your Design Software: Use Silhouette Studio, Cricut Design Space, Adobe Illustrator, or any graphic design software you prefer.
- Import Your Design: Import your chosen image into your software.
- Size and Position: Adjust the size and position of your design to fit your project.
- Mirror Image (Important for some transfer papers): Crucially, for many types of transfer paper, you DO NOT mirror the image. However, always check the instructions provided with your specific transfer paper. Some transfer papers, particularly those for light fabrics, may require you to mirror the image before printing. For the Silhouette Heat Transfer for darks, as used in the original article, mirroring is explicitly stated as unnecessary. Double-check your paper’s instructions to avoid printing errors.
Printing on Transfer Paper
- Load Transfer Paper: Load the transfer paper into your printer, ensuring it’s placed correctly for printing on the printable side. Refer to your printer manual if needed.
- Printer Settings:
- Paper Type: Select “Photo Matte Paper” or a similar high-quality paper setting in your printer settings. This usually provides better ink coverage and vibrancy for transfer paper.
- Print Quality: Choose “Best” or “High” quality for optimal print results, especially for designs with fine details or vibrant colors.
- Color Settings: Ensure your color settings are appropriate for your design (e.g., RGB for most digital designs).
- Print Your Design: Print your design onto the transfer paper.
- Let it Dry: Allow the ink to dry completely before proceeding to the next step. This prevents smudging during cutting or heat pressing.

Printer settings are crucial for achieving high-quality prints on transfer paper. Selecting “Photo Matte Paper” and “High” print quality ensures optimal ink application and detail.
Cutting Your Design (Print and Cut Method – Optional but Recommended)
If you want a precisely cut design, follow these steps for print and cut using a cutting machine like a Silhouette:
- Add Registration Marks: In your design software, add registration marks to your page. These marks help your cutting machine accurately align the blade for cutting around your printed design.
- Upload to Cutting Machine Software: Send your design with registration marks to your cutting machine’s software (e.g., Silhouette Studio).
- Adjust Cut Settings: Select the appropriate material setting for your transfer paper. Start with a test cut to determine the ideal blade depth and pressure for clean cuts without cutting through the carrier sheet.
- Load and Cut: Place your printed transfer paper onto your cutting mat, aligning it as shown in your software. Load the mat into your cutting machine and initiate the print and cut process.
- Weed Excess Paper: After cutting, carefully remove the excess transfer paper around your design, leaving only the image on the carrier sheet. Weeding tools can be helpful for intricate designs.

The design is ready for cutting after printing. The red border in Silhouette Studio indicates the cut lines, ensuring precise cutting around the printed image.
Heat Pressing Your Design
- Prepare Your Fabric: Preheat your fabric item with your heat press or iron for a few seconds to remove wrinkles and moisture.
- Position Your Design: Place the weeded transfer paper design onto your fabric in the desired location, with the image facing down.
- Cover with Parchment Paper: Place a sheet of parchment paper or Teflon sheet over the transfer paper to protect it and your heat press/iron.
- Apply Heat and Pressure:
- Heat Press: Follow the heat transfer paper manufacturer’s recommended temperature, pressure, and time settings for your specific paper and fabric. Usually, this is around 300-330°F (150-165°C) for 15-30 seconds with medium pressure.
- Iron: If using an iron, set it to a medium-high heat setting (cotton or linen, no steam). Press firmly and evenly over the design for the recommended time, usually longer than with a heat press (e.g., 1-3 minutes), ensuring consistent pressure across the entire design.
- Cool Peel or Warm Peel: Refer to your transfer paper instructions for peeling instructions. Some papers are “warm peel,” meaning you peel off the carrier sheet while it’s still warm. Others are “cool peel,” requiring you to wait until it’s completely cool. Follow the instructions to prevent damaging your transfer.

Applying heat and pressure with a heat press is essential for transferring the design onto the fabric. Consistent heat and pressure ensure a durable and vibrant transfer.
Tips for Success with Transfer Paper Printers
- Choose Quality Transfer Paper: Invest in reputable brands like Silhouette, Neenah, or Heat Transfer Nation for reliable results and durability.
- Test Cut (if cutting): Always perform a test cut on a small piece of transfer paper to ensure your cut settings are correct before cutting your final design.
- Proper Printer Settings: Use the recommended printer settings (paper type and quality) for your transfer paper to maximize print quality and ink adhesion.
- Even Heat and Pressure: Consistent heat and pressure are key to a successful transfer. A heat press provides the best results, but if using an iron, apply firm, even pressure.
- Follow Instructions: Always carefully read and follow the instructions provided by the transfer paper manufacturer for printing, cutting, and heat pressing.
- Care Instructions: Advise recipients of transferred items to follow care instructions, typically including washing inside-out in cold water and avoiding harsh detergents or high dryer heat, to prolong the life of the transferred design.
- Practice Makes Perfect: Don’t be discouraged if your first attempt isn’t flawless. Practice with scrap fabric and designs to refine your technique and printer settings.

The final result: a custom-designed item created using heat transfer paper and a standard printer. Heat transfer paper offers versatility for various fabric types and colors.
Conclusion
Transfer paper printers, utilizing your home inkjet or laser printer, are a fantastic and accessible way to create personalized DIY projects. Whether you’re making custom t-shirts, unique home décor, or personalized gifts, understanding how to use transfer paper effectively opens up a world of creative possibilities. By choosing the right materials, following the steps outlined in this guide, and practicing your technique, you’ll be creating stunning, professional-looking transferred designs in no time.
Explore more creative crafting techniques and project ideas on amazingprint.net!