
Printing directly from your iPhone is incredibly convenient, whether you need hard copies of documents, photos, or emails. With AirPrint, Apple’s technology, setting up your printer to work with your iPhone is straightforward. This guide will walk you through the simple steps to Set Up Printer On Iphone and start printing wirelessly in no time.
Before You Begin: Essential Checks
To ensure a smooth setup process for printing from your iPhone, there are a couple of important things to check first:
-
AirPrint Compatibility: First and foremost, confirm that your printer supports AirPrint. This is Apple’s technology that allows for seamless wireless printing. You can usually find this information on the printer manufacturer’s website or in the printer’s manual. Look for “AirPrint” listed in the printer’s specifications.
-
Wi-Fi Connection: Both your iPhone and your printer need to be on the same Wi-Fi network. Make sure they are connected to the same network and that they are within a reasonable range of your Wi-Fi router for a stable connection.
Steps to Print from Your iPhone Using AirPrint
Once you’ve confirmed the prerequisites, printing from your iPhone is a breeze. Here’s how to set up printer on iPhone for printing and initiate a print job:
-
Open the Document or Content to Print: Start by opening the app that contains the document, photo, email, or webpage you wish to print.
-
Locate the Print Option: Look for the Share button (often an upward-pointing arrow in a box) or an Actions button within the app. Tap this button to reveal more options.
-
Find the Print Icon: Scroll through the options until you see the Print button, usually represented by a printer icon. Tap “Print”. If you are unable to locate the print option, it’s advisable to check the app’s help section or user guide, as some apps may not support AirPrint.
-
Select Your Printer: Tap on “No Printer Selected”. Your iPhone will then search for available AirPrint-enabled printers on your Wi-Fi network. Choose your printer from the list of available printers.
-
Configure Print Settings: You can now adjust settings such as the number of copies, page range, and other print options depending on the app and your printer’s capabilities.
-
Print: Finally, tap “Print” located in the upper-right corner to send your print job to the selected printer.
Managing Your Print Jobs
While your document is printing, you can easily monitor or cancel the print job directly from your iPhone.
View a Print Job
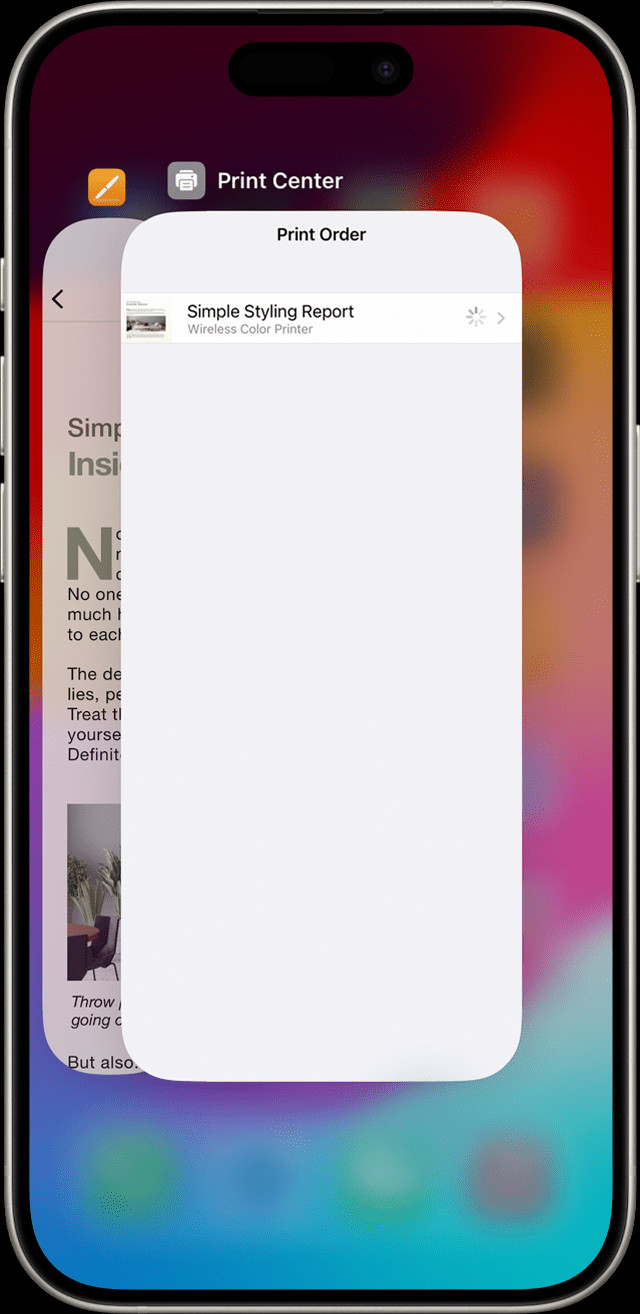 View print jobs in Print Center on iPhone
To view the print queue, open the App Switcher (swipe up from the bottom of the screen or double-click the Home button on older iPhones) and tap “Print Center”. This will show you the current status of your print job.
Cancel a Print Job
If you need to cancel a print job, access the “Print Center” via the App Switcher as described above, and then tap “Cancel Printing”. This will stop the current print job from proceeding.
AirPrint makes printing from your iPhone a seamless experience as long as your printer and iPhone are on the same Wi-Fi network. Enjoy the convenience of wireless printing directly from your iOS device!
