In today’s connected world, many homes and offices have multiple printers. While convenient, Windows 10’s automatic default printer switching can sometimes be frustrating. By default, Windows 10 sets your default printer to the last one you used at your current location. This feature, while intended to be helpful, can be inconvenient if you consistently use one printer for the majority of your printing needs and only occasionally use another. Having to manually select your preferred printer each time can be time-consuming. Fortunately, you can easily Set Default Printer Windows 10 and prevent Windows from automatically changing it. This guide will walk you through the simple steps to ensure your chosen printer remains the default, no matter which printer you last used.
Step-by-Step Guide to Setting Your Default Printer in Windows 10
To take control of your printer settings and set default printer windows 10 permanently, follow these straightforward steps:
Step 1: Accessing Printer Settings
The first step is to navigate to the printer settings in Windows 10. There are a couple of easy ways to do this:
-
Using the Start Menu: Click on the Start button in the bottom-left corner of your screen. Then, click on the “Settings” icon, which looks like a gear. This will open the Windows Settings window.
-
Using Keyboard Shortcut: A quicker method is to use the keyboard shortcut. Press the Windows key + I simultaneously. This will directly open the Windows Settings window.
Once you have the Settings window open, you are ready to move to the next step.
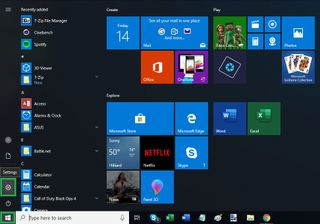 Windows 10 Settings Menu for accessing printer options
Step 2: Navigating to Devices, then Printers & Scanners
In the Windows Settings window, you will see various categories.
- Click on “Devices”. This section manages all the hardware connected to your computer, including printers, Bluetooth devices, and more.
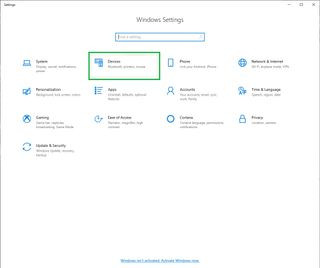 Devices option within Windows 10 Settings to manage printers
- Select “Printers & scanners” from the left-hand menu. This will display a list of all printers currently installed on your Windows 10 system, along with options to add or manage printers.
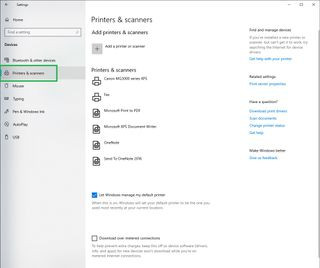 Printers & scanners section in Windows 10 Devices settings
Step 3: Disabling “Let Windows Manage My Default Printer”
By default, Windows 10 is set to manage your default printer automatically. To set default printer windows 10 manually and permanently, you need to disable this feature.
- Toggle off the switch under “Let Windows manage my default printer”. This option is usually located at the top of the “Printers & scanners” settings page. Turning this off ensures that Windows will no longer automatically change your default printer based on your last used printer.
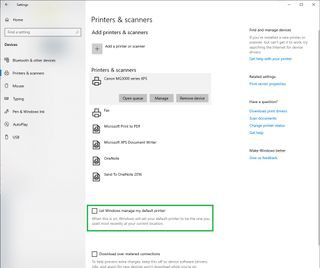 Toggle switch to disable Windows 10 default printer management
Step 4: Choosing Your Preferred Printer and Setting it as Default
With the automatic management disabled, you can now manually set default printer windows 10 to your preferred device.
-
Select the printer you want to set as your default from the list of installed printers. Click on the name of the printer to select it.
-
Click “Manage”. Once you select a printer, a “Manage” button will appear below the printer list. Click on this button to access further settings for the selected printer.
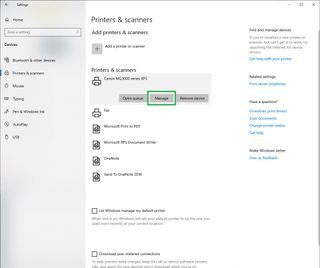 Manage option for a selected printer in Windows 10
- Click “Set as default”. On the printer management page, you will find a “Set as default” button. Click this button to designate the selected printer as your default printer. If you do not see this button, it means the selected printer is already set as the default. You can confirm your chosen default printer by checking for the “Default” status listed under the printer name on the main “Printers & scanners” page.
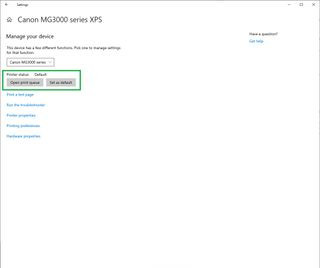 Set as default button for choosing a default printer in Windows 10
Conclusion
By following these simple steps, you can effectively set default printer windows 10 and prevent unwanted automatic changes. Now, whenever you print from any application, your chosen default printer will be automatically selected, streamlining your printing process and ensuring consistent output to your preferred device. This simple adjustment can significantly improve your daily workflow, especially if you rely on a specific printer for most of your printing tasks.