
Fall is undeniably a favorite season for many, bringing with it cozy vibes and beautiful autumn décor. Pumpkins, especially the miniature ones, are a staple in fall decorating. However, after adorning our homes for a few weeks, these cute gourds often end up in the trash. This year, let’s give those pumpkins a second life and unleash their artistic potential through Pumpkin Print Out art!
Yes, you read that right. We’re turning pumpkins into unique mixed-media art tools. This simple technique is quick to set up – just five minutes – and offers a rewarding creative activity that you can enjoy any time. Prepare to feel a sense of accomplishment as you transform ordinary pumpkins into extraordinary prints.
To embark on this fun pumpkin printing adventure, gather these readily available supplies:
- Acrylic paint (fluid or heavy body – both work wonderfully)
- Cosmetic wedges or foam brushes
- Paper (various types for different effects)
- Palette or palette paper
- Craft foam or felt sheet
- Wipes for easy cleanup
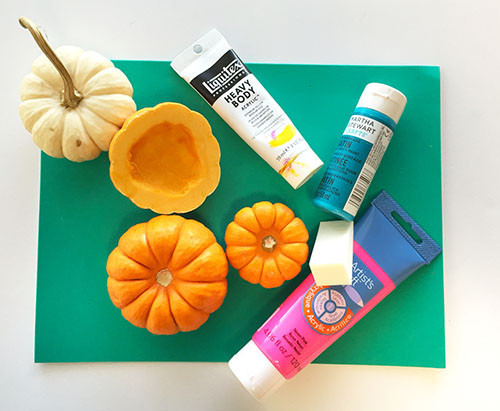 Supplies for pumpkin printing
During initial tests on scrap paper, it became clear that pumpkins, with their firm surfaces, needed a little help to transfer paint effectively. The solution? A softer base! Printing on top of a sheet of craft foam proved to be the perfect remedy, allowing for better paint transfer and clearer pumpkin print patterns. Felt or even an old mouse pad can also serve as excellent substitutes, providing that essential bit of cushioning.
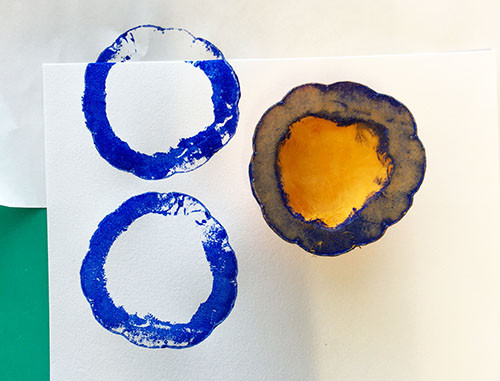 Printing with a cut pumpkin
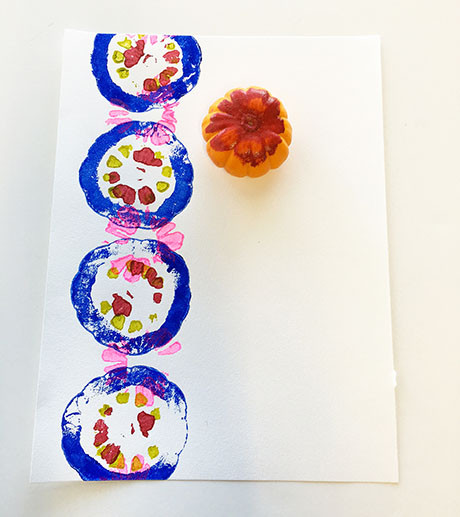
To start experimenting, cut a pumpkin in half and scoop out the insides. For slightly drier prints, let the cut pumpkin sit, cut-side down, on paper towels for a couple of hours. However, if a bit of moisture doesn’t bother you, simply remove the seeds and dive right into printing. For a first attempt, blue heavy body acrylic paint was applied to the cut pumpkin using a sponge, then pressed firmly onto paper. The result was instantly captivating – unique and textured marks that sparkled with creative potential.
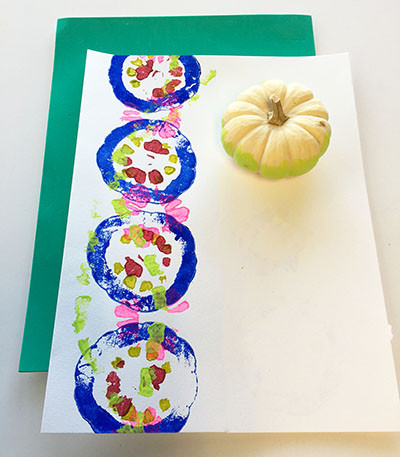
Next, fluid acrylic paint in olive green was used on the top of a miniature pumpkin. This produced fascinating prints that resembled seeds, highlighting the beauty of imperfection as not all ridges transferred paint evenly. Remember, you can always add more paint or reposition the pumpkin to achieve a fuller and more defined print.
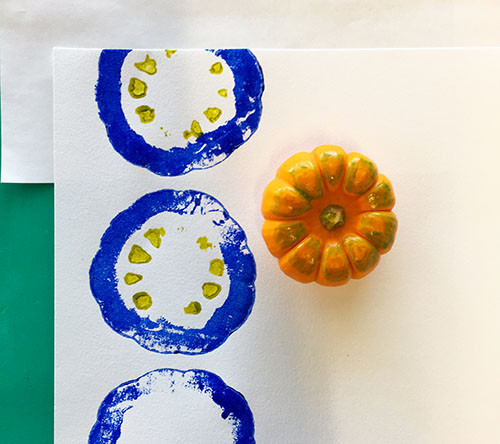 Pumpkin printing with fluid and heavy-body acrylic paints
Pumpkin printing test number three involved using the bottom of a pumpkin and vibrant neon pink paint. This combination yielded a completely different set of marks, proving the versatility of pumpkin parts in creating varied patterns.
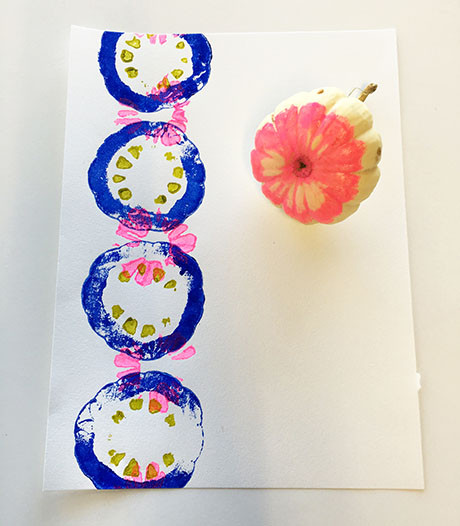 Pumpkin printing with the bottom of a pumpkin
Test number four explored applying paint to the top of another pumpkin. This method unveiled even more unique patterns, demonstrating the endless possibilities of pumpkin print out art.
 Creating patterns with pumpkin printing
But the pumpkin printing fun doesn’t stop there! Applying paint around the middle section of a pumpkin and rolling it across paper opens up a new dimension of design. Experimenting with stamping ink could also lead to exciting and unexpected effects.
 Pumpkin printing by rolling the painted pumpkin over paper
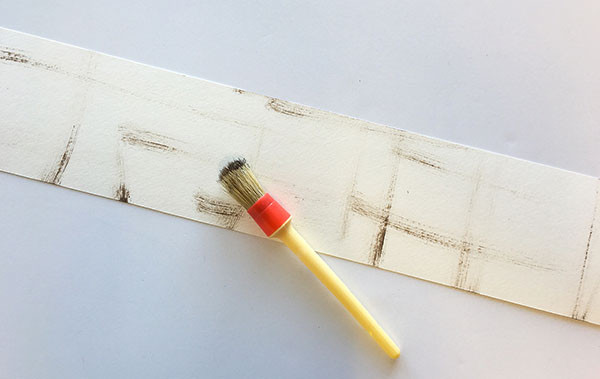
Feeling confident with these basic pumpkin printing techniques, the next step was to create a more elaborate piece. A long sheet of watercolor paper was chosen, and grey-brown paint was dry-brushed across it in various areas to create a textured background. The intention was to maintain an abstract feel with neutral tones, adding pops of color later.
 Dry-brushing acrylic paint over watercolor paper
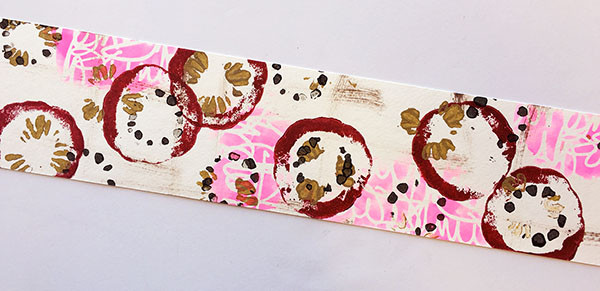
Starting with the cut pumpkin and a deep red-brown paint, prints were applied in overlapping circles across the paper, allowing some to extend beyond the edges for a more organic composition. Next, olive green-brown paint was applied to the top of a pumpkin and printed, some within the initial red-brown circles and others randomly across the background. Embrace the delightful surprises inherent in pumpkin printing; like nature printing in general, the unpredictable outcomes contribute to its organic aesthetic and exciting process.
 Layering pumpkin prints
For added depth, a darker value was introduced by mixing phthalo green with burnt umber and a touch of black. This deep green shade was printed both inside some of the larger circles and in arbitrary areas, ensuring prints extended off the paper’s edge to prevent a confined look.
To inject a vibrant pop of color, neon pink was chosen to stencil scribble writing in several locations, adding energy and contemporary flair to the piece.
 Adding a pop of color lends energy to the piece.
To refine the pumpkin print art, details were added. Some prints were outlined with a black permanent pigment ink pen, and circles of dots were created with a white paint pen, enhancing definition and visual interest.
Finally, parchment paint was applied to the middle of a pumpkin, and it was rolled across the paper a few times to complete the artwork. The finished piece was then folded into an accordion and attached inside an art journal, creating a unique and textured journal page.
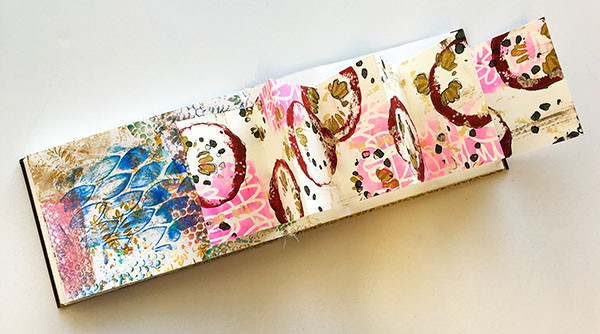 Accordion fold with pumpkin printing in an art journal
You are encouraged to continue exploring pumpkin printing as much as your creativity allows. Experiment on tags, cards, art journal pages, watercolor paper scraps, and even fabric. Try various color palettes and pattern combinations. Consider carving pumpkins to see how carved designs translate into prints. This stash of unique printed materials will be a valuable resource for numerous creative projects.
For even more printing and mark-making techniques using everyday household objects like rug mats, beans, and rope, explore this inspiring blog post.
Printing is a wonderfully enjoyable art form, and these resources offer a wealth of techniques and inspiration from creative artists ready to share their ideas.
 Playful Printmaking video with Dina Wakley
A promotional image for the “Playful Printmaking: Mixed Media Monoprinting” video workshop with Dina Wakley, inviting viewers to explore creative printmaking techniques for art journals.
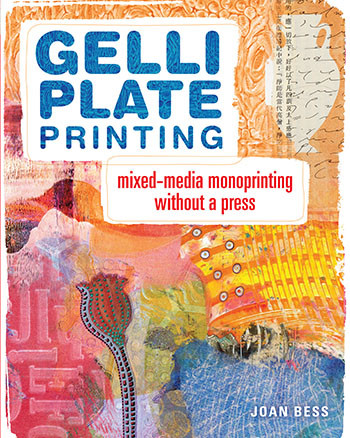 Gelli Plate Printing by Joan Bess
Advertisement for the “Gelli Plate Printing” workshop by Joan Bess, highlighting the exciting possibilities of monoprinting using a Gelli Arts plate.
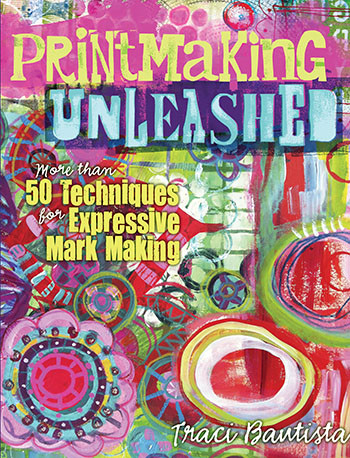 Printmaking Unleashed by Traci Bautista
Promotional material for the “Printmaking Unleashed” workshop by Traci Bautista, encouraging viewers to discover innovative and fun printmaking techniques.
Unleash your creativity this fall with pumpkin print outs! Experiment with different techniques, colors, and pumpkin parts to create unique and beautiful art. Share your pumpkin printing creations and inspire others to try this fun and eco-friendly fall craft!