
Is your HP printer producing faded, streaky, or spotty prints? This is often a sign of a clogged printhead. Like any precision instrument, your printer’s printhead, responsible for delivering ink onto the page, can become blocked over time. Fortunately, cleaning your HP printer head is a straightforward process that can save you money on replacement cartridges and extend the life of your printer. In this comprehensive guide, we’ll explore how HP printheads work, the common causes of clogs, and provide step-by-step instructions for effective Printer Head Cleaning. Keep your prints sharp and clear by learning how to properly maintain your HP printer head.
Understanding HP Printheads: Your Printer’s Ink Delivery System
The printhead is a crucial component in your inkjet printer. It acts as the gateway for ink, precisely spraying microscopic droplets onto paper to form text and images. Imagine a showerhead with incredibly tiny nozzles – that’s essentially how a printhead operates. These nozzles, however, are susceptible to clogs from dried ink particles and dust, especially if your printer isn’t used regularly. When these nozzles become blocked, it disrupts the ink flow, resulting in print quality issues.
Types of HP Printheads: Integrated vs. Individual
HP printers utilize two main types of printhead designs, and understanding which type your printer uses is essential for proper printer head cleaning.
Type 1: Integrated Printheads (Built into the Cartridge)
Integrated printheads are exactly as they sound – they are built directly into the ink cartridge. This means that every time you replace the cartridge, you’re also replacing the printhead. This design is commonly found in more affordable HP Deskjet and ENVY series printers, such as the Deskjet 2755 or ENVY 6055. If you encounter print quality problems with this type, simply replacing the cartridge often resolves the issue, as you’re getting a fresh printhead.
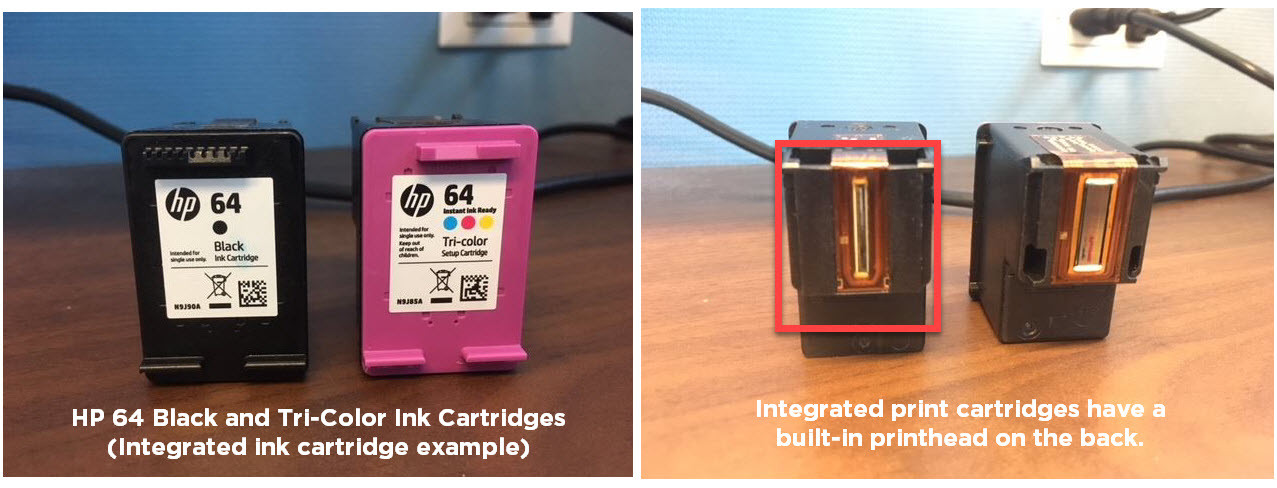 HP 64 ink cartridge with integrated printhead
Common HP Integrated Cartridge Series:
- HP 61 Series
- HP 62 Series
- HP 63 Series
- HP 64 Series
- HP 65 Series
- HP 67 Series
Type 2: Individual Printheads (Built into the Printer)
In printers with individual printheads, the printhead is a separate, permanent part of the printer. Each ink cartridge slots into this printhead. This design is often found in HP OfficeJet Pro and PageWide models, like the OfficeJet Pro 9015 or PageWide Pro 477dw. While these printheads are designed for longevity, they can still become clogged and may eventually need replacement after extensive use. Replacing a built-in printhead can be costly, sometimes nearing the price of a new printer, making regular printer head cleaning even more crucial.
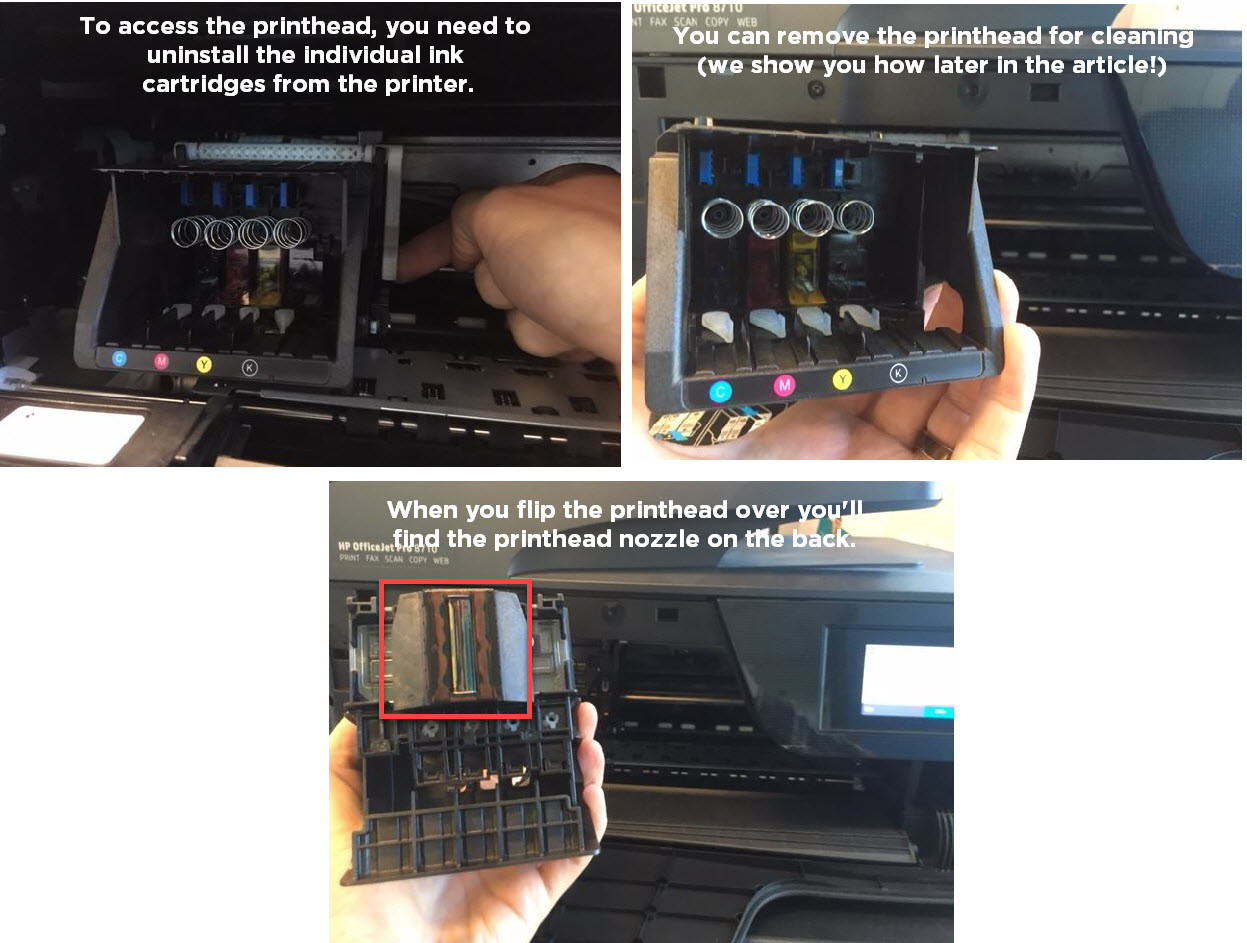 HP Printhead removed from printer
Common HP Individual Ink Cartridge Series:
- HP 902 Series
- HP 952 Series
- HP 910 Series
- HP 962 Series
Automatic HP Printer Head Cleaning: The First Line of Defense
Before resorting to manual cleaning, your HP printer offers a built-in automatic printer head cleaning function. This is the easiest and often most effective first step to resolving print quality issues. This function uses ink to flush out clogs from the nozzles.
Most HP printers have this utility accessible through the printer’s control panel menu, typically located under “Maintenance,” “Tools,” or “Printer Setup.” Refer to your printer’s manual for the exact steps for your model.
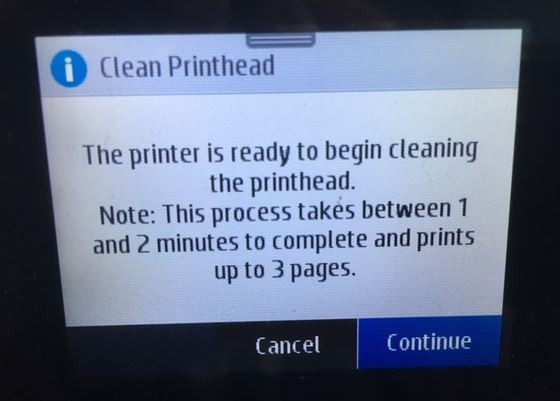 HP Printer Control Panel – Clean Printhead Option
An automatic cleaning cycle usually takes a couple of minutes and consumes a small amount of ink. After the cleaning cycle, print a test page to check if the print quality has improved. If necessary, you can run the cleaning cycle 2-4 times. However, avoid excessive cleaning cycles as it can deplete your ink supply unnecessarily. If automatic cleaning doesn’t solve the problem, it’s time for manual printer head cleaning.
Manual HP Printer Head Cleaning: Step-by-Step Guides
For more stubborn clogs, manual printer head cleaning may be required. The method differs slightly depending on whether you have integrated or individual printheads.
Manual Cleaning for Printheads Built into the Printer (Individual Printheads)
This method is for HP printers where the printhead is a separate unit, like many OfficeJet Pro models. You can also use this method for other printer brands with similar printhead designs.
Supplies You’ll Need:
- Plastic container
- 2-3 dry paper towels
- Lint-free cloth
- Filtered or distilled hot water
Cleaning Steps:
- Prepare the Soaking Container: Fold paper towels into quarters and place them in the plastic container.
- Add Hot Water: Pour about two inches of hot water into the container, ensuring the paper towels are fully submerged.
- Open Printer and Remove Cartridges: Turn on your printer, open the cartridge access door, and remove all ink cartridges. Place them aside on a paper towel, nozzles facing up.
- Remove the Printhead: Locate the gray latch behind the cartridge carriage. Lift the latch to release the printhead. Gently pull the printhead up and out of the printer.
- Initial Cleaning: Dampen the lint-free cloth with hot water and gently wipe away any excess ink from the printhead nozzles.
- Soak the Printhead: Place the printhead in the container with the submerged paper towels, nozzles facing down. Be careful not to touch the nozzles directly.
- Soak and Dry: Let the printhead soak for about 10 minutes. Remove it and place it on a dry paper towel, nozzles facing up, to air dry for about 15 minutes.
- Reinstall and Clean: Reinstall the printhead back into the printer, ensuring the latch is secured. Reinstall the ink cartridges. Run the automatic printer head cleaning function again through your printer’s menu.
Manual Cleaning for Printheads Built into Ink Cartridges (Integrated Printheads)
If your printer uses integrated cartridges, the “paper towel method” is a simple way to attempt printer head cleaning.
Supplies You’ll Need:
- Warm, damp paper towel or coffee filter
- Dry paper towel
Cleaning Steps:
- Blot the Printhead: Take a warm, damp paper towel or coffee filter and gently blot the cartridge printhead (nozzle side down) onto the damp towel. This helps to dissolve dried ink.
- Wick Ink with Dry Towel: Immediately hold the cartridge with the printhead facing down onto a dry paper towel for 2-3 minutes. The dry towel will wick away excess ink and help clear the nozzles. Do not wipe the printhead, as this can cause damage.
- Reinstall and Test: Reinstall the cartridge into your printer and try printing again. If print quality is still poor, you may need to repeat the process or consider replacing the cartridge.
When to Consider Printhead Replacement
If you’ve tried both automatic and manual printer head cleaning methods multiple times and are still experiencing poor print quality, it may indicate a more serious issue or a failing printhead.
For printers with integrated printheads, replacement is straightforward – simply replace the ink cartridge.
For printers with individual printheads, replacing the printhead is an option, but as mentioned earlier, the cost can be significant. In many cases, especially for older printers, it might be more economical to invest in a new printer rather than replacing a costly printhead.
Keep Your Prints Perfect with Regular Printer Head Cleaning
Regular printer head cleaning, whether automatic or manual when needed, is key to maintaining optimal print quality and extending the life of your HP printer and cartridges. By understanding your printer’s printhead type and following these cleaning steps, you can effectively address common print quality issues and ensure crisp, clear prints every time.
If you have further questions about printer head cleaning or printer maintenance, feel free to leave a comment below!
| Cartridge Series |
|---|
| Thank you for reading! This article is brought to you by the ink experts at AmazingPrint.net, your resource for printer knowledge and quality ink solutions. For all your ink and toner needs, visit AmazingPrint.net. We appreciate your support! |