Polyethylene Terephthalate Glycol (PETG) has risen as a favored material in the realm of Fused Deposition Modeling (FDM) 3D printing, celebrated for its blend of strength, durability, and ease of use. Derived from Polyethylene Terephthalate (PET), a globally prevalent plastic in textiles and packaging, PETG enhances printability by incorporating glycol, modifying its properties for 3D printing applications. Compared to other common filaments like PLA, PETG offers superior layer adhesion, enhanced impact resistance, and minimal shrinkage, all while remaining cost-effective. However, achieving flawless PETG prints hinges on understanding and correctly applying the ideal Petg Printing Temperature and associated settings.
Mastering PETG print settings can initially seem challenging. Its low viscosity when molten, while facilitating smooth extrusion, can lead to issues such as stringing and oozing, impacting print quality. Furthermore, PETG’s strong bed adhesion, although beneficial for print stability, can sometimes make part removal difficult. Therefore, meticulous preparation of your 3D printer and a solid grasp of PETG print settings are crucial for success. While slicer software often provides default profiles, a deeper understanding of these settings allows for fine-tuning, resulting in superior print outcomes. This guide delves into the essential PETG print settings, particularly focusing on PETG printing temperature, to help you achieve optimal results, while also considering other vital factors for successful PETG 3D printing.
Understanding PETG Filament Basics
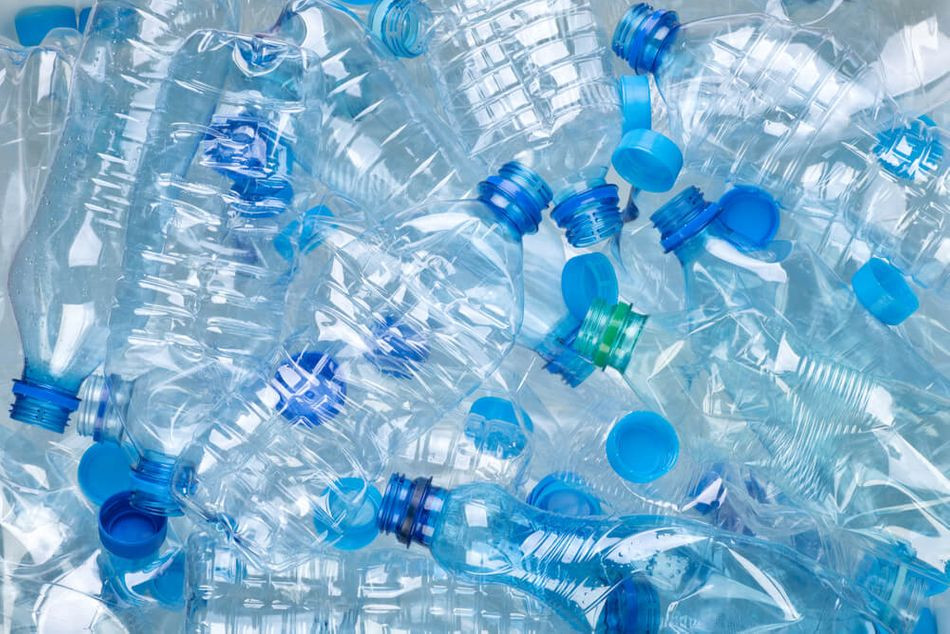 PET bottles
Alt text: Common applications of PET plastic, illustrating its use in manufacturing clear and durable plastic bottles.
PETG, or Polyethylene Terephthalate Glycol, stands out as a versatile filament widely adopted in 3D printing. As a modified version of standard PET, the addition of glycol during manufacturing is key. This modification prevents crystallization, enhancing the material’s durability and printability. The result is a filament that effectively bridges the gap between PLA and ABS, offering the ease of printing associated with PLA and the enhanced mechanical properties of ABS. This combination makes PETG suitable for a broad spectrum of 3D printing applications, from functional prototypes to end-use parts.
A significant advantage of PETG lies in its balanced mechanical properties. It is notably tougher and more durable than PLA, rendering it suitable for parts subjected to mechanical stress or impact, such as gears, brackets, or protective casings. At the same time, it avoids the brittleness often associated with ABS, making it a more robust choice in many scenarios.
Excellent layer adhesion is another hallmark of PETG. The layers in a 3D printed PETG object fuse together exceptionally well, resulting in prints that are not only strong but also structurally sound. This characteristic is especially advantageous when printing large, complex objects or parts designed to bear significant loads.
However, PETG is not without its nuances. Compared to filaments like PLA, PETG is more susceptible to stringing and oozing. These imperfections can detract from the surface finish of printed objects. Successfully navigating PETG printing requires careful attention to slicer settings, particularly PETG printing temperature, to mitigate these potential drawbacks and maximize print quality.
Build Surface and Bed Temperature for PETG
When it comes to first layer adhesion, PETG typically presents fewer challenges than materials like ABS. PETG exhibits a natural tendency to adhere to a wide range of build surfaces. In fact, the adhesion can sometimes be too strong, requiring measures to prevent prints from bonding too firmly to the bed and potentially causing damage upon removal.
Selecting the appropriate build surface is crucial for PETG. Extremely smooth surfaces, such as bare glass beds, can lead to excessive adhesion. For such surfaces, applying a release agent like glue stick or hairspray is recommended. These agents act as a barrier, reducing adhesion and protecting both the print and the bed surface. Blue painter’s tape provides a reliable and readily available surface for most PETG prints. However, for optimal performance and ease of part removal, textured build surfaces, such as powder-coated PEI (Polyetherimide) sheets, are often preferred. While a textured surface will impart a subtle pattern on the bottom surface of the print, this is generally a minor trade-off for the benefits of easy removal and consistent adhesion.
The recommended bed temperature for PETG printing falls within the range of 65–90 °C. A practical approach is to start at the lower end of this range. If good first-layer adhesion is achieved at a lower temperature, maintaining that temperature is advisable. Using the lowest effective bed temperature minimizes the risk of warping or other temperature-related issues.
Nozzle Temperature: The Heart of PETG Printing
The nozzle temperature is arguably the most critical setting for PETG printing, directly influencing material flow, layer adhesion, and overall print quality. PETG generally prints optimally within a nozzle temperature range of 220–260 °C. Leading 3D printer manufacturers and filament producers offer specific recommendations within this range. For instance, Prusa Research suggests a PETG printing temperature of 230 °C for the initial layer, slightly increasing to 240 °C for subsequent layers. MatterHackers, a filament company, recommends a consistent 245 °C throughout the entire print. These recommendations serve as excellent starting points, but the ideal PETG printing temperature can vary depending on your specific printer, filament brand, and even ambient conditions.
It’s generally advisable to use the lowest PETG printing temperature that still yields good results. Excessively high temperatures can exacerbate issues like bridging and overhangs, leading to drooping or deformation in these features. Conversely, a temperature that is too low can result in poor layer adhesion and under-extrusion.
Nozzle height calibration is also intrinsically linked to PETG printing temperature and success. The optimal distance between the nozzle and the print bed for PETG should be slightly greater than that used for PLA, ideally around 0.1 mm more. This adjustment is due to PETG’s lower viscosity when molten. The more fluid nature of PETG means it can readily flow and “drop” from the nozzle onto the bed without requiring forceful nozzle pressure. An appropriately calibrated nozzle height ensures consistent extrusion and proper first-layer adhesion, which are foundational for successful PETG prints.
For a deeper dive, consider exploring resources specifically dedicated to PETG Temperature Considerations: Nozzle Temperature, Heated Bed & Cooling.
Print Speed Considerations for PETG
Print speed is a PETG print setting that strikes a balance between print time and print quality. Generally, PETG is best printed at moderate speeds, ideally not exceeding 60 mm/s. Lower print speeds contribute to improved layer bonding and cooling, resulting in enhanced overall print quality and structural integrity. Research has indicated that slower print speeds can positively influence the mechanical properties of PETG parts, a contrast to materials like PLA, where faster speeds can sometimes improve mechanical performance.
Travel speed, the rate at which the print head moves when not extruding material, is equally important, especially for PETG. A faster travel speed, approximately double the print speed (around 120 mm/s), is recommended. This rapid movement minimizes the time the hot nozzle spends traversing open spaces, thereby reducing the likelihood of oozing and stringing. If the hot end moves too slowly, molten PETG has more time to drip or seep from the nozzle, leading to unwanted imperfections and potentially compromising the print’s integrity.
Mastering Retraction for PETG
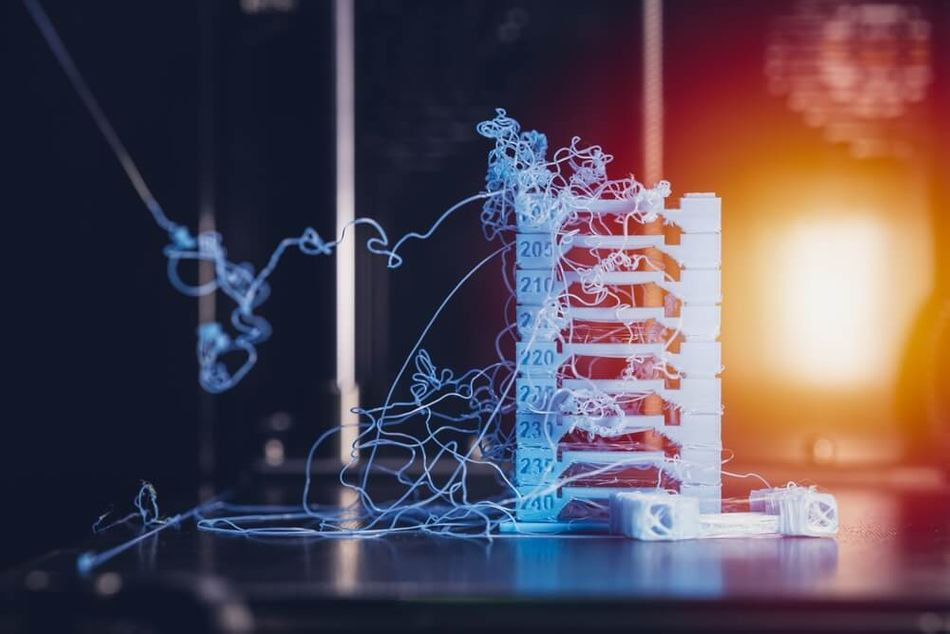 PETG stringing
Alt text: Example of stringing in a PETG 3D print, highlighting the need for proper retraction settings to achieve clean prints.
Oozing and stringing are common challenges encountered with PETG, primarily due to its low viscosity in a molten state. These phenomena occur when molten filament leaks from the nozzle during non-printing movements, leaving thin strands (strings) or blobs of plastic on the print.
Adjusting retraction settings is the primary strategy to combat oozing and stringing. Retraction is a function in FDM 3D printers where the extruder motor reverses briefly, pulling a small amount of filament back from the nozzle before the print head moves to a new location. This retraction action reduces pressure in the nozzle, preventing unwanted material leakage. When stringing occurs during PETG printing, consider adjusting these retraction parameters:
- Retraction Distance: Start with a retraction distance of 3–7 mm. Incrementally increase this value by 1 mm at a time until stringing is minimized or eliminated. Bowden extruders, which have a longer filament path, typically require greater retraction distances compared to direct drive extruders.
- Retraction Speed: Set the retraction speed to approximately 20 mm/s. If stringing persists, gradually increase the speed in increments of 5 mm/s.
- Minimum Travel Distance: Reduce or disable the minimum travel distance for retraction. This setting dictates the minimum movement distance before retraction is activated. Lowering or disabling it can ensure retraction occurs more frequently, even for short travel moves.
- Disable Z-Hop: Deactivate any vertical lift or Z-Hop feature in your slicer settings. Z-Hop, where the nozzle lifts slightly during travel moves, can sometimes exacerbate stringing with PETG.
For further insights, explore resources focused on PETG Stringing: What It Is & How To Prevent It During 3D Printing.
Fan and Cooling Strategies for PETG
Cooling plays a crucial role in PETG printing, although it is approached differently compared to materials like PLA. Controlled cooling, by lowering the temperature below PETG’s glass transition temperature during printing, can mitigate issues such as warping and sinking, leading to dimensionally accurate and aesthetically pleasing prints.
PETG exhibits minimal shrinkage as it cools, a significant advantage that reduces warping tendencies, even in large prints. This inherent stability means PETG is less reliant on active cooling compared to PLA. Some users even opt to print PETG without any cooling fan. However, this approach can be risky and is generally not recommended for most prints, especially those with intricate details or overhangs.
For the majority of PETG prints, employing a cooling fan at a moderate speed of 30–60% is effective in preventing oozing and stringing without compromising layer adhesion. It’s important to delay fan activation until after the first few layers have been printed. This initial layer should be allowed to cool more slowly to promote optimal adhesion to the build plate and minimize warping. Excessive cooling fan speed, especially in the initial layers, can hinder proper interlayer bonding, resulting in weaker parts.
Infill Density and Pattern for PETG
Infill settings, specifically density and pattern, are important considerations for PETG prints, influencing the strength, weight, and print time of the final object. A typical infill density range for PETG is 20% to 30%. However, the optimal density is application-dependent. Parts requiring high strength or rigidity will benefit from higher infill percentages, while decorative or less load-bearing parts can utilize lower densities to save material and print time.
The infill pattern is particularly relevant for PETG due to its viscosity. Patterns that involve frequent nozzle movements across previously printed areas within the same layer can increase the likelihood of material build-up or “blobs.” Infill patterns like rectilinear, honeycomb, and gyroid are generally well-suited for PETG. These patterns minimize nozzle crossover and tend to produce cleaner infill structures with PETG.
Additional Factors for Successful PETG Printing
Beyond the core settings of PETG printing temperature, bed adhesion, retraction, and cooling, several other factors can influence print success.
Filament storage is a key consideration for PETG. PETG is hygroscopic, meaning it absorbs moisture from the air. While not as prone to moisture absorption as nylon, PETG filament can still accumulate enough moisture to negatively impact print quality. Moisture in PETG can lead to issues like stringing, popping during printing, and reduced mechanical properties. Storing PETG spools in airtight containers with desiccant packets is recommended to maintain dryness. In humid environments, using a filament dryer to pre-dry the filament before printing can be beneficial.
Support structures can also pose a unique challenge with PETG. PETG’s excellent layer adhesion, while generally advantageous, can make support removal difficult. Supports printed in PETG tend to bond strongly to the part. For users without multi-material 3D printers capable of printing soluble support materials, careful adjustment of support settings is necessary to ensure easy removal without damaging the printed part’s surface.
The support Z distance is a crucial parameter for PETG supports. This setting defines the vertical gap between the support structure and the printed part. Increasing the support Z distance, ideally to at least twice the layer height, can significantly improve support removal. A larger gap reduces the contact area between the support and the part, making separation easier while still providing adequate support during printing.
Conclusion: Optimizing PETG Printing Temperature and Settings
PETG stands as a highly versatile 3D printing material, offering a compelling combination of strength, impact resistance, affordability, and dimensional stability. By carefully managing build surface preparation, retraction settings, cooling strategies, and, most importantly, PETG printing temperature, users can reliably achieve high-quality prints on most FDM 3D printers.
To summarize, adhere to these key PETG print settings for optimal results:
- Utilize a textured build surface for enhanced adhesion and easy removal.
- Maintain a heated bed temperature within the 65–90 °C range.
- Set the PETG printing temperature between 220–260 °C, adjusting within this range to find the sweet spot for your specific filament and printer.
- Calibrate nozzle height slightly higher than for PLA, around 0.1 mm.
- Print at a moderate speed, ideally below 60 mm/s.
- Employ a faster travel speed, approximately 120 mm/s, to minimize stringing.
- Optimize retraction distance and speed to combat oozing.
- Use a moderate cooling fan speed (30–60%) after the initial layers.
By diligently applying these guidelines and focusing on the crucial aspect of PETG printing temperature, you can consistently produce PETG parts with excellent layer adhesion, smooth surface finishes, and minimal printing artifacts like stringing and oozing.
Frequently Asked Questions (FAQs) about PETG Printing Temperature
What is the ideal PETG printing temperature for best results?
The optimal PETG printing temperature typically falls between 220 and 260 degrees Celsius. However, the precise temperature can vary based on filament brand, printer model, and ambient conditions. Experimenting within this range is recommended to find the ideal temperature for your specific setup.
Why am I experiencing stringing in my PETG prints, and how can PETG printing temperature help?
Stringing in PETG prints is often due to its low viscosity. While adjusting retraction settings is the primary solution, lowering the PETG printing temperature slightly within the recommended range can also help reduce stringing. Higher temperatures increase fluidity, potentially exacerbating stringing issues.
How can I improve bed adhesion when printing with PETG, and is PETG printing temperature related?
Bed adhesion for PETG is generally good, but it can be further improved by ensuring a clean and level bed and using a suitable build surface. Increasing the bed temperature within the recommended 65–90 °C range can also enhance adhesion. However, excessively high bed temperatures are generally not needed for PETG and can even lead to warping.
What are recommended infill density and pattern for PETG prints, and how do they relate to PETG printing temperature?
A typical infill density for PETG is 20-30%, adjustable based on the part’s strength requirements. Infill patterns like rectilinear, honeycomb, and gyroid are well-suited for PETG. Infill settings are not directly related to PETG printing temperature, but choosing appropriate infill patterns can help optimize print quality and minimize potential issues like blobs, which can sometimes be influenced by temperature and material flow.
References
[1] The Science Behind PET [Internet]. PET Resin Association. 2015 [cited 2022Mar14].
[2] How to Get Perfect PETG Prints on Ender-3: Correct Settings [Internet]. Creality. 2020 [cited 2022Mar14].
[3] PETG [Internet]. Prusa Knowledge Base. 2020 [cited 2022Mar14]. Available from: https://help.prusa3d.com/en/article/petg_2059
[4] Black MH Build Series PETG Filament [Internet]. MatterHackers. 2016 [cited 2022Mar14]. Available from: https://www.matterhackers.com/store/l/petg-black-high-strength-filament-1.75mm/sk/M3MY2VQG
[5] Hsueh MH, Lai CJ, Wang SH, Zeng YS, Hsieh CH, Pan CY, Huang WC. Effect of printing parameters on the thermal and mechanical properties of 3d-printed pla and petg, using fused deposition modeling. Polymers. 2021 May 27;13(11):1758.