Today, I’m thrilled to bring you one of my all-time favorite beanie designs – the Luxe Leopard Beanie, now in a versatile worsted weight! This pattern was born in 2019 and quickly became a crowd-pleaser. Back then, sharing it for free wasn’t feasible for my small business, but now I’m delighted to offer it to you. If you’re passionate about crochet accessories and captivated by leopard print, this crochet leopard beanie pattern is absolutely perfect for your next project!
This free pattern is available in four convenient sizes: Adult, Child, Toddler, and Baby. For those seeking even more flexibility, a comprehensive PDF version of this pattern is available for purchase in my Etsy or Ravelry shop. This expanded PDF includes a total of 10 sizes and 3 detailed graphs to guide you through every stitch.
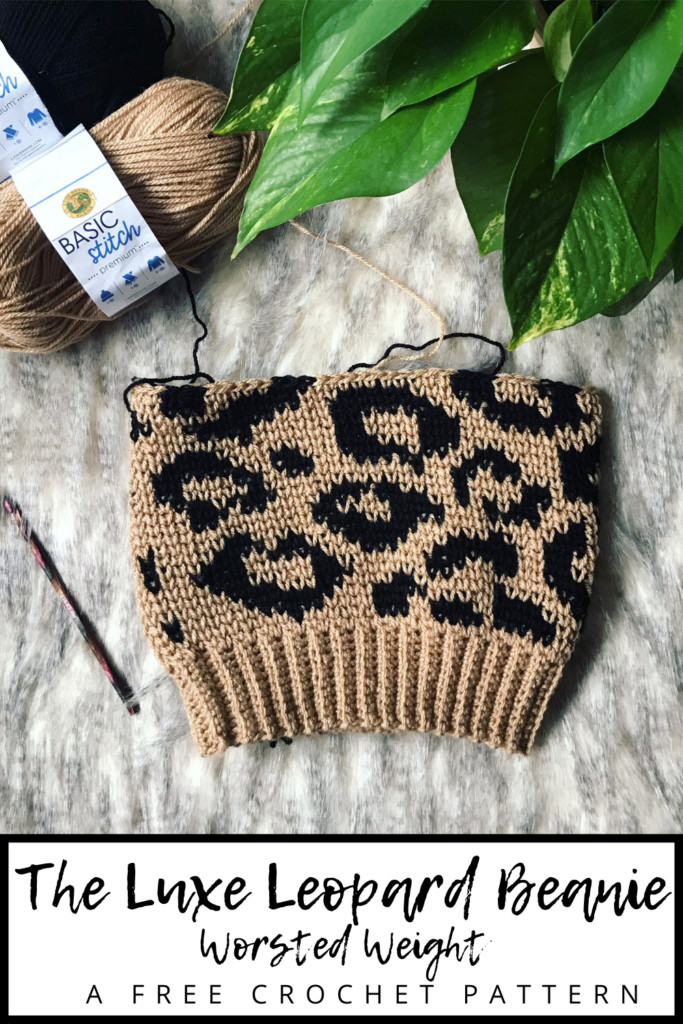 Close up of the leopard print beanie in brown and beige yarn
Discovering the Worsted Weight Leopard Beanie
The Luxe Leopard Beanie in worsted weight is a reimagining of my original Luxe Leopard Beanie – Bulky. That first design, crafted with bulky yarn, was my initial foray into crochet leopard print beanies. I adore the bulky version for its wonderful balance: it offers a visually intricate design while still being a satisfyingly quick project. The larger spots were intentionally designed to suit the thicker yarn, ensuring the leopard print effect remained striking and recognizable, making it ideal for market crafts.
However, as I received feedback regarding yarn availability and inquiries about using worsted weight yarn as a substitute, the idea for a worsted weight adaptation took shape. By reworking the stitch counts, I discovered a delightful bonus – a more petite spot pattern was achievable with the finer yarn. This led to the inclusion of a second graph in the pattern, which I affectionately named the “Petite” print. While both spot sizes are charming, the milder weather often leans me towards the worsted weight version for its lighter feel.
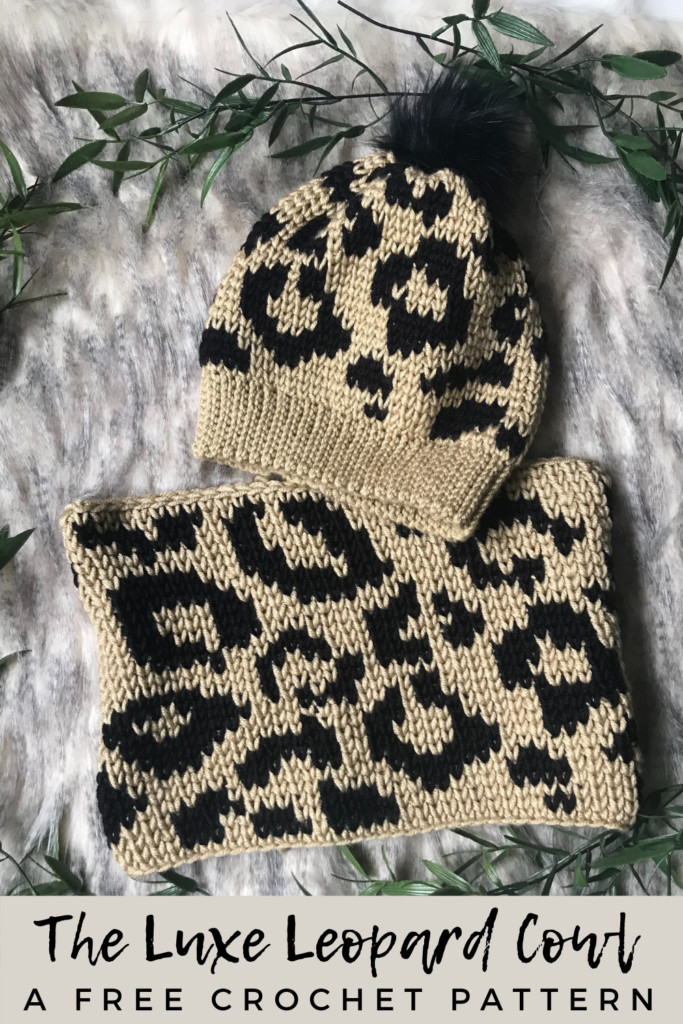
And for a touch of romance, don’t miss the Love Leopard Beanie! This variation incorporates hearts into the leopard print graph for a Valentine’s Day twist. It’s also available as a free pattern in four sizes, which you can find here!
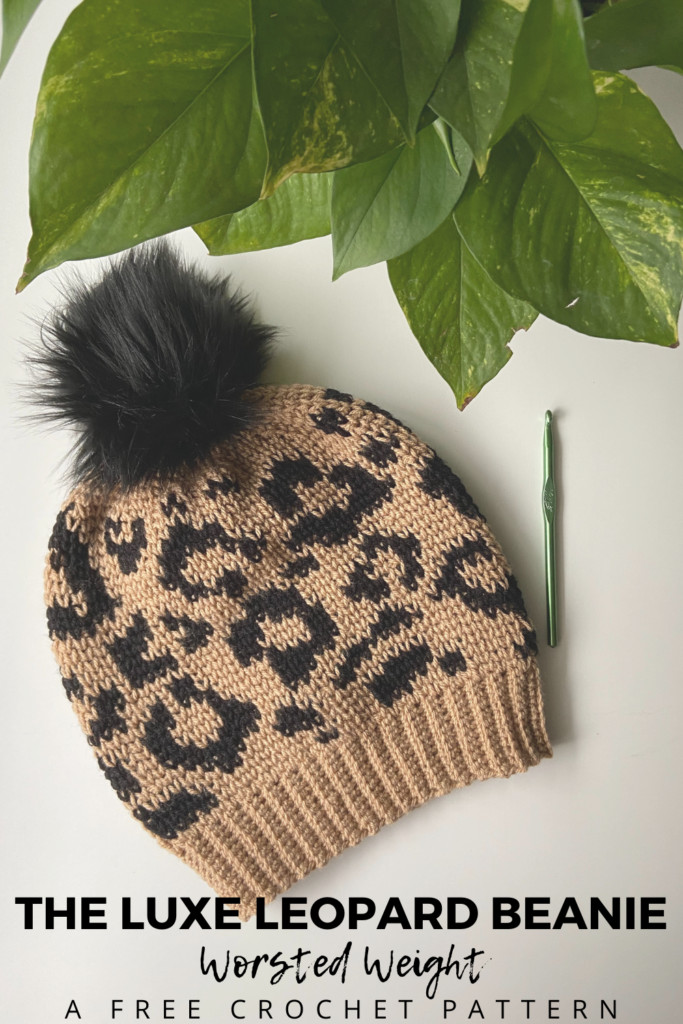
 Side view of a person wearing the leopard print beanie, showcasing the fit and style
Yarn Selection for Your Leopard Print Hat
For this particular beanie, I initially chose Lion Brand Basic Stitch. At the time of design, this yarn was a relatively new option, and I was eager to try it out. Basic Stitch performed beautifully, but my long-standing favorite for worsted weight projects remains Lion Brand Heartland. (Truthfully, the lack of desired Heartland colors at my local Jo-ann Fabrics that day certainly influenced my initial yarn choice!)
Another excellent worsted weight option is Brava Worsted Weight from WeCrochet. I used this yarn for my Luxe Leopard Pumpkins and appreciated its extensive color palette. Brava Worsted is also a fantastic choice for budget-conscious crafters. Ultimately, the beauty of this pattern is its adaptability – most worsted weight yarns will work wonderfully. Just remember to always check your gauge to ensure the perfect fit.
Mastering Key Crochet Techniques
Like other pieces in the Luxe Leopard Collection, this beanie incorporates a few specialized techniques that are helpful to understand before you begin.
Waistcoat Stitch
The foundation of this beanie’s unique texture is the waistcoat stitch. Essentially a variation of single crochet, the waistcoat stitch is worked between the posts of the stitches in the row below, rather than in the top loops. This subtle shift creates a dense, knit-like fabric that truly elevates the beanie’s look.
For some, the waistcoat stitch can present a slight challenge initially. The key is to maintain a looser tension than you might typically use, allowing your hook to easily slip between those posts. You might even find that going up a hook size makes the process smoother. For a helpful visual guide, Make & Do Crew offers an excellent video tutorial on this stitch, which you can find here!
If the waistcoat stitch proves too fiddly, a perfectly acceptable substitute is single crochet in the back loop only (BLO). This variation helps to minimize any potential slant in the colorwork pattern as you crochet upwards, ensuring your leopard spots stay aligned.
Reading the Leopard Print Graph
This crochet leopard beanie pattern utilizes a graph to guide the color changes, bringing the iconic print to life. To read the graph, begin at Row 1, Column 1, located in the bottom right corner. On the graph, white boxes represent your main color, and black boxes indicate your contrasting color. Gray boxes, if present in some variations, represent an optional second contrasting color for added depth.
Each box on the graph corresponds to one stitch in the designated color. When approaching a color change, you’ll need to follow the instructions provided in the ‘Changing Colors’ section of your chosen crochet method (tapestry crochet as described below, or intarsia if preferred). Upon reaching the end of a row on the graph, simply return to Column 1 and begin working the next row.
(Note for left-handed crocheters working counter-clockwise: Pay close attention to the column number that corresponds to the stitch count for your chosen size on the graph. Start at the bottom left corner of the chart at the marked column and work across, returning to the left side at the end of each row.)
Tapestry Crochet for Colorwork
There are several methods for executing colorwork in crochet. For this leopard beanie, I prefer tapestry crochet, which involves carrying both yarn colors along with you throughout the round. The unused yarn is carried behind the stitches, and the working yarn is wrapped around it as you crochet.
To execute tapestry crochet, loosely hold the yarn you aren’t currently using behind your work. Insert your hook into the stitch, ensuring it goes under the carried yarn as well as the stitch itself. Complete your stitch as usual. This action effectively encases the carried yarn within your working stitches. You can carry the unused yarn until you need to switch colors again according to the graph. Keep in mind that carrying multiple strands can slightly stiffen your finished project, which can be desirable for beanies to provide structure and warmth.
If you’d like a more in-depth visual demonstration, Bethany from Whistle & Ivy has created an excellent tutorial video on tapestry crochet and graph reading, which you can access here.
 A close up image of the waistcoat stitch texture in beige yarn
Ready to Crochet? Let’s Get Started!
Materials Needed
- Worsted weight yarn in main color and contrast color (and optional second contrast color) – See yarn recommendations above.
- Crochet hooks in sizes H/8 (5.0 mm) and J/10 (6.0 mm) – or sizes needed to meet gauge.
- Stitch marker
- Tapestry needle for weaving in ends
- Scissors
- Optional: Faux fur pompom or yarn for pompom
Stitches Used (US Terms)
- Sl St – Slip Stitch
- Ch – Chain
- SC – Single Crochet
- SC2Tog – Single Crochet two together (single crochet decrease)
Gauge
With J hook and waistcoat stitch in the round:
12 SC stitches x 16 rows = 4” square
Skill Level
Intermediate
Finished Measurements (Approximate Circumference x Height)
- Baby: 8” width, 6.5” height
- Toddler: 9” width, 7.5” height
- Child: 9.5” width, 8.5” height
- Teen/Adult: 11” width, 10” height
Pattern Notes
- This hat is worked in continuous rounds. Placing a stitch marker at the beginning of each round is recommended to help keep track of your progress.
- Decreasing rounds vary by size. Pay close attention to the instructions for your chosen size to ensure proper shaping.
- Sizes are written in the pattern as follows: (Baby, Toddler, Child, Teen/Adult).
- For a three-color leopard print effect, incorporate an accent color into the center of the spots by referring to the graphs in the PDF pattern.
Luxe Leopard Beanie Crochet Pattern
Brim
Using H hook & Main Color.
Row 1: Ch (9, 11, 11, 13). Sc in 2nd chain from hook and in each chain across. (8, 10, 10, 12 sts)
Row 2: Ch 1 and turn. Sc in BLO of first stitch and each stitch across. (8, 10, 10, 12 sts)
Repeat Row 2 until brim band has a total of (50, 58, 62, 70) rows.
Fold brim band in half, holding ends together. Sl st in each stitch across both layers to join and close the band. Do not break yarn. Turn band right side out so slip stitches are facing inward and working yarn is at the top edge.
Hat
Switch to J hook.
Foundation Round: Ch 1. Working loosely, Sc 1 in each brim row around the top edge of the brim. (50, 58, 62, 70 sts)
Round 1: Using Waistcoat stitch, SC in each st around, following color changes according to the corresponding graph for your chosen size.
Baby Size Graph
Chart for Baby size only. (Note: Baby graph is in the PDF pattern)
Toddler, Child, and Adult Size Graph
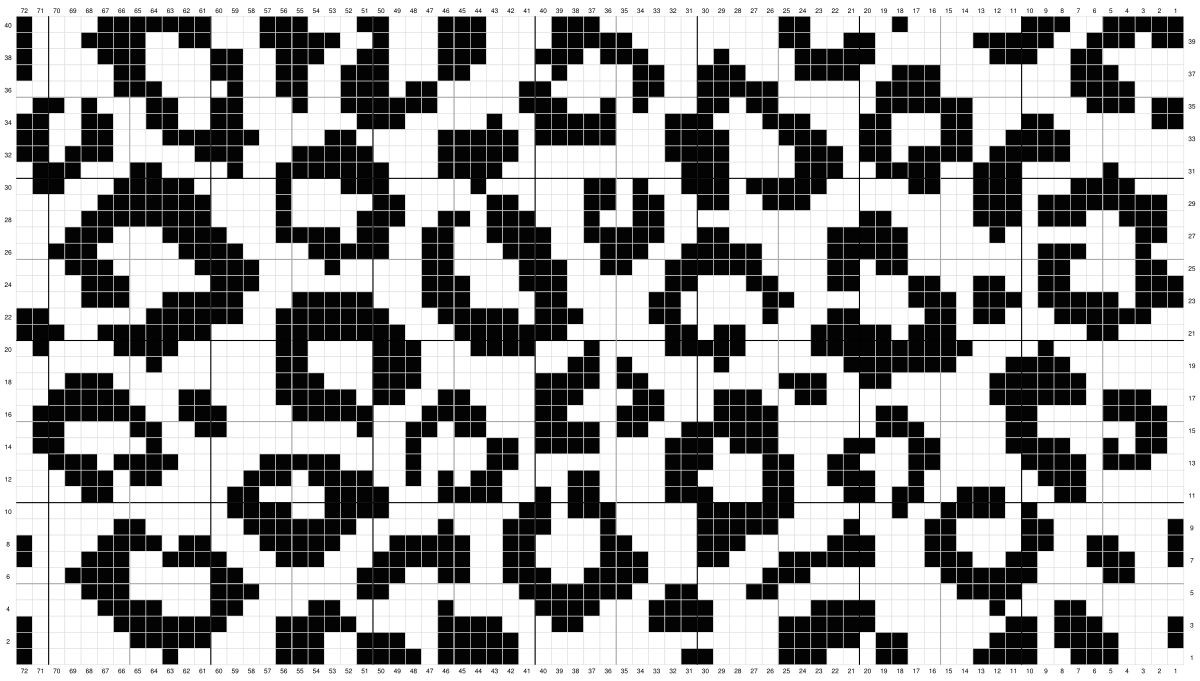 Leopard print colorwork chart for toddler, child and adult sizes
Chart for Toddler, Child, and Adult Sizes
Repeat Round 1 until hat measures approximately (5.5”, 6”, 7”, 8”) from the brim edge, including the brim height. Then proceed to Decreasing Rounds.
Decreasing Rounds (Using Main color and continuing in Waistcoat stitch)
Teen/Adult Size: Begin decreasing with Round 1
Round 1: Sc 4, Sc2Tog. Repeat from * around. Sc in any remaining stitches.
Round 2: Sc in each stitch around. Move on to Round 3.
Toddler & Child Size: Begin decreasing with Round 3
Round 3: Sc 3, Sc2Tog. Repeat from * around. Sc in any remaining stitches.
Round 4: Sc in each stitch around. Move on to Round 5.
Baby Size: Begin decreasing with Round 5
Round 5: Sc 2, Sc2Tog. Repeat from * around. Sc in any remaining stitches.
Round 6: Sc in each stitch around.
Round 7: Sc, Sc2Tog. Repeat from * around. Sc in any remaining stitches.
Round 8: Sc in each stitch around.
Round 9: Sc2Tog around. Tie off, leaving a long tail for closing the top.
Assembly
- Thread the long tail onto a tapestry needle. Weave the needle in and out of the top row of stitches approximately every 2-3 stitches around the circumference.
- Once you have gone all the way around the top opening of the hat, pull the tail tightly to cinch the top closed.
- Turn the hat inside out. Securely tie off the yarn end and weave in all loose ends to conceal them within the hat.
- Optional: Attach a faux fur pompom or a handmade yarn pompom to the top center of the hat for an extra touch of style.
Final Thoughts on Your Crochet Leopard Beanie
I truly hope you adore crafting the Luxe Leopard Beanie in worsted weight as much as you enjoyed the original bulky version. Sharing this crochet leopard beanie pattern with you is a joy, even though it’s been almost a year in the making! Keep an eye out – I’ll be sharing more exciting leopard print patterns with you throughout this fall season.
If you’re seeking a change from the wildness of leopard print and prefer a textured beanie, explore these free pattern alternatives:
Great Star Beanie
XOXO Slouch Hat
Trip Stitch Beanie
Until our next crafting adventure, happy crocheting!