Animal prints, especially leopard print, are a timeless trend in fashion. Designers consistently incorporate these dynamic patterns into their collections. If you’re looking to add this iconic design to your fashion sketches, this tutorial will guide you through creating a Leopard Print Drawing in easy-to-follow steps. Let’s explore how to bring this wild pattern to life in your designs!
drawing paperpencilerasermarkersblack ink
 Leopard print drawing tutorial cover showcasing step-by-step guide for creating animal and cheetah print patterns
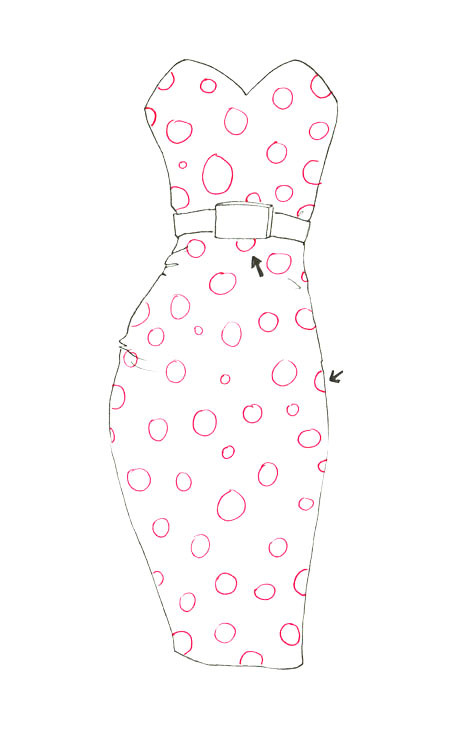
Step 1: Sketching the Base Spots for Your Leopard Print Drawing
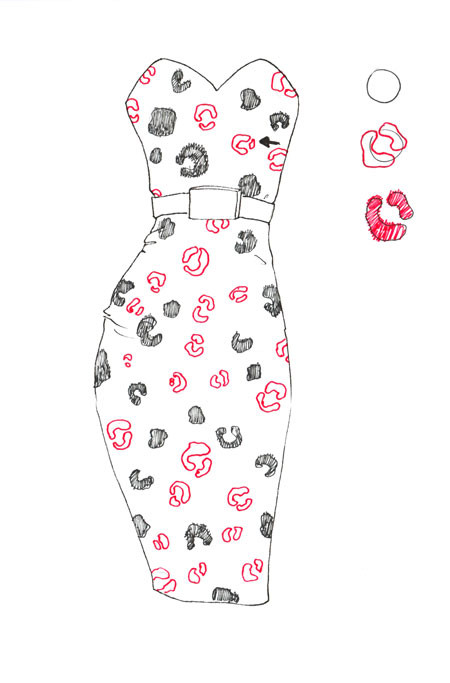
Begin your leopard print drawing by planning the arrangement and size of your spots. Lightly sketch circles to indicate where the spots will be placed on your design. Remember, the key to a realistic and visually appealing leopard print pattern is variation in spot sizes. Avoid making them uniform, as this can lead to a monotonous and less engaging pattern.
Observe how some circles are intentionally drawn to intersect with the edges of the garment outline. This technique adds depth and a more three-dimensional quality to your fashion illustration. Also, consider partially hiding some spots under elements like belts to mimic how fabric drapes and folds in real life.
 Step 1 of leopard print drawing tutorial demonstrating spot placement and size variation for animal print patterns
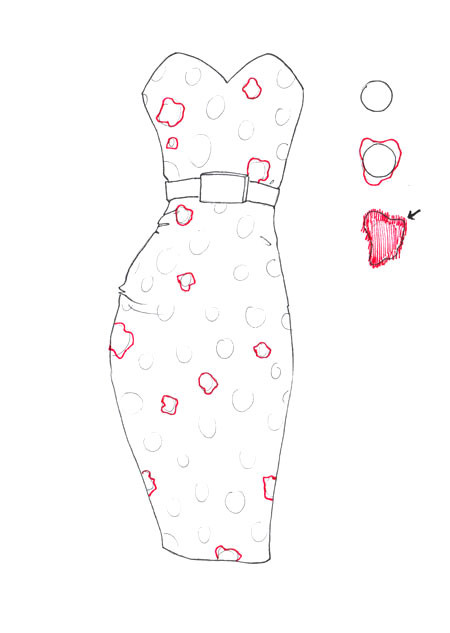
Step 2: Defining the First Leopard Print Shapes
Now, let’s start shaping the actual leopard spots within the circles you’ve sketched. Using the circles as a guide, begin to distort their forms to create irregular, organic shapes. While you’re altering the shapes, it’s important to maintain a size that is close to the original circle. Avoid extreme distortions at this stage. Also, ensure that you select circles that are not too close together to allow for distinct spot shapes.
This particular shape style works exceptionally well for smaller spots, but feel free to adapt it to larger areas as well.
Once you are satisfied with the shapes, fill them in with a dark color, such as black or dark brown. Don’t strive for perfect, clean lines. In fact, a slightly textured and imperfect fill can enhance the natural look of the leopard print drawing.
 Step 2 of leopard print drawing tutorial showing the creation of initial irregular spot shapes for animal print design
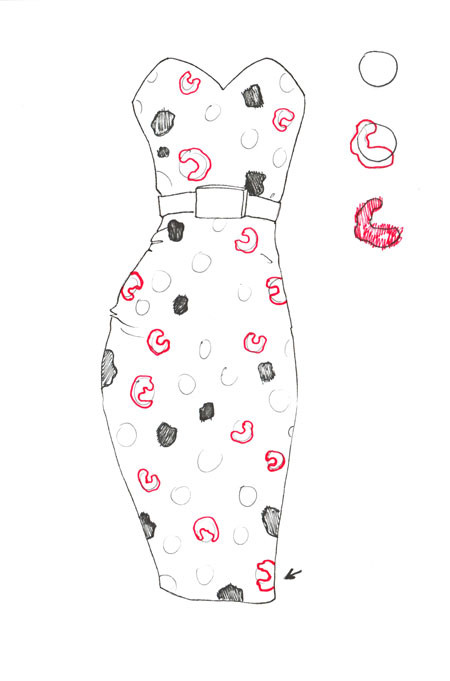
Step 3: Incorporating “C” Shapes into Your Leopard Pattern
Another characteristic shape in leopard print is the “C” shape. Following your initial circles again, draw distorted arch or “C” shapes around some of them. To create a dynamic and interesting pattern, rotate this “C” shape at various angles as you place them. Notice in the example how these “C” shapes also interact with the garment’s outline, being partially cut off to enhance the realistic effect. Fill these newly formed “C” shapes with the same dark color.
 Step 3 of leopard print drawing tutorial illustrating the addition of 'C' shaped spots to create a varied animal print
Step 4: Adding Special “Twin” Leopard Spots for Depth
A distinctive element often found in leopard patterns is what we can call “twin” spots. To create these, start with a “C” shape as in the previous step, and then add a mirrored reflection on the opposite side of the original circle. This reflection doesn’t need to be identical – it can be smaller, larger, wider, or slightly different in form compared to the initial “C” shape. The variation adds to the natural randomness of the print. Fill in these new “twin” shapes with your dark color, continuing to embrace a slightly imperfect, hand-drawn look.
 Step 4 of leopard print drawing tutorial demonstrating how to draw 'twin' spots for a more detailed leopard print
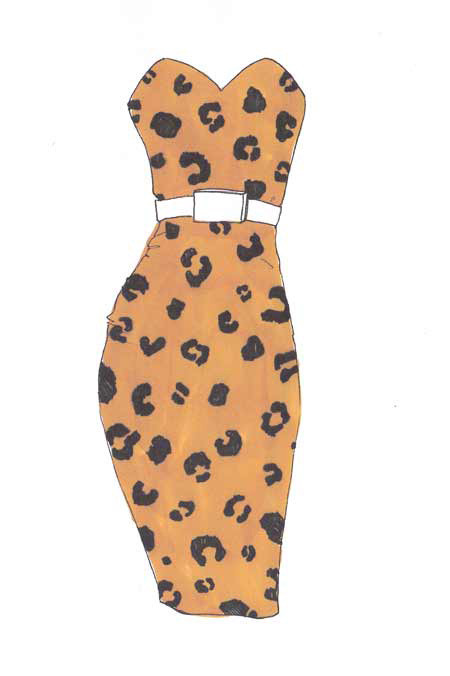
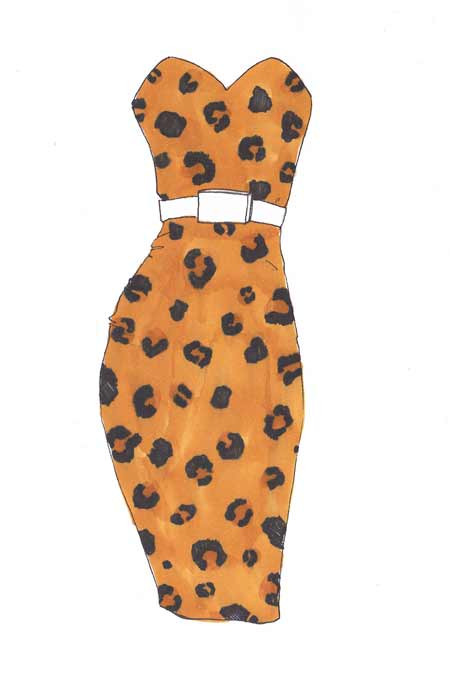
Step 5: Applying the Background Color to Your Leopard Drawing
After you’ve built up your leopard print with the variety of spot shapes, take a step back and assess your design. Does it feel balanced? Are there any areas that seem too sparse or too crowded? If you feel it needs a bit more, don’t hesitate to add an extra spot or two wherever necessary. Once you’re happy with the distribution of spots, it’s time to apply the background color to the entire design. While traditional leopard prints use oranges and browns, feel free to experiment with different color palettes. Consider using pinks, blues, grays, or any color that complements your overall design concept. The background color is a fantastic opportunity to inject your personal style and creativity into your leopard print drawing.
 Step 5 of leopard print drawing tutorial showing the application of background color to enhance the animal print design
Step 6: Adding Finishing Touches for a Realistic Leopard Print
For the final step, we’ll add subtle details to enhance the realism of your leopard print drawing. Look at the “opened” or “C” shaped spots and consider adding a slightly darker shade within these shapes. This creates an impression of depth and dimension, mimicking the natural variations in a leopard’s coat. Again, avoid making these inner details too perfect or uniform. If you prefer a less realistic and more stylized look, or if you are satisfied with your design as it is, you can certainly skip this step.
 Step 6 of leopard print drawing tutorial detailing the addition of inner spot shading for a finished animal print look
And there you have it! Drawing leopard print is a fun and straightforward process. Now that you know how to create a leopard print drawing, why not explore other animal print patterns? You can find more textile drawing tutorials here. To further enhance your fashion illustrations with animal print, consider adding a leather jacket to your leopard print garment for a chic and edgy look.
Have fun experimenting with this incredible animal print and let your imagination run wild!
Happy drawing and designing!