Ink Printing, an age-old technique, allows for a unique and personal touch to various creative projects. Whether you’re drawn to the rustic charm of stamped fabrics or the delicate lines of handwritten notes on paper, the type of ink you use profoundly impacts the final result. In the realm of natural artistry, walnut ink stands out as a timeless and accessible option. This guide will walk you through the enchanting process of creating your own walnut ink, transforming humble walnuts into a rich, versatile medium for your printing endeavors.
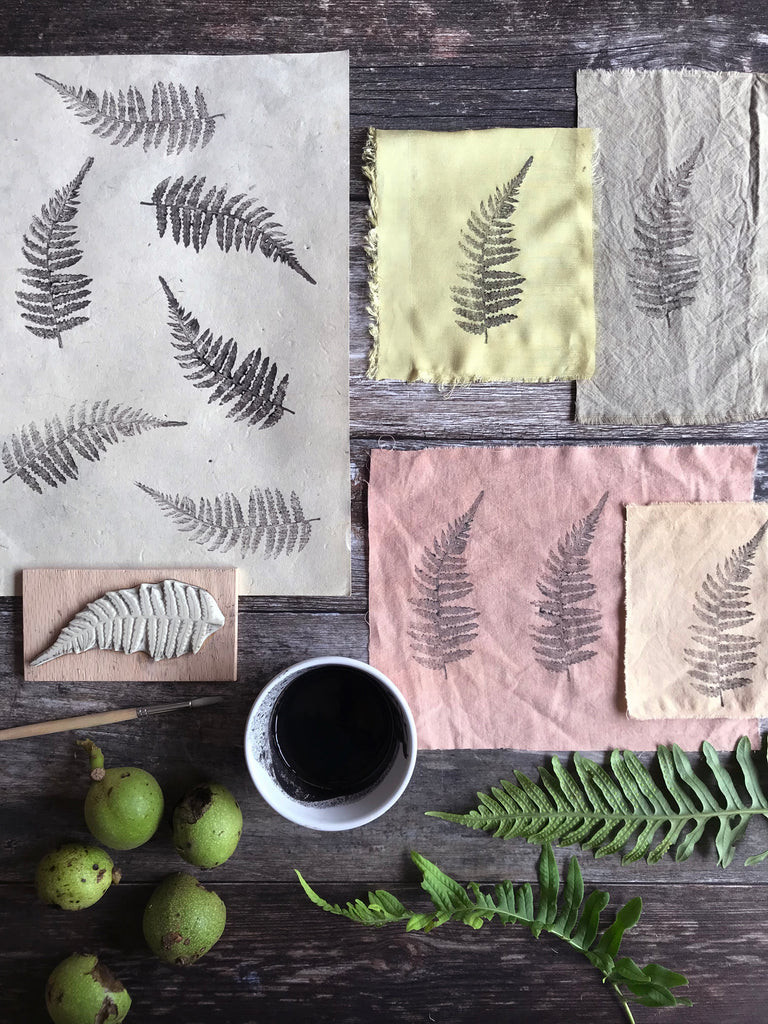 Walnut ink and fern stamp
Inspired by the beauty of nature and the desire to create plant-based art materials, this tutorial explores the simple yet rewarding method of making walnut ink. Just as serendipity played a role in the original inspiration, you too can discover the joy of crafting ink directly from nature’s bounty. This method, adaptable for various tannin-rich plants, is particularly effective with walnuts due to their high tannin concentration, ensuring a deep, lasting color ideal for ink printing.
Delving into Natural Ink Printing with Walnuts
Walnut ink, prized for its warm brown tones that can deepen to an almost black hue with the addition of iron, has been used for centuries. Historically, natural inks like walnut ink were staples for writing, drawing, and artistic expression. The appeal lies not only in their natural origins but also in the unique character they lend to artwork, offering subtle variations in tone and texture that are difficult to replicate with synthetic inks.
This guide will adapt a time-tested method, inspired by traditional oak gall ink recipes, to harness the power of walnuts. While this might appear to be a detailed process, rest assured that the steps are straightforward. This comprehensive approach aims to provide clarity and answer potential questions, ensuring your ink-making journey is smooth and successful.
Essential Supplies for Your Homemade Ink Printing Project
Before embarking on this exciting ink-making adventure, gather these readily available materials. Remember to dedicate a separate set of tools specifically for dyeing purposes, keeping your kitchen utensils dye-free.
Materials List:
- Walnuts in their Husks: A generous handful of walnuts, husks included (the dye source). Foraged or damaged walnuts work perfectly, making it an eco-friendly project.
- Dye Pot (Stainless Steel): A stainless steel pot is recommended for this project. Unlike aluminum, stainless steel is less reactive and easier to clean, especially when working with tannins over extended periods.
- Water: For extracting the dye and adjusting ink consistency.
- Heat Source: A stove or hot plate to heat the walnut dye.
- Muslin Cloth & Sieve: For straining the walnut dye, removing solids and ensuring a smooth ink.
- Straining Bowl: A bowl to collect the strained dye.
- Small Saucepan: For the ink thickening process.
- Ferrous Sulphate Crystals (Iron): This crucial ingredient deepens the brown walnut dye to a rich black and acts as a mordant, enhancing the ink’s lightfastness. Available online from specialized dye suppliers.
- Ferrous Sulphate Spoon: A dedicated spoon for measuring and handling ferrous sulphate.
- Measuring Cup (1/3 cup): For precise dye measurement.
- Measuring Spoon (1/8 teaspoon): For accurate gum tragacanth measurement.
- Gum Tragacanth Powder: A natural thickener that provides the ink with the ideal consistency for printing. Available from herbal websites and cake decorating stores.
- Whisk: For smoothly incorporating gum tragacanth into the dye.
- Small Ink Bowl: To hold the prepared ink during your printing session.
- Jam Jar (for storage): A clean jam jar for storing leftover ink in the refrigerator.
Step-by-Step Guide: Crafting Walnut Ink for Printing
Let’s embark on the ink-making process, transforming walnuts into a beautiful, natural printing medium.
1. Preparing the Walnuts: Extracting the Dye
Begin by gathering your walnuts. Whether collected from your backyard or foraged responsibly, even walnuts with damaged shells or partially eaten by wildlife are suitable for ink making.
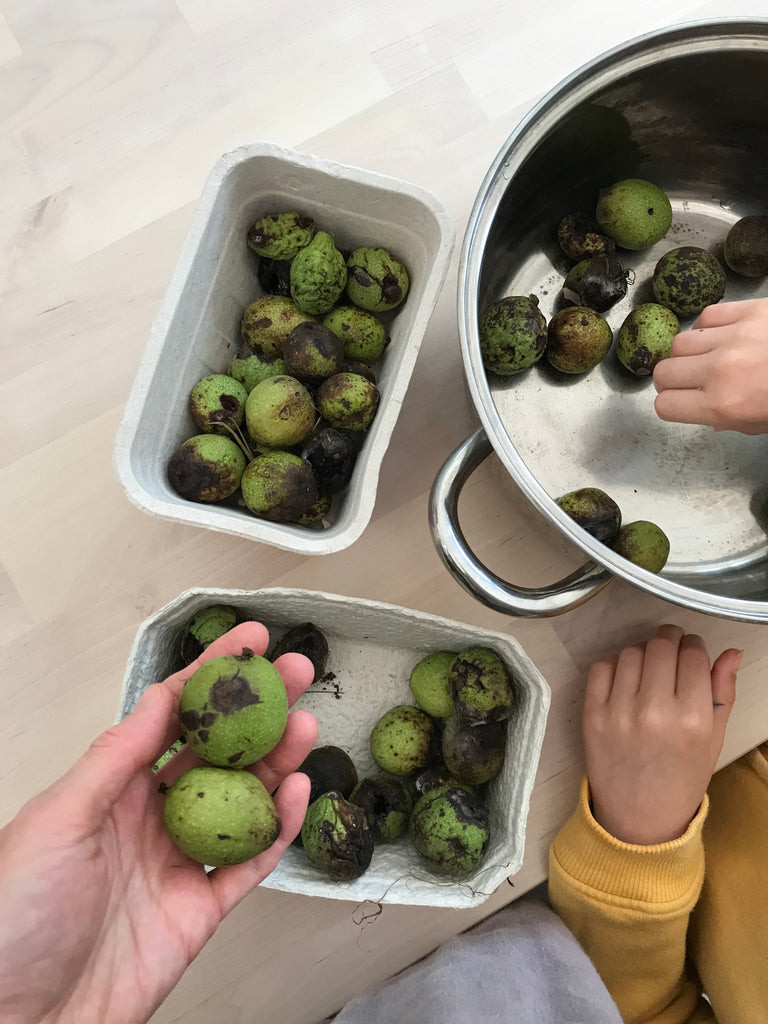 Walnuts in husks
Place the walnuts, husks intact, into your stainless steel dye pot. Cover them completely with water, ensuring they are fully submerged. The choice of stainless steel is deliberate; it’s less reactive than aluminum and easier to clean when dealing with tannin-rich dyes. While aluminum can offer mordanting benefits in some dyeing processes, in this case, we will be introducing iron separately, and the tannins in walnuts themselves also act as natural mordants.
While keeping walnuts whole is convenient, breaking them into smaller pieces can increase the surface area exposed to water, potentially yielding a more concentrated dye. If you choose to crush the walnuts, place them in a sturdy bag like an old pillowcase and carefully break them with a hammer, ideally outdoors to contain any mess.
 Walnuts submerged in water in a stainless steel pot
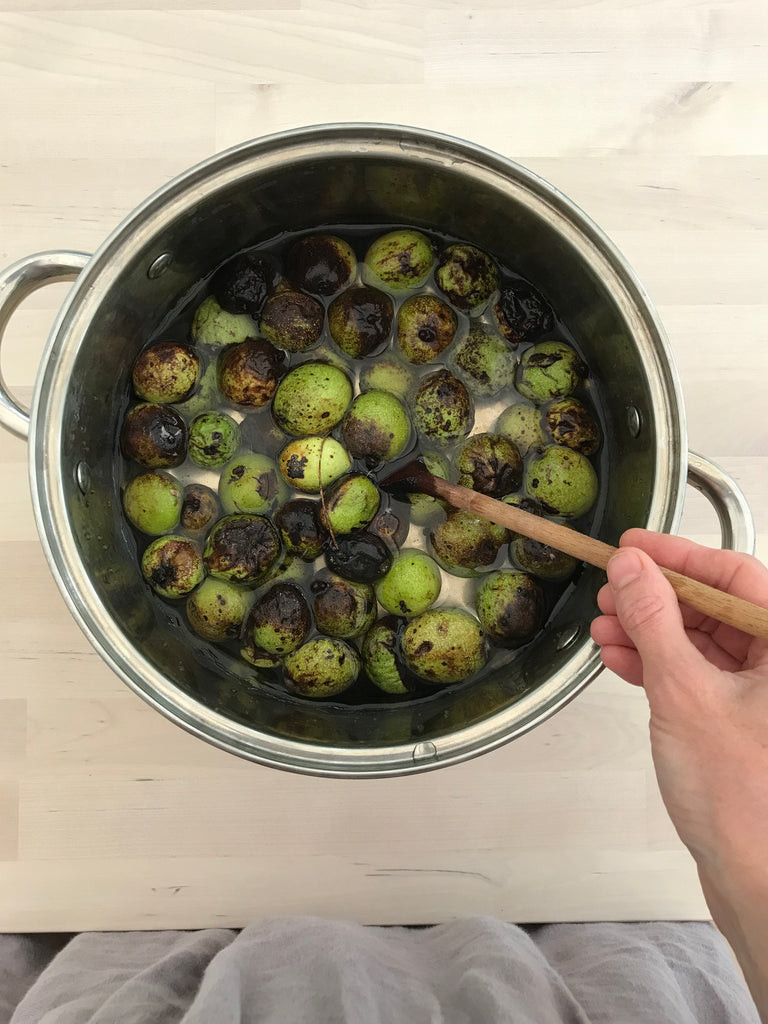
Gently heat the pot of walnuts and water for approximately one hour. This initial heating helps to accelerate the dye extraction process. You’ll observe the water gradually turning brown as the walnut husks begin to release their color, deepening over time.
 Walnut dye simmering on the stove
2. Steeping and Straining: Achieving Rich Color
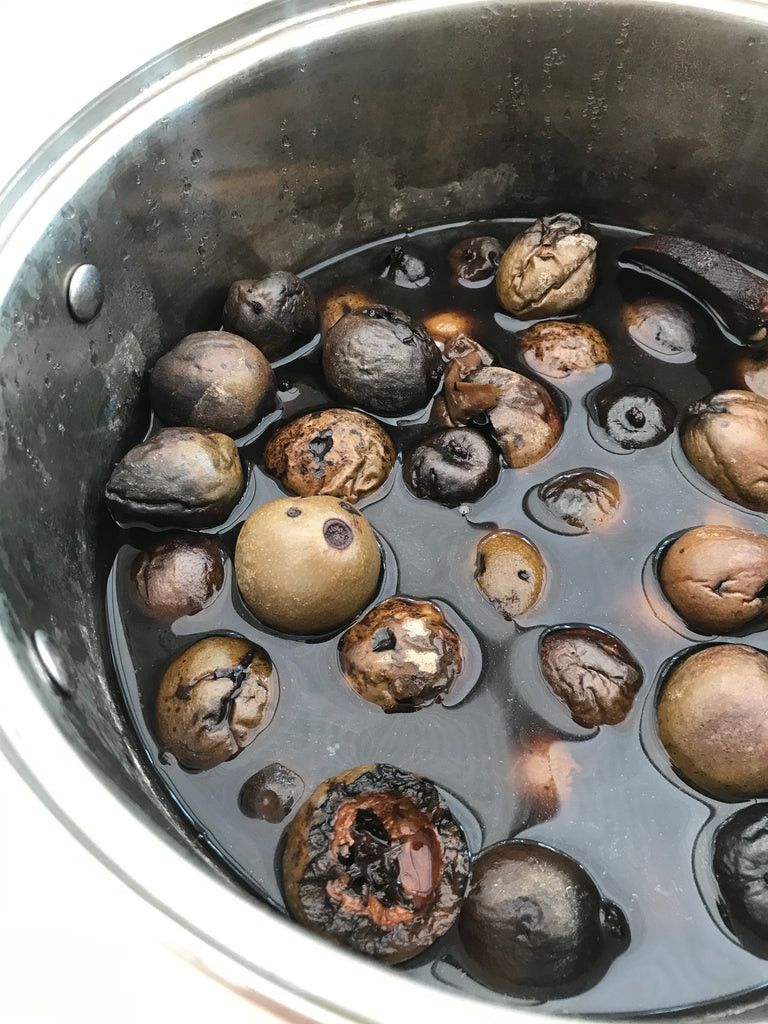
After the initial heating, remove the pot from the heat source and allow it to sit in a cool place for several days. This steeping period is crucial for developing a richer, more concentrated dye. The duration can vary; leaving it for around four days should yield a deep chocolate brown. Some natural dyers even steep walnuts for weeks or months, especially during cooler seasons, to achieve intensely dark shades.
During this time, monitor your dye pot daily, observing the color intensity and checking for any signs of mold. If a small amount of mold appears, carefully scoop it out and proceed with using the dye immediately. You can also test the dye’s strength by immersing a small fabric swatch and observing the color development each day.
Once you are satisfied with the depth of color, it’s time to strain the dye. Line a sieve with muslin cloth and position it over a bowl. Carefully pour the walnut dye through the sieve, ensuring the muslin cloth catches all the fine particles and walnut fragments, resulting in a smooth, particle-free dye.
Your strained walnut dye is now ready for a variety of applications. At this stage, it can be used as a beautiful dark brown dye, or transformed into a deep black ink with the addition of iron, as detailed in the next step. Remember, this recipe yields a generous amount of dye, so you’ll have plenty leftover for future ink printing projects.
3. Transforming Dye into Ink: Thickening and Enhancing
To create the printing paste, we’ll thicken the walnut dye, following a method similar to traditional oak gall ink recipes.
-
Measure the Dye: Pour the required amount of strained walnut dye into your smaller saucepan. A good starting proportion is 1/3 cup of dye. You can adjust the batch size by maintaining this ratio.
-
Introduce Ferrous Sulphate (Iron): Add a very small amount of ferrous sulphate crystals to the dye. The key here is to add it gradually and observe the color change. Stir gently and watch as the brown dye deepens and shifts towards black. Continue adding tiny amounts of ferrous sulphate until you achieve your desired black shade. Remember, less is more – you can always add more, but you can’t remove it.
-
Gentle Heating and Thickening: Place the saucepan with the dye and ferrous sulphate over very low heat. Slowly sprinkle in 1/8 teaspoon of gum tragacanth powder.
-
Whisk and Dissolve: Using a whisk, thoroughly incorporate the gum tragacanth powder into the dye. As the mixture gently warms, the gum tragacanth will dissolve completely, beginning to thicken the liquid.
-
Achieving Ink Consistency: Now comes the crucial step of achieving the desired ink consistency. We aim for a paste-like texture ideal for printing, not a watery dye. Evaporating excess water is key to concentrating the ink. There are two methods for this:
- Passive Evaporation (Windowsill Method): Pour the mixture into shallow bowls and allow it to evaporate naturally on a windowsill over a few days. This gentle evaporation prevents scorching and allows you to monitor the thickening process gradually. The iron content helps to prevent mold growth during this period.
- Gentle Heating (Stovetop Method): Alternatively, you can continue heating the mixture on the stovetop on a very low setting, carefully evaporating the water. Stir constantly to prevent burning and ensure even thickening. This method requires close attention as the ink will thicken further as it cools, making it tricky to judge the exact heating time.
The windowsill method is often preferred as it is less prone to burning and allows for better control over the final ink consistency. You can check the texture daily and stop the evaporation process when the ink reaches the perfect printing paste consistency. If it becomes too thick, simply add a drop or two of water to adjust.
-
Storage and Longevity: Once you are satisfied with the ink’s texture, you can begin printing immediately or store it for later use. To store, transfer the ink into a clean jam jar and seal it tightly. Label the jar clearly as “walnut ink” and store it in the refrigerator. The iron content acts as a natural preservative, allowing the ink to be stored for several months. However, always check for any signs of spoilage before use, and ensure it is clearly labeled to avoid accidental misidentification as food!
Ink Printing Techniques: Stamping on Fabric and Paper
With your homemade walnut ink ready, let’s explore the exciting world of ink printing on both fabric and paper.
Printing on Fabric
For fabric printing, consider pre-treating your chosen fabrics. Cotton and bamboo viscose are excellent choices, especially when pre-treated with soya (soy) milk. Soya milk acts as a binder, enhancing the adherence of plant dyes to natural fibers. Iron your fabric beforehand to ensure a smooth, crease-free printing surface.
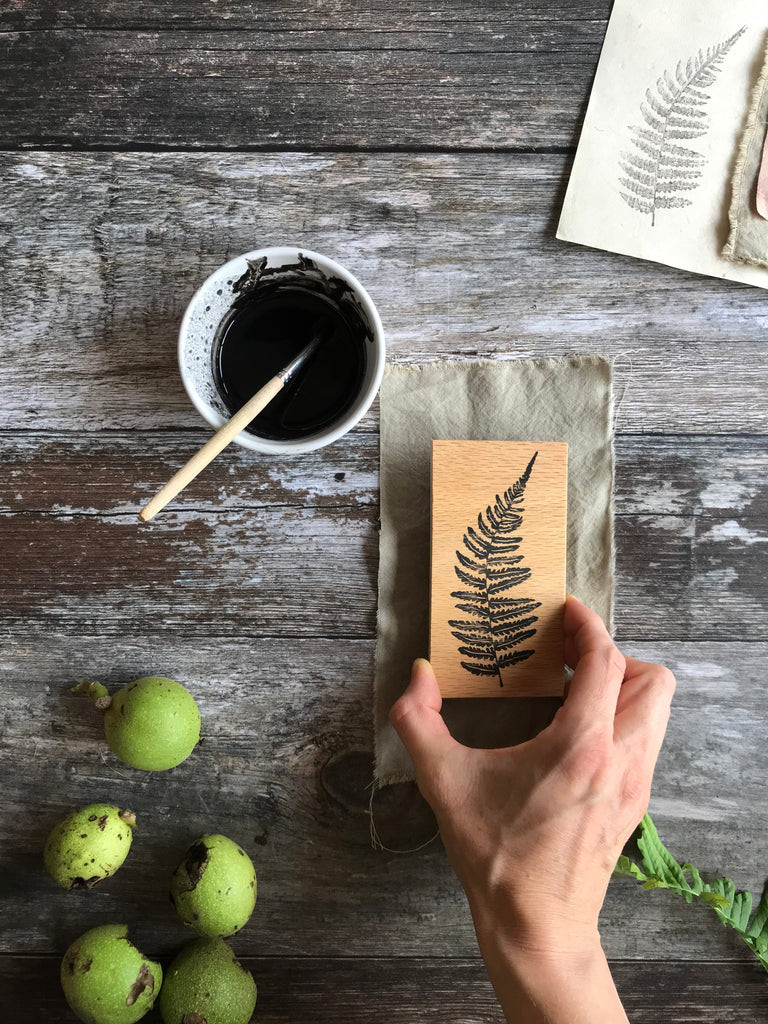
 Stamping fern pattern on fabric with walnut ink
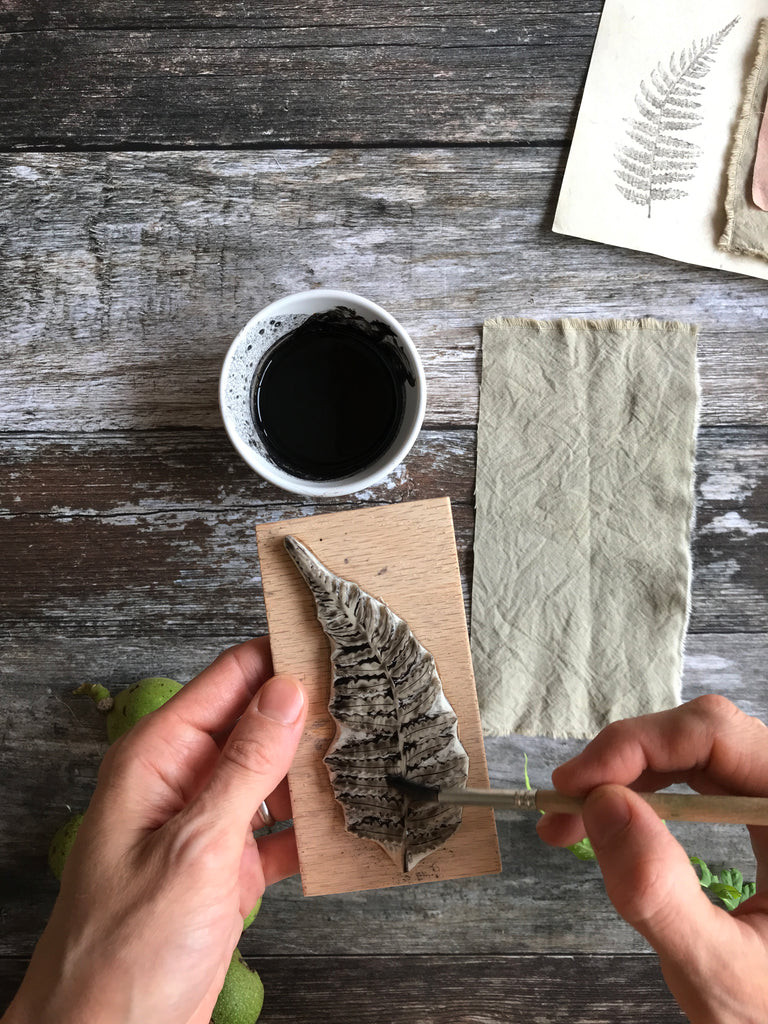
Applying Ink to the Stamp:
There are several methods to apply the walnut ink paste to your stamp:
- Brush Application: Carefully apply the ink to the stamp using a brush. This method offers control but can sometimes lead to over-application, potentially obscuring fine details in intricate stamp designs.
- Dish and Stamp Method: Pour a small amount of ink paste into a shallow dish (recycled plastic food containers work well). Gently press the stamp into the dish to pick up the ink. Be mindful of picking up too much ink, which can also compromise stamp detail.
- Roller Application: Use a roller to apply a thin, even layer of ink to the stamp surface. This method generally yields the most consistent and detailed prints.
Regardless of your chosen application method, carefully examine the stamp before printing to ensure it is evenly coated with ink. Practice on scrap fabric or paper to get a feel for ink transfer and pressure.
 Close up of stamping process with walnut ink
Stamping Technique:
When stamping, apply even pressure across the entire stamp to ensure consistent ink transfer. Embrace the inherent variations in handmade prints; slight imperfections and textural nuances are part of the charm of hand-printed art. If creating repeating patterns, slight variations in print density can add visual interest. For the smoothest results, roller application of ink is recommended.
After printing, allow the fabric to air dry completely. Paper prints are ready to use once dry, but fabric prints require an additional step to set the dye and ensure wash fastness.
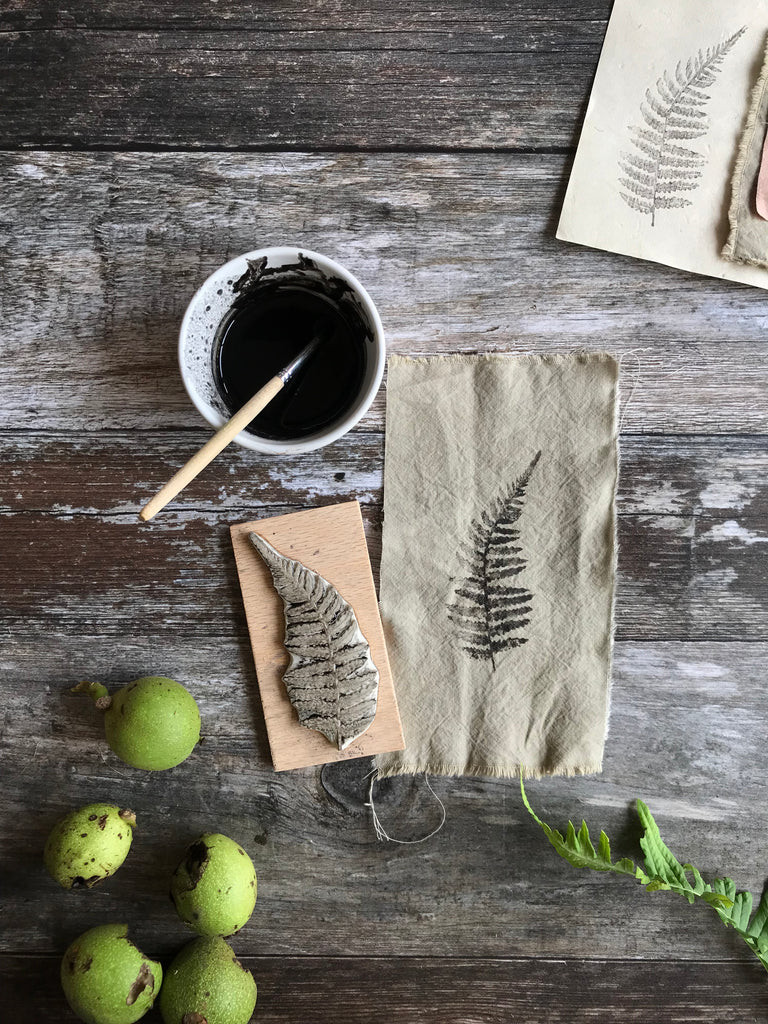 Fabric samples drying after walnut ink printing
Setting the Ink on Fabric:
Once the ink is fully dry on the fabric, heat-setting is essential. Iron the printed fabric using the hottest setting appropriate for the fabric type. For cotton, high heat is suitable, while more delicate fabrics like bamboo viscose require a lower setting. Iron over the prints several times, using a pressing cloth or tea towel to protect the print and iron.
After heat-setting, you can either rinse the fabric immediately or allow it to sit for a few days before rinsing, which some believe can enhance color retention. When washing, begin with a plain water rinse to remove any loose dye particles, followed by a gentle wash with a mild laundry detergent.
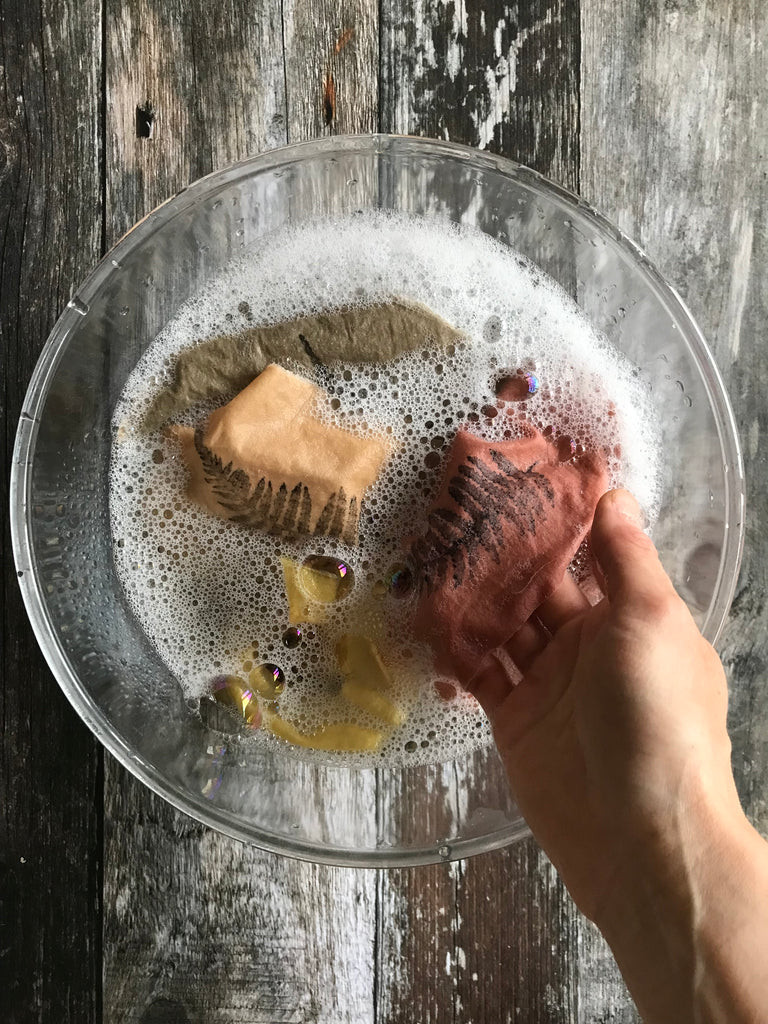 Washing printed fabric samples
Rinse the fabric thoroughly in fresh water, gently squeeze out excess water, and hang to dry. Alternatively, a gentle machine wash cycle can be used. Once dry, a quick ironing will restore smoothness, and your hand-printed fabric is ready to be enjoyed.
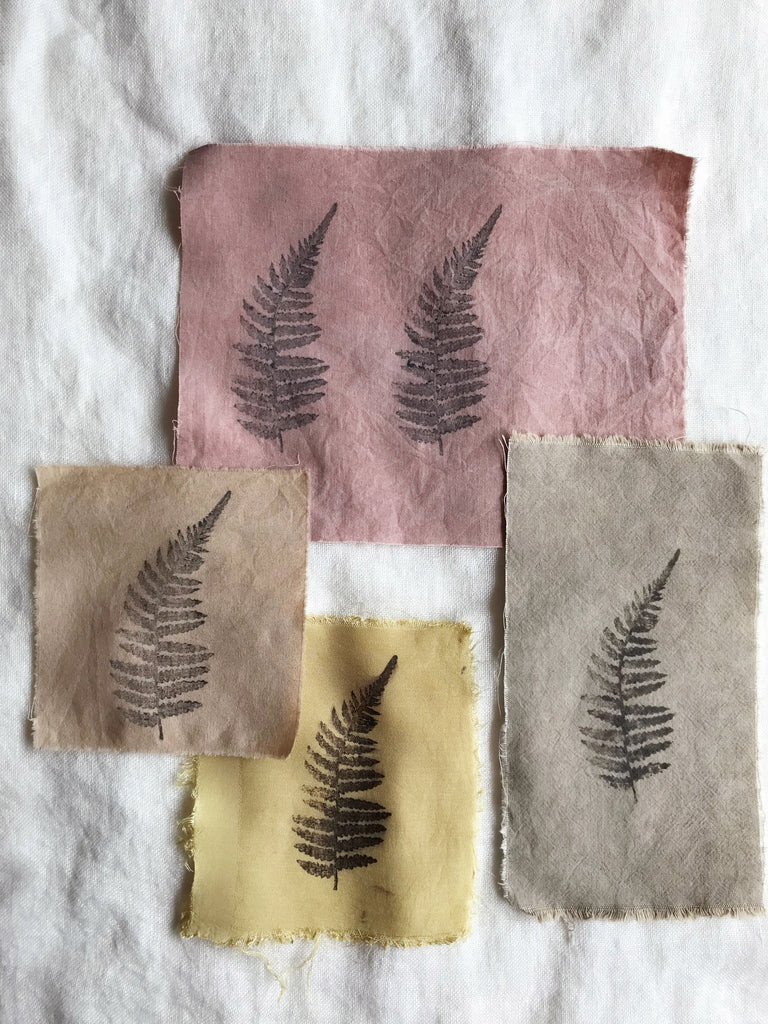 Washed fabric samples showing walnut ink prints
Durability of Walnut Ink Prints:
Thanks to the high tannin content of walnuts and the addition of iron, walnut ink prints exhibit excellent colorfastness, ensuring your creations will last.
Painting on Paper with Walnut Ink
Walnut ink’s creamy texture also makes it a delightful medium for painting directly onto paper. Its smooth flow allows for creating beautiful lines and washes, perfect for calligraphy, sketching, and watercolor-style painting.
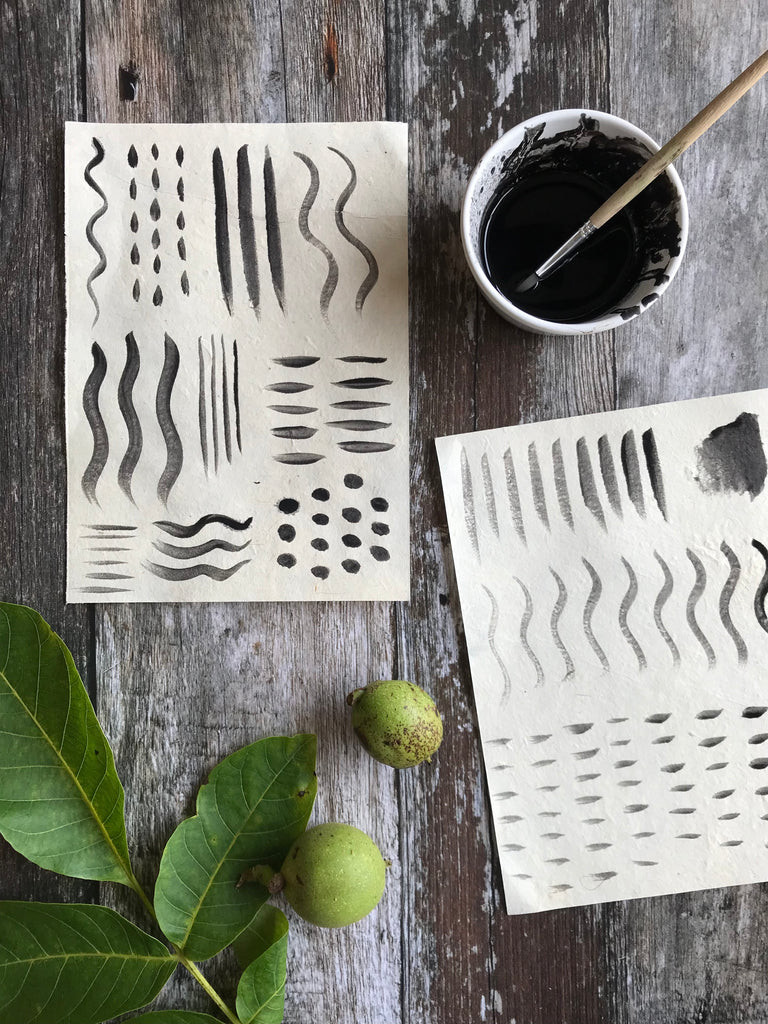 Walnut ink painting on paper
Experiment with different brushes and paper types to explore the versatility of walnut ink as a painting medium.
Expanding Your Ink Printing Horizons
Dive deeper into the world of botanical dyes with these resources:
- Plant Dye Zine: Discover more ink recipes and tutorials alongside techniques like bundle dyeing and plant hammering.
- Botanical Colour at your Fingertips: A comprehensive guide to dyeing fabric and yarn with natural dyes.
- Botanical Dyes on Wood: Explore the fascinating application of botanical dyes on wood surfaces.
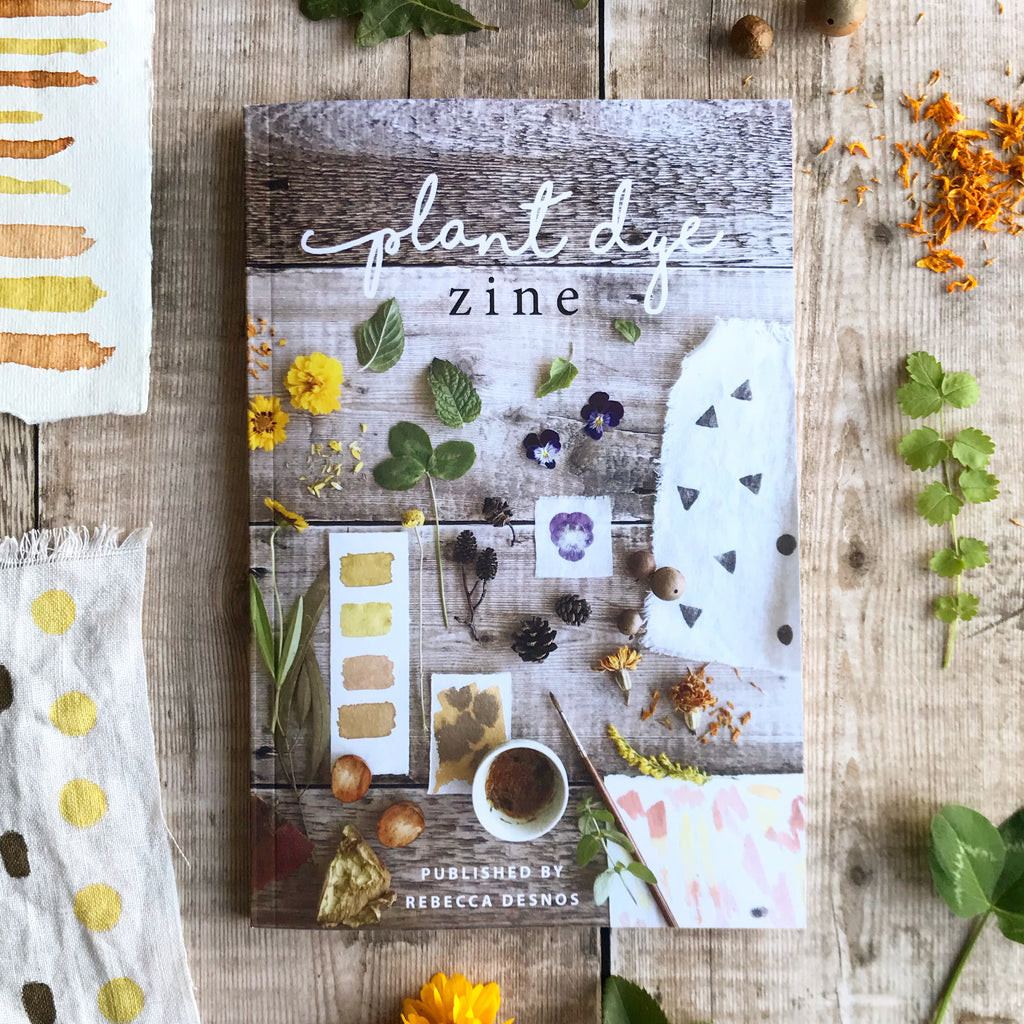 Plant Dye Zine book cover
Unleash your creativity with homemade walnut ink and explore the captivating art of ink printing. From fabric embellishments to paper crafts, the possibilities are as boundless as your imagination.