
Are you eager to explore the world of 3D printing but don’t know where to start? This guide from amazingprint.net will take you through the process of How To Use A 3d Printer Step By Step. From understanding the basics to mastering advanced techniques, you’ll discover how accessible and rewarding additive manufacturing can be, plus you will gain insights into prototyping, rapid tooling, and custom fabrication.
1. Understanding the Basics of 3D Printing
3D printing, also known as additive manufacturing, is a transformative process of creating three-dimensional objects from a digital design. Instead of traditional subtractive methods where material is removed, 3D printing builds an object layer by layer, offering unparalleled design freedom and customization.
1.1. What is 3D Printing?
3D printing constructs 3D objects by adding successive layers of material, as stated by the Wohlers Report 2023, additive manufacturing is expanding at an annual growth rate of 21%. This layer-by-layer approach allows for complex geometries and intricate designs that are often impossible to achieve with traditional manufacturing techniques.
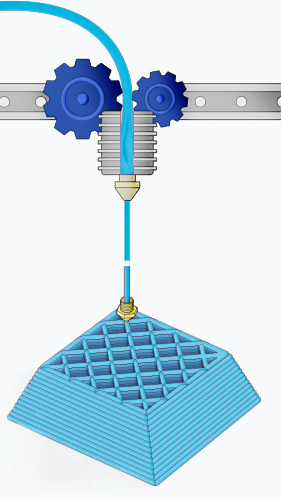 FFF Technology
Fused Filament Fabrication (FFF) technology in 3D printing
1.2. How Does 3D Printing Work?
The 3D printing process typically involves these key steps:
- Design Creation: A 3D model is created using Computer-Aided Design (CAD) software or downloaded from an online repository.
- Slicing: The 3D model is “sliced” into thin, horizontal layers using slicing software. This software generates a G-code file, which contains the instructions for the 3D printer.
- Printing: The 3D printer reads the G-code file and deposits material layer by layer, following the instructions to create the object.
- Post-Processing: Once the printing is complete, the object may undergo post-processing steps such as support removal, cleaning, and surface finishing.
1.3. Types of 3D Printing Technologies
Several 3D printing technologies cater to different materials and applications:
- Fused Deposition Modeling (FDM): This is the most common type, where a thermoplastic filament is heated and extruded through a nozzle to build the object.
- Stereolithography (SLA): This technology uses a UV laser to cure liquid resin layer by layer.
- Selective Laser Sintering (SLS): A laser is used to fuse powder materials, such as nylon or metal, together.
- Material Jetting: This method jets droplets of liquid photopolymer onto a build platform and cures them with UV light.
- Binder Jetting: A liquid binding agent is deposited onto a powder bed to bind the particles together.
2. Essential Equipment and Materials
To begin your 3D printing journey, you’ll need the right equipment and materials:
2.1. Choosing a 3D Printer
Selecting the right 3D printer depends on your budget, printing needs, and desired print quality. Consider these factors:
- Build Volume: The maximum size of the object you can print.
- Print Resolution: The level of detail and smoothness of the printed object.
- Material Compatibility: The types of materials the printer can use.
- Ease of Use: The user-friendliness of the printer’s interface and software.
- Price: 3D printers range from a few hundred dollars to several thousand, depending on their capabilities.
2.2. Popular 3D Printer Brands
| Brand | Target User | Key Features |
|---|---|---|
| Creality | Beginners, Hobbyists | Affordable, wide range of models, large community support |
| Prusa | Enthusiasts, Professionals | High-quality prints, open-source design, reliable performance |
| Ultimaker | Professionals, Educators | Precise and reliable, user-friendly interface, wide range of material compatibility |
| Raise3D | Professionals, Industrial Users | Large build volume, dual extrusion, advanced features for complex prints |
| Formlabs | Professionals, Medical/Dental | High-resolution resin printing, excellent surface finish, specialized materials |
2.3. 3D Printing Materials (Filaments)
The choice of filament is crucial for the success of your 3D printing project. Here are some common options:
- PLA (Polylactic Acid): A biodegradable thermoplastic derived from renewable resources. It’s easy to print, making it ideal for beginners.
- ABS (Acrylonitrile Butadiene Styrene): A strong and durable thermoplastic, commonly used in engineering applications. It requires a heated bed and good ventilation.
- PETG (Polyethylene Terephthalate Glycol-modified): Combines the ease of printing of PLA with the strength and heat resistance of ABS.
- Nylon: A strong, flexible, and durable material with good chemical resistance.
- TPU (Thermoplastic Polyurethane): A flexible and elastic material, ideal for printing parts that need to bend or stretch.
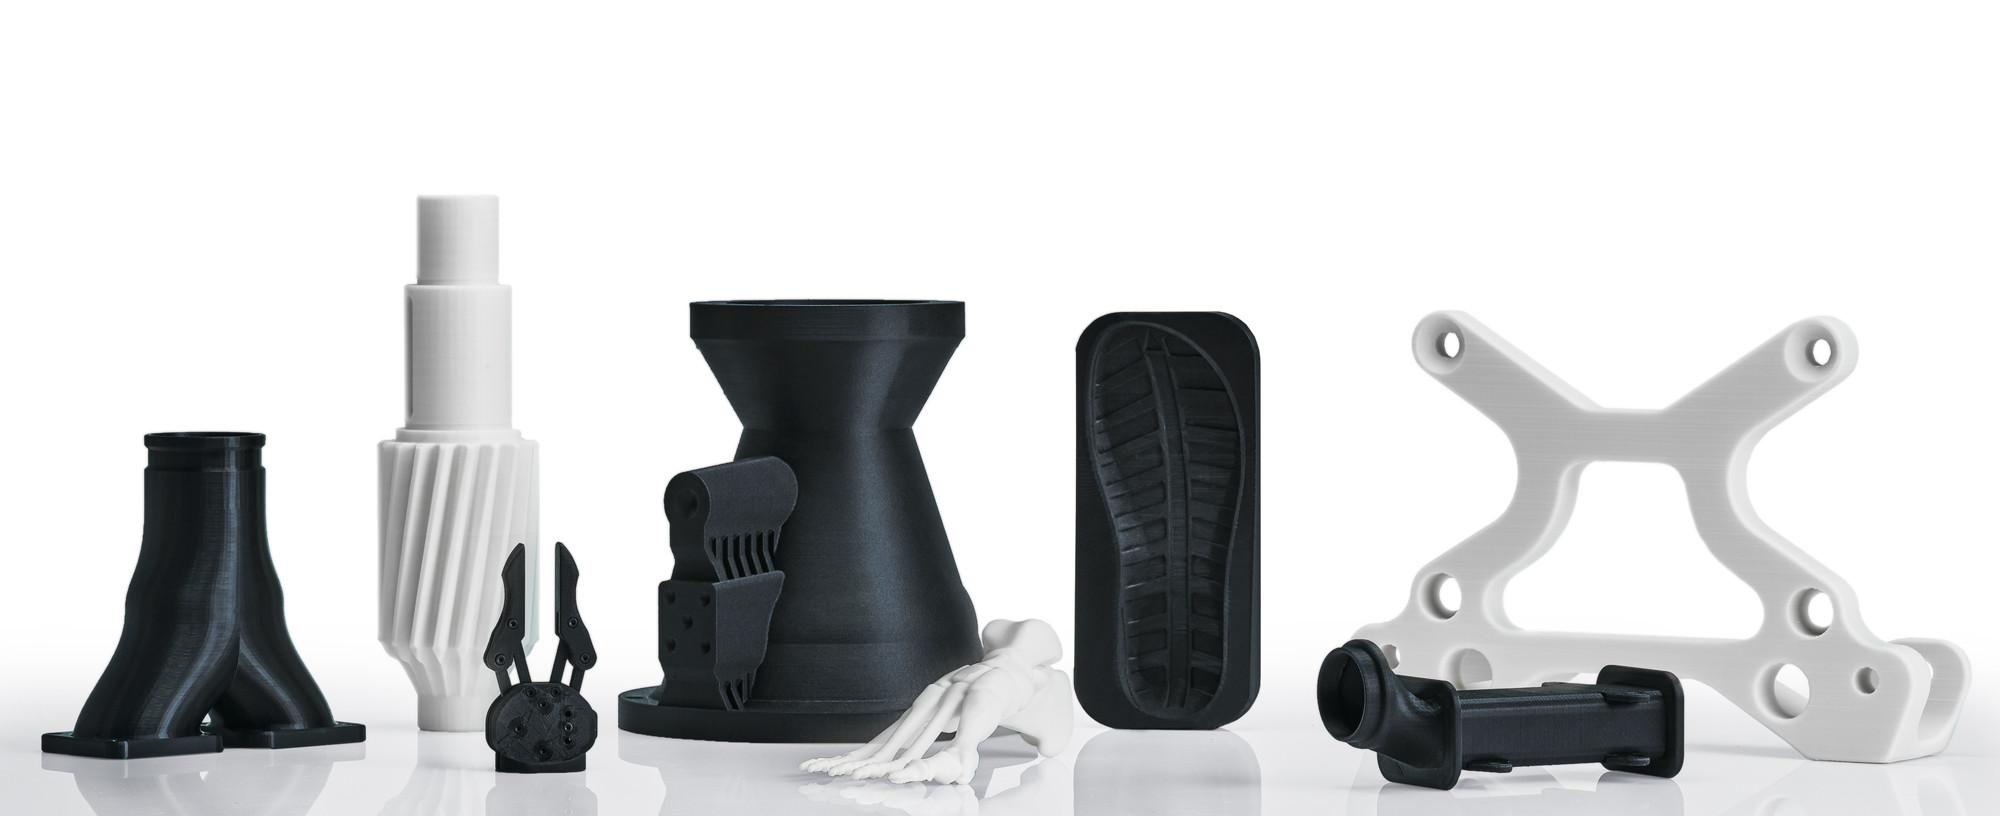 The Beginner’s Guide to 3D Printing: Filaments
Selection of 3D printing filaments
2.4. Essential Tools and Accessories
Besides the printer and filament, you’ll need a few essential tools and accessories:
- Slicing Software: Converts 3D models into G-code. Popular options include Cura, Simplify3D, and PrusaSlicer.
- Adhesive: Helps the print stick to the build plate. Options include glue sticks, hairspray, and specialized adhesives.
- Scraper: Used to remove prints from the build plate.
- Flush Cutters: For removing support structures.
- Sandpaper: For smoothing and finishing the printed object.
- Calipers: For precise measurements.
3. Step-by-Step Guide: How to Use a 3D Printer
Follow these steps to successfully print your first 3D object:
3.1. Step 1: Setting Up Your 3D Printer
- Unboxing and Assembly: Carefully unpack your 3D printer and follow the manufacturer’s instructions for assembly.
- Calibration: Level the build plate to ensure proper adhesion. Most printers have an automatic or manual leveling system.
- Loading Filament: Feed the filament through the extruder and into the hot end, following the printer’s instructions.
3.2. Step 2: Finding or Creating a 3D Model
- Online Repositories: Explore websites like Thingiverse, MyMiniFactory, and Cults3D for free or paid 3D models.
- CAD Software: Use CAD software like Autodesk Fusion 360, Tinkercad, or SolidWorks to create your own designs.
- 3D Scanning: Use a 3D scanner to create a digital model of a real-world object.
3.3. Step 3: Slicing the 3D Model
- Import Model: Open your slicing software and import the STL file of your 3D model.
- Adjust Settings: Configure the printing parameters, such as layer height, infill density, print speed, and support structures.
- Generate G-Code: Slice the model to generate the G-code file.
3.4. Step 4: Printing Your 3D Object
- Transfer G-Code: Save the G-code file to an SD card or transfer it to the printer via USB or Wi-Fi.
- Preheating: Preheat the printer’s hot end and build plate to the recommended temperatures for your chosen filament.
- Start Printing: Start the printing process and monitor the first few layers to ensure proper adhesion.
3.5. Step 5: Post-Processing
- Removing the Print: Once the printing is complete, carefully remove the object from the build plate using a scraper.
- Support Removal: Remove any support structures using flush cutters or pliers.
- Cleaning: Clean the object with a brush or cloth to remove any loose material.
- Finishing: Sand, paint, or apply other finishing techniques to achieve the desired look.
4. Tips and Tricks for Successful 3D Printing
Here are some valuable tips to improve your 3D printing results:
4.1. Bed Adhesion
Ensuring proper bed adhesion is crucial for preventing warping and print failures. Here are some techniques:
- Leveling the Bed: Make sure the build plate is perfectly level.
- Using an Adhesive: Apply glue stick, hairspray, or specialized adhesive to the bed.
- Adjusting Z-Offset: Fine-tune the distance between the nozzle and the bed.
- Using a Brim or Raft: Add a brim or raft to increase the surface area in contact with the bed.
4.2. Optimizing Print Settings
Experiment with different print settings to achieve the best results for your specific object and material:
- Layer Height: Lower layer heights result in smoother surfaces but increase print time.
- Infill Density: Higher infill densities increase strength but also increase material consumption and print time.
- Print Speed: Slower print speeds can improve accuracy and reduce vibrations.
- Temperature: Adjust the hot end and bed temperatures according to the filament manufacturer’s recommendations.
4.3. Dealing with Common Problems
Be prepared to troubleshoot common 3D printing issues:
- Warping: Caused by uneven cooling. Try using a heated bed, enclosure, or brim.
- Stringing: Occurs when the nozzle oozes filament during travel moves. Adjust retraction settings or lower the hot end temperature.
- Layer Shifting: Can be caused by loose belts, high print speeds, or vibrations.
- Clogging: Prevent clogs by using high-quality filament and cleaning the nozzle regularly.
5. Advanced 3D Printing Techniques
Once you’ve mastered the basics, explore these advanced techniques to take your 3D printing skills to the next level:
5.1. Multi-Material Printing
Use a printer with multiple extruders to print objects with different colors or materials. This allows for complex designs with varying properties.
5.2. Support Structures
Learn how to design and use support structures effectively. Consider using soluble support materials for easy removal.
5.3. Post-Processing Techniques
Master advanced post-processing techniques like sanding, painting, polishing, and vapor smoothing to achieve professional-looking results.
5.4. Design Optimization
Optimize your 3D models for printing by considering factors like wall thickness, overhangs, and bridging. Use topology optimization techniques to minimize material usage while maintaining strength.
6. Applications of 3D Printing
3D printing is revolutionizing various industries:
6.1. Prototyping
Create prototypes quickly and affordably to test designs and iterate on product development. According to research from the Printing Industries of America (PIA), in July 2023, 3D printing reduces prototyping costs by up to 70%.
6.2. Manufacturing
Produce custom parts, tools, and fixtures on demand. 3D printing enables decentralized manufacturing and reduces lead times.
6.3. Healthcare
Create customized prosthetics, implants, and surgical guides. 3D printing is improving patient outcomes and reducing costs.
6.4. Education
Use 3D printing in schools and universities to teach design, engineering, and manufacturing concepts. It fosters creativity and problem-solving skills.
6.5. Art and Design
Create intricate sculptures, jewelry, and fashion items. 3D printing allows artists and designers to push the boundaries of creativity.
7. Staying Up-to-Date with 3D Printing Trends
The 3D printing industry is constantly evolving. Stay informed about the latest trends and technologies:
7.1. New Materials
Explore new materials like carbon fiber composites, ceramics, and metals. These materials offer unique properties and expand the range of applications for 3D printing.
7.2. Advanced Technologies
Keep an eye on emerging technologies like bioprinting, 4D printing, and continuous printing. These technologies have the potential to transform industries and create new possibilities.
7.3. Industry Events and Publications
Attend industry events like RAPID + TCT and Formnext to network with professionals and learn about the latest innovations. Read industry publications like 3D Printing Industry and TCT Magazine to stay informed about trends and developments.
8. Conclusion
Learning how to use a 3D printer opens up a world of creative and practical possibilities. By following this step-by-step guide, you’ll be well on your way to mastering this exciting technology. Embrace the learning process, experiment with different materials and techniques, and unleash your imagination.
Ready to take your 3D printing journey to the next level? Visit amazingprint.net for a wealth of resources, including in-depth articles, product reviews, and expert advice. Explore our comprehensive guides, discover innovative printing solutions, and get inspired for your next project. Contact us at Address: 1600 Amphitheatre Parkway, Mountain View, CA 94043, United States. Phone: +1 (650) 253-0000. Website: amazingprint.net.
9. FAQ: Frequently Asked Questions About 3D Printing
9.1. What is the best 3D printer for beginners?
The Creality Ender 3 and Prusa Mini are popular choices for beginners due to their affordability, ease of use, and large community support.
9.2. What is the easiest material to 3D print with?
PLA is generally considered the easiest material to print with due to its low printing temperature, minimal warping, and biodegradable nature.
9.3. How much does it cost to 3D print something?
The cost of 3D printing depends on factors like material cost, print time, and electricity consumption. Small prints can cost a few dollars, while larger, more complex prints can cost tens or hundreds of dollars.
9.4. What software do I need for 3D printing?
You’ll need CAD software for designing 3D models and slicing software for converting the models into G-code. Popular options include Autodesk Fusion 360, Tinkercad, Cura, and Simplify3D.
9.5. How long does it take to 3D print an object?
Print time depends on the size and complexity of the object, layer height, infill density, and print speed. Small prints can take minutes, while large prints can take hours or even days.
9.6. Can I 3D print metal?
Yes, you can 3D print metal using technologies like Selective Laser Melting (SLM) and Direct Metal Laser Sintering (DMLS). However, metal 3D printers are typically more expensive and require specialized knowledge.
9.7. Is 3D printing environmentally friendly?
3D printing can be more environmentally friendly than traditional manufacturing in some cases, as it reduces material waste and enables on-demand production. However, the environmental impact depends on factors like material choice, energy consumption, and disposal methods.
9.8. What are the limitations of 3D printing?
Limitations of 3D printing include build volume constraints, material limitations, and the need for post-processing. However, these limitations are constantly being addressed with new technologies and materials.
9.9. How accurate is 3D printing?
The accuracy of 3D printing depends on the printer, material, and print settings. High-end printers can achieve accuracies of up to 20 microns, while lower-end printers may have accuracies of around 100 microns.
9.10. Can I make money with a 3D printer?
Yes, you can make money with a 3D printer by offering 3D printing services, selling 3D printed products, or creating and selling 3D models. The possibilities are endless!
10. Further Reading and Resources
- “3D Printing: The Ultimate Guide to Mastering 3D Printing for Beginners” by John Zenger
- “Functional Design for 3D Printing” by Clifford T Smyth
- “3D Printing Handbook: 3D Hubs” by Filemon Schoffer
Visit amazingprint.net to find more resourceful guides and get connected with the world of printing!