
When preparing artwork for screen printing, especially for dark garments, you might encounter a common challenge: designs created for white backgrounds don’t always translate perfectly to black or colored fabrics. Simply changing black lines to white on a dark background can result in a washed-out or less impactful print. Inverting your artwork in Adobe Illustrator is a crucial technique to ensure your designs pop and maintain their crispness when printed on darker materials.
This guide, inspired by insights from experts at Golden Press Studio, will walk you through the process of effectively reversing your print image in Adobe Illustrator. This technique is essential for achieving professional-quality screen prints, making your artwork truly stand out on any colored apparel.
Step-by-Step Guide to Inverting Artwork in Illustrator
Let’s dive into the practical steps to reverse your image for optimal printing results.
Step 1: Open Your Artwork in Illustrator
Begin by launching Adobe Illustrator and opening a new document. Copy your design (using “Command C” or “Ctrl C” for Windows) and paste it into your new Illustrator document (using “Command V” or “Ctrl V”). For demonstration purposes, we’ll use a design element similar to those found in vector packs, like the Stay Wild Vector Pack, which are excellent resources for screen printing artwork.
Step 2: Duplicate and Secure Your Artwork
Once your artwork is in Illustrator, select the entire image. To create a duplicate directly on top of the original, use “Command C” (or “Ctrl C”) to copy, followed by “Command F” (or “Ctrl F”) to paste in place. This creates an exact copy layered directly over your original design. Next, lock the bottom layer. This ensures the original artwork remains untouched and serves as a reference point throughout the inversion process. Locking layers prevents accidental edits and maintains the integrity of your initial design.
Step 3: Refine the Top Layer by Removing Inside Anchor Points
Select the Direct Selection Tool (A) from the toolbar. With the top, duplicated layer selected, begin deleting all inside anchor points. This step is crucial for creating a clean inversion. For designs with intricate details, you might find that using the Pen Tool (P) to manually trace and fill each shape is more effective than simply deleting anchor points. The Pen Tool offers greater precision, especially when dealing with complex artwork requiring sharp, clean edges after inversion.
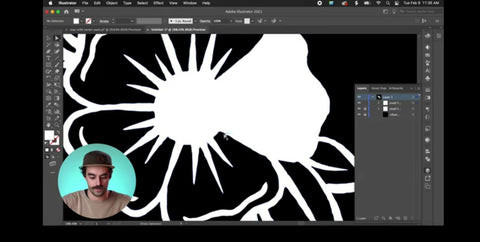 White floral design on black background before color inversion in Adobe Illustrator for screen printing.
Step 4: Unite the Design Using Pathfinder
After refining the top layer by removing anchor points, select the entire modified design. Open the Pathfinder panel (Window > Pathfinder). In the Pathfinder panel, click the “Unite” option. This action merges all selected paths into a single, unified shape, effectively filling the entire design area with a solid color, typically white for inversion purposes.
Step 5: Position the Original Artwork
To bring back the original linework and create the inverted effect, use “Command” + “Left Bracket” (or “Ctrl” + “Left Bracket”) to send the original, locked artwork layer to the back, positioning it underneath the filled shape you just created. This layering is key to achieving the reverse print look.
Step 6: Create a Compound Path and Minus Front
Select both the filled shape and the original artwork. Ungroup them if they are grouped. Then, apply “Command 8” (or “Ctrl 8”) to create a compound path. This merges the selected shapes into a single, editable path. With both layers still selected, find the Pathfinder tool again and this time, hit “Minus Front.” This final step subtracts the shape that is in front (the filled white shape) from the shape that is in back (the original artwork), effectively inverting the colors of your design.
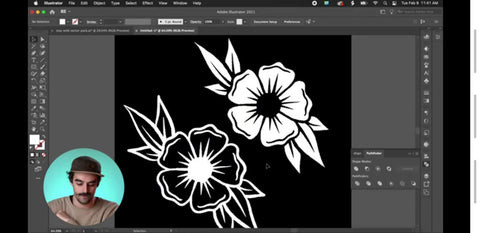 Comparison of original white outline floral artwork and inverted white on black version in Adobe Illustrator for improved screen print on dark apparel.
Final Touches and Best Practices
By following these steps, you’ve successfully inverted your artwork in Adobe Illustrator. As you can see when comparing the before and after results, inverted artwork provides a much crisper and more defined look, especially when printing white or light-colored designs on dark backgrounds. This technique ensures that the white lines of your design are solid and impactful, rather than appearing as empty space, which can often look less refined on dark apparel.
Experiment with this technique to see how it enhances your screen printing projects. Mastering the art of reversing print images in Illustrator will significantly improve the quality and visual appeal of your printed designs, making them pop with clarity and professionalism.