
Printing specific sections of your spreadsheet in LibreOffice Calc and ensuring it fits onto a single page is straightforward. This guide will walk you through defining the print range and adjusting the scaling options to achieve your desired print output.
To print a selected range, such as A1:G138, and fit it to a single page, follow these steps:
-
Select the Range: Begin by highlighting the cells you want to print. In this example, select cells A1 through G138. The selected area will be visibly highlighted, usually in grey-blue.
-
Define the Print Range: Navigate to the menu bar and click on
Format -> Print Ranges -> Add. It may appear as if nothing has occurred, but this action defines the selected area as the print range. -
Verify the Print Range: To confirm and edit the defined print range, go back to
Format -> Print Ranges -> Edit. This will open the “Edit Print Ranges” dialog, displaying the currently set print range.
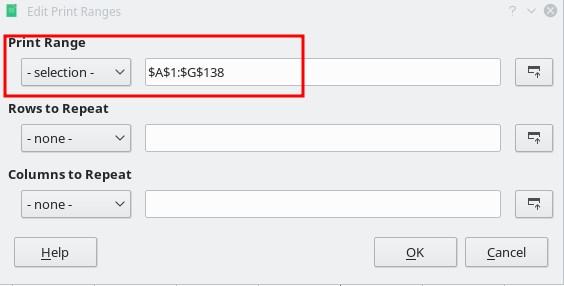 LibreOffice Calc Edit Print Ranges Dialog showing the defined print area
With the print range defined, the next step is to ensure it prints on a single page. This is controlled within the Page settings:
-
Access Page Settings: Go to
Format -> Pageto open the Page Style dialog. -
Adjust Scaling Mode: In the “Page Style” dialog, locate the
Scaling modeoption. Change this setting toFit print ranges(s) on number of Pages. -
Specify Single Page: Set the
Number of pagesvalue to1. This instructs LibreOffice Calc to scale the print range to fit within a single page.
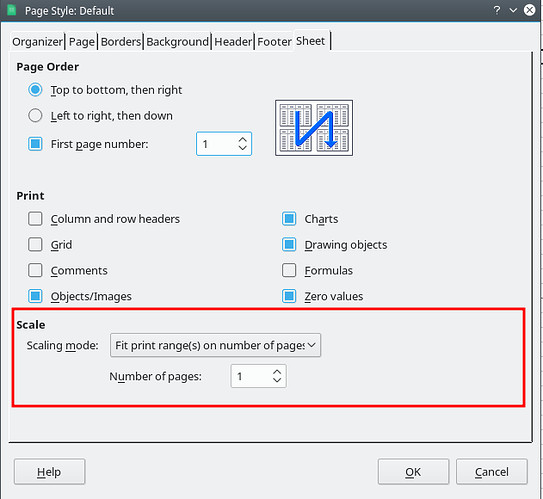 LibreOffice Calc Page Style Dialog with Scaling Mode set to Fit Print Ranges to Number of Pages
By configuring these settings, your specified range (A1:G138 in this case) will be printed, scaled to fit onto one page. Keep in mind that printing a large number of rows and few columns on a single page might lead to significant font size reduction to accommodate all content within the page width.
