
Printing Excel sheets might seem straightforward, but to achieve the best results and avoid common pitfalls, understanding the nuances of Excel’s print options is crucial. Whether you’re aiming to print a specific section, the entire sheet, or even manage hidden rows and columns, this guide will walk you through each scenario in Excel for the web, ensuring you get perfect printouts every time.
Let’s dive into the essential steps to master printing your Excel sheets.
Printing an Entire Excel Worksheet
When you need a hard copy of your entire dataset or analysis, printing the whole worksheet is the way to go. Excel for the web simplifies this process, making it just a few clicks away.
-
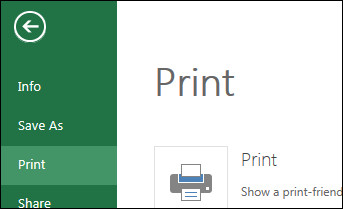
Navigate to the Print Menu: Begin by clicking on the File tab located in the top-left corner of your Excel for the web interface. From the dropdown menu, select Print, and then click Print again in the submenu.
-
Ensure ‘Entire Workbook’ is Selected: A print settings screen will appear. Before proceeding, verify that Entire Workbook is selected in the print options. This ensures that if your workbook contains multiple sheets, only the current sheet you are viewing will be printed. For printing multiple sheets, we’ll cover that in a later section.
-
Initiate Print: Once you’ve confirmed that ‘Entire Workbook’ is selected (or if it’s a single sheet workbook, this is the default), click the Print button. This will send your worksheet to your printer, and you’ll have a printed copy in moments.
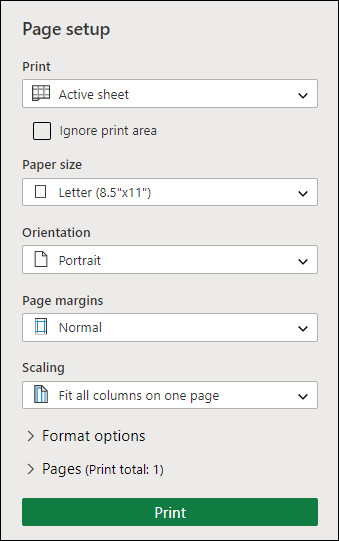 Print setup screen
Printing a Selected Range of Cells in Excel
Sometimes, you only need to print a specific portion of your Excel sheet. Excel for the web allows you to easily print a selected range of cells, focusing only on the data you need.
-
Select the Range: On your worksheet, use your mouse to click and drag, selecting the exact range of cells you wish to print. The selected area will be highlighted.
-
Access the Print Options: Go to File > Print > Print, just as you would for printing the entire worksheet.
-
Choose ‘Current Selection’: In the Print Options, you’ll see different choices. To print only the cells you’ve selected, ensure that Current Selection is chosen. This option tells Excel to only consider the highlighted area for printing.
-
Review Print Preview: After selecting ‘Current Selection’, a print preview will appear. Take a moment to review this preview to confirm that the selected range is correctly displayed and formatted for printing. This step is crucial to avoid wasting paper and ink.
-
Print Your Selection: If the print preview looks satisfactory, click Print to proceed. Excel will now print only the range of cells you selected. If you need to adjust the selection, simply close the print preview and repeat the steps with a new cell range.
How to Print Excel Sheet with Hidden Rows and Columns
Dealing with hidden rows and columns is a common scenario in Excel. When it comes to printing, Excel for the web, by default, excludes these hidden elements. If you need to print a worksheet and include data from hidden rows or columns, you’ll first need to unhide them.
-
Identify Hidden Rows or Columns: Hidden rows or columns are usually indicated by missing header labels in the row numbers or column letters, or by a double line where the hidden rows or columns are.
-
Select Headers Around Hidden Areas: To unhide, you need to select the range of row headers (numbers) or column headers (letters) that surround the hidden section. For example, if rows 3, 4, and 5 are hidden between row 2 and row 6, select the headers for rows 2 through 7.
Alt text: Selecting row headers to unhide hidden rows in Excel for the web, demonstrating how to choose the surrounding headers.
-
Unhide Rows or Columns: Right-click on the selected headers. In the context menu that appears, choose Unhide Rows or Unhide Columns, depending on what you need to reveal. The hidden rows or columns will now become visible in your worksheet.
-
Print as Usual: Once the hidden rows or columns are unhidden, you can proceed to print your worksheet as you normally would, using either the ‘Entire Workbook’ or ‘Current Selection’ options under File > Print > Print. Ensure that ‘Entire Sheet’ is selected in Print Options to include all unhidden content.
Important Note: Row and column headers themselves (like 1, 2, 3 or A, B, C) do not appear in the print preview or on the final printout in Excel for the web.
Printing an Entire Excel Workbook with Multiple Sheets
When your Excel file contains multiple worksheets, and you need to print the entire workbook, you’ll need to print each sheet individually in Excel for the web. Unlike the desktop application, Excel for the web doesn’t directly offer a “Print Entire Workbook” option that prints all sheets at once.
-
Navigate to Each Sheet: For each worksheet you want to print, you’ll need to select its tab at the bottom of the Excel interface. Sheet tabs are usually named Sheet1, Sheet2, etc., or custom names if you’ve renamed them.
 sheet tabs
 -
Print Each Worksheet Individually: After selecting a sheet, follow the steps to print an entire worksheet as described earlier: File > Print > Print, ensuring ‘Entire Workbook’ is selected in the print options for each sheet. Repeat this process for every sheet in your workbook that you need to print.
Checking for Hidden Worksheets:
Before printing, it’s good practice to check for any hidden worksheets that you might also need to print.
-
Right-click on a Sheet Tab: Right-click on any of the visible sheet tabs.
-
Check for ‘Unhide’ Option: If the option Unhide is available in the context menu, it means there are hidden worksheets in your workbook.
-
Unhide if Necessary: Select Unhide. A dialog box will appear listing the hidden sheets. Choose the sheet you want to unhide and click OK. The unhidden sheet will now be visible and printable.
Printing an Excel Table
Often, you might have your data neatly organized in an Excel table and only need to print this specific table. Excel for the web makes printing tables straightforward, provided your table is within the size limit (less than 10,000 cells). For larger tables, you would need to use the Excel desktop application for printing.
-
Select the Entire Table: To print a table, you first need to select all of its cells. The easiest way to do this is to click on the first cell of the table, then scroll to the last cell while holding down the Shift key, and click on the last cell. This will select the entire rectangular range of your table. Alternatively, for tables with many columns, after selecting the first cell, press and hold Shift and then select the last cell to avoid excessive scrolling.
-
Go to Print Menu: Navigate to File > Print > Print to open the print settings.
-
Select ‘Current Selection’: In the Print Options, ensure that Current Selection is selected. This will restrict the print area to just the table you’ve selected.
 Print selected cells
 -
Preview and Print: Review the print preview to ensure your table is correctly formatted and displayed. If everything looks right, click Print. If adjustments are needed, close the preview and refine your selection or formatting before printing again.
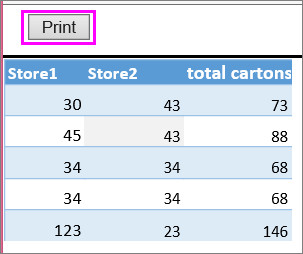 Print preview of table
For enhancing the visual presentation of your printed table, you might want to print your table with gridlines, which can be configured in the page setup options within the Excel desktop application.
Page Numbers in Printed Excel Sheets
Unfortunately, Excel for the web has limitations regarding page numbers. You cannot directly insert, view, or print page numbers in the web version. This functionality is available in the Excel desktop application.
To add page numbers to your Excel printouts, you’ll need to open your workbook in the desktop application.
-
Open in Excel Desktop App: In Excel for the web, click on Open in Excel. This button is typically located in the ribbon or file menu and will open your current workbook in the Excel desktop application if you have it installed.
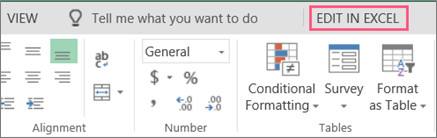 Button to Edit in Excel
 -
Add Page Numbers in Page Layout View: Once in the desktop application, switch to Page Layout view. Here, you can add page numbers in the header or footer areas of your worksheet. Excel desktop offers extensive options for customizing headers and footers, including page numbering, dates, and more.
-
Print from Excel Desktop: After adding page numbers and any other desired formatting, print your worksheet directly from the Excel desktop application. The printed output will now include page numbers.
By mastering these techniques, you can efficiently print Excel sheets in various formats directly from Excel for the web. For more advanced printing options like page numbers and printing multiple sheets at once, leveraging the Excel desktop application provides additional functionalities.