Text messages on your Android phone are typically confined to the digital realm. However, situations arise where having a hard copy becomes necessary – be it for legal documentation, personal archiving, or simply sharing a conversation offline. Printing text messages from your Android device isn’t immediately obvious, but it’s definitely achievable. This guide will walk you through the most effective methods to print your Android SMS messages, ensuring you have a tangible record when you need it.
Method 1: Printing Android Text Messages via Screenshots
For a quick and straightforward approach that maintains the visual authenticity of your text conversation, screenshots are your best bet. This method captures exactly what you see on your screen, preserving timestamps and conversation flow.
To begin, navigate to the text message conversation you wish to print on your Android phone. Scroll to the beginning of the messages you want to include in your printout. To capture a screenshot, simultaneously press and hold the Power button and the Volume Down button for a brief moment. Your screen will flash, indicating a successful screenshot capture.
 Pressing the Power and Volume Down buttons to take a screenshot on an Android phone
For longer conversations, utilize the scrolling screenshot feature available on most modern Android devices. This handy tool allows you to capture an extended portion of the chat in a single image, minimizing the number of screenshots you need to take. Check your Android device’s manual or online resources for specific instructions on how to activate scrolling screenshots, especially if you are using a Samsung Galaxy device, which might have a slightly different process explained here.
 Tapping the scroll capture icon to take a scrolling screenshot on an Android device
When taking screenshots, readability is key. While scrolling screenshots are convenient, excessively long images might make the text appear too small when printed on a standard page. Consider cropping your screenshots to focus on key sections of the conversation, especially if page space is a concern. Learn how to crop screenshots on your Android device for better print formatting. However, exercise caution when cropping if the printed messages are intended for legal purposes, as excessive cropping might raise questions about the integrity of the evidence.
Once you have captured all the necessary screenshots, the next step is to compile them into a printable document. Word processing applications like Google Docs or Microsoft Word are perfect for this. For this guide, we’ll use Google Docs for Android, but the process is similar in other apps. You can download Google Docs from the Google Play Store or Microsoft Word from Google Play Store. Open a new blank document and insert your screenshots as images.
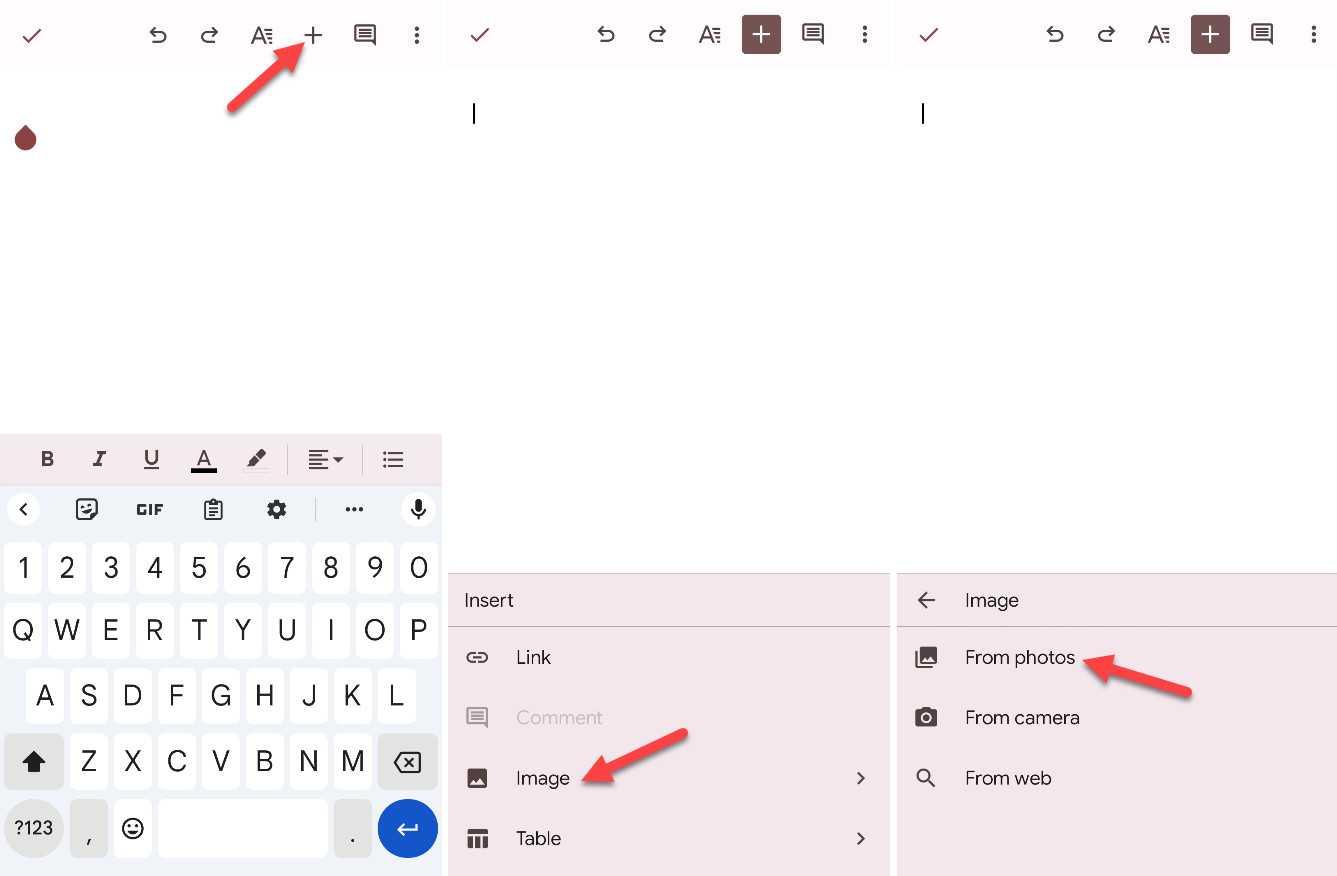 Inserting a screenshot image into a Google Docs document on Android
Arrange and resize the images within the document to optimize page usage and readability. You can typically fit multiple screenshots on a single page by carefully resizing them.
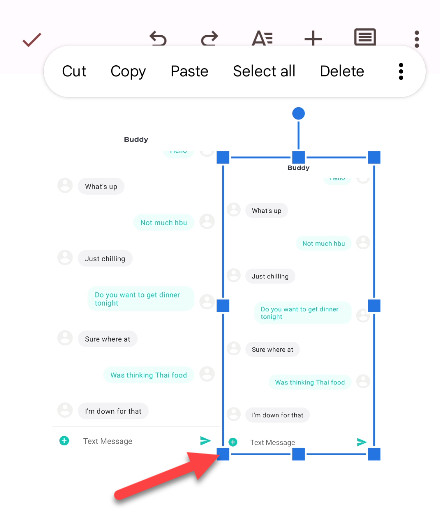 Resizing and arranging screenshot images within a Google Docs document on Android
After arranging your screenshots, access the print function. In Google Docs, tap the three-dot menu icon in the top right corner and select “Share & export,” then find the “Print” option. The location of the print option might slightly vary depending on the word processing application you are using, but it is usually found within the “File” or “Menu” options.
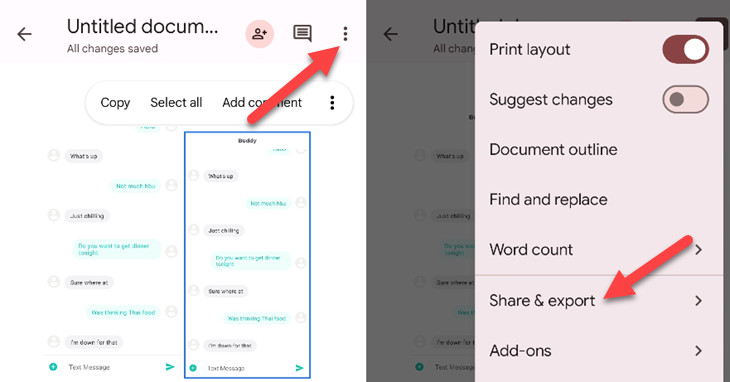 Accessing the print option from the Share & export menu in Google Docs on Android
Select “Print” to proceed to the Android printing dialog.
 Selecting the Print option in the Share & export menu of Google Docs on Android
Android’s built-in print dialog will appear, providing options to print directly to a Wi-Fi connected printer or save the document as a PDF. Saving as a PDF is useful if you need to transfer the file to a computer connected to a printer. Learn more about PDF files and how to use them.
You can customize print settings like paper size, orientation, and color by expanding the “More options” menu within the print dialog.
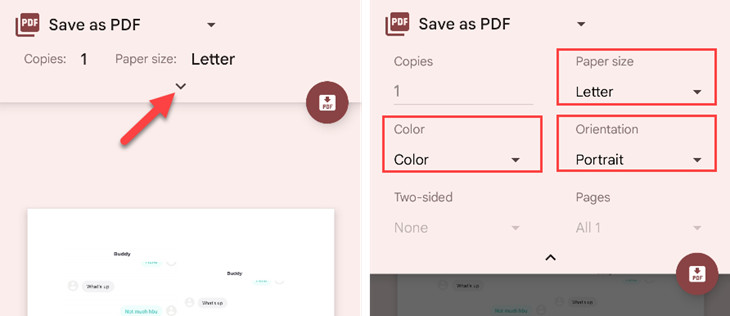 Adjusting printer options such as paper size and orientation in the Android print dialog
Finally, tap the printer icon to initiate printing, or the “Save as PDF” button to create a digital copy of your text messages.
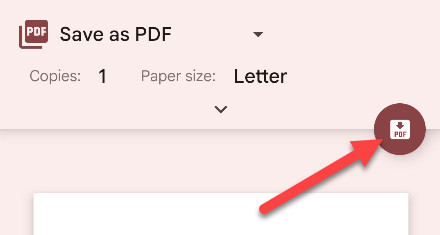 Tapping the print icon in the Android print dialog to start printing
While this screenshot method might not be the most refined solution, it provides a quick and reliable way to obtain a printed version of your text conversations directly from your Android phone.
Method 2: Printing Android Text Message Transcripts Using Third-Party Apps
If screenshots are not ideal, or if you prefer a more text-based transcript of your messages, third-party apps offer a solution. These apps create text transcripts of your SMS conversations, which you can then print. However, it’s crucial to note that transcripts generated by third-party apps might not be accepted as authentic records in legal contexts. Disclaimer: We are not legal professionals, and for any legal advice regarding text message evidence, it is recommended to consult with an attorney. Understanding what “IANAL” means is important when seeking legal interpretations online.
For this method, we will use the “SMS Backup & Restore” app, a popular free app available on the Google Play Store with over 10 million downloads and a solid 4-star rating. You can download “SMS Backup & Restore” from the Google Play Store. After installing, open the app and grant it the necessary permissions to access your SMS messages, contacts, and call logs.
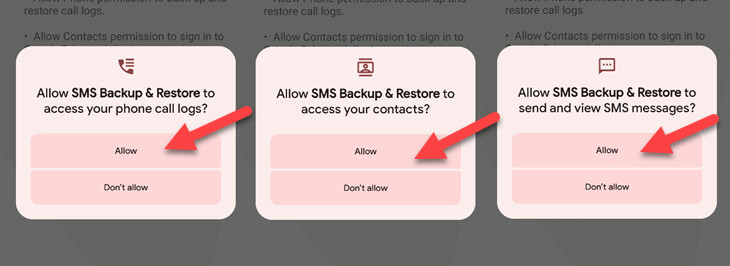 Granting permissions to the SMS Backup & Restore app on Android
To create a printable transcript, you first need to back up your text messages using the app. Tap the “Set up a backup” button on the app’s main screen.
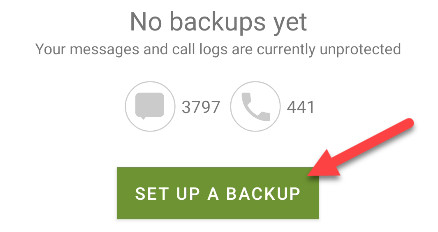 Tapping the Set up a backup button in the SMS Backup & Restore app
Ensure that “Messages” is selected for backup. Then, tap “Advanced options” to refine your backup settings.
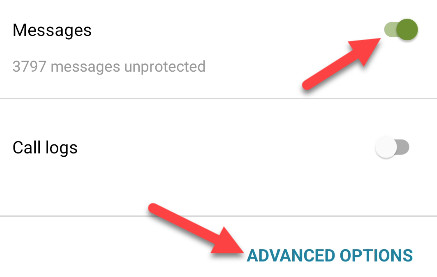 Selecting Messages and tapping Advanced Options in the backup setup of SMS Backup & Restore app
Within “Advanced Options,” select “Selected conversations only” and tap “Change” to choose the specific conversations you want to print. You can also choose to include “Attachments and Media” if needed.
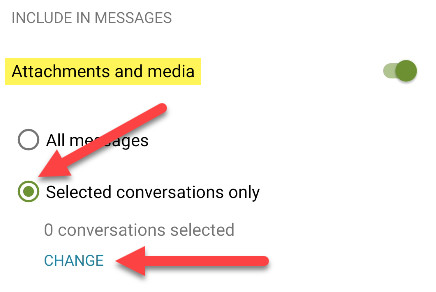 Selecting Selected Conversations Only and changing conversation selection in Advanced Options of SMS Backup & Restore app
Tap “Next” to proceed with the backup setup.
Choose your backup destination and tap “Next” again. Options typically include local storage on your device or cloud services.
 Choosing backup destination in SMS Backup & Restore app
Disable “Schedule recurring backups” and tap “Back Up Now” to initiate an immediate backup of your selected text messages.
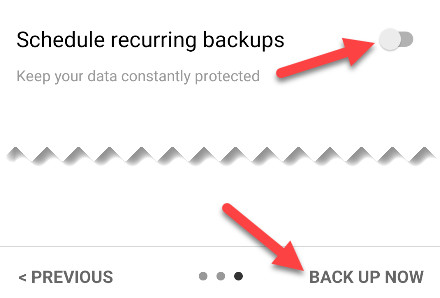 Tapping Back Up Now to start the backup process in SMS Backup & Restore app
Once the backup is complete, access the app’s menu by tapping the hamburger menu icon in the top left corner and select “View Backups.”
Navigate to and open the backup you just created.
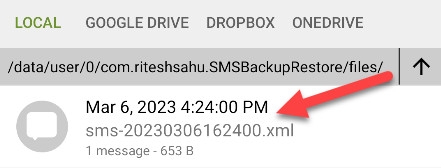 Opening the newly created backup in SMS Backup & Restore app
Tap the three-dot menu icon next to the specific conversation you wish to print.
Finally, select “Print Conversation” from the options menu.
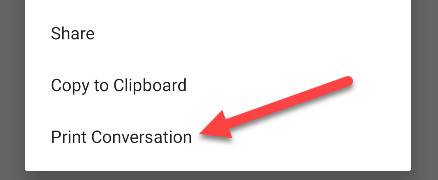 Selecting Print Conversation from the options menu for a specific conversation backup in SMS Backup & Restore app
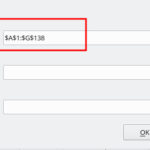
The standard Android print dialog will appear, previewing your text conversation in a spreadsheet-like format. You can then print directly or save as a PDF, similar to the screenshot method.
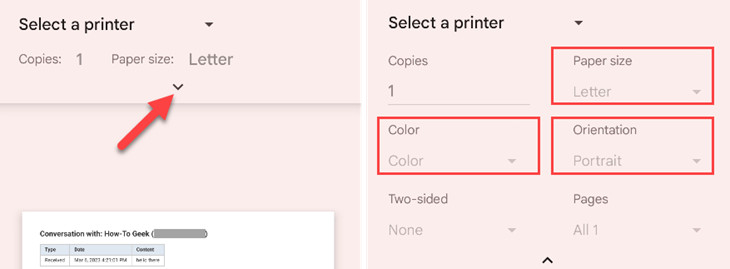 Preview of the text message transcript in the Android print dialog from SMS Backup & Restore app
Adjust print settings as needed and tap the print icon or “PDF” button to finalize the process.
Tapping the print icon in the Android print dialog to start printing
This transcript method offers a cleaner, text-based output compared to screenshots. However, it’s important to be aware that transcripts might be more easily editable than image-based screenshots, which could be a factor depending on your intended use.
While Android doesn’t offer a direct built-in print SMS function, these methods provide viable workarounds. Interestingly, transferring text messages from iPhone to Android is surprisingly streamlined. Furthermore, if you need to recover deleted text messages on your Android device, several recovery options are available.