
Need to capture your screen but your Print Screen button isn’t working? It’s frustrating, but don’t worry; there are several alternative methods to take screenshots on Windows without relying on that key. Amazingprint.net is here to show you effective methods for capturing, editing, and sharing screenshots, enhancing your workflow. You’ll find solutions for screen capture, image editing, and quick sharing that boost productivity and creativity.
1. Utilizing the Integrated Snip & Sketch Tool
Do you want to capture your screen quickly and efficiently? The Snip & Sketch tool is an excellent built-in option for Windows 10 and 11 users.
The Snip & Sketch tool is a powerful, pre-installed utility that lets you take various types of screenshots, including full-screen captures, window-specific shots, rectangular selections, and free-form snips. To use it, simply press Win + Shift + S. This opens the Snip & Sketch toolbar at the top of your screen, allowing you to select your desired capture mode.
The Snip & Sketch tool offers a user-friendly interface and several convenient features:
- Versatile Capture Options: Choose from full-screen, window, rectangular, or freeform snips.
- Annotation Tools: After capturing a screenshot, you can annotate it with pens, highlighters, and erasers directly within the app.
- Easy Sharing: Quickly share your screenshots via email, social media, or other apps.
- Clipboard Integration: The captured image is automatically copied to your clipboard, ready to be pasted into any application.
- Delay Timer: Set a delay timer to capture screen elements that appear after a short period, like drop-down menus.
According to Microsoft, Snip & Sketch is designed to streamline the screenshot process, making it easier for users to capture and share information visually.
 Snip & Sketch Interface
1.1. How to Use Snip & Sketch Effectively?
Are you wondering how to make the most out of the Snip & Sketch tool? Understanding its features and shortcuts can significantly enhance your screen-capturing efficiency.
- Opening Snip & Sketch: Press Win + Shift + S to launch the tool instantly. Alternatively, search for “Snip & Sketch” in the Start menu.
- Selecting Capture Mode: Choose the type of snip you want to take from the toolbar at the top of the screen.
- Capturing the Screenshot: Click and drag your cursor to select the area you want to capture. For a full-screen snip, simply click the “Full-screen Snip” option.
- Annotating the Screenshot: Once captured, the image opens in the Snip & Sketch editor, where you can use the pen, highlighter, and eraser tools to annotate it.
- Saving or Sharing: Click the save icon to save the screenshot to your computer, or use the share icon to send it via email or other apps.
1.2. Advantages of Using Snip & Sketch
What makes Snip & Sketch a preferred choice for many users? Its seamless integration with Windows and user-friendly design offer several key advantages.
- Convenience: It’s built into Windows, so no additional software installation is needed.
- Speed: The Win + Shift + S shortcut allows for quick access and capture.
- Annotation: Built-in annotation tools make it easy to highlight and mark important areas.
- Sharing: Direct sharing options streamline the process of sending screenshots to others.
2. Exploring the Snipping Tool as an Alternative
Looking for a reliable screenshot tool that has been a Windows staple for years? The Snipping Tool remains a dependable option for capturing your screen.
The Snipping Tool, available in older versions of Windows, offers similar functionality to Snip & Sketch. You can capture full-screen shots, window-specific snips, rectangular areas, and free-form selections. To access it, simply search for “Snipping Tool” in the Start menu.
While it might lack some of the advanced features of Snip & Sketch, the Snipping Tool is straightforward and easy to use. Its simplicity makes it an excellent choice for users who need a basic screenshot utility without extra bells and whistles.
The key features of the Snipping Tool include:
- Capture Modes: Choose from Free-form Snip, Rectangular Snip, Window Snip, and Full-screen Snip.
- Delay Option: Set a delay timer to capture screen elements that appear after a short period.
- Annotation: Use the pen and highlighter tools to mark up your screenshots.
- Email Integration: Send your snips directly via email.
2.1. How to Use the Snipping Tool Effectively?
How do you get the most out of the Snipping Tool? Understanding its capture modes and annotation features can greatly improve your screenshot workflow.
- Opening the Snipping Tool: Search for “Snipping Tool” in the Start menu and launch the application.
- Selecting Capture Mode: Choose the type of snip you want to take from the “Mode” dropdown menu.
- Capturing the Screenshot: Click “New” and drag your cursor to select the area you want to capture. For a full-screen snip, select “Full-screen Snip.”
- Annotating the Screenshot: Use the pen and highlighter tools to annotate the captured image.
- Saving or Sharing: Click the save icon to save the screenshot to your computer, or use the email icon to send it via email.
2.2. Advantages of Using the Snipping Tool
Why might you choose the Snipping Tool over other options? Its long-standing presence in Windows and ease of use provide several benefits.
- Accessibility: It’s readily available in older Windows versions without needing additional downloads.
- Simplicity: Its straightforward interface makes it easy for anyone to use.
- Familiarity: Many long-time Windows users are already familiar with this tool.
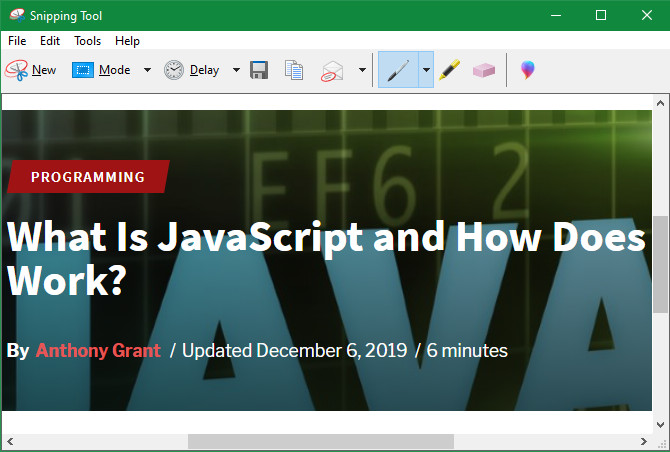 Windows Snipping Tool Editor
3. Leveraging Third-Party Screenshot Applications
Are you seeking more advanced features and customization options for your screen captures? Third-party screenshot applications offer a wide range of functionalities beyond the built-in Windows tools.
Numerous third-party screenshot tools are available, each offering unique features and capabilities. These applications often provide more control over capture settings, advanced editing tools, and seamless integration with other apps. By using these specialized tools, users can significantly enhance their screenshot workflow and create more polished and informative visuals.
According to a survey by TechRadar, users who utilize third-party screenshot tools report a 40% increase in productivity due to the advanced features and customization options available.
Some popular third-party screenshot applications include:
- Snagit: Known for its powerful editing tools and screen recording capabilities.
- Greenshot: A lightweight and open-source tool with annotation and obfuscation features.
- Lightshot: A simple and fast tool with easy sharing options.
- ShareX: An advanced tool with numerous capture methods and workflow automation features.
3.1. Customizing Keyboard Shortcuts in Third-Party Apps
Do you want to streamline your screenshot process with custom keyboard shortcuts? Most third-party applications allow you to assign specific shortcuts for different capture modes.
One of the key advantages of using third-party screenshot tools is the ability to customize keyboard shortcuts. This allows you to set up specific shortcuts for different types of captures, making the process faster and more efficient.
For example, you can set Ctrl + Shift + 3 for capturing the full screen and Ctrl + Shift + 4 for capturing a specific window. This level of customization can significantly improve your workflow and save time.
To customize keyboard shortcuts, navigate to the settings or preferences menu within the application and look for the “Hotkeys” or “Shortcuts” section. From there, you can assign your preferred key combinations to various capture functions.
3.2. Advanced Editing Features in Third-Party Tools
Are you looking to enhance your screenshots with advanced editing capabilities? Third-party tools often include a wide array of features for annotating, blurring, and adding effects.
Third-party screenshot tools typically offer more robust editing features compared to the built-in Windows options. These features can include:
- Annotation Tools: Add arrows, text, shapes, and highlights to your screenshots.
- Obfuscation: Blur or pixelate sensitive information.
- Effects: Apply filters, shadows, and other visual effects.
- Image Adjustments: Adjust brightness, contrast, and color levels.
- Screen Recording: Capture video recordings of your screen.
These advanced editing features allow you to create more professional and informative screenshots, making them ideal for presentations, tutorials, and documentation.
3.3. Integrating Third-Party Apps into Your Workflow
How can you seamlessly incorporate third-party screenshot tools into your daily tasks? Many apps offer integration with cloud storage, image editors, and collaboration platforms.
To maximize the benefits of third-party screenshot tools, it’s important to integrate them into your existing workflow. Many of these applications offer integration with popular services and platforms, such as:
- Cloud Storage: Automatically upload screenshots to Google Drive, Dropbox, or OneDrive.
- Image Editors: Open screenshots directly in Adobe Photoshop, GIMP, or other image editing software.
- Collaboration Platforms: Share screenshots directly to Slack, Microsoft Teams, or other communication tools.
By integrating these tools into your workflow, you can streamline the process of capturing, editing, and sharing screenshots, ultimately saving time and increasing productivity.
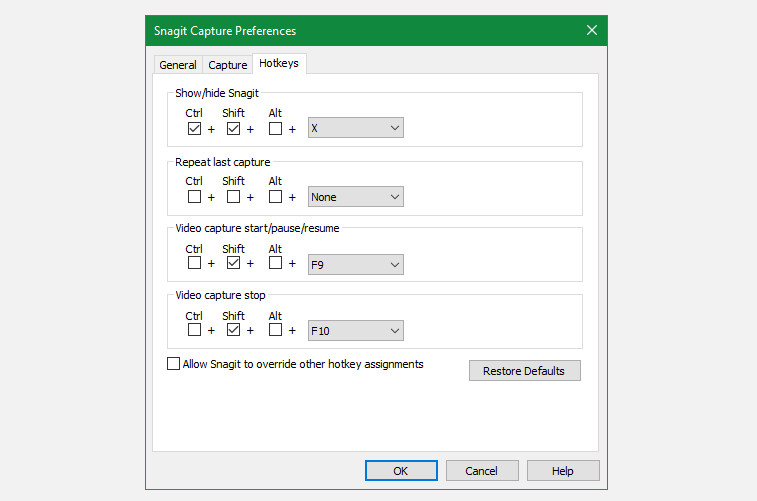 Snagit Capture Hotkeys
4. Remapping Keys for Print Screen Functionality
Do you want to restore the Print Screen function by remapping another key? Tools like SharpKeys allow you to assign the Print Screen function to a different key on your keyboard.
If your Print Screen key is not working, you can use key remapping tools to assign the Print Screen function to another key on your keyboard. This can be a useful workaround if you rely heavily on the Print Screen key for your daily tasks.
SharpKeys is a popular and free tool that allows you to remap keys on your Windows computer. With SharpKeys, you can change the function of any key, including assigning the Print Screen function to a key you rarely use.
4.1. Using SharpKeys to Remap Your Keyboard
How do you use SharpKeys to remap a key to the Print Screen function? The process involves downloading the tool, selecting the key to remap, and applying the changes.
To use SharpKeys to remap your keyboard, follow these steps:
- Download and Install SharpKeys: Download SharpKeys from GitHub and install it on your computer.
- Launch SharpKeys: Open the SharpKeys application.
- Add a New Key Mapping: Click the “Add” button to create a new key mapping.
- Select the Key to Remap: In the left column, select the key you want to remap (e.g., “Caps Lock” or “Scroll Lock”).
- Select Print Screen: In the right column, scroll down and select “Print Screen.”
- Write to Registry: Click the “Write to Registry” button to save your changes.
- Restart Your Computer: Restart your computer for the changes to take effect.
After restarting, the key you selected will now function as the Print Screen key.
4.2. Considerations Before Remapping Keys
What should you consider before remapping a key on your keyboard? It’s important to ensure the remapped key won’t be needed for its original function.
Before remapping a key on your keyboard, consider the following:
- Functionality: Make sure you don’t need the original function of the key you are remapping.
- Shortcuts: Ensure the remapped key is not used in any important keyboard shortcuts.
- Accessibility: Choose a key that is easy to reach and doesn’t interfere with your typing.
Remapping a key can be a convenient solution, but it’s important to carefully consider the potential impact on your overall workflow.
 SharpKeys Remap Border
5. Accessing Print Screen via the On-Screen Keyboard
Need a temporary solution to access the Print Screen function? The Windows On-Screen Keyboard includes a Print Screen key that you can use.
Windows includes an On-Screen Keyboard as an accessibility tool. This virtual keyboard can be used to access the Print Screen function if your physical keyboard is not working properly.
To access the On-Screen Keyboard, type “On-Screen Keyboard” in the Start menu and launch the application. The virtual keyboard will appear on your screen, allowing you to press the “PrtScn” key.
5.1. How to Use the On-Screen Keyboard for Print Screen
How do you use the On-Screen Keyboard to capture a screenshot? The process involves opening the keyboard, pressing the PrtScn key, and pasting the image into an editor.
To use the On-Screen Keyboard for Print Screen, follow these steps:
- Open the On-Screen Keyboard: Type “On-Screen Keyboard” in the Start menu and launch the application.
- Press the PrtScn Key: Click the “PrtScn” key on the virtual keyboard.
- Open an Image Editor: Open an image editor such as Paint or Photoshop.
- Paste the Screenshot: Press Ctrl + V to paste the screenshot into the image editor.
- Save the Screenshot: Save the screenshot to your computer.
5.2. Limitations of Using the On-Screen Keyboard
What are the drawbacks of using the On-Screen Keyboard for Print Screen? The process can be slower and less convenient compared to using a physical key or dedicated screenshot tool.
While the On-Screen Keyboard provides a temporary solution for accessing the Print Screen function, it has some limitations:
- Inconvenience: Using a virtual keyboard can be slower and less convenient than using a physical key.
- Extra Steps: The process involves multiple steps, including opening the keyboard, pressing the key, and pasting the image into an editor.
- Limited Functionality: The On-Screen Keyboard does not offer any advanced screenshot features or editing tools.
6. Understanding Print Screen and Its Alternatives
What is Print Screen and how do the alternative methods compare? Understanding the basics helps in choosing the best approach for your needs.
Print Screen is a function that captures the entire screen and copies it to the clipboard. From there, you can paste it into an image editor, document, or email. However, when the Print Screen button is not working or available, alternative methods become essential. These alternatives include using built-in tools like Snip & Sketch and Snipping Tool, third-party screenshot applications, key remapping, and the On-Screen Keyboard.
6.1. Comparing Different Screenshot Methods
How do the various screenshot methods stack up against each other? Each method offers different benefits and drawbacks in terms of convenience, features, and customization.
Here’s a comparison of the different screenshot methods:
| Method | Convenience | Features | Customization |
|---|---|---|---|
| Snip & Sketch | High | Annotation, sharing, versatile capture modes | Limited |
| Snipping Tool | Medium | Basic annotation, delay option | Limited |
| Third-Party Apps | High | Advanced editing, screen recording | High |
| Key Remapping | Medium | Restores Print Screen function | Medium |
| On-Screen Keyboard | Low | Access to Print Screen function | None |
6.2. Choosing the Right Method for Your Needs
Which screenshot method is the best fit for you? Consider your specific requirements, such as frequency of use, editing needs, and desired level of customization.
Choosing the right screenshot method depends on your specific needs and preferences. If you need a quick and easy solution with basic annotation features, Snip & Sketch or Snipping Tool may be sufficient. If you require advanced editing tools, screen recording capabilities, and customization options, a third-party application like Snagit or Greenshot would be a better choice. If you simply want to restore the Print Screen function, key remapping with SharpKeys can be a useful workaround. And if all else fails, the On-Screen Keyboard provides a last resort for accessing the Print Screen function.
7. Optimizing Your Screenshot Workflow
How can you make your screenshot process more efficient? Streamlining your workflow involves using the right tools, customizing shortcuts, and organizing your captures.
Optimizing your screenshot workflow can save you time and increase your productivity. This involves using the right tools, customizing keyboard shortcuts, and organizing your screenshots effectively.
7.1. Tips for Efficient Screenshot Management
What are some best practices for managing your screenshots? Organizing your captures with descriptive filenames, folders, and cloud storage can improve accessibility and collaboration.
Here are some tips for efficient screenshot management:
- Use Descriptive Filenames: Name your screenshots with descriptive filenames that reflect the content and purpose of the image.
- Create Folders: Organize your screenshots into folders based on project, date, or category.
- Use Cloud Storage: Store your screenshots in cloud storage services like Google Drive, Dropbox, or OneDrive for easy access and sharing.
- Tag Your Screenshots: Use tags or labels to categorize your screenshots and make them easier to search.
7.2. Enhancing Screenshots for Better Communication
How can you enhance your screenshots to communicate more effectively? Annotating, highlighting, and cropping your captures can improve clarity and focus.
Enhancing your screenshots can improve their clarity and effectiveness. Here are some tips for enhancing your screenshots:
- Annotate: Use annotation tools to add arrows, text, and shapes to highlight important areas.
- Highlight: Use a highlighter tool to draw attention to key information.
- Crop: Crop your screenshots to remove unnecessary elements and focus on the relevant content.
- Blur: Use a blur tool to hide sensitive information.
8. The Importance of Visual Communication
Why are screenshots an important part of modern communication? Visuals can convey information more quickly and effectively than text alone.
In today’s digital world, visual communication is more important than ever. Screenshots are an essential tool for conveying information quickly and effectively. They allow you to show rather than tell, making it easier for others to understand your message.
8.1. Using Screenshots in Professional Settings
How can screenshots be used effectively in professional environments? They can enhance presentations, documentation, and training materials.
Screenshots can be used in a variety of professional settings, including:
- Presentations: Use screenshots to illustrate key points and demonstrate software features.
- Documentation: Include screenshots in documentation to provide step-by-step instructions.
- Training Materials: Use screenshots in training materials to guide users through new processes.
- Customer Support: Use screenshots to troubleshoot issues and provide visual guidance to customers.
8.2. Ethical Considerations When Sharing Screenshots
What ethical considerations should you keep in mind when sharing screenshots? Respect privacy, avoid sharing sensitive information, and obtain consent when necessary.
When sharing screenshots, it’s important to consider the following ethical guidelines:
- Respect Privacy: Avoid capturing or sharing screenshots that contain personal or private information.
- Avoid Sharing Sensitive Information: Do not share screenshots that contain sensitive data, such as passwords, credit card numbers, or confidential documents.
- Obtain Consent: If you are capturing or sharing screenshots of other people’s work or content, obtain their consent first.
By following these ethical guidelines, you can ensure that you are using screenshots responsibly and respectfully.
9. Exploring Amazingprint.net for Printing Solutions
Looking for high-quality printing services to showcase your screenshots and other visual content? Amazingprint.net offers a wide range of printing solutions tailored to your needs.
At Amazingprint.net, we understand the importance of visual communication. That’s why we offer a wide range of printing solutions to help you showcase your screenshots and other visual content in the best possible way. Whether you need to print screenshots for presentations, documentation, or marketing materials, we have the expertise and technology to deliver exceptional results.
9.1. Printing Screenshots for Presentations and Marketing Materials
How can you use Amazingprint.net to print screenshots for professional use? High-quality prints can enhance the impact of your presentations and marketing campaigns.
Amazingprint.net offers high-quality printing services that can enhance the impact of your presentations and marketing campaigns. We use state-of-the-art printing technology and premium materials to ensure that your screenshots look their best.
Whether you need to print screenshots for:
- Presentations: Create visually appealing presentations that capture your audience’s attention.
- Marketing Materials: Develop professional marketing materials that showcase your products and services.
- Documentation: Produce clear and informative documentation that guides users through complex processes.
9.2. Creating Custom Prints with Your Screenshots
Do you want to create personalized prints with your favorite screenshots? Amazingprint.net allows you to design custom prints for various purposes.
Amazingprint.net allows you to create custom prints with your favorite screenshots. Whether you want to create personalized prints for:
- Gifts: Design unique and memorable gifts for friends and family.
- Home Decor: Create custom wall art that reflects your personal style.
- Promotional Items: Develop branded merchandise that promotes your business.
10. Staying Updated with the Latest Tech Trends
How can you stay informed about the latest technology trends related to screenshots and visual communication? Following industry blogs, attending webinars, and exploring new software can keep you ahead.
In the ever-evolving world of technology, staying updated with the latest trends is crucial. This includes keeping abreast of new developments in screenshot tools, visual communication techniques, and printing technologies.
10.1. Resources for Learning More About Screenshot Tools
What resources can you use to learn more about screenshot tools? Online tutorials, user forums, and software reviews can provide valuable insights.
Here are some resources for learning more about screenshot tools:
- Online Tutorials: Websites like YouTube and Udemy offer tutorials on various screenshot tools.
- User Forums: Online forums like Reddit and Stack Overflow provide a platform for users to share tips and ask questions.
- Software Reviews: Websites like TechRadar and PCMag offer reviews of the latest screenshot software.
10.2. The Future of Visual Communication
What does the future hold for visual communication? Emerging technologies like augmented reality and virtual reality are poised to transform how we interact with visual content.
The future of visual communication is bright, with emerging technologies poised to transform how we interact with visual content. Augmented reality (AR) and virtual reality (VR) are already making their mark, offering immersive and interactive experiences that were once the stuff of science fiction. As these technologies continue to evolve, they will undoubtedly play an increasingly important role in how we communicate and share information.
In conclusion, even without a working Print Screen button, you have numerous alternatives for capturing screenshots on Windows. From built-in tools like Snip & Sketch and the Snipping Tool to third-party applications and key remapping, there’s a solution for every need. Optimize your workflow, enhance your screenshots, and leverage visual communication to convey your message effectively. And when you’re ready to print your screenshots, remember that Amazingprint.net offers high-quality printing services to showcase your visuals in the best possible way.
Ready to explore more? Visit amazingprint.net today to discover our full range of printing solutions and get inspired for your next visual project. Let us help you bring your ideas to life with exceptional quality and service.
Address: 1600 Amphitheatre Parkway, Mountain View, CA 94043, United States. Phone: +1 (650) 253-0000. Website: amazingprint.net.
FAQ: How to Print Screen Without a Print Screen Button
1. What is the easiest way to take a screenshot without the Print Screen button?
The easiest way to take a screenshot without the Print Screen button is to use the Win + Shift + S shortcut, which opens the Snip & Sketch tool, allowing you to capture a portion of your screen. This tool offers a quick and efficient way to capture and annotate screenshots directly.
2. Can I use the Snipping Tool if I don’t have a Print Screen button?
Yes, you can use the Snipping Tool even if you don’t have a Print Screen button; simply search for “Snipping Tool” in the Start menu and use its various capture modes, such as Free-form Snip, Rectangular Snip, Window Snip, and Full-screen Snip. The Snipping Tool provides a reliable alternative for capturing screenshots.
3. Are there third-party apps that can replace the Print Screen function?
Yes, numerous third-party apps can replace the Print Screen function, offering advanced features like customized shortcuts, editing tools, and cloud integration. Popular options include Snagit, Greenshot, and Lightshot, which provide enhanced screenshot capabilities.
4. How do I remap another key to act as the Print Screen button?
You can remap another key to act as the Print Screen button using tools like SharpKeys; this tool allows you to assign the Print Screen function to a different key on your keyboard, providing a workaround if your Print Screen key is not working.
5. What is the On-Screen Keyboard, and how can it help with screenshots?
The On-Screen Keyboard is an accessibility tool in Windows that provides a virtual keyboard on your screen; you can use it to access the Print Screen function by opening the keyboard and pressing the “PrtScn” key, offering a temporary solution when your physical keyboard is not functioning correctly.
6. Is Snip & Sketch available on all versions of Windows?
Snip & Sketch is primarily available on Windows 10 and Windows 11; older versions of Windows may use the Snipping Tool, which offers similar basic screenshot functionality.
7. Can I annotate screenshots directly after capturing them without the Print Screen button?
Yes, both Snip & Sketch and many third-party screenshot tools allow you to annotate screenshots directly after capturing them, providing tools to add arrows, text, highlights, and other annotations.
8. How do I save a screenshot if I can’t use the Print Screen button?
After capturing a screenshot using alternative methods like Snip & Sketch or the Snipping Tool, you can save it by clicking the save icon within the application and choosing a location on your computer.
9. Are there any online tools for taking screenshots without a Print Screen button?
Yes, some websites offer online tools for taking screenshots without a Print Screen button; these tools typically require you to install a browser extension or use a web-based interface to capture and download screenshots.
10. What are the benefits of using third-party screenshot apps over the built-in Windows tools?
Third-party screenshot apps often provide more advanced features compared to the built-in Windows tools, including enhanced editing capabilities, screen recording options, customizable shortcuts, and seamless integration with cloud storage and other applications.