
Printing directly from your iPad is a convenient feature, whether you need a hard copy of a document, a photo, or even a screenshot of your screen. While the term “print screen” might be associated with capturing screenshots, on iPad, printing encompasses a broader range of functionalities. This guide will walk you through the simple steps to print from your iPad, ensuring you can easily get your digital content onto paper.
Printing Directly from Your iPad: Utilizing the Share Icon
The primary method for printing from your iPad involves using the Share icon. This versatile icon, represented by an arrow pointing upwards from a box, is your gateway to various actions, including printing. Here’s how to use it to print:
-
Locate the Share Icon: Regardless of the app you are using – be it Safari, Photos, Files, or others – look for the Share icon. It’s typically situated at the top or bottom corner of your screen.
-
Tap the Share Icon: Once you’ve found it, tap the Share icon. This will open up a menu with a variety of options.
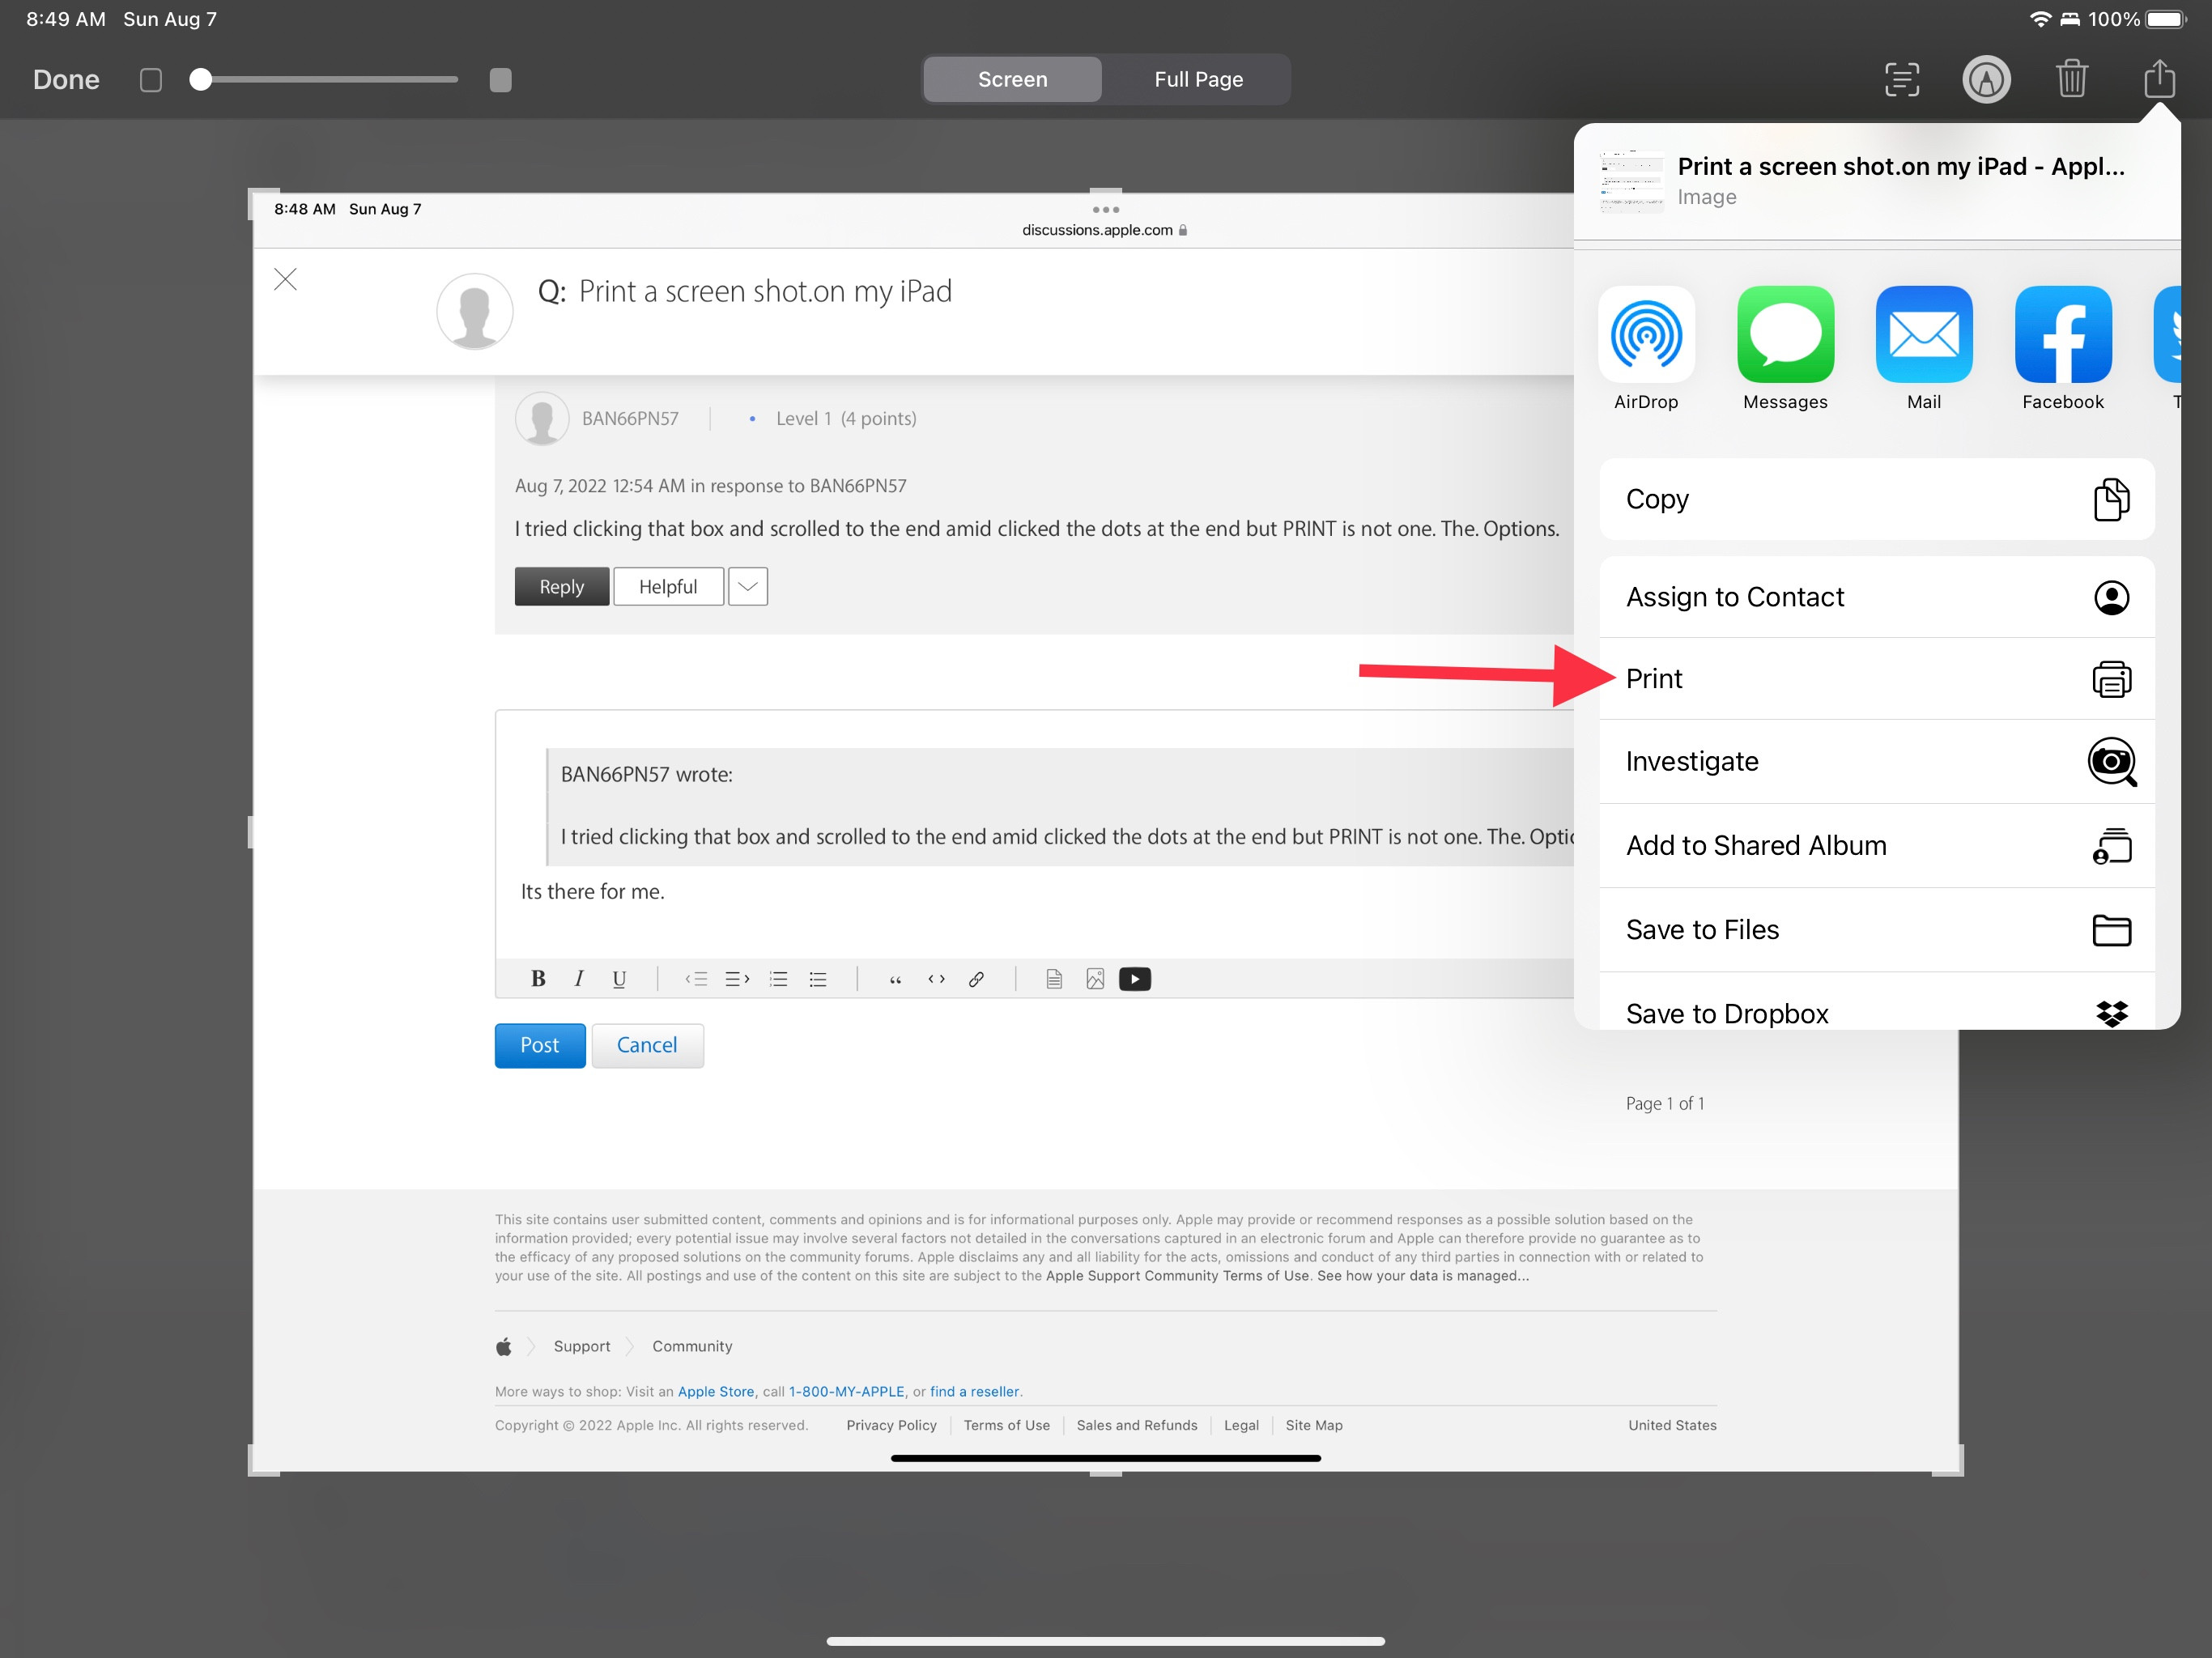 Locate the Print option within the Share menu on your iPad, indicated by the arrow icon coming out of a box, as shown in this iPad screen capture.
 -
Scroll and Find “Print”: In the Share menu, scroll through the options. You will find the “Print” option listed among other actions like “Copy,” “Save to Files,” and more. You might need to scroll down to see it, depending on the app and other available actions.
-
Select “Print”: Tap on “Print.” This will open the Printer Options screen.
-
Choose Your Printer and Settings: On the Printer Options screen, you can select your printer (make sure your printer is AirPrint-compatible or connected to the same Wi-Fi network as your iPad). You can also adjust settings like the number of copies, paper size, and range of pages if you’re printing a document.
-
Tap “Print”: After configuring your settings, tap the “Print” button in the top right corner. Your iPad will then send the content to your selected printer.
Printing Photos from the Photos App
If you want to print photos directly from your iPad’s Photo Library, the process is equally straightforward:
- Open the Photos App: Launch the Photos app and navigate to the photo you wish to print.
- Tap the Share Icon: Tap the Share icon, usually located in the bottom left corner when viewing a photo.
- Scroll and Select “Print”: In the Share menu, scroll down and tap on “Print”.
- Choose Printer and Print: Select your printer and adjust any necessary settings in the Printer Options, then tap “Print”.
Printing PDFs from the Files App
For printing PDF documents stored on your iPad in the Files app:
- Open the Files App: Open the Files app and locate the PDF document you want to print.
- Select the PDF: Tap on the PDF to open it for viewing.
- Tap the Share Icon: Tap the Share icon, usually located at the top right or bottom left corner.
- Scroll and Select “Print”: Find and tap “Print” in the Share menu.
- Choose Printer and Print: Select your printer and adjust settings in the Printer Options as needed, then tap “Print”.
Troubleshooting Printing Issues
If you encounter issues while trying to print from your iPad, consider these common troubleshooting steps:
- Check Printer Connection: Ensure your printer is properly connected to a power source and is on the same Wi-Fi network as your iPad.
- AirPrint Compatibility: Verify that your printer supports AirPrint. If not, you may need to use the printer manufacturer’s app.
- Software Updates: Make sure your iPad’s operating system (iPadOS) and printer firmware are up to date.
- Restart Devices: Try restarting both your iPad and your printer.
Printing from your iPad is designed to be a user-friendly process. By utilizing the Share icon and ensuring your printer is correctly set up, you can easily print various types of content directly from your iPad. Whether it’s documents, photos, or web pages, your iPad offers a seamless printing experience.