
Are you wondering how to print beautiful save the dates from Canva? With Canva and amazingprint.net, designing and printing your dream save the dates is easier than you think, allowing you to add a personal touch to your wedding preparations. Dive into this guide to discover how to create stunning, personalized announcements that perfectly capture the essence of your special day.
1. Why Use Canva to Design Your Save the Dates?
Canva has become a favorite tool for creating wedding stationery, and for good reason. It simplifies the design process and offers a range of benefits. Let’s explore the key advantages of using Canva for your save-the-date cards:
- User-Friendly Interface: Canva’s drag-and-drop interface makes it incredibly easy for anyone to create professional-looking designs, even without prior experience. This simplicity is crucial when you’re juggling multiple wedding planning tasks.
- Extensive Template Library: With hundreds of customizable templates, Canva provides a starting point for various wedding themes, from rustic to modern. These templates can save you time and inspire your creativity.
- Customization Options: Canva allows you to tailor every design element to match your wedding theme. You can easily change fonts, colors, images, and layouts to reflect your personal style.
- Cost-Effective: Canva offers a free version with plenty of features, and the premium options are affordable. This makes it a budget-friendly choice for couples looking to save money on wedding stationery.
- Accessibility: Being a web-based platform, Canva is accessible from any device with an internet connection. This means you can work on your designs anytime, anywhere, making it convenient for busy couples.
- Collaboration Features: Canva allows you to easily share your designs with your partner, friends, or family for feedback. This collaborative aspect ensures everyone’s input is considered, leading to a design you’ll all love.
2. What Are the First Steps to Take in Canva?
Before diving into design, there are a couple of essential steps to get started with Canva. Here’s how to set up your account and navigate the platform:
-
Create a Canva Account:
- Visit Canva’s website (www.canva.com) and sign up for a free account. You can use your email address, Google account, or Facebook account to register.
- Consider upgrading to Canva Pro for additional features and benefits, such as access to premium templates, graphics, and tools. Canva often offers a 30-day free trial for Canva Pro, allowing you to explore these enhanced capabilities.
-
Explore Canva’s Interface:
- Familiarize yourself with the Canva dashboard. You’ll find various design options, including templates, custom sizes, and your previously created projects.
- Navigate the template library to see the wide range of pre-designed templates available for different purposes, including wedding invitations and save-the-date cards.
- Check out Canva’s design tools, such as the text editor, image uploader, and color palette, to understand how you can customize your designs.
-
Understand Canva Pro Benefits:
- Canva Pro unlocks additional printing benefits, such as higher resolution downloads and access to CMYK color profiles, which are essential for professional printing.
- Take advantage of the Canva Pro free trial to experience these benefits firsthand and decide if it’s the right investment for your wedding stationery needs.
-
Accessing Support and Tutorials:
- Canva provides a comprehensive help center with articles and tutorials to guide you through the design process.
- Explore Canva’s design school for more in-depth courses and tips on graphic design principles.
3. How Do You Choose the Right Save the Date Template in Canva?
Selecting the perfect template is a crucial step in creating save-the-date cards that reflect your wedding style. Here’s how to navigate Canva’s template library and choose a design that resonates with you:
-
Search for Wedding Templates:
- In the Canva template library, search for “Wedding Save the Dates” to find a variety of designs tailored for wedding announcements.
- Browse through the options and filter by category, style, or theme to narrow down your choices.
-
Consider Your Wedding Theme:
- Choose a template that aligns with your wedding theme, whether it’s rustic, modern, floral, or minimalist. The design should complement the overall aesthetic you’re aiming for.
- Think about the colors, fonts, and imagery that best represent your wedding style. For example, a rustic wedding might feature wooden textures and earthy tones, while a modern wedding could incorporate geometric shapes and bold colors.
-
Start with a Blank Canvas:
- If you prefer a completely custom design, select “Custom Size” and input the dimensions of your card.
- Common save-the-date sizes include A5 (5.8 x 8.3 inches) or A6 (4.1 x 5.8 inches), but you can choose any size that fits your vision.
-
Evaluate Template Elements:
- Pay attention to the layout, fonts, and graphics used in the templates. Consider how easily you can customize these elements to match your preferences.
- Look for templates with placeholder text and images that you can easily replace with your own wedding details and photos.
-
Save Your Favorite Templates:
- As you browse, save your favorite templates to a collection or folder. This allows you to easily compare them later and make a final decision.
-
Test Customization Options:
- Before committing to a template, experiment with customizing it. Change the colors, fonts, and images to see how well it adapts to your wedding style.
- This will give you a better idea of whether the template is the right fit for your vision.
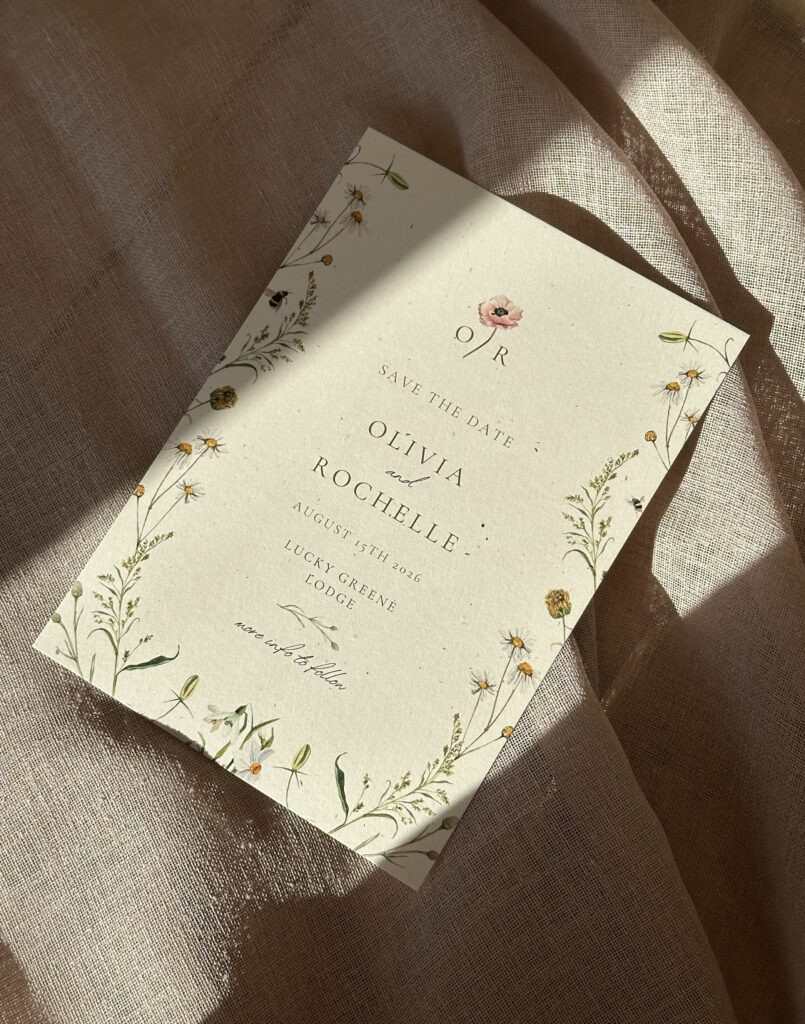 Save the Date Template
4. What Essential Details Should You Include on Your Save the Dates?
Customizing your save-the-date cards involves adding all the essential details your guests need to mark their calendars. Here’s a breakdown of what to include and how to personalize your design:
-
Edit the Text:
- Replace the placeholder text with your own wedding details. Ensure all information is accurate and up-to-date.
- Include the following essentials:
- Your Names: Clearly state the names of the couple getting married.
- Wedding Date: Provide the exact date of the wedding.
- Venue: Mention the city and state where the wedding will take place. If you have a specific venue, include its name.
- Website: If you have a wedding website, include the URL for guests to access additional information.
-
Choose Fonts:
- Select fonts that align with your wedding vibe. Canva offers a wide selection of fonts to choose from.
- Use elegant scripts for a formal affair or playful lettering for a casual event. Ensure the fonts are legible and complement the overall design.
- Consider using a combination of fonts for headings and body text to add visual interest.
-
Add Colors:
- Match your wedding color palette by tweaking the template’s colors. Canva’s tools make it simple to customize borders, backgrounds, and text colors.
- Use colors that evoke the desired mood and reflect your wedding theme. For example, pastel colors can create a romantic feel, while bright colors can add a fun and festive touch.
-
Include Graphics or Photos:
- Add a personal touch by uploading your favorite couple photo or including themed graphics like flowers, leaves, or geometric shapes.
- Ensure the photos are high-resolution and well-composed. Graphics should complement the overall design and not overpower the text.
-
Experiment with Layouts:
- Use Canva’s grid and alignment features to achieve a clean and polished design. Pay attention to the spacing and positioning of elements.
- Experiment with different layouts to find one that best showcases your wedding details and visual elements.
-
Additional Information (Optional):
- If space allows, you can include additional information such as:
- A short message: A brief, heartfelt message expressing your excitement for the wedding.
- Dress code: If there is a specific dress code, such as “formal attire” or “cocktail attire,” mention it on the save the date.
- Accommodation suggestions: If you have negotiated special rates at local hotels, provide that information for your guests.
- If space allows, you can include additional information such as:
5. How Do You Ensure Accuracy and Quality Before Printing?
Before you send your save-the-date cards to print, it’s crucial to proofread and finalize the design. Here’s how to ensure accuracy and quality:
-
Triple-Check Details:
- Carefully review all the details for accuracy, including spelling, dates, and venue information. Even small errors can cause confusion for your guests.
- Pay special attention to names, addresses, and contact information.
-
Share for Review:
- Share the design with your partner, a close friend, or a family member for a fresh pair of eyes. Getting feedback from others can help catch errors you may have missed.
- Ask them to focus on clarity, accuracy, and overall design appeal.
-
Test QR Codes:
- If you’re adding a QR code to your save the date, test it with your phone camera to ensure it works correctly.
- The QR code should direct guests to your wedding website or RSVP page without any issues.
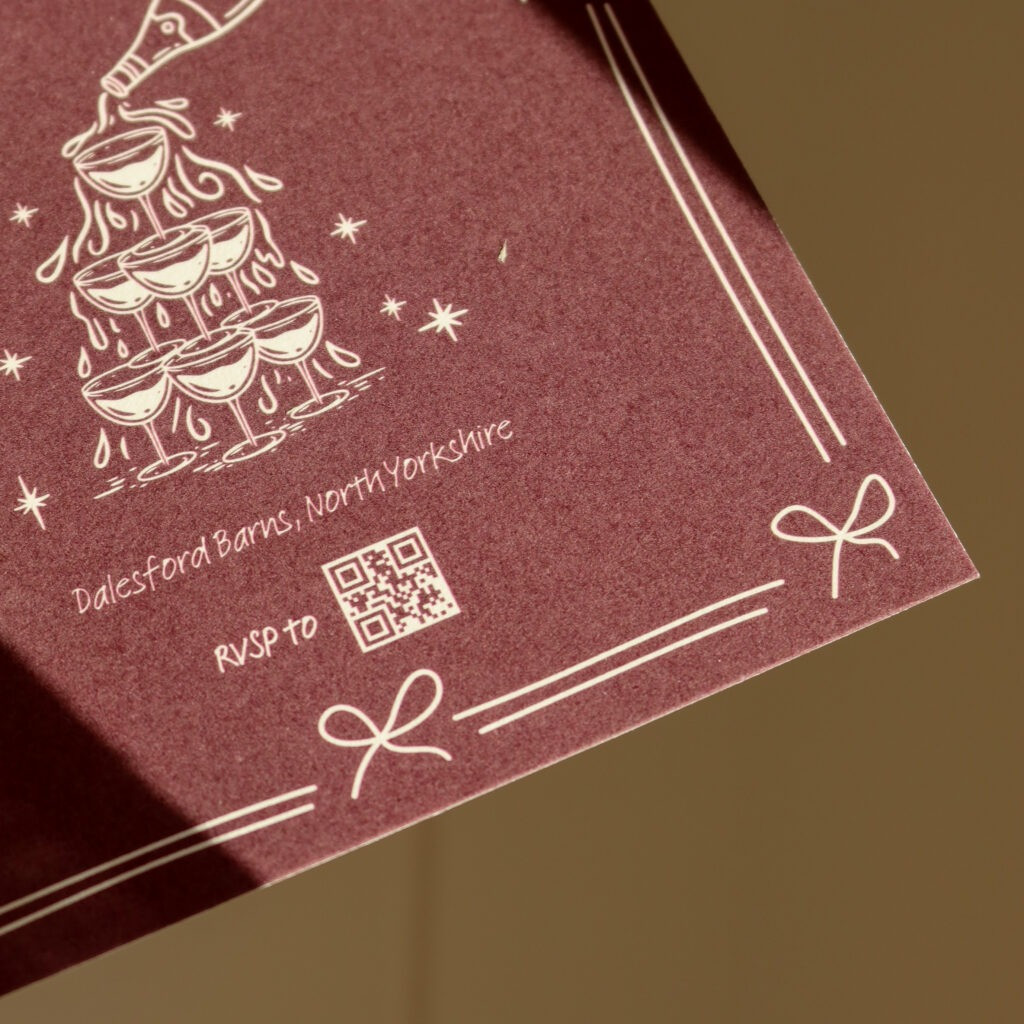 QR Code
6. What Printing Settings Are Recommended for Canva?
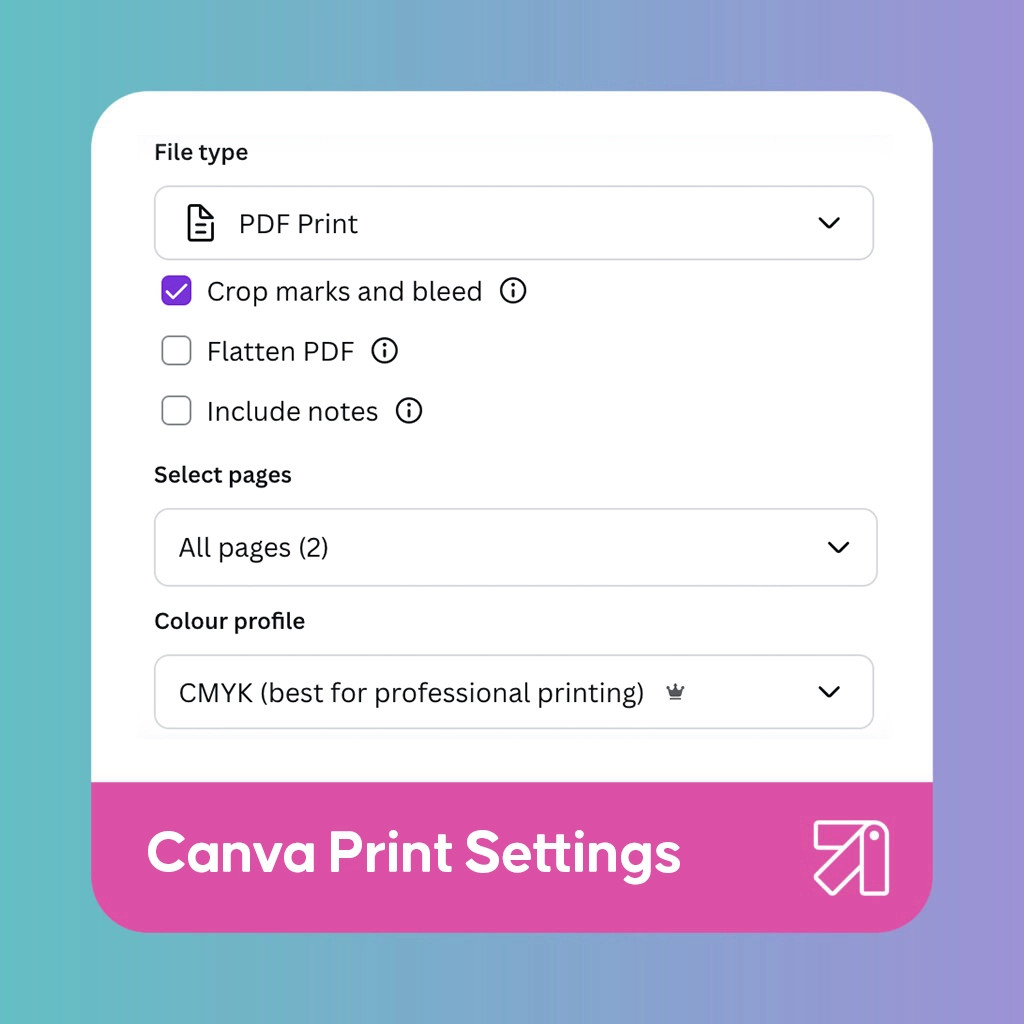
To achieve the best print quality for your save-the-date cards, it’s essential to use the correct settings when downloading your design from Canva. Here’s what amazingprint.net recommends:
-
File Format:
- Save your file as a PDF Print. This format ensures the highest resolution and is ideal for professional printing.
-
Crop Marks and Bleed:
- Select the ‘crop marks and bleed’ box. Crop marks indicate where the printer should trim the paper, while bleed ensures that your design extends to the edge of the paper without leaving any white edges.
- A standard bleed size is 3mm (0.125 inches). This means your design should extend 3mm beyond the trim lines on all sides.
-
Color Profile:
- Change the color profile to CMYK (Cyan, Magenta, Yellow, Key/Black). RGB (Red, Green, Blue) is the color mode used for digital screens, while CMYK is used for printing.
- Converting to CMYK ensures that the colors in your printed save-the-date cards are more accurate and consistent with what you see on your screen.
-
Resolution:
- Ensure your design is high-resolution, ideally 300 DPI (dots per inch). This will result in sharper and more detailed prints.
- Canva Pro users can download their designs at higher resolutions for even better print quality.
-
Flatten Layers:
- Before downloading, flatten the layers in your design. This simplifies the printing process and reduces the risk of any issues with transparency or overlapping elements.
-
Test Print:
- If possible, do a test print of your design before printing the entire batch. This allows you to check the colors, layout, and overall quality of the print.
- Make any necessary adjustments based on the test print results.
 canva printing
7. How Do You Choose the Right Paper Stock and Finish?
Selecting the right paper stock and finish can significantly impact the look and feel of your save-the-date cards. Here’s a guide to help you make the best choice:
-
Paper Weight:
- Paper weight is measured in pounds (lbs) or grams per square meter (gsm). A higher number indicates a thicker, more substantial paper.
- For save-the-date cards, consider using a paper weight between 80 lb cover (216 gsm) and 110 lb cover (298 gsm). This range provides a good balance of thickness and durability.
-
Paper Type:
- Matte: Matte paper has a smooth, non-glossy finish. It’s a great choice for elegant and understated designs. Matte paper is also easy to write on, making it ideal for handwritten notes.
- Gloss: Gloss paper has a shiny, reflective finish. It makes colors appear more vibrant and is suitable for designs with photos. However, gloss paper can be prone to fingerprints and glare.
- Semi-Gloss: Semi-gloss paper, also known as satin or silk, offers a balance between matte and gloss. It has a slight sheen that enhances colors without being too reflective.
- Linen: Linen paper has a subtle, textured finish that adds a touch of sophistication to your save-the-date cards. It’s a great choice for classic and traditional designs.
- Recycled: Recycled paper is an eco-friendly option that’s made from post-consumer waste. It has a natural, slightly textured finish and is available in various weights and colors.
-
Paper Color:
- White: White paper is a classic and versatile choice that works well with any design. It provides a clean and crisp background for your text and images.
- Off-White: Off-white paper, such as cream or ivory, adds a touch of warmth and elegance to your save-the-date cards. It’s a great choice for vintage and romantic designs.
- Colored: Colored paper can add a pop of personality to your save-the-date cards. Choose a color that complements your wedding theme and overall design.
-
Specialty Finishes:
- Soft Touch: Soft touch finish adds a velvety feel to your save-the-date cards. It’s a luxurious option that enhances the tactile experience.
- Spot UV: Spot UV finish applies a glossy coating to specific areas of your design, creating a contrast between the matte and shiny surfaces. It’s a great way to highlight important elements.
- Foil Stamping: Foil stamping adds a metallic accent to your save-the-date cards. It’s a luxurious option that’s perfect for adding a touch of glamour.
8. What Are Some Creative Ideas to Make Your Save the Dates Unique?
To make your save-the-date cards stand out, consider these creative ideas:
-
Personalized Photos:
- Incorporate a unique and personal photo of you and your partner. Consider a professional photoshoot or use a candid snapshot that captures your personalities.
-
Interactive Elements:
- Include a QR code that directs guests to your wedding website or an interactive map of the venue location. This adds a modern and engaging touch.
-
Unconventional Shapes and Sizes:
- Opt for save-the-date cards in unconventional shapes and sizes. Round, square, or custom-cut shapes can make your cards more memorable.
-
Themed Designs:
- Align your save-the-date design with your wedding theme. For example, a beach wedding could feature nautical elements, while a rustic wedding could incorporate wood textures and floral accents.
-
Handwritten Touches:
- Add handwritten notes or calligraphy to your save-the-date cards. This personal touch can make your guests feel extra special.
-
Use of Texture:
- Incorporate textured paper or embellishments like ribbon, lace, or twine to add a tactile element to your save-the-date cards.
-
Destination-Inspired Designs:
- If you’re having a destination wedding, feature iconic landmarks or cultural elements from the location in your save-the-date design.
9. What Are Some Common Mistakes to Avoid When Printing Save the Dates?
To ensure your save-the-date cards turn out perfectly, avoid these common mistakes:
-
Typos and Errors:
- Always proofread your design carefully for typos, grammatical errors, and incorrect information. Have multiple people review it to catch any mistakes.
-
Low Resolution Images:
- Use high-resolution images to avoid blurry or pixelated prints. Ensure your images are at least 300 DPI.
-
Incorrect Color Mode:
- Make sure your design is in CMYK color mode to ensure accurate color reproduction. RGB colors can appear different when printed.
-
Lack of Bleed:
- Include bleed in your design to avoid white edges when the cards are trimmed. Extend your design elements beyond the trim lines.
-
Poor Paper Choice:
- Choose a paper stock that is appropriate for your design and printing method. Consider the weight, finish, and color of the paper.
-
Ignoring Printer Requirements:
- Follow the printer’s specifications for file format, size, and resolution. This will help ensure a smooth printing process.
-
Not Ordering a Sample:
- Order a sample print before placing a large order to check the colors, paper quality, and overall design.
10. Where Can You Get High-Quality and Affordable Printing Services?
Once your save-the-date design is finalized, choosing the right printing service is the next important step. Here are some options for high-quality and affordable printing:
-
amazingprint.net:
- amazingprint.net offers a wide range of printing services for wedding stationery, including save-the-date cards. They provide high-quality prints with various paper options and finishes.
- Explore their website (amazingprint.net) to find the best solutions for your needs.
-
Online Printing Services:
- Vistaprint: Vistaprint is a popular choice for affordable printing. They offer a variety of templates and customization options.
- Shutterfly: Shutterfly is known for its high-quality photo prints and personalized stationery.
- Minted: Minted offers unique designs from independent artists and high-quality printing services.
-
Local Print Shops:
- Support local businesses by using a local print shop. They can often provide personalized service and quick turnaround times.
- Ask for samples and compare prices before making a decision.
-
DIY Printing:
- If you have a high-quality printer, you can print your save-the-date cards at home. This option allows you to have more control over the printing process and save money.
- Make sure to use the correct paper and settings to achieve the best results.
By following these steps and tips, you can create stunning save-the-date cards that perfectly capture the essence of your special day. With Canva and amazingprint.net, the process is easy, affordable, and fun! For inspiration and to explore printing services, visit amazingprint.net today.
Address: 1600 Amphitheatre Parkway, Mountain View, CA 94043, United States. Phone: +1 (650) 253-0000. Website: amazingprint.net.
FAQ: Printing Save the Dates from Canva
- Can I use Canva for free to design my save the dates?
Yes, Canva offers a free version with plenty of features for designing save the dates. You can access a wide range of templates, graphics, and design tools without paying anything. However, some premium elements and templates may require a Canva Pro subscription. - What file format should I use when downloading my save the dates from Canva for printing?
For the best print quality, download your save the dates as a PDF Print file. This format ensures high resolution and is ideal for professional printing. - What is bleed, and why is it important when printing save the dates?
Bleed is the area of your design that extends beyond the trim lines. It’s important because it ensures that your design extends to the edge of the paper without leaving any white edges after trimming. - Should I use RGB or CMYK color mode when designing save the dates for printing in Canva?
Use CMYK color mode. RGB is for digital screens, while CMYK is for printing. Converting to CMYK ensures that the colors in your printed save the dates are accurate. - What resolution should my images be for printing save the dates from Canva?
Your images should be high-resolution, ideally 300 DPI (dots per inch). This will result in sharper and more detailed prints. - What paper weight is recommended for save the dates?
A paper weight between 80 lb cover (216 gsm) and 110 lb cover (298 gsm) is recommended for save the dates. This provides a good balance of thickness and durability. - Can I add a QR code to my save the dates designed in Canva?
Yes, you can add a QR code to your save the dates in Canva. Simply upload the QR code as an image and place it in your design. Test the QR code to ensure it works correctly before printing. - Where can I find affordable and high-quality printing services for my Canva save the dates?
You can find affordable and high-quality printing services at amazingprint.net, Vistaprint, Shutterfly, Minted, or local print shops. - How can I make my save the dates unique when designing them in Canva?
To make your save the dates unique, consider using personalized photos, interactive elements like QR codes, unconventional shapes and sizes, themed designs, and handwritten touches. - What should I do if I notice a mistake after downloading my save the dates from Canva?
If you notice a mistake after downloading your save the dates, go back to Canva, correct the error, and download the file again. Make sure to proofread the corrected version carefully before printing.