
Printing multiple photos on a single page is a great way to save paper, create contact sheets, or even design your own photo collages. If you’re a Mac user, you have several built-in tools at your disposal to achieve this easily. This guide will walk you through different methods to print multiple photos on one page using your Mac, ensuring you get the layout you desire.
Method 1: Utilizing the Photos App for Contact Sheets
The Photos app on macOS offers a straightforward way to print multiple images on one page using the “Contact Sheet” option. This is perfect for quickly creating a visual index of your photos or simply printing several snapshots together.
Here’s how to do it:
-
Open the Photos App: Launch the Photos application on your Mac.
-
Select Your Photos: Choose the photos you want to print on one page. You can select multiple images by holding down the Command key while clicking on each photo, or by using Shift key to select a range of photos.
-
Initiate Print Command: Press
Command + Pto open the print dialog. Alternatively, you can go toFilein the menu bar and selectPrint. -
Choose Contact Sheet Layout: In the print dialog, you will see various layout options. Select
Contact Sheetfrom the style dropdown menu.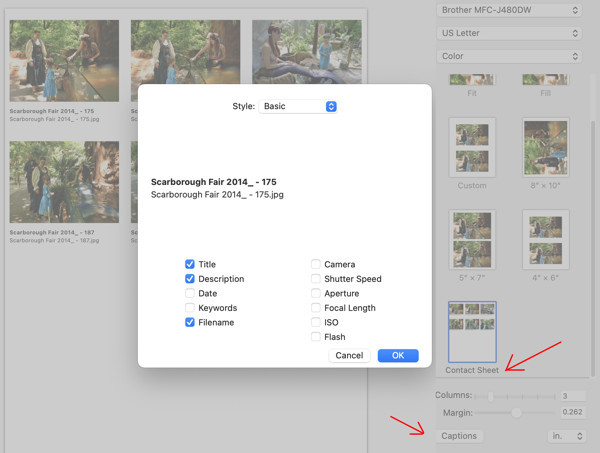 Printing multiple photos on one page using the Contact Sheet option in macOS Photos app. Adjusting columns for layout.
 -
Adjust Layout Settings: You can customize the layout of your contact sheet. The most important setting is the number of columns, which determines how many photos are arranged horizontally. Adjust the number of columns to fit more or fewer photos per page. Experiment with different column numbers to see what layout best suits your needs.
-
Optional Settings: You can also choose to include titles, dates, and other information with each picture by checking the relevant boxes in the print dialog.
-
Print or Save as PDF:
- To print directly, ensure your printer is selected and click the
Printbutton. - To save the layout as a PDF file instead of printing, click on the
PDFdropdown menu in the bottom left corner of the print dialog and selectSave as PDF…. This allows you to create a digital contact sheet that you can share or print later.
- To print directly, ensure your printer is selected and click the
Method 2: Creating Flexible Layouts with Preview App
For more flexibility in arranging your photos on a page, you can use the Preview app. Preview allows you to manually place and resize images on a blank canvas, giving you greater control over the final layout.
Follow these steps to print multiple photos on one page using Preview:
-
Prepare a Blank Canvas:
- Duplicate any photo on your Mac. This is a precautionary step to avoid altering your original photo. You can do this by selecting a photo, right-clicking, and choosing
Duplicate. - Open the duplicated photo in Preview.
- Select all content of the image by pressing
Command + Aor going toEdit > Select All. - Delete the selected content by pressing
Deleteor going toEdit > Delete. This will leave you with a blank, transparent screen.
- Duplicate any photo on your Mac. This is a precautionary step to avoid altering your original photo. You can do this by selecting a photo, right-clicking, and choosing
-
Copy and Paste Photos:
- Open the photos you want to include on your page in separate Preview windows.
- For each photo, select all (
Command + A) and copy (Command + CorEdit > Copy). - Go back to your blank transparency screen and paste the copied photo (
Command + VorEdit > Paste). The photo will be placed onto the transparent screen.
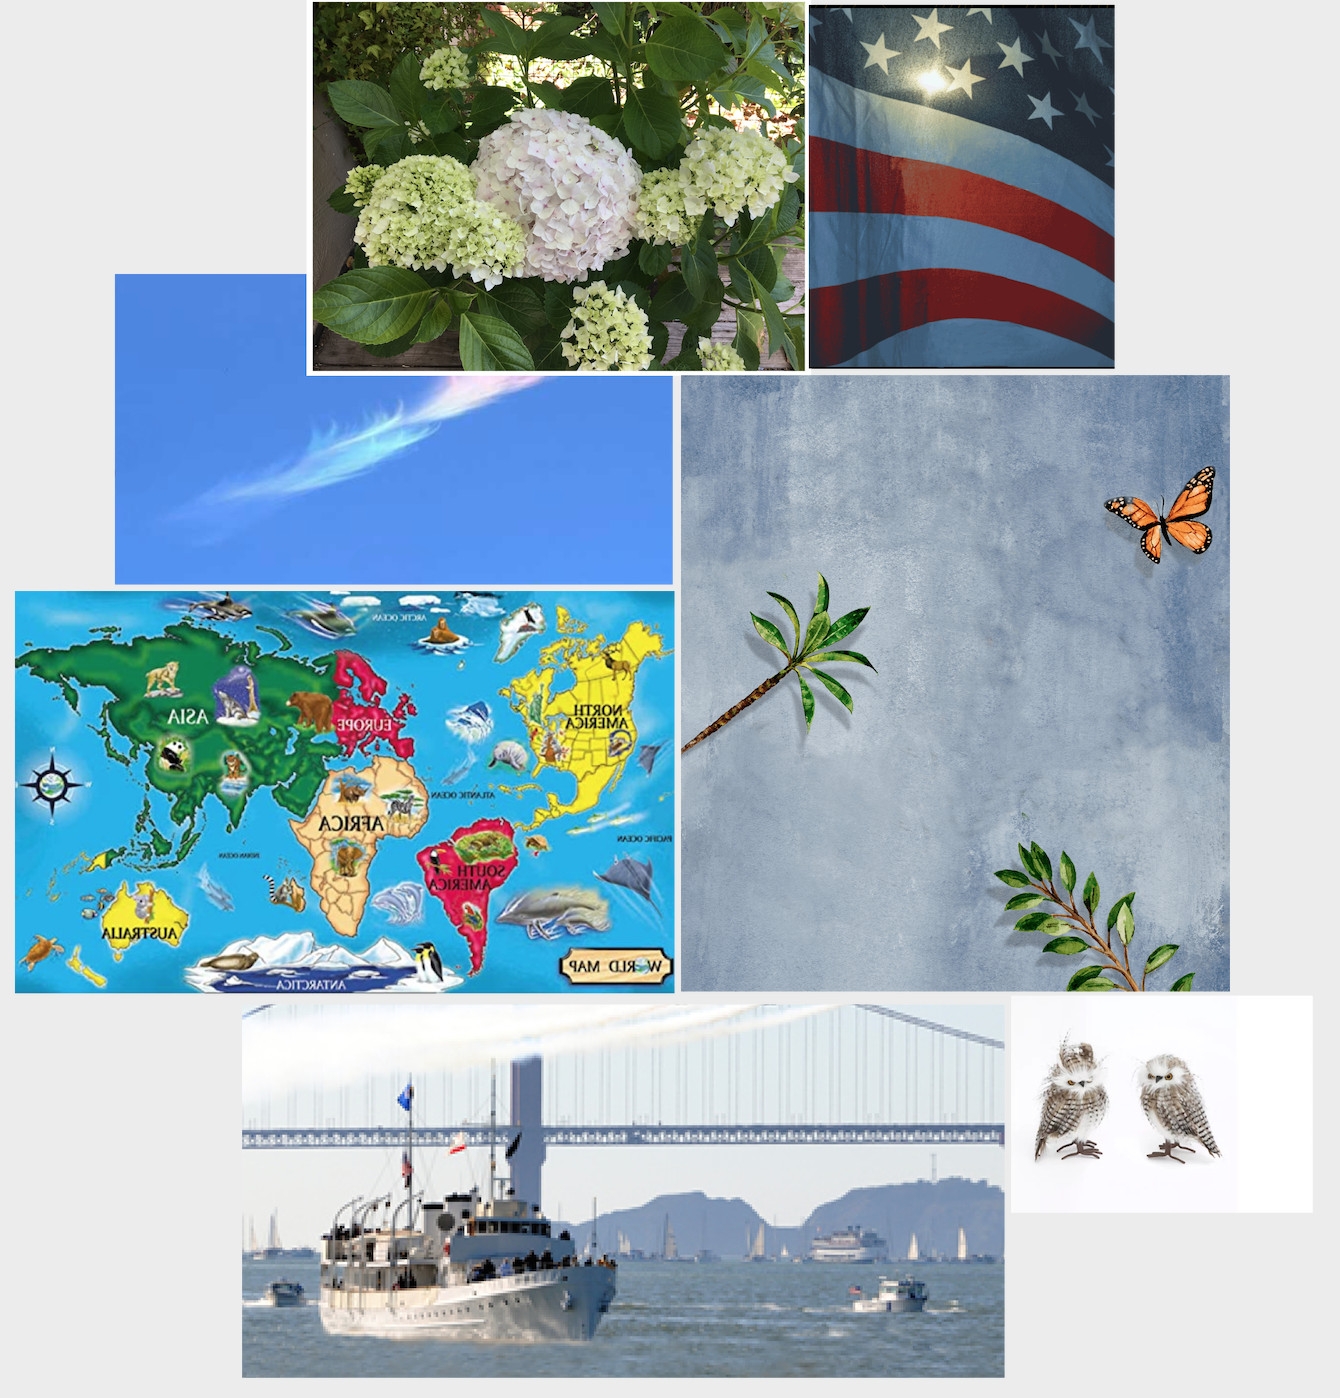 Creating a photo collage in macOS Preview app by pasting photos onto a transparent background. Resizing and positioning images.
 -
Position and Resize Photos:
- Once pasted, you can move the photo around by clicking and dragging it.
- To resize a photo, click on the selection handles at the corners of the image and drag them to adjust the size. Hold down the Shift key while resizing to maintain the aspect ratio of the photo.
- Repeat steps 2 and 3 to add more photos to your page and arrange them as desired, creating your custom layout.
-
Print Your Layout: Once you are satisfied with the arrangement, press
Command + Por go toFile > Printto open the print dialog and print your page. You can also save it as a PDF using the PDF dropdown menu in the print dialog, similar to the Photos app method.
Method 3: Designing Photo Collages with Pages App
For the most advanced layout options and the ability to create visually appealing photo collages, Apple’s Pages app is an excellent free tool. Pages is a word processing and page layout application that gives you extensive control over image placement, resizing, and text integration.
Here’s how to use Pages to print multiple photos on one page:
-
Open Pages and Create a New Document: Launch the Pages app and create a new blank document.
-
Set Page Size (Optional): If you need a specific page size for your collage (e.g., for a large print), you can adjust it in the Document settings. Go to
File > Page Setup…and select your desired paper size. You can even create custom page sizes here. -
Insert Photos:
- Drag and drop photos directly from your Finder onto the Pages document. Alternatively, you can go to
Mediabutton in the toolbar and choosePhotosorChoose…to insert images. - Each photo will be inserted into the document, and you can then manipulate them individually.
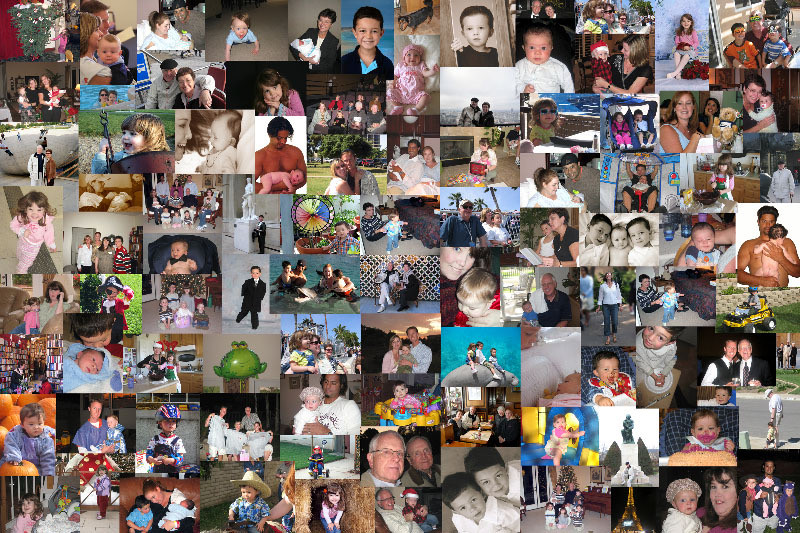 Designing a custom photo collage in macOS Pages app with flexible image placement and resizing. Example of a 20×30 inch collage.
 - Drag and drop photos directly from your Finder onto the Pages document. Alternatively, you can go to
-
Resize and Arrange Photos:
- Click on a photo to select it. Drag the handles at the corners to resize the image.
- Drag the photo to move it to the desired location on the page.
- Pages allows for overlapping images, rotating images, and adding text boxes, giving you full creative control over your collage design.
-
Print Your Collage: Once you have arranged all your photos and are happy with the layout, press
Command + Por go toFile > Printto print your collage. As with the other methods, you can also save your design as a PDF.
Conclusion
Printing multiple photos on one page on a Mac is simple with the right tools. Whether you need a quick contact sheet from the Photos app, a flexible layout from Preview, or a detailed collage from Pages, macOS provides you with the necessary applications to get the job done. Choose the method that best suits your needs and start creating your own multi-photo prints today!