
It’s a common tech joke that printers seem to malfunction at the most inconvenient times. Wireless printers, while offering great flexibility, can sometimes be trickier to troubleshoot than their wired counterparts. When your wireless printer acts up, often the first step in diagnosing the issue is to find its IP address. This guide will walk you through various methods to easily find your printer’s IP address, so you can quickly resolve connection problems and get back to printing.
Why Find Your Printer’s IP Address?
Knowing your printer’s IP address is essential for several reasons, primarily for troubleshooting and network management. It allows you to:
- Diagnose Connection Issues: If your printer is not connecting to your computer or network, the IP address can help pinpoint the problem.
- Establish a Direct Connection: You can use the IP address to connect directly to your printer’s interface for advanced settings and configurations.
- Connect New Devices: When adding a new computer or device to your network, you’ll need the printer’s IP address to establish a connection.
- Set Up a Static IP Address: For more reliable connections, you can configure your printer with a static IP address, which requires knowing the current dynamic IP address first.
Let’s explore the different ways you can locate your printer’s IP address, depending on your printer type and operating system.
Method 1: Print a Network Configuration Page
Many modern printers, especially those with a display screen, offer a straightforward way to print a network configuration page directly from the printer itself. This is often the quickest and most universal method.
- Access the Control Panel: On your printer, navigate to the Control Panel using the physical buttons or touchscreen. The exact wording may vary depending on your printer model.
- Find Settings or Setup: Look for options like Settings, Setup, Network Settings, or Wireless Settings.
- Locate Network Configuration: Within the settings menu, search for options like Network Configuration, Wireless LAN Setup, or Reports.
- Print Configuration Page: Select the option to print a Network Configuration Page or Network Setup Page.
This printed page will contain a wealth of information about your printer’s network settings, including its IP address, subnet mask, gateway, and more. Look for the IPv4 Address – this is typically the IP address you need.
» See Example: What our Printer Network Configuration Page looks like.
Method 2: Find Printer IP Address on Windows
If you prefer to find the IP address through your Windows computer, follow these steps:
- Open Control Panel: Click the Start Menu, type “Control Panel,” and select it.
- Go to Hardware and Sound: Click on Hardware and Sound.
- Open Devices and Printers: Under “Devices and Printers,” click on View devices and printers.
- Right-click on Your Printer: Locate your printer in the list of devices, right-click on it, and select Properties or Printer properties.
- Check Tabs for IP Address:
- Web Services Tab: If you see a Web Services tab (usually indicated by three tabs in total), click on it. Your printer’s IP address may be listed on this tab.
- Ports Tab: If you see a Ports tab (usually indicated by five tabs in total), click on it. Look for a port that is checked and corresponds to your printer. Click Configure Port… and you might find the IP address in the settings.
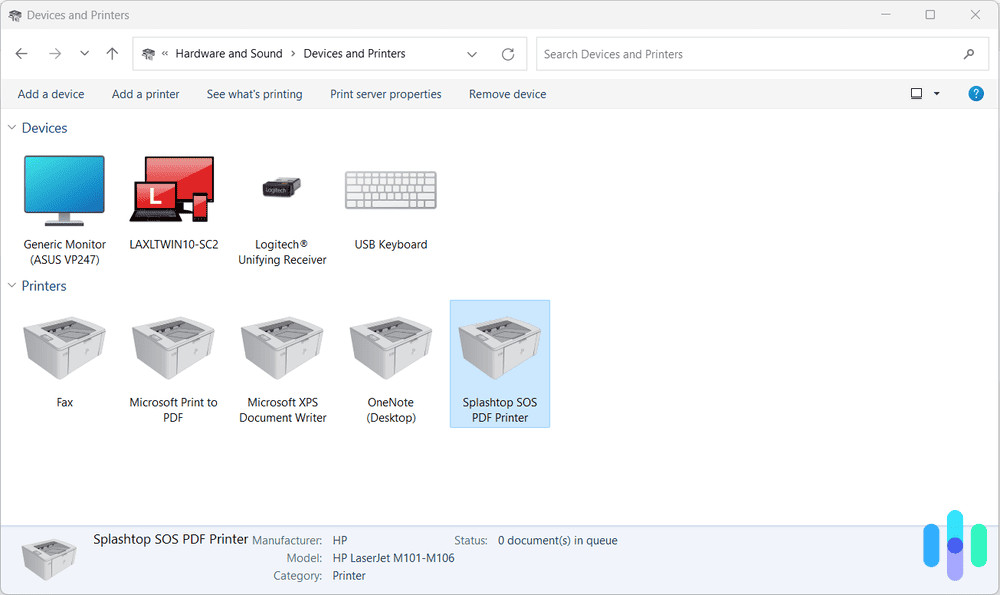 Devices and Printers page on Windows
Method 3: Access Your Router’s Interface
Your router acts as the central hub of your network and often keeps a list of connected devices, including their IP addresses. To use this method, you’ll need to access your router’s settings page.
- Find Your Router’s IP Address: If you don’t know your router’s IP address, you can usually find it by typing
ipconfigin Command Prompt (on Windows) or checking your network settings on macOS. The “Default Gateway” is usually your router’s IP address. - Open a Web Browser: Enter your router’s IP address into the address bar of any web browser (e.g., Chrome, Firefox, Safari).
- Log in to Your Router: You’ll be prompted to enter your router’s username and password. These are usually found on a sticker on the router itself or in your router’s documentation. Default usernames and passwords are often something like “admin” and “password” (but it’s best to change these for security).
- Find DHCP Client Table or Client List: Once logged in, look for sections like DHCP Client Table, Client List, Attached Devices, or similar. The exact location varies depending on your router’s manufacturer and model.
- Locate Your Printer: Browse the list of connected devices to find your printer. It might be listed by its name or model number.
- View Printer’s IP Address: Once you find your printer in the list, its IP address should be displayed next to it.
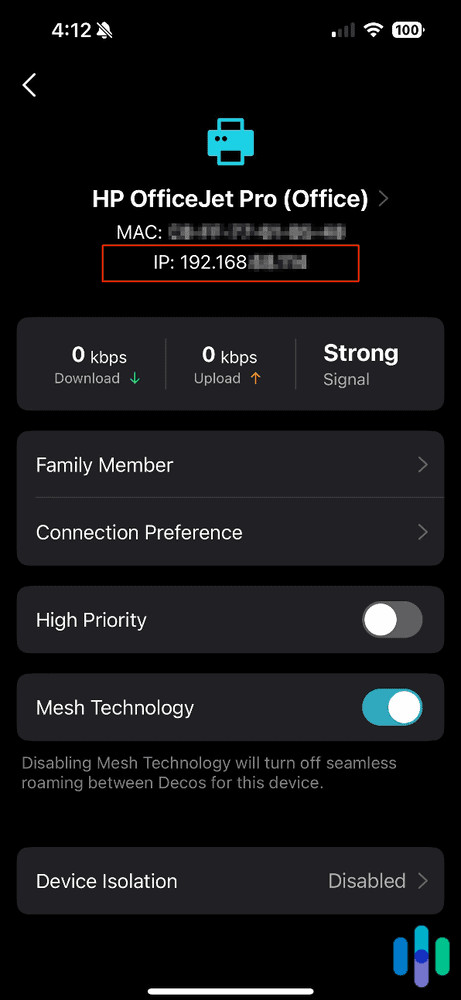 Finding the IP address of our printer from our Deco router app
Method 4: Use Command Prompt (Windows)
For users comfortable with command-line interfaces, Command Prompt offers a quick way to display network information, including device IP addresses.
- Open Command Prompt: Press the Windows key, type “cmd,” and press Enter to open Command Prompt.
- Run the
netstat -rCommand: Typenetstat -rand press Enter. - Find Your Printer’s IP Address: The command will display a routing table. Look through the list of “Network Destination” and “Gateway” addresses. While this command doesn’t directly list device names, you might be able to identify your printer’s IP address by recognizing its IP range or by process of elimination if you know the IP addresses of other devices on your network. This method is less direct for finding a specific printer IP, but it can provide network address information.
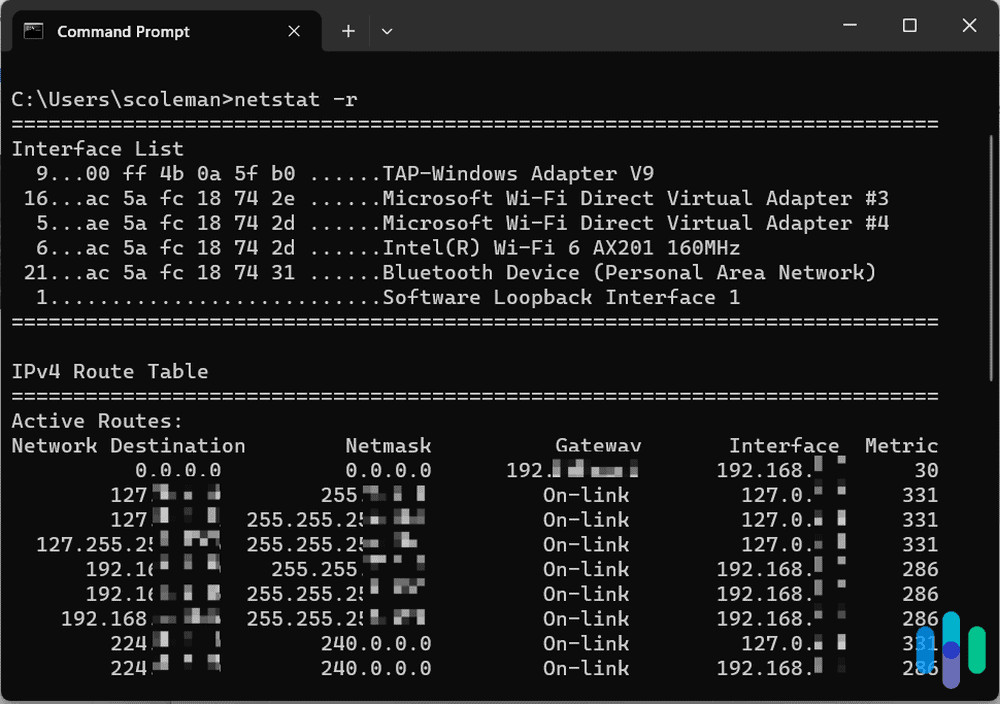 netstat -r command results on Command Prompt
Method 5: Find Printer IP Address on macOS
Mac users can find their printer’s IP address through System Settings:
- Open System Settings: Click on the Apple menu in the top-left corner of your screen and select System Settings (or System Preferences in older macOS versions).
- Go to Printers & Scanners: Click on Printers & Scanners.
- Select Your Printer: Choose your printer from the list on the left.
- Find Location for IP Address: On the right-hand side, under the printer’s name and details, you should see a field labeled Location. This field often displays the printer’s IP address.
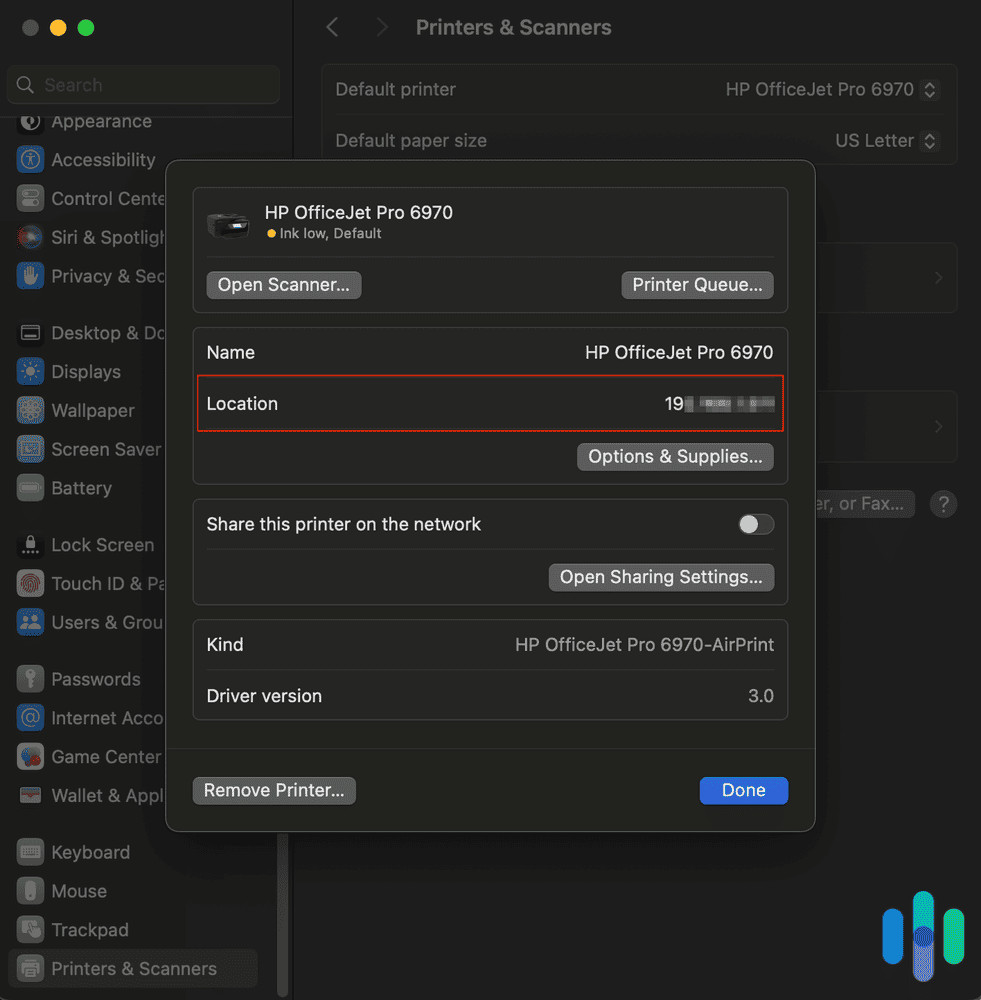 Printer IP address location on Mac
» Learn more: How to find the IP address on a Mac
Method 6: HP Printer Specific Method (HP Smart App or EWS)
HP printers often have dedicated methods through the HP Smart app or the printer’s Embedded Web Server (EWS).
Using HP Smart App:
- Open HP Smart App: Launch the HP Smart application on your computer or mobile device. If you don’t have it, you can download it from HP’s website or your device’s app store.
- Select Printer Settings: Choose your printer from the app’s main screen.
- Access Printer Reports: Look for options like Printer Reports or Tools.
- Print Network Configuration Report: Select Network Configuration Report to print a page containing your printer’s IP address, usually under the IPv4 category.
Using HP Embedded Web Server (EWS):
- Obtain Printer’s IP Address (using other methods): You might need to use one of the other methods described in this guide to get the initial IP address.
- Open a Web Browser: Enter the printer’s IP address into your web browser’s address bar. This will open the printer’s EWS interface.
- Navigate to Network Settings: Within the EWS interface, look for Networking, Network Setup, or similar options.
- Find IP Address Information: The IP address should be displayed within the network settings section, often under IPv4 Configuration.
Method 7: CUPS Webpage (macOS Advanced Method)
For macOS users, the Common Unix Printing System (CUPS) offers a more technical approach via a web interface.
- Open Terminal: Open the Terminal application, found in Applications > Utilities > Terminal.
- Enable Web Interface: Type the command
cupsctl WebInterface=yesand press Enter. - Access CUPS Webpage: Open Safari or another web browser and type
localhost:631/printersin the address bar. Press Enter. - Find Printer IP Address: You’ll see a list of printers. Click on your printer’s name. The printer’s IP address might be listed under the Location section on the printer’s information page.
Alt text: Screenshot of the CUPS web interface in a browser, showing a printer’s details with the IP address highlighted under the “Location” field.
Method 8: Chromebook Printer IP Address
Finding the IP address on a Chromebook involves accessing printer settings:
- Open Settings: Click on the clock in the bottom-right corner of your Chromebook screen and then click the Settings gear icon.
- Click Advanced: Scroll down and click Advanced.
- Go to Printers: Under the “Printing” section, select Printers.
- Save Available Printers: Toggle the switch to Save printers found.
- Set Up Printer: Under “Saved printers,” right-click on your printer and select Set up.
- Access Model and Label: In the setup dialog, click Model, then Label, and finally Add.
- View Printer Information: Under “Printer information” in the next screen, your printer’s IP address should be displayed.
Method 9: Canon Printer Specific Steps
Canon printers often have their own menu system for accessing network settings directly on the printer.
- Access Settings Menu: On your Canon printer’s control panel, find and select Settings or Setup, then Adjustments or Device settings.
- Navigate to IP Address Menu: Look for options like Set or Adjust Menu, then OK, then IP Address Menu, and OK again.
- Interface Setup: Select Interface Setup, then TCP/IP.
- IPv4 Settings: Open the next tab or menu and select IPv4 Settings.
- View IP Address: A box or screen should pop up displaying your Canon printer’s IP address, often starting with
192.168.
FROM THE EXPERTS: Printing a network configuration page remains the most universally reliable method for finding your printer’s IP address. If the steps outlined here don’t perfectly match your printer, consult your printer’s manual or search online for “[Your Printer Make and Model] print network configuration page” for specific instructions.
What to Do With Your Printer’s IP Address
Once you have your printer’s IP address, you can use it for several troubleshooting and configuration tasks:
Resolve Connection Problems
One of the primary uses of a printer IP address is to fix connection issues. Wireless printers use IP addresses to communicate with devices on your network. If your printer suddenly becomes unavailable, it might be due to an IP address change.
Routers often assign dynamic IP addresses, meaning the IP address can change periodically when:
- The printer is inactive for a while and reconnects.
- The router is restarted.
- The IP address lease expires (a temporary assignment period).
When the printer’s IP address changes, your computer might be trying to connect to the old, outdated address. To prevent this, you can set a static IP address for your printer. A static IP address is a permanent address within your local network, ensuring consistent connectivity.
How to set a static IP address on Windows:
- Open Devices and Printers: Go to Control Panel > Hardware and Sound > Devices and Printers.
- Select Print Server Properties: Right-click on any printer and choose Print server properties.
- Go to Ports Tab: Click on the Ports tab in the Print Server Properties window.
- Add Port: Click Add Port….
- Standard TCP/IP Port: Choose Standard TCP/IP Port and click New Port….
- Enter IP Address: In the “Hostname or IP Address” field, enter the desired static IP address for your printer. You’ll also need to give the port a name.
- Apply Changes: Click Next and then Finish to add the port.
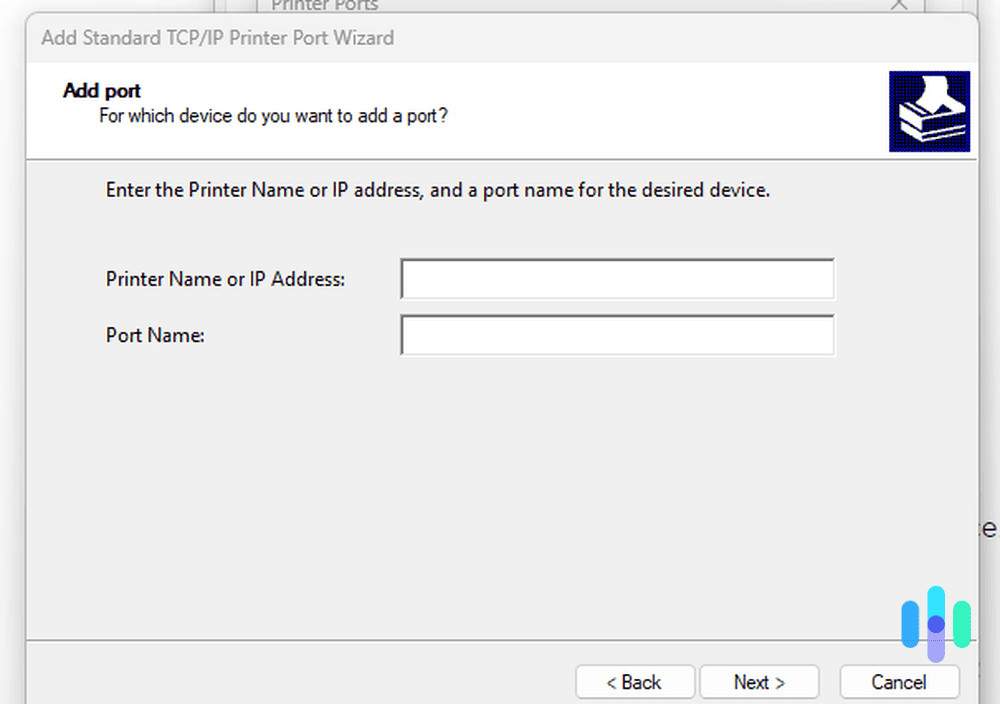 Add Standard TCP/IP Printer Port Wizard
How to set a static IP address on macOS:
- Open Printers & Scanners: Go to System Settings > Printers & Scanners.
- Select Your Printer: Choose your printer from the list.
- Access Options & Supplies: Click on your printer, then click Options & Supplies….
- Change Location (IP Address): In the “Options and Supplies” window, you should be able to edit the Location field, which contains the IP address. Change it to your desired static IP address.
- Confirm Changes: Click OK to save the new IP address.
TIP: Before setting a static IP address, it’s wise to consult your printer’s support documentation or contact their customer support for specific guidance tailored to your printer model and network setup. Incorrect static IP configuration can cause network conflicts.
Connect New Devices to Your Printer
When you get a new computer, phone, or tablet, you’ll need the printer’s IP address to connect it to your existing printer.
Connecting a Windows device using IP address:
- Open Printers & Scanners: Go to Start > Settings > Devices > Printers & scanners.
- Add Printer or Scanner: Click Add a printer or scanner.
- Printer Not Listed: After a short search, click “The printer that I want isn’t listed”.
- Add Manually: Select “Add a printer using a TCP/IP address or hostname” and click Next.
- TCP/IP Device: Choose TCP/IP Device as the device type.
- Enter IP Address: Enter your printer’s IP address in the “Hostname or IP address” field.
- Complete Setup: Click Next to proceed with the driver installation and complete the printer setup.
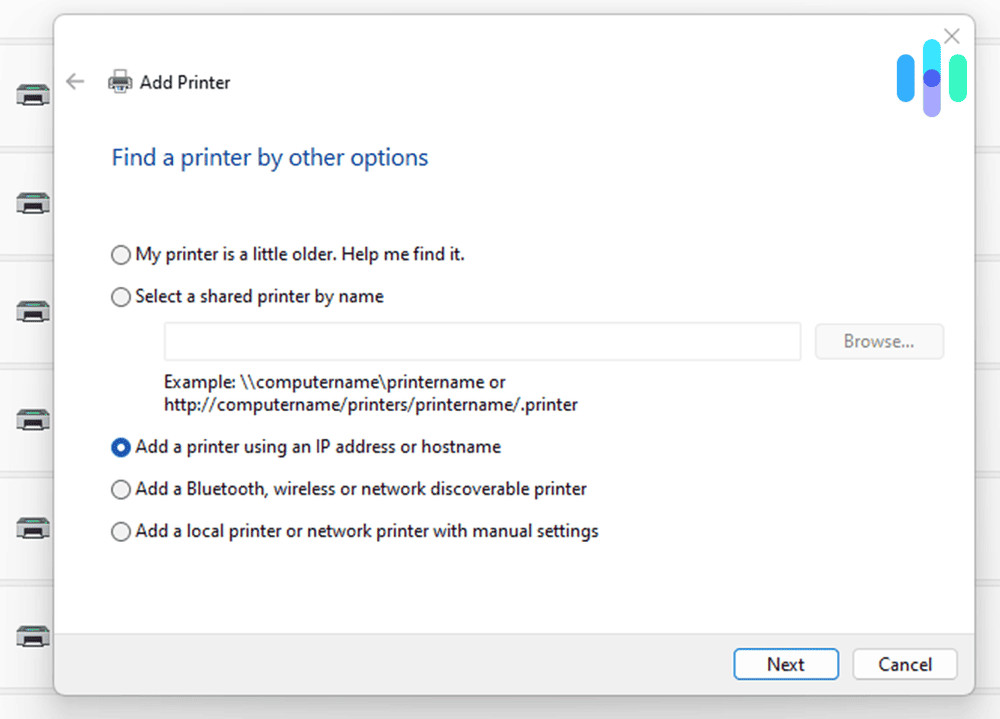 Add a printer using an IP address or hostname
Connecting an Apple device using IP address:
- Open Printers & Scanners: Go to System Settings > Printers & Scanners.
- Add Printer: Click the Add Printer, Scanner, or Fax… button (+ button).
- Select IP Tab: In the “Add Printer” window, click the IP tab.
- Enter IP Address: Enter your printer’s IP address in the “Address” field.
- Add Printer: The system should detect your printer. Click Add to complete the connection.
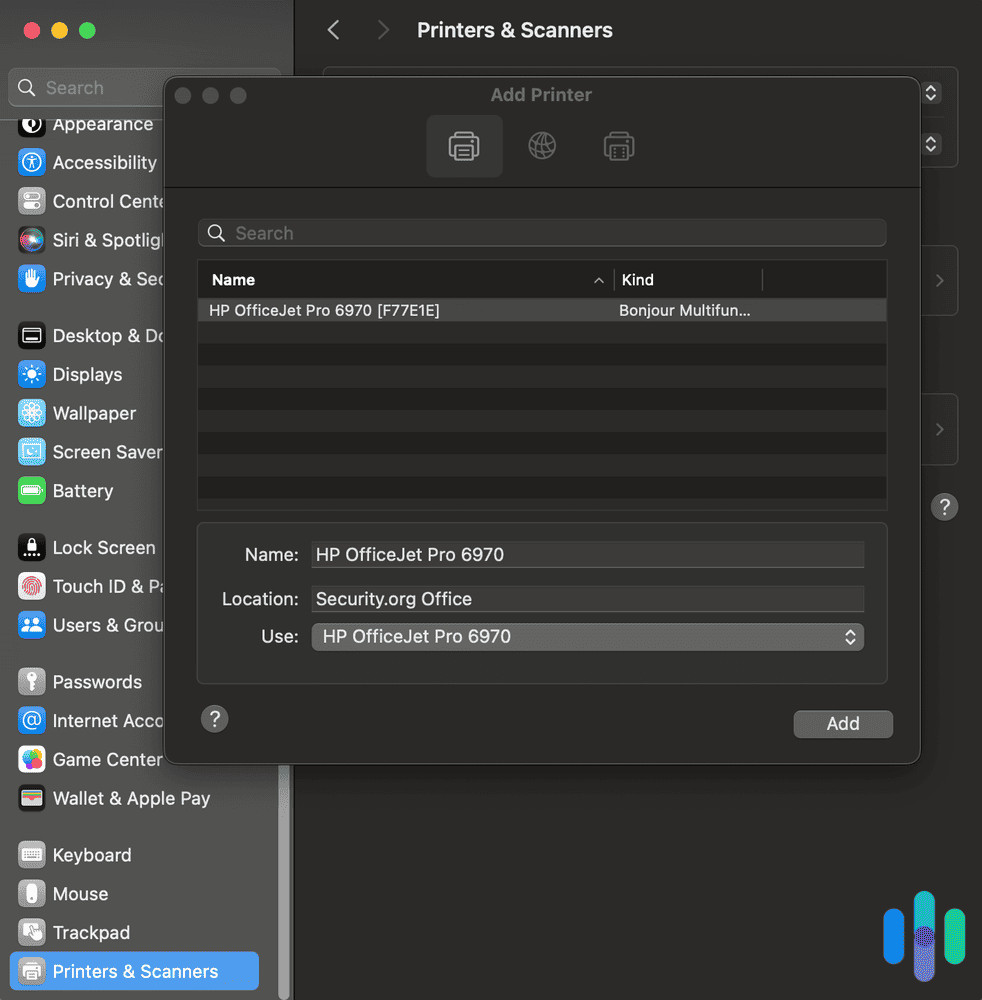 Adding a new device connection to printer
» Do you know: What is a static IP address?
In Conclusion
Finding your printer’s IP address is a fundamental skill for anyone using a wireless printer. It’s the first step towards resolving connectivity problems and managing your printer effectively. Whether you choose to print a configuration page, use your computer’s settings, or access your router, the methods outlined in this guide will equip you to quickly locate this crucial piece of information and keep your printing experience smooth.
FAQs About Printer IP Addresses
Why does my printer need an IP address?
Just like computers on a network, printers need IP addresses to communicate over a network. The IP address acts as the printer’s unique identifier, allowing devices on the network to find and send print jobs to it.
Is my printer’s IP address the same as my computer’s IP address?
No, each device on your network (computers, printers, smartphones, etc.) has its own unique IP address. Your printer’s IP address is specific to the printer and allows it to be identified on your local network. Your computer also has its own IP address for network communication.
What if I can’t find my printer’s IP address using these methods?
If you’re having trouble, double-check that your printer is actually connected to your Wi-Fi network and powered on. Ensure your computer is on the same network. If problems persist, consult your printer’s manual or the manufacturer’s support website for model-specific instructions. You may also need to troubleshoot your network connection in general.
Is it safe to share my printer’s IP address?
Generally, your printer’s local IP address (the one starting with 192.168 or 10.0) is only relevant within your home or office network. Sharing this local IP address with someone outside your network doesn’t pose a significant security risk in itself. However, you should always be cautious about sharing any network information with untrusted individuals. Avoid making your printer directly accessible from the public internet unless you have a specific need and understand the security implications.