
Are you looking for efficient ways to organize your documents with professional-looking file folder labels? Printing file folder labels is a straightforward process, and at amazingprint.net, we are here to guide you through each step. Whether you need printable file folder labels for your home office or a large-scale labeling solution for your business, discover how easy it is to create customized and visually appealing labels that make file management a breeze. Let’s dive into the world of label printing to enhance efficiency, boost productivity, and explore innovative printing solutions.
Here’s a comprehensive guide on How To Print File Folder Labels to create an organized workspace:
1. Understand Your Filing Needs
Before diving into the technical aspects of printing, it’s essential to understand your filing requirements. Planning your filing system can significantly impact the effectiveness of your organization strategy.
1.1. Assess the Scope of Your Filing System
What’s the scope of your filing system? It is essential to determine the number of files you need to organize, the categories you’ll use, and the frequency with which you’ll need to update your labels. According to a study by the Printing Industries of America (PIA) in July 2025, businesses that plan their filing systems in advance experience a 20% increase in efficiency when retrieving documents.
- Small-Scale: For home offices or small businesses, the needs might be relatively simple.
- Large-Scale: Corporations or institutions often require a more complex approach.
1.2. Determine Label Content
What information do you need to include on your labels? The content of your labels should be concise and informative. The University of California, Berkeley’s research on information management highlights that labels containing clear, category-based information reduce retrieval times by up to 30%.
1.3. Plan for Updates and Changes
How often will you need to update or replace your labels? Anticipate the need for updates, especially in dynamic environments where information changes frequently. Consider using removable labels or label protectors to facilitate easy changes.
2. Select the Right Label Size and Material
Choosing the correct label size and material is crucial for readability and durability. The wrong size can make labels difficult to read, while the wrong material may not withstand frequent handling.
2.1. Measure Your File Folder Tabs
What size labels do you need for your file folder tabs? Most standard file folder tabs use labels that are approximately 2/3″ x 3-7/16″. Use a ruler to measure the exact dimensions of your file folder tabs to ensure a perfect fit.
2.2. Opt for Standard Label Sizes
Are standard label sizes suitable for your needs, or do you require custom dimensions? Standard label sizes are readily available and cost-effective. However, custom dimensions may be necessary for unique filing systems. According to a survey by the Graphic Arts Technical Foundation (GATF), 75% of businesses use standard label sizes to save on costs and simplify procurement.
2.3. Consider Label Material
What type of label material is best for your specific use case? Different materials offer varying levels of durability and adhesion.
| Material Type | Characteristics | Best Use Cases |
|---|---|---|
| Paper Labels | Cost-effective, suitable for general use | Indoor filing, temporary labels |
| Vinyl Labels | Durable, water-resistant | Outdoor filing, files exposed to moisture |
| Polyester Labels | Highly durable, resistant to chemicals and extreme temperatures | Industrial filing, harsh environments |
| Removable Labels | Easy to peel off without leaving residue, ideal for temporary labeling | Temporary files, frequently updated categories |
| Eco-Friendly Labels | Made from recycled materials, environmentally responsible | Businesses committed to sustainability, green initiatives |
| Clear Labels | Create a seamless look on your folders, giving a professional and polished appearance, virtually disappearing on surfaces | When you want the label to blend into the background, for a clean and uncluttered look |
3. Choose Your Label Printing Method
Selecting the appropriate printing method can impact the quality and cost-effectiveness of your file folder labels. Both desktop printers and professional printing services offer unique advantages, depending on your specific needs.
3.1. Desktop Printer Printing
Do you prefer printing labels in-house using a desktop printer? Desktop printers are suitable for small to medium-sized businesses that require flexibility and control over the printing process.
- Pros:
- Cost-effective for small quantities.
- Immediate printing capability.
- Full control over design and content.
- Cons:
- Time-consuming for large quantities.
- Limited material options.
- May not offer the same print quality as professional services.
3.2. Professional Printing Services
When is it more advantageous to use professional printing services like amazingprint.net? Professional printing services are ideal for large-scale projects that require high-quality printing and a wide range of material options.
- Pros:
- High-quality printing.
- Wide range of materials and finishes.
- Cost-effective for large quantities.
- Professional design assistance.
- Cons:
- Higher upfront costs.
- Longer turnaround times.
- Less control over the immediate printing process.
3.3. Compare Printing Methods
| Feature | Desktop Printer | Professional Printing Services (amazingprint.net) |
|---|---|---|
| Print Quality | Good | Excellent |
| Material Options | Limited | Wide range |
| Quantity | Small to Medium | Any quantity, especially large |
| Cost | Lower for small runs | Cost-effective for large runs |
| Turnaround Time | Immediate | Longer |
| Customization | Full control | Extensive customization options |
| Best Use Cases | Small offices, immediate needs | Large businesses, high-quality needs |
| Service | DIY | Comprehensive service, including design and printing |
4. Design Your File Folder Labels
Creating an effective design is crucial for making your file folder labels readable and visually appealing. A well-designed label can significantly improve the organization and efficiency of your filing system.
4.1. Use Label Design Software
What software can you use to design your labels? Label design software simplifies the process and ensures accurate alignment and formatting.
- Avery Design & Print Online: A free, user-friendly online tool with pre-designed templates.
- Microsoft Word: A widely used option with basic label design capabilities.
- Adobe Illustrator: A professional-grade design tool for advanced customization.
4.2. Incorporate Essential Information
What key details should your labels include? Effective labels contain essential information that helps you quickly identify the contents of each file.
- Descriptive Titles: Use clear, concise titles that accurately reflect the file contents.
- Dates: Include date ranges to organize files chronologically.
- Categories: Categorize files by subject, project, or client.
- Color Coding: Use colors to differentiate categories and improve visual organization.
4.3. Choose Fonts and Layout
How can you optimize the readability and visual appeal of your labels? The right fonts and layout can make your labels easier to read and more visually organized.
- Font Choice: Select fonts that are easy to read and appropriate for the label size. Sans-serif fonts like Arial and Helvetica are often preferred for their clarity.
- Font Size: Ensure the font size is large enough to be easily readable, even from a distance.
- Alignment: Use consistent alignment to create a clean, professional look. Left alignment is often preferred for readability.
- White Space: Leave enough white space around the text to prevent the label from looking cluttered.
4.4. Consider Branding
How can you incorporate your brand into your file folder labels? Adding your company logo and colors can reinforce your brand identity and create a cohesive look in your office.
- Logo Placement: Position your logo strategically on the label without overshadowing the essential information.
- Color Palette: Use your brand colors to create a consistent visual theme.
- Brand Consistency: Ensure that your labels align with your overall branding guidelines.
4.5. Design Tips for Effective Labels
| Tip | Description |
|---|---|
| Keep it Simple | Avoid overcrowding the label with too much information. Focus on the essentials. |
| Use Visual Cues | Incorporate icons or symbols to represent different categories or file types. |
| Maintain Consistency | Use the same font, size, and layout for all labels to create a uniform look. |
| Optimize for Readability | Ensure that the text is easy to read by choosing appropriate fonts and sizes. |
| Test Your Design | Print a test sheet to check the alignment, readability, and overall appearance of your labels before printing in bulk. |
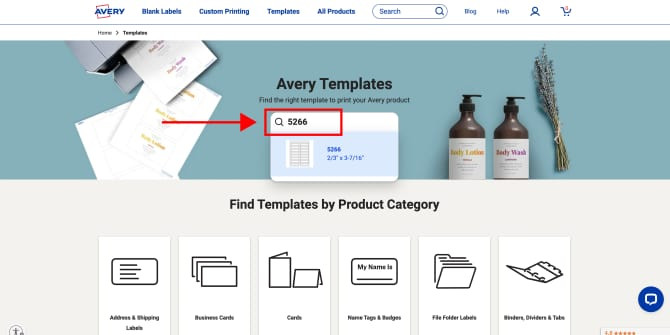 Avery Templates page highlighting a search bar with the template number
5. Set Up Your Printer for Label Printing
Proper printer settings are crucial for achieving high-quality label prints. Incorrect settings can lead to misaligned prints, smeared ink, and wasted labels.
5.1. Load Labels Correctly
How should you load your labels into the printer? Proper loading ensures that the labels feed correctly and prevents jams.
- Check Label Orientation: Determine the correct orientation of the label sheet based on your printer’s feed mechanism.
- Adjust Paper Guides: Adjust the paper guides in the printer tray to fit the label sheet snugly.
- Load Only the Recommended Amount: Avoid overloading the tray, as this can cause misfeeds.
5.2. Select the Correct Paper Type
What paper type setting should you use for printing labels? Selecting the correct paper type ensures that the printer applies the appropriate amount of heat and pressure.
- Choose “Labels” or “Heavy Paper”: These settings optimize the printer for thicker label stock.
- Avoid “Plain Paper” Setting: This setting may not provide enough heat for the adhesive to bond properly, leading to smudging.
5.3. Adjust Print Quality Settings
How can you optimize print quality for labels? Adjusting print quality settings can improve the sharpness and clarity of your labels.
- Set to “High Quality” or “Best”: This ensures that the printer uses the maximum resolution for printing.
- Check Ink Levels: Ensure that your ink or toner cartridges are adequately filled to prevent faded prints.
5.4. Perform a Test Print
Why is a test print essential before printing your labels? A test print allows you to check the alignment and print quality before committing to a full print run.
- Use a Plain Paper Sheet: Print a test page on plain paper to check the alignment of the design.
- Adjust Alignment as Needed: If the alignment is off, adjust the printer settings or the label design and repeat the test print.
6. Print Your File Folder Labels
With your design finalized and printer settings configured, you’re ready to print your file folder labels. Follow these steps to ensure a smooth and efficient printing process.
6.1. Access Print Settings
How do you access the print settings in your design software? Accessing the print settings allows you to specify the number of copies, print range, and other essential parameters.
- Locate the Print Option: In your design software, click on “File” and then select “Print.”
- Open Printer Properties: Click on “Printer Properties” or “Advanced Settings” to access the printer-specific settings.
6.2. Specify Print Range
What print range should you select when printing labels? Specifying the print range ensures that you only print the labels you need.
- Print All Labels: If you want to print the entire sheet, select “All Pages.”
- Print Specific Labels: If you only need to print certain labels, select “Pages” and enter the page numbers or label numbers.
6.3. Confirm Printer Settings
How can you double-check your printer settings before printing? Confirming your settings ensures that everything is configured correctly and prevents errors.
- Verify Paper Type: Make sure the paper type is set to “Labels” or “Heavy Paper.”
- Check Print Quality: Ensure that the print quality is set to “High Quality” or “Best.”
- Review Alignment: Double-check the alignment settings to prevent misaligned prints.
6.4. Start Printing
What’s the final step to print your file folder labels? Once you’ve confirmed all settings, you’re ready to start printing.
- Click “Print”: Click the “Print” button to begin the printing process.
- Monitor the Printing: Keep an eye on the printer to ensure that the labels are feeding correctly and there are no jams.
6.5. Post-Printing Tips
| Tip | Description |
|---|---|
| Allow Ink to Dry | Give the ink a few minutes to dry before handling the labels to prevent smudging. |
| Check for Imperfections | Inspect the printed labels for any imperfections, such as streaks or misprints. |
| Store Labels Properly | Store unused label sheets in a cool, dry place to prevent them from curling or becoming damaged. |
| Address Printer Issues | If you encounter any printing problems, consult your printer’s manual or the manufacturer’s website for troubleshooting tips. |
7. Apply Labels to File Folders
Applying labels correctly ensures that they adhere properly and look professional. Follow these steps to achieve a clean and organized look for your file folders.
7.1. Prepare Your File Folders
How should you prepare your file folders before applying labels? Proper preparation ensures that the labels adhere smoothly and securely.
- Clean the Surface: Wipe the file folder tabs with a clean, dry cloth to remove any dust or debris.
- Ensure Smooth Surface: Make sure the surface is smooth and free from any wrinkles or creases.
7.2. Peel Labels Carefully
What’s the best way to peel labels from the sheet? Peeling labels carefully prevents them from tearing or curling.
- Bend the Label Sheet: Gently bend the label sheet to separate the label from the backing.
- Peel from a Corner: Peel the label from a corner, using a slow and steady motion.
- Avoid Touching the Adhesive: Try not to touch the adhesive side of the label to prevent contamination.
7.3. Align Labels Accurately
How can you ensure that the labels are aligned correctly on the file folder tabs? Accurate alignment creates a professional and organized appearance.
- Use a Guide: Use a ruler or a straight edge as a guide to align the labels.
- Center the Label: Center the label on the file folder tab, leaving equal space on both sides.
7.4. Adhere Labels Securely
What’s the best way to adhere labels to the file folders? Secure adhesion prevents the labels from peeling off over time.
- Press Firmly: Press the label firmly onto the file folder tab, starting from the center and moving outwards.
- Smooth Out Bubbles: Use your fingers or a smooth object, such as a credit card, to smooth out any air bubbles.
- Check Adhesion: Make sure the label is securely attached to the file folder tab before placing it in the filing system.
7.5. Tips for Professional Label Application
| Tip | Description |
|---|---|
| Maintain Consistency | Apply all labels in the same manner to create a uniform look. |
| Avoid Overlapping Labels | Make sure that the labels do not overlap each other, as this can make them difficult to read. |
| Replace Damaged Labels | Replace any damaged or torn labels immediately to maintain a professional appearance. |
| Protect Labels with Covers | Consider using label protectors or clear tape to protect the labels from wear and tear. |
| Store File Folders Properly | Store file folders in a way that prevents the labels from being damaged or obscured. |
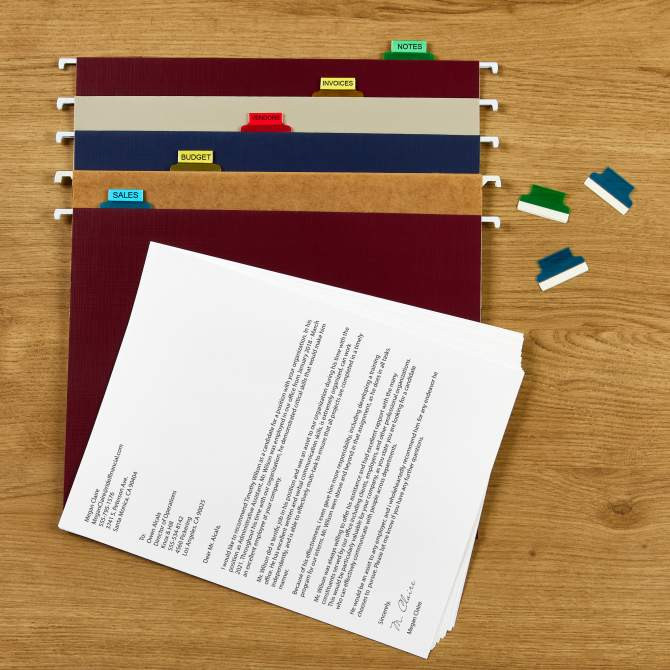 Avery hanging file folders on a wooden desk, each labeled with colorful tabs for categories such as
8. Explore Advanced Labeling Techniques
Beyond the basics, several advanced techniques can further enhance your file folder labeling system. These techniques can improve organization, efficiency, and visual appeal.
8.1. Color-Coded Labeling
Why use color-coded labeling? Color-coding can significantly improve the speed and accuracy of file retrieval.
- Assign Colors to Categories: Assign different colors to different categories, such as clients, projects, or departments.
- Use Color-Coded Labels: Use colored labels or add colored stripes to your labels to create a visual coding system.
- Create a Color Key: Create a color key or legend to help users quickly identify the meaning of each color.
8.2. Sequential Numbering
When is sequential numbering useful for file folder labels? Sequential numbering can help you maintain a logical order in your filing system.
- Number Files Consecutively: Assign each file a unique sequential number.
- Print Numbers on Labels: Print the sequential numbers on your file folder labels.
- Maintain a Number Log: Keep a log of the files and their corresponding numbers to track their location.
8.3. Barcodes and QR Codes
How can barcodes and QR codes enhance your labeling system? Barcodes and QR codes can streamline file tracking and retrieval.
- Generate Codes: Use a barcode or QR code generator to create unique codes for each file.
- Print Codes on Labels: Print the codes on your file folder labels.
- Use a Scanner: Use a barcode or QR code scanner to quickly identify and locate files.
8.4. Multi-Line Labels
When should you use multi-line labels? Multi-line labels can provide more detailed information about the file contents.
- Use Label Design Software: Use label design software to create labels with multiple lines of text.
- Include Key Information: Include key information, such as the file title, date range, and a brief description.
- Optimize for Readability: Ensure that the font size and layout are optimized for readability.
8.5. Tips for Advanced Labeling
| Tip | Description |
|---|---|
| Plan Your System | Develop a comprehensive labeling plan before implementing advanced techniques. |
| Train Your Team | Provide training to your team members on how to use and maintain the labeling system. |
| Use Technology | Leverage technology, such as barcode scanners and label design software, to streamline the labeling process. |
| Regularly Review and Update | Regularly review and update your labeling system to ensure that it remains effective and efficient. |
9. Common Mistakes to Avoid
Avoiding common mistakes can save you time, money, and frustration. Here are some pitfalls to watch out for when printing file folder labels.
9.1. Incorrect Label Size
What happens if you use the wrong label size? Using the wrong label size can lead to misaligned prints and wasted labels.
- Measure Carefully: Always measure your file folder tabs before purchasing labels.
- Check Template Compatibility: Make sure that the label template is compatible with the label size.
9.2. Misaligned Printing
Why does misaligned printing occur? Misaligned printing can result in labels that are difficult to read and unprofessional in appearance.
- Check Printer Settings: Always check your printer settings to ensure that the paper type and alignment are correct.
- Perform a Test Print: Perform a test print on plain paper before printing on label sheets.
9.3. Poor Print Quality
What causes poor print quality on labels? Poor print quality can make the labels difficult to read and may require reprinting.
- Check Ink Levels: Make sure that your ink or toner cartridges are adequately filled.
- Adjust Print Quality Settings: Set the print quality to “High Quality” or “Best.”
9.4. Using the Wrong Label Material
What are the consequences of using the wrong label material? Using the wrong label material can result in labels that peel off easily or are not durable enough for the intended use.
- Consider the Environment: Choose a label material that is appropriate for the environment in which the files will be stored.
- Test the Material: Test the label material on a sample file folder to ensure that it adheres properly.
9.5. Overcrowded Labels
Why should you avoid overcrowding labels with too much information? Overcrowded labels can be difficult to read and may defeat the purpose of the labeling system.
- Keep It Simple: Focus on including only the essential information on the label.
- Use Clear and Concise Language: Use clear and concise language to describe the file contents.
10. Frequently Asked Questions (FAQs)
10.1. What is the standard size for file folder labels?
The standard size for file folder labels is typically 2/3″ x 3-7/16″. However, it’s always best to measure your file folder tabs to ensure a perfect fit.
10.2. Can I use any printer to print file folder labels?
Most inkjet and laser printers can be used to print file folder labels. However, it’s essential to select the correct paper type and adjust the printer settings accordingly.
10.3. What is the best software for designing file folder labels?
Avery Design & Print Online is a popular and user-friendly option. Other options include Microsoft Word and Adobe Illustrator.
10.4. How can I prevent labels from peeling off file folders?
Ensure that the file folder surface is clean and smooth before applying labels. Press the labels firmly onto the file folder and smooth out any air bubbles. Consider using label protectors or clear tape to protect the labels from wear and tear.
10.5. Can I print on both sides of a label sheet?
No, it is not recommended to print on both sides of a label sheet, as this can cause the labels to peel off or jam the printer.
10.6. What should I do if my labels are misaligned when printing?
Check your printer settings to ensure that the paper type and alignment are correct. Perform a test print on plain paper and adjust the alignment as needed.
10.7. How can I create color-coded file folder labels?
Use colored labels or add colored stripes to your labels to create a visual coding system. Assign different colors to different categories and create a color key to help users quickly identify the meaning of each color.
10.8. What are the benefits of using removable file folder labels?
Removable file folder labels are ideal for temporary labeling or when you need to frequently update the file categories. They can be easily peeled off without leaving residue.
10.9. How can I make my file folder labels more readable?
Use clear and concise language, select easy-to-read fonts, and ensure that the font size is large enough. Leave enough white space around the text to prevent the label from looking cluttered.
10.10. Where can I find templates for file folder labels?
Templates for file folder labels can be found on the Avery website, as well as within label design software like Microsoft Word and Adobe Illustrator.
By following these steps and avoiding common mistakes, you can create a file folder labeling system that is efficient, effective, and visually appealing. Start organizing your files today and experience the benefits of a well-organized workspace!
Printing file folder labels is a simple yet powerful way to enhance organization and efficiency in any environment. Whether you’re managing files at home or in a large corporation, the right labels can make a significant difference. At amazingprint.net, we offer a wide range of label printing solutions to meet your specific needs. Explore our services and discover how easy it is to create customized, professional-looking labels that help you stay organized and productive.
Ready to transform your filing system? Visit amazingprint.net today and explore our comprehensive range of label printing solutions. Discover how easy it is to create customized, professional-looking labels that bring order and efficiency to your workspace.
Address: 1600 Amphitheatre Parkway, Mountain View, CA 94043, United States.
Phone: +1 (650) 253-0000.
Website: amazingprint.net.
Let amazingprint.net be your partner in achieving a perfectly organized and efficient workspace.