Printing email attachments in Outlook can sometimes feel like navigating a maze, but amazingprint.net is here to guide you through every step. This comprehensive guide provides you with simple, effective methods to print your Outlook attachments, ensuring you never miss an important document again.
1. Understanding Your Options: Printing Attachments in Outlook
Do you want to streamline your workflow by printing multiple attachments at once in Outlook? Let’s explore the various ways you can achieve this, depending on the Outlook version you are using.
1.1. Printing Attachments in New Outlook
The new Outlook interface offers a streamlined approach to managing and printing attachments. Here’s how you can print attachments in the new Outlook:
- Open the Email: Start by selecting and opening the email containing the attachments you wish to print.
- Access the Attachment:
- Preview: If the attachment is a file type Outlook can preview (like a PDF or image), use the attachment dropdown and select “Preview.” From the preview screen, you can select the print option to print directly.
- Open: For file types that require an external program, select “Open” from the dropdown. This will open the file in its associated program (e.g., Word for .doc files, Adobe Reader for .pdf files). From there, you can use the program’s print function (usually found under “File” > “Print” or by pressing Ctrl + P).
1.2. Printing Attachments in Classic Outlook
Classic Outlook provides a few different methods for printing attachments, including the “Quick Print” option, which can be particularly useful for sending attachments directly to your default printer.
-
Print Just an Attachment:
-
Open the Email: Open the email from which you want to print the attachment.
-
Use Quick Print: Hover over the attachment, click the dropdown arrow, and select “Quick Print.” This sends the attachment directly to your default printer.
Note: If you need to use a different printer, double-click the attachment to open it, then use the “Print” option (Ctrl + P) to select your preferred printer.
-
-
Print an Email and Its Attachment with Quick Print:
-
Enable Print Attached Files: This feature allows you to print both the email and its attachments in one go. To enable it:
- Select the email in your message list.
- Go to File > Print.
- Select Print Options.
- Check the Print attached files box.
-
Print: Once enabled, any email you print using the regular print command will also print its attachments.
-
1.3. Printing Attachments in Outlook on the Web and Outlook.com
Outlook on the web and Outlook.com offer similar functionalities for printing attachments.
- Open the Email: Open the email that contains the attachment you want to print.
- Access the Attachment:
- Preview: If the file type supports preview, select “Preview” from the attachment dropdown, then select the print option from the preview screen.
- Download: For other file types, select “Download” to save the attachment to your computer. Open the downloaded file with its associated program, and then print from there.
2. Step-by-Step Guides for Each Outlook Version
Having a clear, step-by-step guide can simplify the process of printing attachments across different versions of Outlook. This section breaks down the process for New Outlook, Classic Outlook, and Outlook on the Web.
2.1. How to Print Attachments in New Outlook: A Detailed Guide
Navigating the new Outlook interface to print attachments is straightforward once you know the steps. This guide offers a detailed walkthrough.
- Open the Desired Email:
- Start by launching the new Outlook application on your computer.
- Navigate to your inbox or the folder containing the email with the attachments you want to print.
- Select the email to open it. Ensure that the email contains the attachments you intend to print.
- Accessing Attachment Options:
- Once the email is open, locate the attachment(s) displayed within the email body.
- Hover your mouse over the specific attachment you wish to print. This action should reveal a dropdown menu or icon associated with the attachment.
- Choosing to Preview or Open:
- From the dropdown menu, you will typically see two options: “Preview” and “Open.”
- Preview: Use this option if the attachment is a common file type like a PDF or image that Outlook can display directly. Clicking “Preview” will open the attachment within Outlook itself.
- Open: Choose “Open” if the attachment requires a specific program to view (e.g., a .doc file for Microsoft Word, or a .xls file for Microsoft Excel). This will launch the appropriate application to open the file.
- Printing from Preview:
- If you selected “Preview,” the attachment will open within Outlook.
- Look for a print icon or a “Print” option within the preview interface. It is usually located in the top toolbar.
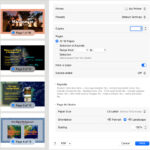
- Click the “Print” option. This will open the print dialog box, where you can select your printer, specify the number of copies, and adjust other printing settings.
- Once you have configured your print settings, click the “Print” button to send the attachment to the printer.
- Printing from the Associated Program:
- If you selected “Open,” the attachment will launch in its associated program (e.g., Microsoft Word, Adobe Acrobat Reader).
- Within the program, navigate to the “File” menu, typically located in the top-left corner of the application window.
- Select “Print” from the “File” menu, or use the keyboard shortcut Ctrl + P to open the print dialog box.
- Configure your print settings as needed, such as selecting the printer, specifying the number of copies, and adjusting page settings.
- Click the “Print” button to send the attachment to the printer.
- Handling Multiple Attachments:
- If the email contains multiple attachments, repeat the above steps for each attachment you want to print.
- You can streamline the process by opening all attachments first and then printing them one after the other from their respective programs.
2.2. How to Print All Attachments in Classic Outlook: A Comprehensive Guide
Classic Outlook offers a straightforward method for printing attachments, including the useful “Quick Print” option. Here’s a step-by-step guide to help you print your attachments efficiently:
- Open Outlook and Select the Email:
- Launch the Classic Outlook application on your computer.
- Navigate to your inbox or the folder containing the email with the attachments you wish to print.
- Select the email to open it. Ensure that the email contains the attachments you intend to print.
- Using the Quick Print Option:
- Once the email is open, locate the attachment(s) displayed within the email body.
- Hover your mouse over the specific attachment you want to print. This action should reveal a dropdown menu or icon associated with the attachment.
- Click the dropdown menu (usually represented by a small arrow) to reveal the options available for the attachment.
- Select “Quick Print” from the dropdown menu. This option sends the attachment directly to your default printer without opening it.
- Printing with a Different Printer:
- If you want to use a printer other than your default printer, you’ll need to open the attachment first.
- Double-click the attachment. This will open the file in its associated program (e.g., Microsoft Word for .doc files, Adobe Acrobat Reader for .pdf files).
- Within the program, navigate to the “File” menu, typically located in the top-left corner of the application window.
- Select “Print” from the “File” menu, or use the keyboard shortcut Ctrl + P to open the print dialog box.
- In the print dialog box, select the printer you want to use from the list of available printers.
- Configure any other print settings as needed, such as the number of copies, page orientation, and paper size.
- Click the “Print” button to send the attachment to the selected printer.
- Enabling “Print Attached Files” Option:
- Classic Outlook allows you to print the email and its attachments together by enabling the “Print attached files” option.
- In the message list, select the email that has the attachments you want to print.
- Go to File > Print.
- In the Print dialog box, select Print Options.
- Check the Print attached files box. This ensures that all attachments are printed along with the email.
- Printing the Email and Attachments:
- With the “Print attached files” option enabled, click the “Print” button in the Print dialog box.
- Outlook will now print the email and all its attachments to your default printer.
- If you want to print to a different printer, you’ll need to follow the steps in the “Printing with a Different Printer” section above for each attachment.
- Managing Multiple Attachments:
- If the email contains multiple attachments and you only want to print specific ones, it’s best to use the “Quick Print” option for each desired attachment or open each one individually to print from its associated program.
- Ensure that the “Print attached files” option is unchecked if you only want to print specific attachments.
By following these steps, you can efficiently print attachments in Classic Outlook, whether you need to use the quick print feature for speed or customize your printing options for specific needs.
2.3. How to Print Attachments in Outlook on the Web: An Easy Guide
Printing attachments in Outlook on the Web is a simple process that allows you to quickly access and print your documents. Here’s a detailed guide to help you through each step:
- Access Outlook on the Web:
- Open your web browser (e.g., Chrome, Firefox, Safari).
- Go to the Outlook on the Web website.
- Log in using your Microsoft account credentials (email address and password).
- Navigate to the Email with Attachments:
- Once logged in, you will see your Outlook inbox.
- Navigate to the folder containing the email with the attachments you wish to print. This could be your inbox, sent items, or any other folder.
- Select the email to open it. Ensure that the email contains the attachments you intend to print.
- Accessing Attachment Options:
- Once the email is open, locate the attachment(s) displayed within the email body. Attachments are typically listed below the subject line or within the body of the email.
- Hover your mouse over the specific attachment you want to print. This action should reveal a dropdown menu or an icon associated with the attachment.
- Click the dropdown menu (usually represented by a small arrow) to reveal the options available for the attachment.
- Choosing to Preview or Download:
- From the dropdown menu, you will typically see two options: “Preview” and “Download.”
- Preview: Use this option if the attachment is a common file type like a PDF or image that Outlook can display directly in the browser. Clicking “Preview” will open the attachment within the Outlook web interface.
- Download: Choose “Download” if the attachment requires a specific program to view (e.g., a .doc file for Microsoft Word, or a .xls file for Microsoft Excel). This will download the file to your computer.
- Printing from Preview:
- If you selected “Preview,” the attachment will open within the Outlook web interface.
- Look for a print icon or a “Print” option within the preview interface. It is usually located in the top toolbar.
- Click the “Print” option. This will open the print dialog box, where you can select your printer, specify the number of copies, and adjust other printing settings.
- Once you have configured your print settings, click the “Print” button to send the attachment to the printer.
- Printing from the Associated Program:
- If you selected “Download,” the attachment will download to your computer’s default download location.
- Navigate to the download location and open the downloaded file. This will launch the file in its associated program (e.g., Microsoft Word, Adobe Acrobat Reader).
- Within the program, navigate to the “File” menu, typically located in the top-left corner of the application window.
- Select “Print” from the “File” menu, or use the keyboard shortcut Ctrl + P to open the print dialog box.
- Configure your print settings as needed, such as selecting the printer, specifying the number of copies, and adjusting page settings.
- Click the “Print” button to send the attachment to the printer.
- Handling Multiple Attachments:
- If the email contains multiple attachments, repeat the above steps for each attachment you want to print.
- You can streamline the process by downloading all attachments first and then printing them one after the other from their respective programs.
3. Troubleshooting Common Printing Issues
Encountering issues while trying to print attachments in Outlook can be frustrating. Here are some common problems and their solutions to help you get back on track.
3.1. Attachment Won’t Print
Problem: The attachment does not print when you select the print option.
Solutions:
- Check File Compatibility:
- Issue: The file format may not be compatible with Outlook’s built-in preview or your printer.
- Solution: Save the attachment to your computer and open it with the appropriate program (e.g., Adobe Acrobat Reader for PDF files, Microsoft Word for DOCX files). Then, print from that program.
- Update Printer Drivers:
- Issue: Outdated or corrupt printer drivers can prevent printing.
- Solution: Update your printer drivers. Go to your printer manufacturer’s website, download the latest drivers for your operating system, and install them.
- Restart Printer Spooler Service:
- Issue: The printer spooler service might be stuck or not running.
- Solution: Restart the printer spooler service.
- Press
Windows Key + R, typeservices.msc, and press Enter. - Find the “Print Spooler” service in the list.
- Right-click on it and select “Restart.”
- Press
- Check Printer Connection:
- Issue: The printer may not be properly connected to your computer.
- Solution: Ensure that the printer is connected to your computer via USB or Wi-Fi and that it is turned on. If it’s a network printer, verify that you are connected to the network.
- Preview Issues:
- Issue: The preview might be corrupted or not displaying correctly.
- Solution: Instead of printing from the preview, download the attachment and print it from the appropriate application.
- Check for Security Restrictions:
- Issue: Security settings may be preventing the attachment from being printed.
- Solution: Check if your organization’s security policies are blocking the printing of certain file types. Contact your IT department for assistance.
3.2. Garbled or Incorrect Print Output
Problem: The printed attachment appears with garbled text, incorrect formatting, or missing images.
Solutions:
- Use the Correct Program:
- Issue: Printing directly from Outlook’s preview might not render the file correctly.
- Solution: Open the attachment in its native application. For example, open a PDF file in Adobe Acrobat Reader or a DOCX file in Microsoft Word.
- Adjust Print Settings:
- Issue: Incorrect print settings can cause formatting issues.
- Solution: In the print dialog box, adjust settings such as paper size, orientation, and margins. Ensure that the settings match the document’s format.
- Update Fonts:
- Issue: Missing or corrupted fonts can cause text to appear incorrectly.
- Solution: Ensure that you have the necessary fonts installed on your computer. If the document uses a specific font, download and install it.
- Clear Printer Cache:
- Issue: A corrupted printer cache can cause printing errors.
- Solution: Clear the printer cache by deleting temporary print files.
- Stop the Print Spooler service (as described above).
- Navigate to
C:WindowsSystem32spoolPRINTERSand delete the files in this folder. - Restart the Print Spooler service.
- Print as Image:
- Issue: Complex documents with many graphics or unusual formatting may not print correctly.
- Solution: In the print dialog box, look for an option to “Print as Image” or “Rasterize.” This can help ensure that the document is printed accurately.
3.3. Cannot Access Attachments
Problem: You are unable to open or access the attachments in Outlook.
Solutions:
- Check Attachment Block Settings:
- Issue: Outlook may be blocking certain types of attachments for security reasons.
- Solution: Check your Trust Center settings in Outlook.
- Go to File > Options > Trust Center > Trust Center Settings > Attachment Handling.
- Ensure that the file type you are trying to open is not blocked. Note that changing these settings can expose you to security risks.
- Repair Outlook:
- Issue: Corrupted Outlook files can prevent access to attachments.
- Solution: Repair your Outlook installation.
- Close Outlook.
- Go to Control Panel > Programs > Programs and Features.
- Find Microsoft Office (or Microsoft 365) in the list, right-click on it, and select “Change.”
- Choose “Quick Repair” or “Online Repair” and follow the prompts.
- Run Outlook in Safe Mode:
- Issue: Add-ins may be interfering with Outlook’s ability to access attachments.
- Solution: Start Outlook in Safe Mode.
- Close Outlook.
- Press
Windows Key + R, typeoutlook.exe /safe, and press Enter. - If Outlook works correctly in Safe Mode, disable your add-ins one by one to identify the culprit.
- Check Antivirus Software:
- Issue: Antivirus software may be scanning attachments and preventing access.
- Solution: Temporarily disable your antivirus software and try to access the attachment again. If this resolves the issue, adjust your antivirus settings to allow Outlook attachments.
- File Size Limits:
- Issue: Very large attachments may not open or download properly.
- Solution: Ask the sender to compress the file or send it in multiple parts. You can also try accessing Outlook on the web, which may handle large attachments more effectively.
3.4. Slow Printing
Problem: Printing attachments takes an unusually long time.
Solutions:
- Reduce Print Quality:
- Issue: High print quality settings can slow down the printing process.
- Solution: Reduce the print quality in the print dialog box. Select a lower DPI (dots per inch) setting.
- Simplify the Document:
- Issue: Complex documents with many graphics or intricate formatting can take longer to print.
- Solution: Simplify the document by removing unnecessary graphics or formatting before printing.
- Use a Direct Connection:
- Issue: Printing over a Wi-Fi network can be slower than using a direct USB connection.
- Solution: Connect the printer directly to your computer using a USB cable.
- Update Printer Firmware:
- Issue: Outdated printer firmware can cause performance issues.
- Solution: Check for and install any available firmware updates for your printer. Visit the printer manufacturer’s website for instructions.
- Close Unnecessary Programs:
- Issue: Running many programs simultaneously can slow down your computer and the printing process.
- Solution: Close any programs that you are not using to free up system resources.
4. Optimizing Your Printing Workflow in Outlook
Optimizing your printing workflow in Outlook can save you time and increase efficiency. By implementing a few key strategies, you can streamline the process of printing attachments and emails.
4.1. Using Quick Print Effectively
Quick Print is a convenient feature in Classic Outlook that sends attachments directly to your default printer without opening them. Here’s how to use it effectively:
- Set a Default Printer:
- Importance: Ensure that your most frequently used printer is set as the default printer on your computer.
- How to:
- Go to Control Panel > Devices and Printers.
- Right-click on the printer you want to use as the default and select “Set as default printer.”
- Understand File Compatibility:
- Limitation: Quick Print works best with common file types that your printer can easily process, such as PDFs and images.
- Tip: For less common file types, it may be better to open the attachment in its native application to ensure proper formatting and printing.
- Utilize Quick Print for Speed:
- Advantage: Quick Print is ideal for quickly printing attachments when you don’t need to review them first.
- Process:
- Open the email containing the attachment.
- Hover over the attachment, click the dropdown arrow, and select “Quick Print.”
- Combine with “Print Attached Files”:
- Efficiency: In Classic Outlook, you can enable the “Print attached files” option to print both the email and its attachments together.
- Steps:
- Go to File > Print > Print Options.
- Check the “Print attached files” box.
- Now, when you print an email, all attachments will automatically be printed as well.
- Manage Multiple Attachments:
- Selective Printing: If you only want to print specific attachments, use Quick Print on each desired attachment individually.
- Avoid Printing All: Ensure that the “Print attached files” option is unchecked to prevent printing all attachments when you only need a few.
4.2. Organizing Emails for Easy Printing
Keeping your emails organized can significantly simplify the process of finding and printing attachments. Here are some tips for organizing your emails:
- Use Folders:
- Strategy: Create folders for different projects, clients, or types of documents.
- Benefits: This makes it easy to locate specific emails and their attachments when you need to print them.
- How to:
- In Outlook, right-click on your email account in the folder pane.
- Select “New Folder” and give it a descriptive name.
- Move relevant emails into the folder.
- Implement a Naming Convention:
- Strategy: Use a consistent naming convention for your emails and attachments.
- Benefits: This helps you quickly identify the content of the email and locate the correct attachment.
- Example:
- Email Subject: “Project Alpha – Weekly Report”
- Attachment: “Project Alpha – Weekly Report – [Date].pdf”
- Use Categories and Tags:
- Strategy: Assign categories or tags to your emails to group them by topic, project, or priority.
- Benefits: This allows you to quickly filter and find emails with specific attachments.
- How to:
- Right-click on an email and select “Categorize.”
- Choose an existing category or create a new one.
- Create Rules to Automatically Sort Emails:
- Strategy: Set up rules to automatically move incoming emails with attachments to specific folders.
- Benefits: This automates the organization process and ensures that important emails are always easy to find.
- How to:
- Go to File > Manage Rules & Alerts.
- Click “New Rule.”
- Choose a template or start from a blank rule.
- Specify the conditions (e.g., emails from a specific sender or with certain keywords in the subject).
- Specify the action (e.g., move the email to a specific folder).
- Regularly Archive Old Emails:
- Strategy: Archive old emails that you no longer need to access regularly.
- Benefits: This reduces clutter in your inbox and makes it easier to find recent emails with attachments.
- How to:
- Go to File > Info > Tools > Clean Up Old Items.
- Choose the folder to archive and the date range.
- Use Search Effectively:
- Strategy: Learn how to use Outlook’s search function to quickly find emails with attachments.
- Tips:
- Use keywords related to the attachment name or content.
- Filter by date range or sender.
- Use the
hasattachments:yesfilter to find emails with attachments.
4.3. Setting Default Print Options for Efficiency
Configuring default print options in Outlook and your operating system can save you time and ensure consistent printing results. Here’s how to set them up:
- Set Default Printer in Windows:
- Importance: Ensure that your most frequently used printer is set as the default printer.
- How to:
- Go to Control Panel > Devices and Printers.
- Right-click on the printer you want to use as the default and select “Set as default printer.”
- Configure Print Settings in Applications:
- Importance: Set default print settings in applications like Microsoft Word and Adobe Acrobat Reader to match your preferences.
- How to (Microsoft Word):
- Open Microsoft Word.
- Go to File > Print.
- Adjust settings such as paper size, orientation, margins, and print quality.
- Click “Print” to save these settings as the default.
- How to (Adobe Acrobat Reader):
- Open Adobe Acrobat Reader.
- Go to File > Print.
- Adjust settings such as paper size, orientation, and print quality.
- Click “Print” to save these settings as the default.
- Customize Outlook Print Options:
- Importance: Configure Outlook’s print options to suit your needs.
- How to:
- Go to File > Print.
- Click “Print Options.”
- Adjust settings such as print style, paper size, and the option to print attached files.
- Save Frequently Used Print Profiles:
- Importance: Create and save print profiles for different types of documents or printing tasks.
- How to (Windows):
- Go to Control Panel > Devices and Printers.
- Right-click on your printer and select “Printing Preferences.”
- Adjust settings as needed and click “Apply.”
- Go to the “Advanced” tab and click “Printing Defaults.”
- Adjust settings as needed and click “Apply.”
- Use Keyboard Shortcuts:
- Efficiency: Learn and use keyboard shortcuts to speed up the printing process.
- Common Shortcuts:
Ctrl + P: Open the print dialog box.Ctrl + Shift + P: Open the print setup dialog box.
- Regularly Check and Update Printer Drivers:
- Importance: Ensure that your printer drivers are up to date to avoid printing issues.
- How to:
- Go to your printer manufacturer’s website.
- Download and install the latest drivers for your printer model and operating system.
By implementing these strategies, you can optimize your printing workflow in Outlook, saving time and ensuring consistent, high-quality printing results.
5. Advanced Techniques for Managing Attachments
To further enhance your ability to manage attachments in Outlook, consider these advanced techniques. These methods can help you handle multiple attachments more efficiently and securely.
5.1. Batch Printing Attachments
Printing multiple attachments at once can be a significant time-saver. While Outlook doesn’t have a built-in feature for batch printing, here are a few workarounds:
- Save All Attachments to a Folder:
- Process:
- Open the email containing the attachments.
- Select all attachments.
- Right-click and choose “Save All Attachments.”
- Select a folder on your computer to save the files.
- Printing:
- Open the folder containing the saved attachments.
- Select all files (Ctrl + A).
- Right-click and choose “Print.”
- Note: This method works best with common file types like PDFs and images.
- Process:
- Use a Third-Party Tool:
- Option: Several third-party Outlook add-ins and utilities can batch print attachments.
- Examples:
- Attachments Processor for Outlook: This add-in allows you to batch print, save, and rename attachments.
- MAPILab Toolbox: This tool includes a feature for batch printing attachments.
- Benefits: These tools often offer advanced features such as filtering attachments by file type and automatically naming files.
- Combine with “Print Attached Files” (Classic Outlook):
- Method: If you are using Classic Outlook, you can enable the “Print attached files” option to print all attachments along with the email.
- Steps:
- Go to File > Print > Print Options.
- Check the “Print attached files” box.
- Print the email. All attachments will be printed as well.
- Limitation: This method prints all attachments, so it may not be suitable if you only want to print specific files.
- Create a Macro (Advanced):
- Method: Use a VBA macro to automate the process of saving and printing attachments.
- Steps:
- Press
Alt + F11to open the VBA editor. - Insert a new module (Insert > Module).
- Copy and paste the following code into the module:
- Press
Sub BatchPrintAttachments()
    Dim objMail As Outlook.MailItem
    Dim objAttachments As Outlook.Attachments
    Dim i As Integer
    Dim strFile As String
    Dim strPath As String

    ' Set the path to save attachments
    strPath = "C:Attachments" ' Change this to your desired folder

    ' Create the folder if it doesn't exist
    If Dir(strPath, vbDirectory) = "" Then
        MkDir strPath
    End If

    ' Get the selected email
    Set objMail = Application.ActiveExplorer.Selection.Item(1)
    Set objAttachments = objMail.Attachments

    ' Loop through each attachment
    For i = 1 To objAttachments.Count
        ' Save the attachment
        strFile = strPath & objAttachments.Item(i).FileName
        objAttachments.Item(i).SaveAsFile strFile

        ' Print the attachment
        ShellExecute 0, "print", strFile, vbNullString, vbNullString, vbNormalFocus

        ' Optional: Delete the file after printing
        ' Kill strFile
    Next i

    ' Clean up
    Set objAttachments = Nothing
    Set objMail = Nothing
End Sub

Declare Function ShellExecute Lib "shell32.dll" Alias "ShellExecuteA" ( _
    ByVal hWnd As Long, _
    ByVal lpOperation As String, _
    ByVal lpFile As String, _
    ByVal lpParameters As String, _
    ByVal lpDirectory As String, _
    ByVal nShowCmd As Long _
) As Long- Modify the
strPathvariable to the desired folder. - Run the macro by selecting it from the “Macros” dialog box (View > Macros > View Macros).
- This macro saves each attachment to the specified folder and then prints it.
5.2. Secure Handling of Sensitive Attachments
When dealing with sensitive information, it’s crucial to handle attachments securely to protect against data breaches and unauthorized access.
- Encryption:
- Method: Encrypt sensitive attachments before sending them.
- Tools:
- Microsoft Office: Use the built-in encryption feature in Word, Excel, and PowerPoint.
- Third-Party Encryption Software: Tools like VeraCrypt or 7-Zip can encrypt files with strong algorithms.
- Process:
- Open the file.
- Go to File > Info > Protect Document > Encrypt with Password (in Microsoft Office).
- Set a strong password.
- Send the encrypted file and share the password with the recipient through a separate, secure channel.
- Password Protection:
- Method: Protect attachments with a password.
- Tools:
- PDF Editors: Adobe Acrobat Pro and other PDF editors allow you to set passwords for PDF files.
- File Compression Tools: Tools like WinRAR and 7-Zip can create password-protected archives.
- Process:
- Open the file in the appropriate program.
- Set a password and save the file.
- Send the password to the recipient separately.
- Data Loss Prevention (DLP):
- Method: Implement DLP policies to prevent sensitive information from being sent in attachments without proper authorization.
- Tools:
- Microsoft Purview DLP: This tool can scan emails and attachments for sensitive data and block or encrypt them based on predefined policies.
- Third-Party DLP Solutions: Many DLP solutions are available that integrate with Outlook and other email platforms.
- Process:
- Define policies to identify sensitive data (e.g., social security numbers, credit card numbers).
- Configure actions to take when sensitive data is detected (e.g., block the email, encrypt the attachment, notify the sender).
- Secure File Sharing Platforms:
- Method: Use secure file sharing platforms to send and receive sensitive attachments.
- Examples:
- Microsoft OneDrive for Business: Offers secure file sharing and collaboration features.
- Box: A cloud-based file sharing platform with robust security features.
- Dropbox Business: Provides secure file storage and sharing options.
- Process:
- Upload the attachment to the secure platform.
- Share the file with the recipient and grant appropriate permissions.
- Set expiration dates and access controls as needed.
- Redaction:
- Method: Redact sensitive information from attachments before sending them.
- Tools:
- PDF Editors: Adobe Acrobat Pro and other PDF editors allow you to redact text and images from PDF files.
- Image Editing Software: Use image editing software to redact sensitive information from images.
- Process:
- Open the file in the appropriate program.