Printing a screenshot might seem straightforward, but many users find themselves searching for the print option. This guide will walk you through the simple steps to print your screenshots effectively, ensuring you can easily get a hard copy of your on-screen captures.
Printing Directly from the Share Menu
The most direct way to print a screenshot, especially on mobile devices like iPhones and iPads, is through the share menu. After you take a screenshot, it typically opens for preview or is saved to your photos. From here, the share icon is your gateway to printing.
-
Locate the Share Icon: Look for the share icon, which is usually represented by an arrow pointing upwards out of a box. This icon is commonly found in the top right or bottom left corner of your screen when viewing a screenshot.
-
Open the Share Menu: Tap on the share icon. This will open a menu with various options, including sharing via different apps, saving, and printing.
-
Find the Print Option: Scroll through the options in the share menu. The “Print” option should be listed among them. You might need to scroll down to see all available actions.
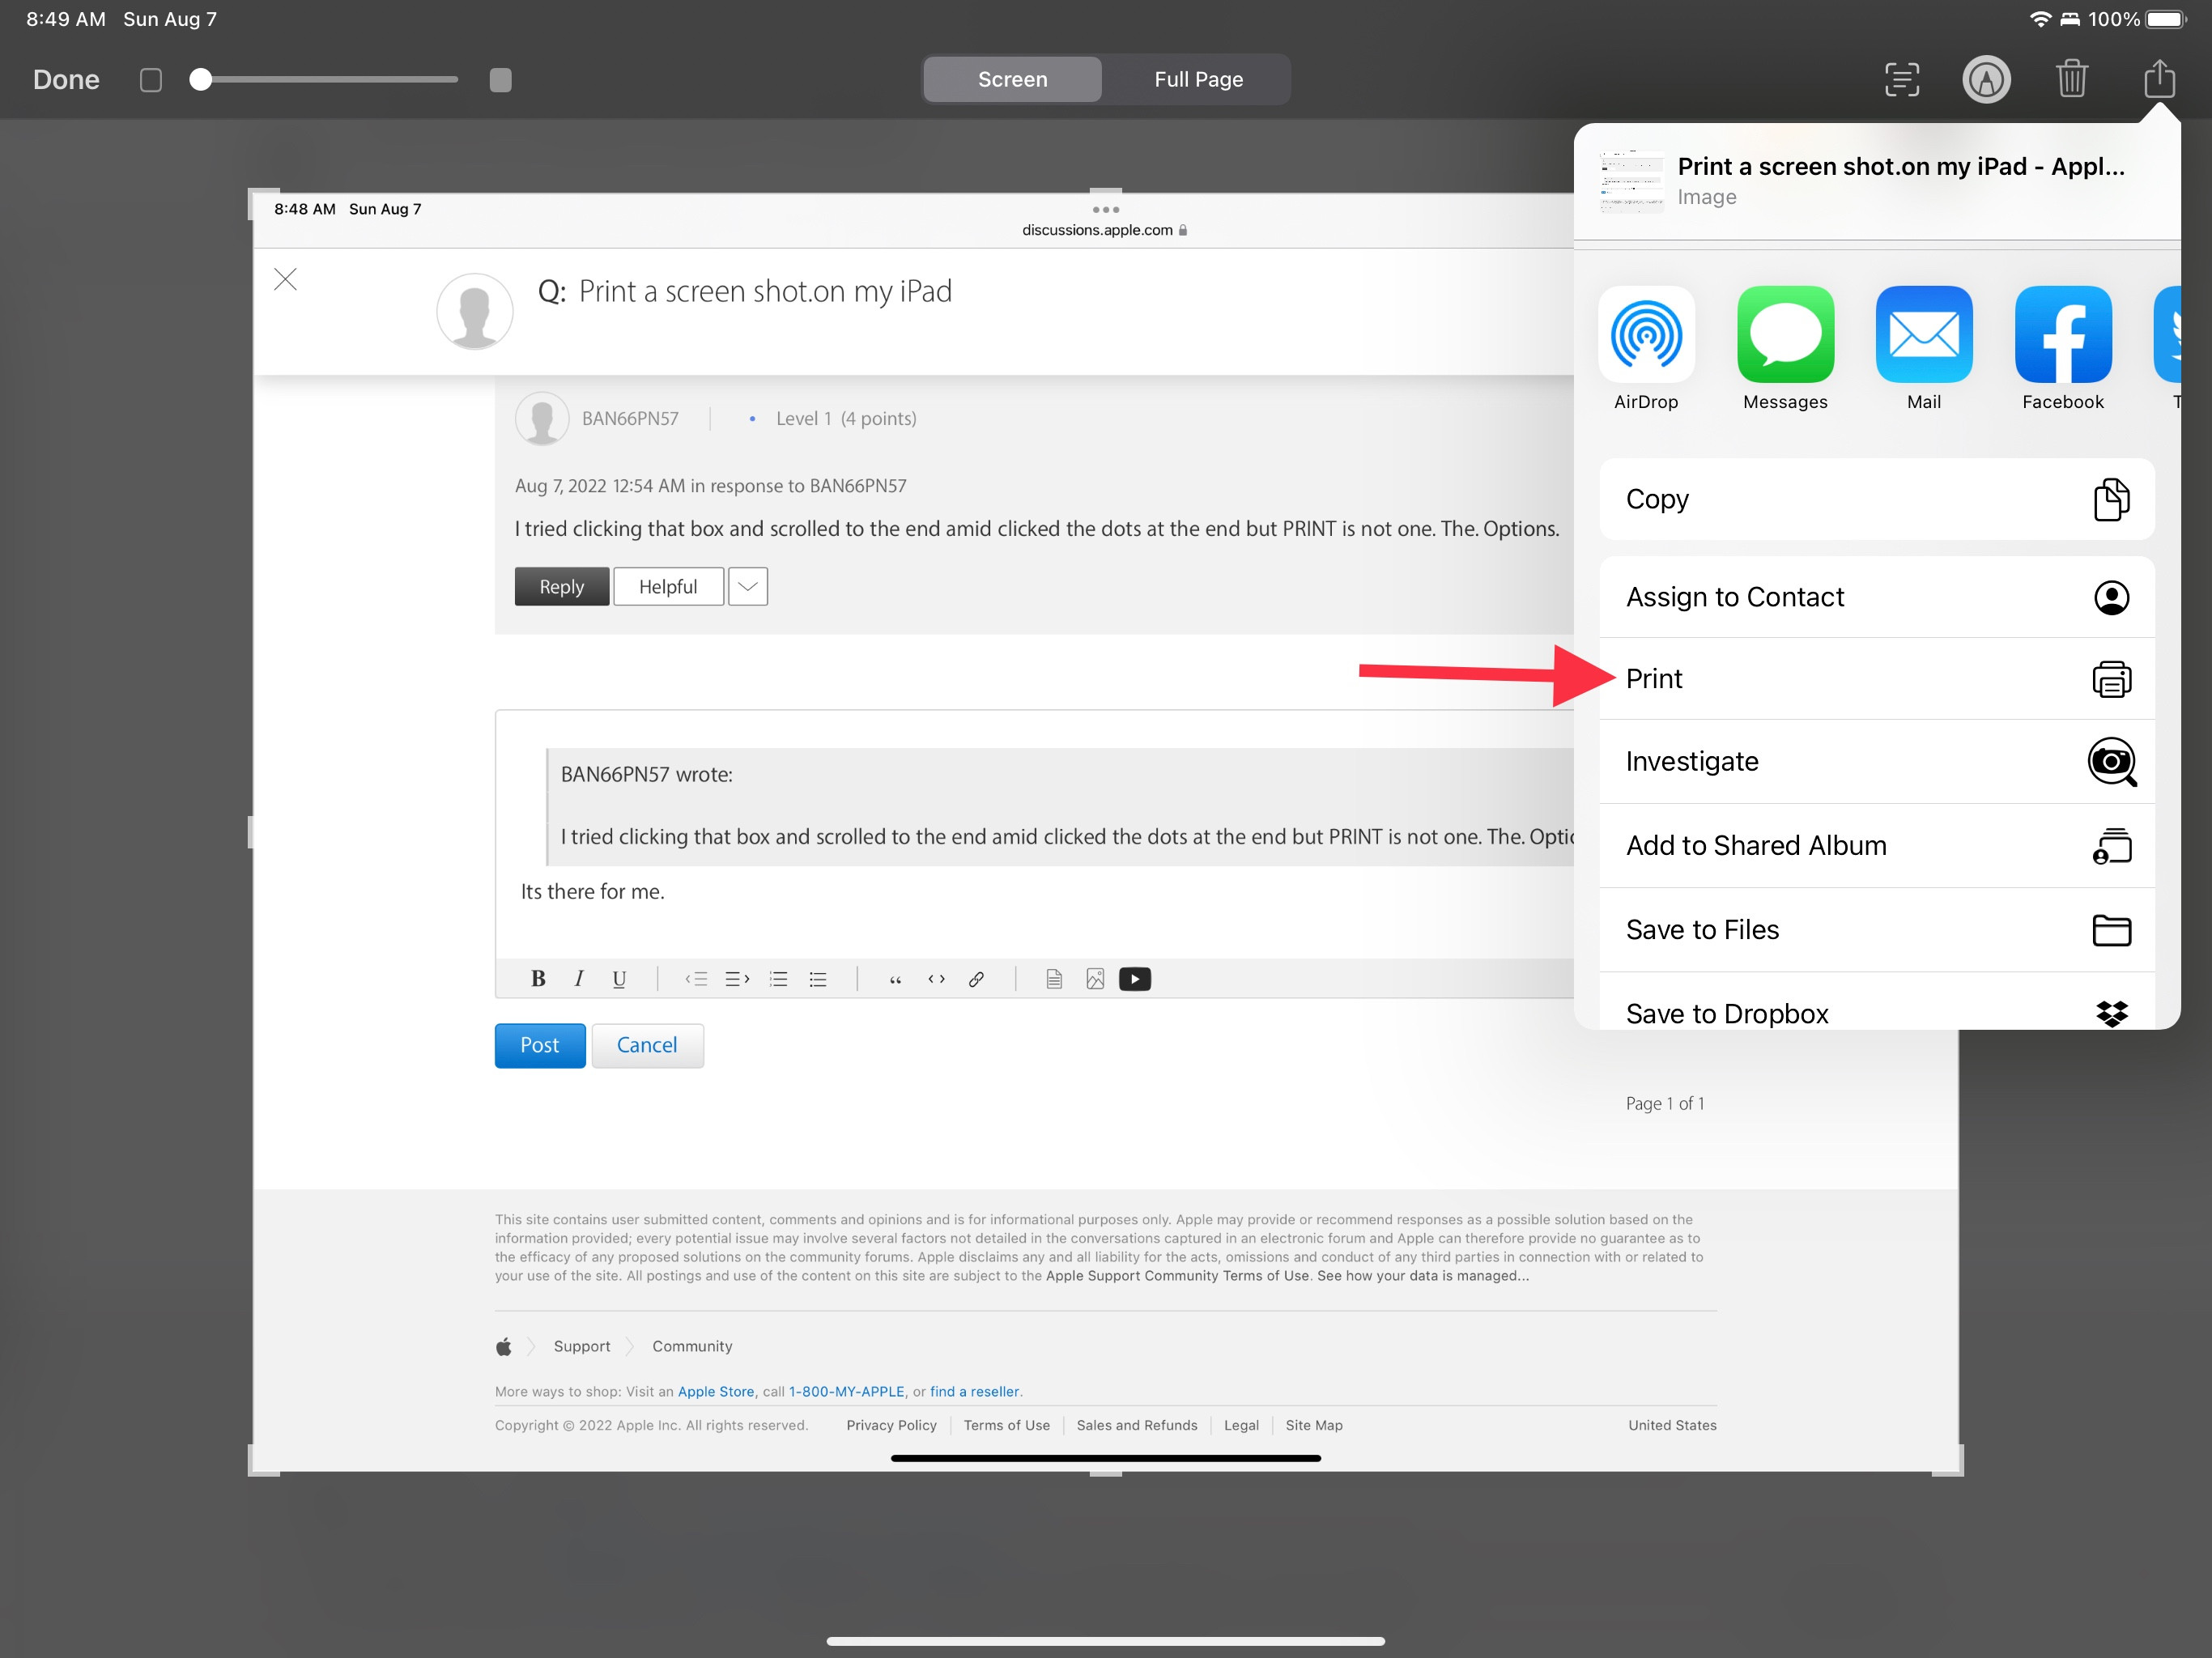 The share icon on an iOS device, indicated by an arrow coming out of a box, is where you can find the print option for screenshots.
- Select Printer and Print: Tap “Print.” You will then be prompted to select a printer, adjust print settings like paper size and orientation, and finally, initiate the printing process. Ensure your device is connected to a printer, either via Wi-Fi or cable, for this to work seamlessly.
Saving and Printing Screenshots
If the direct share menu print option isn’t readily available or if you prefer a different method, saving your screenshot and then printing it is another reliable approach.
-
Save the Screenshot: After taking your screenshot, ensure it is saved to your device’s photo library or files. Usually, screenshots are automatically saved. You can also manually save or export them as image files (like JPG or PNG) or as PDF documents.
-
Access the Saved Screenshot: Go to your Photos app or Files app, depending on where you saved the screenshot.
-
Open the Screenshot: Find and open the screenshot you wish to print.
-
Use the Share or Print Function within the App: Within the Photos or Files app, look for a share icon or a print option (sometimes represented by a printer icon). The location varies slightly depending on the app and your device.
-
Print the Screenshot: Tap on the print option, select your printer, configure settings, and print your screenshot.
By following these methods, you can easily print any screenshot you take, whether directly through the share menu or by saving and printing from your photo library or files. This ensures you have a physical copy of important on-screen information whenever needed.