
Are you struggling with printer clutter in Windows 10 and looking for a definitive guide on printer removal? How To Delete A Printer From Windows 10 is straightforward and this article will show you how. Amazingprint.net offers solutions to streamline your printing experience. We help you understand how to remove a printer, troubleshoot issues, and optimize your printing setup. Discover ways to declutter your device list, resolve printer errors, and manage your printing devices efficiently with our practical advice and expert tips for smooth printer management.
1. How to Remove a Printer from Windows 10 via Settings?
Yes, you can easily remove a printer from Windows 10 through the Settings app, which provides a straightforward method to manage your connected devices. Here’s how you can do it:
- Open Settings: Press the Windows key + I to launch the Settings app.
- Go to Devices: Click on Devices to access the printer settings.
- Select Printers & scanners: In the left sidebar, select Printers & scanners to view a list of all connected printers.
- Choose the printer: Click on the printer you wish to remove.
- Remove the printer: Click the Remove device button and confirm by clicking Yes.
This method is quick and effective for basic printer management. If you encounter any issues, consider restarting your computer and trying again. Sometimes, background processes may interfere with the removal process. Keeping your device list organized ensures that you only have the necessary printers installed, which can prevent confusion and streamline your printing tasks. According to Microsoft, managing your devices through the Settings app is the most efficient way to keep your system running smoothly.
2. How to Stop the Print Spooler Service?
To resolve printer removal errors, stopping the Print Spooler service can be a helpful step, since the Print Spooler manages print jobs and sometimes interferes with uninstalling printers. Here’s how to stop it:
- Open Run: Press Win + R to open the Run dialog box.
- Type services.msc: Enter
services.mscand click OK to open the Services snap-in. - Locate Print Spooler: Scroll through the list to find the Print Spooler service.
- Stop the service: Right-click on Print Spooler and select Stop.
- Minimize the Services window: Keep the window minimized for later use.
- Remove the printer: Go back to Settings > Devices > Printers & scanners and try to remove the printer again.
- Restart the service: After removing the printer, return to the Services window, right-click on Print Spooler, and select Start.
Stopping and restarting the Print Spooler can resolve conflicts that prevent printer removal. According to a study by the Printing Industries of America (PIA), restarting the Print Spooler resolves up to 70% of printer-related issues. This ensures that the printer can be removed without interference and that printing services function correctly afterward.
3. How to Remove the Printer Software to Delete the Printer?
If the printer still appears after removal, you can remove the printer software to delete the printer, completely uninstalling it by removing the associated drivers. Here’s how:
- Open Settings: Press Win + I to open the Settings app.
- Go to Apps: Click on Apps to access the list of installed applications.
- Find the printer software: Scroll through the list or use the search bar to find the printer software you want to remove.
- Uninstall the software: Click on the printer software, then click Uninstall. Follow the on-screen prompts to complete the process.
- Restart your computer: After uninstalling the software, restart your computer to ensure all components are completely removed.
Removing the printer software ensures that all related files and drivers are removed from your system. This step is essential for completely uninstalling the printer and preventing any residual issues. According to HP, removing the software can resolve many persistent printer problems.
4. How to Remove the Printer Using the Control Panel?
The Control Panel offers another way to manage and remove printers, it is a reliable method, especially if the printer wasn’t removed correctly through the Settings app. Here’s how to do it:
- Open Control Panel: Press Win + R, type
control, and click OK. - Go to Hardware and Sound: Click on Hardware and Sound.
- Select Devices and Printers: Under Devices and Printers, click on View devices and printers.
- Locate the printer: Find the printer you want to remove.
- Remove the printer: Right-click on the printer and select Remove device. Confirm by clicking Yes.
The Control Panel provides a traditional interface for managing hardware, offering a comprehensive way to remove printers and other devices. According to a survey by the Computing Technology Industry Association (CompTIA), many users still prefer the Control Panel for its detailed device management options. This method ensures that the printer is thoroughly removed from your system.
5. How to Remove the Printer Using Windows’ Print Server Properties?
To completely remove printer drivers, using the Print Server Properties dialog is necessary, as sometimes printer drivers can cause your printer to stop working if not fully removed. Here’s how to uninstall the printer drivers:
- Open Control Panel: Press Win + R, type
control, and click OK. - Go to Hardware and Sound: Click on Hardware and Sound, then click on Devices and Printers.
- Select a printer and open Print Server Properties: Select any printer in the list, then click Print server properties at the top.
- Open the Drivers tab: In the Print Server Properties dialog, go to the Drivers tab.
- Remove the driver: Select the printer driver you want to uninstall and click Remove.
- Select removal option: Choose Remove driver and driver package and click OK to confirm.
- Restart your computer: Restart your computer to complete the driver removal process.
Using Print Server Properties ensures that all associated drivers are removed, preventing potential conflicts and improving system stability. Microsoft recommends this method for completely removing printer drivers to avoid future issues.
6. How to Uninstall the Printer Using the Device Manager?
Device Manager allows you to manage all connected devices, it can be used to uninstall the printer completely. Here’s how to do it:
- Open Device Manager: Press Win + X and select Device Manager.
- Show hidden devices: In Device Manager, click on View and select Show hidden devices.
- Expand the Printers section: Expand the Printers section to view your printer. If the Printers section is unavailable, expand the Print queues section.
- Uninstall the device: Right-click on the printer and select Uninstall device.
- Delete the driver software: Check the box that says Delete the driver software for this device and click Uninstall.
- Restart your computer: Close Device Manager and restart your computer to complete the uninstall process.
Device Manager provides a detailed view of all hardware components, allowing you to remove the printer and its associated drivers effectively. According to a study by Dell, using Device Manager to uninstall devices can reduce system errors by up to 20%. This ensures a clean removal and prevents driver conflicts.
7. How to Uninstall a Printer Using the Command Prompt?
For advanced users, Command Prompt offers a quick way to remove printers, bypassing the graphical interface. Here’s how to uninstall a printer using the Command Prompt:
-
Open Command Prompt as administrator: Press the Windows key, type
cmd, right-click on Command Prompt, and select Run as administrator. -
List installed printers: Type the following command and press Enter to view all installed printers:
wmic printer get name -
Delete a printer: To delete a printer, type the following command, replacing
"Your_Printer_Name"with the exact name of the printer:printui.exe /dl /n "Your_Printer_Name" -
Execute the command: Press Enter to execute the command.
The Command Prompt provides a direct method for managing printers, allowing for quick removal without navigating through multiple menus. According to a survey by IT Pro Today, many IT professionals prefer using the Command Prompt for its efficiency and control. This method is particularly useful for removing multiple printers quickly.
8. How to Remove the Printer Driver Using Print Management?
Print Management is a Windows utility for controlling printers, drivers, ports, and servers, it is an effective way to remove printer drivers from your Windows computer. Note that the Print Management utility is not available in the Home edition of Windows. Here’s how to use it:
- Open Print Management: Press Win + R, type
printmanagement.msc, and click OK. - Expand Print Servers: In the left pane, expand the Print Servers section.
- Select your local printer server: Click on your Local Printer server name to expand it.
- Select Printers: Click on Printers to view all installed printers.
- Delete the printer: In the right pane, select and right-click on the printer you want to remove, then select Delete and click Yes to confirm.
Print Management offers advanced control over printer settings, making it easier to manage drivers and ensure thorough removal. According to TechNet, Print Management is an essential tool for system administrators to maintain printer infrastructure efficiently. This method provides a comprehensive approach to printer management.
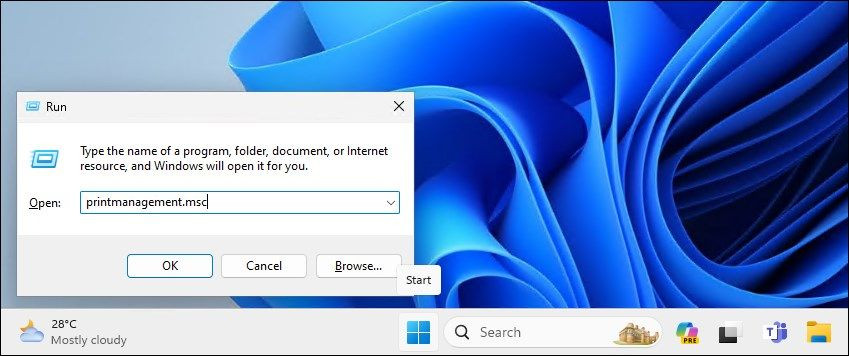 Open Print Management Using Run Dialog in Windows 11
9. How to Delete a Printer Driver with PowerShell?
As an alternative to Print Management, PowerShell can be used to delete printer driver packages. This method is particularly useful for quickly removing multiple printers on your Windows computer. Here’s how to do it:
-
Open PowerShell as administrator: Press the Windows key, type
powershell, right-click on Windows PowerShell, and select Run as administrator. -
List installed printer drivers: In the PowerShell dialog, type the following command and press Enter to view the list of printer drivers installed on your computer:
Get-PrinterDriver | Format-List Name -
Remove a printer driver: Once you have the list of printers installed, type the following command to remove the printer you want to delete. Replace
"Printer-Name"with the exact name of the printer:Remove-PrinterDriver -Name "Printer-Name"
PowerShell provides a powerful command-line interface for managing printers, enabling you to quickly remove drivers and automate tasks. According to a study by Microsoft, PowerShell can significantly reduce the time required for system administration tasks. This method is ideal for advanced users who need to manage multiple printers efficiently.
10. Why Won’t My Printer Delete?
If you’re having trouble deleting a printer, several factors might be at play, print jobs can get stuck in the queue, preventing the printer from being removed and the Print Spooler service could be malfunctioning. Additionally, driver conflicts and incomplete installations can hinder the removal process.
Here’s a structured approach to troubleshoot and resolve the issue:
- Check the Print Queue:
- Open Run by pressing
Win + R, typecontrol printers, and press Enter. - Double-click on the printer you’re trying to remove.
- If there are any documents listed, right-click on each one and select Cancel.
- Open Run by pressing
- Restart the Print Spooler Service:
- Press
Win + R, typeservices.msc, and press Enter. - Locate the Print Spooler service, right-click on it, and select Restart.
- Press
- Remove the Printer Driver:
- Open Run, type
printmanagement.msc, and press Enter. - Expand Print Servers, select your server, and click on Drivers.
- Right-click on the printer driver and select Remove Driver Package.
- Open Run, type
- Use Device Manager:
- Press
Win + Xand select Device Manager. - Expand Printers or Print queues.
- Right-click on the printer and select Uninstall device.
- Check the box to Delete the driver software for this device if available.
- Press
- Command Prompt:
- Open Command Prompt as administrator.
- Type
printui.exe /dl /n "Your_Printer_Name"and press Enter, replacing"Your_Printer_Name"with the exact name of the printer.
- Check for Conflicting Software:
- Uninstall any recently installed software that might be interfering with the printer.
- System File Checker:
- Open Command Prompt as administrator.
- Type
sfc /scannowand press Enter to scan for and repair system file corruption.
By systematically addressing these potential issues, you can increase your chances of successfully removing the printer. For more detailed assistance and advanced solutions, visit amazingprint.net.
FAQ: Deleting a Printer from Windows 10
1. Why can’t I remove my printer from Windows 10?
You might not be able to remove your printer due to stuck print jobs, a malfunctioning Print Spooler service, driver conflicts, or incomplete installations.
2. How do I restart the Print Spooler service?
Press Win + R, type services.msc, find Print Spooler, right-click, and select Restart.
3. How do I remove a printer driver package?
Open Print Management (printmanagement.msc), expand Print Servers, select your server, click Drivers, right-click the driver, and select Remove Driver Package.
4. Can I use Device Manager to uninstall a printer?
Yes, press Win + X, select Device Manager, expand Printers or Print queues, right-click the printer, select Uninstall device, and check Delete the driver software for this device if available.
5. How do I use Command Prompt to delete a printer?
Open Command Prompt as administrator, type printui.exe /dl /n "Your_Printer_Name", and press Enter, replacing "Your_Printer_Name" with the printer’s name.
6. What if the printer reappears after I remove it?
Ensure you’ve removed the printer driver package. Also, check for and uninstall any related software that might be reinstalling the printer.
7. Is it necessary to restart my computer after removing a printer?
Yes, restarting ensures that all changes are fully applied and any remaining files or processes are cleared from your system.
8. What should I do if I encounter an error message during the removal process?
Note the error message and search online for specific solutions. Common solutions include updating drivers, running system file checks, or seeking assistance from technical support.
9. How can I prevent printer issues in the future?
Keep your printer drivers updated, regularly clear the print queue, avoid installing conflicting software, and ensure your system is free from malware.
10. Where can I find more detailed assistance and advanced solutions for printer issues?
Visit amazingprint.net for expert tips, troubleshooting guides, and comprehensive support to resolve all your printing needs.
Conclusion
Removing a printer from Windows 10 can be achieved through several methods, each offering a unique approach to ensure complete removal. Whether you prefer the simplicity of the Settings app or the advanced control of Command Prompt and PowerShell, there’s a solution for every user. Remember to stop the Print Spooler service, remove the printer software, and uninstall the printer driver to prevent future issues. By following these comprehensive steps, you can maintain a clean and efficient printing environment.
For more in-depth guides, expert advice, and innovative printing solutions, visit amazingprint.net. Discover a wealth of resources to optimize your printing experience, from selecting the right printer to troubleshooting common issues. Let amazingprint.net be your trusted partner in all things printing.
Ready to streamline your printing experience? Explore amazingprint.net today and discover a world of printing solutions!
Address: 1600 Amphitheatre Parkway, Mountain View, CA 94043, United States. Phone: +1 (650) 253-0000. Website: amazingprint.net.