
Curing screen printed shirts at home is achievable with the right techniques, ensuring your designs last; at amazingprint.net, we can show you how to properly cure screen-printed T-shirts which is a crucial final step, not just in the screen printing process but in all printing environments where drying ink is concerned. Discover cost-effective methods and professional tips for successful DIY curing; also discover the possibilities with plastisol ink and water-based ink.
1. Understanding the Basics of Curing Screen Printed Shirts
Curing is a vital step in the screen printing process, ensuring the ink adheres permanently to the fabric. Without proper curing, the ink will crack, peel, or wash away, ruining your design. Proper curing involves heating the ink to a specific temperature for a specific duration, allowing the ink particles to bind with the fibers of the garment. This creates a durable, long-lasting print that can withstand repeated washing and wearing. According to the Printing Industries of America (PIA), proper curing extends the lifespan of screen-printed garments by up to 50%.
1.1 What is Curing and Why Is It Important?
Curing is the process of heating screen printing ink to its recommended temperature, causing it to fuse with the fabric. This process is essential for creating a durable and long-lasting print.
Properly cured ink becomes part of the fabric, resisting cracking, peeling, and fading. Improperly cured ink will wash out or degrade quickly.
1.2 Factors Affecting the Curing Process
Several factors can influence the curing process, including:
- Ink Type: Different inks require different curing temperatures and times.
- Fabric Type: Some fabrics require lower temperatures to prevent scorching or damage.
- Equipment: The type of equipment used for curing can affect the consistency and accuracy of the process.
- Humidity: High humidity levels can affect the ink’s drying time and curing temperature.
- Color of Fabric: Darker fabrics can absorb more heat than lighter fabrics, affecting the curing time.
1.3 Essential Tools and Materials for Curing
Before diving into the curing methods, gather these essential tools and materials:
- Heat Source: This could be a heat press, heat gun, oven, or iron.
- Temperature Gun: To accurately measure the temperature of the ink.
- Parchment Paper or Teflon Sheet: To protect the design from direct heat.
- Timer: To ensure accurate curing time.
- Gloves: To protect your hands from heat.
- Well-Ventilated Area: To avoid inhaling harmful fumes.
 essential tools for curing screen printed shirts
2. Understanding Ink Types and Curing Temperatures
Different types of screen printing inks require different curing temperatures and methods. Understanding the specific requirements of your ink is crucial for achieving a successful and durable print. Two of the most common inks used in screen printing T-shirts are plastisol and water-based ink.
2.1 Plastisol Ink
- Characteristics: Durable, thick, versatile, provides vivid colors.
- Curing Temperature: Typically cures at around 290 – 330 degrees Fahrenheit (143 – 166 degrees Celsius).
- Drying Time: Plastisol ink does not air dry, giving you more time to work with it on the screen.
- Pros: Easy to use, excellent color opacity, and long-lasting prints.
- Cons: Contains PVC, requires proper ventilation, and can feel heavy on the garment.
2.2 Water-Based Ink
- Characteristics: Less opaque, offers a soft-hand feel, fashion-forward, and eco-friendly.
- Curing Temperature: Starts curing at 320 degrees Fahrenheit (160 degrees Celsius).
- Drying Time: Water-based inks start to air-dry immediately.
- Pros: Soft feel, eco-friendly, and breathable prints.
- Cons: Can be more challenging to work with, requires higher curing temperatures, and may need additives for faster drying.
2.3 Specialty Inks
| Ink Type | Description | Curing Temperature | Special Considerations |
|---|---|---|---|
| High-Density Inks | Creates a raised, textured effect. | 280-320°F (138-160°C) | Requires a thicker stencil and careful temperature monitoring to avoid scorching. |
| Glow-in-the-Dark Ink | Contains phosphorescent pigments that glow in the dark. | 270-300°F (132-149°C) | Avoid over-curing, as it can reduce the glow effect. |
| Glitter Ink | Contains glitter particles for a sparkly effect. | 260-290°F (127-143°C) | Use a Teflon sheet to prevent glitter from sticking to the heat press. |
| Puff Ink | Expands when heated, creating a raised, 3D effect. | 270-310°F (132-154°C) | Test different temperatures to achieve the desired puff effect without burning. |
| Discharge Ink | Removes the original dye from the fabric, leaving a soft, vintage look. | 320-350°F (160-177°C) | Requires fabrics that are dischargeable. Test on a sample fabric first. |
| Reflective Ink | Contains reflective particles for high visibility. | 280-320°F (138-160°C) | Use a low-pressure setting on the heat press to avoid damaging the reflective particles. |
| Suede Ink | Creates a soft, velvety texture. | 270-300°F (132-149°C) | Avoid over-curing to maintain the suede texture. |
| Gel Ink | Creates a clear, glossy finish. | 250-280°F (121-138°C) | Apply even pressure and temperature to prevent bubbling or cloudiness. |
| Metallic Ink | Contains metallic flakes for a shiny, metallic finish. | 260-290°F (127-143°C) | Use a Teflon sheet to protect the metallic flakes and ensure even heating. |
| Photochromic Ink | Changes color when exposed to UV light. | Follow manufacturer’s recommendations | Avoid prolonged exposure to high heat, which can degrade the photochromic properties. |
2.4 Importance of Following Ink Manufacturer Guidelines
Always refer to the ink manufacturer’s guidelines for specific curing instructions. These guidelines will provide the recommended temperature and time for optimal results. Deviating from these guidelines can lead to under-cured or over-cured prints, both of which can affect the quality and durability of your design.
3. Safe Home Curing Methods for Screen Printed Shirts
While professional curing equipment offers the most consistent results, several safe and effective methods can be used at home. Always prioritize safety and take necessary precautions when working with heat.
3.1 Using a Heat Press
A heat press is a popular and reliable option for curing screen printed shirts at home. It provides even heat distribution and precise temperature control, ensuring a consistent cure.
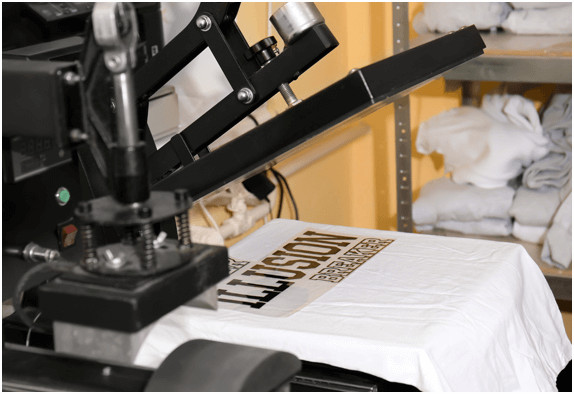 heat press for curing screen printed shirts
3.1.1 How to Use a Heat Press for Curing:
- Set the Temperature: Refer to the ink manufacturer’s guidelines and set the heat press to the recommended temperature.
- Prepare the Shirt: Place the shirt on the heat press, ensuring the design is flat and free of wrinkles.
- Cover the Design: Place a piece of parchment paper or a Teflon sheet over the design to protect it from direct heat.
- Press: Close the heat press and apply firm, even pressure for the recommended time.
- Cool Down: Remove the shirt from the heat press and allow it to cool down completely before wearing or washing.
3.1.2 Advantages of Using a Heat Press:
- Consistent and even heat distribution
- Precise temperature control
- Professional results
- Easy to use
3.1.3 Disadvantages of Using a Heat Press:
- Can be expensive
- Requires storage space
- May not be suitable for large or bulky items
3.2 Using a Heat Gun
A heat gun is a versatile tool that can be used for curing screen printed shirts at home. It provides a concentrated heat source, allowing you to target specific areas of the design.
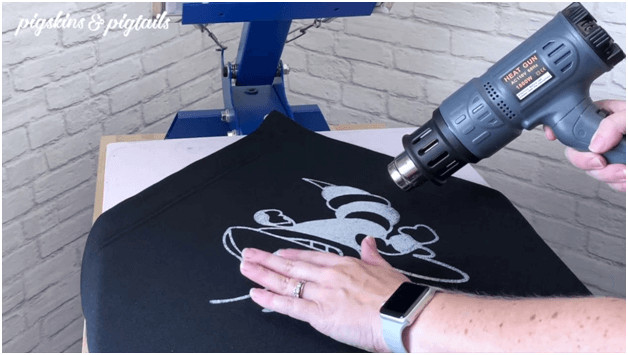 heat gun for curing screen printed shirts
3.2.1 How to Use a Heat Gun for Curing:
- Prepare the Shirt: Place the shirt on a flat, heat-resistant surface.
- Heat the Ink: Hold the heat gun several inches away from the design and move it in a slow, steady motion.
- Monitor the Temperature: Use a temperature gun to monitor the temperature of the ink, ensuring it reaches the recommended curing temperature.
- Cure Evenly: Continue heating the ink until it is fully cured, making sure to cover all areas of the design.
- Cool Down: Allow the shirt to cool down completely before wearing or washing.
3.2.2 Advantages of Using a Heat Gun:
- Affordable
- Portable
- Versatile
3.2.3 Disadvantages of Using a Heat Gun:
- Requires practice to achieve even heat distribution
- Can be time-consuming for large designs
- Risk of scorching the garment if not used carefully
3.3 Using an Oven
Using a conventional oven for curing screen printed shirts is possible, but requires careful monitoring and precise temperature control to avoid scorching or damaging the garment.
3.3.1 How to Use an Oven for Curing:
- Preheat the Oven: Preheat your oven to the curing temperature recommended by the ink manufacturer. Use an oven thermometer to ensure accurate temperature.
- Prepare the Shirt: Place the screen-printed shirt on a baking sheet lined with parchment paper.
- Bake the Shirt: Place the baking sheet with the shirt in the preheated oven. Monitor closely to prevent scorching.
- Check for Curing: After the recommended time, use a temperature gun to verify the ink has reached the required temperature.
- Cool Down: Remove the shirt from the oven and let it cool completely before handling.
3.3.2 Advantages of Using an Oven:
- Even heat distribution when monitored carefully
- Cost-effective if you already own an oven
- Can cure larger items
3.3.3 Disadvantages of Using an Oven:
- Risk of scorching or damaging the garment
- Potential for uneven curing if not monitored
- Requires precise temperature control
- May release fumes that are not safe to inhale
3.4 Using an Iron
An iron can be used for curing screen printed shirts, but it’s best suited for small designs and requires careful attention to avoid scorching the fabric.
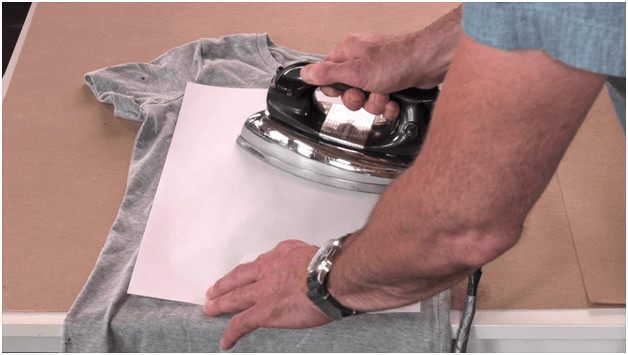 using an iron to cure screen printing t-shirts
3.4.1 How to Use an Iron for Curing:
- Prepare the Shirt: Place the shirt on an ironing board or a flat, heat-resistant surface.
- Cover the Design: Place a piece of parchment paper or a Teflon sheet over the design to protect it from direct heat.
- Iron the Design: Set the iron to the appropriate temperature (refer to the ink manufacturer’s guidelines) and iron over the design in a circular motion, applying firm, even pressure.
- Monitor the Temperature: Use a temperature gun to monitor the temperature of the ink, ensuring it reaches the recommended curing temperature.
- Cure Evenly: Continue ironing the design until it is fully cured, making sure to cover all areas of the design.
- Cool Down: Allow the shirt to cool down completely before wearing or washing.
3.4.2 Advantages of Using an Iron:
- Inexpensive
- Readily available
- Easy to use
3.4.3 Disadvantages of Using an Iron:
- Uneven heat distribution
- Time-consuming
- Not suitable for large designs
- Risk of scorching the garment
3.5 Air Drying (For Water-Based Inks)
Air drying is a simple method, but it only works effectively for water-based inks that are formulated for air curing. Proper airflow and specific ink additives are essential.
3.5.1 How to Air Dry:
- Hang or Rack the Shirts: Place the shirts on hangers or racks in a well-ventilated area.
- Ensure Airflow: Use a fan to create airflow, which helps expedite the drying process. Avoid aiming the fan directly at the shirts to prevent smudging.
- Use Fast-Drying Additives: Choose water-based inks with fast-drying additives to ensure the ink achieves a full cure within 24-48 hours.
3.5.2 Advantages of Air Drying:
- Simple and requires minimal equipment
- Eco-friendly, as it doesn’t use electricity
- Reduces the risk of overheating the garment
3.5.3 Disadvantages of Air Drying:
- Only suitable for specific water-based inks
- Relies on proper ink additives and airflow
- Takes 24-48 hours to achieve a full cure
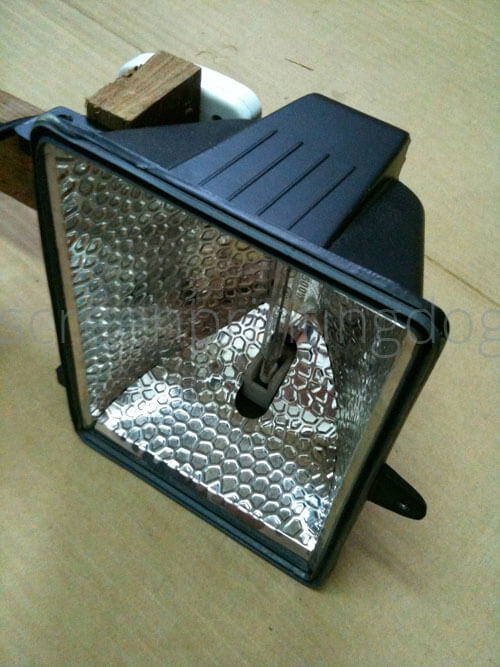
3.6 Halogen Lamp
A halogen lamp can be used to cure screen printed shirts, providing a broader coverage compared to heat guns and hair dryers.
3.6.1 How to Use a Halogen Lamp:
- Set Up the Lamp: Position the halogen lamp at least an inch above the shirt.
- Heat the Ink: Turn on the lamp and let it heat up for a few seconds.
- Monitor the Temperature: Use a temperature gun to check if the ink has reached the desired temperature.
- Cure the Ink: Depending on the size of the bulb, cure the ink evenly, making sure to cover all areas of the design.
3.6.2 Advantages of Using a Halogen Lamp:
- Heats up quickly
- Provides wider coverage compared to heat guns and hair dryers
- Can be used for multiple purposes, such as creating stencils and flashing prints
3.6.3 Disadvantages of Using a Halogen Lamp:
- Can be too intense if placed too close to the shirt, leading to scorching
- Requires careful monitoring to avoid overheating
- May not provide as consistent results as a heat press
3.7 Hair Dryer
A hair dryer can be used, but is only suitable for low-cure water-based inks, and even then, it may not be the most effective method.
3.7.1 How to Use a Hair Dryer:
- Set Up the Hair Dryer: Use a low-cure water-based ink designed for lower temperatures.
- Apply Heat: Hold the hair dryer a few inches away from the printed design.
- Dry the Ink: Move the hair dryer back and forth to evenly dry the ink.
3.7.2 Advantages of Using a Hair Dryer:
- Convenient and readily available
- Safer than an iron or heat gun
3.7.3 Disadvantages of Using a Hair Dryer:
- Not ideal for high-temperature curing
- Can cause ink bleeding due to rapid air blowing
- May not achieve the desired curing temperature
4. Step-by-Step Guide to Curing Screen Printed Shirts at Home
No matter which method you choose, follow these general steps for curing screen printed shirts at home:
- Prepare Your Workspace: Set up your workspace in a well-ventilated area and gather all necessary tools and materials.
- Apply the Ink: Apply the screen printing ink to the shirt according to your design.
- Dry the Ink (If Necessary): Some inks, such as water-based inks, may require a brief air-drying period before curing.
- Set the Temperature: Set your heat source to the recommended curing temperature for your ink type.
- Protect the Design: Place a piece of parchment paper or a Teflon sheet over the design to protect it from direct heat.
- Cure the Ink: Apply heat to the ink, following the specific instructions for your chosen method.
- Monitor the Temperature: Use a temperature gun to monitor the temperature of the ink, ensuring it reaches the recommended curing temperature.
- Cool Down: Allow the shirt to cool down completely before wearing or washing.
 curing a screen printed shirt step by step
5. Testing Your Curing Method
After curing your screen printed shirt, it’s essential to test the effectiveness of your curing method. This will help you identify any issues and make adjustments as needed.
5.1 The Stretch Test
Gently stretch the printed area and check for cracks or tears in the screen print. If there are no significant cracks and if the garment returns to its original shape, then the ink is most likely cured. Otherwise, go back to the drawing board.
5.2 The Wash Test
A “wash test” is the gold standard in determining if the screen print has been properly cured. Simply launder the garment and check for noticeable differences before and after the wash. Be aware that some fading after a wash is unavoidable. So use your judgment and determine if the amount of fading is acceptable or not. I tend to do 2 washes for the same garment – wash, dry, and repeat. If the fade is significant or part of the design has been washed off, this means the print has been under-cured. Re-evaluate your curing method if this happens.
6. Troubleshooting Common Curing Problems
Even with careful attention to detail, curing problems can arise. Here are some common issues and how to address them:
6.1 Ink Cracking or Peeling
- Cause: Under-curing
- Solution: Increase the curing time or temperature, or apply more pressure.
6.2 Scorching or Burning
- Cause: Over-curing
- Solution: Decrease the curing time or temperature, or use a lower pressure setting.
6.3 Uneven Curing
- Cause: Uneven heat distribution
- Solution: Use a heat press with even heat distribution, or move the heat gun or iron in a slow, steady motion.
6.4 Fading After Washing
- Cause: Under-curing or using the wrong ink type
- Solution: Increase the curing time or temperature, or switch to a more durable ink.
6.5 Common Issues and Solutions Table
| Issue | Possible Causes | Solutions |
|---|---|---|
| Ink Cracking | 1. Under-curing | 1. Increase curing time or temperature |
| 2. Using incorrect ink for the fabric | 2. Use ink specifically designed for the fabric type | |
| 3. Ink layer too thick | 3. Apply a thinner layer of ink during printing | |
| Ink Peeling | 1. Under-curing | 1. Increase curing time or temperature |
| 2. Poor adhesion | 2. Pre-treat the fabric to improve ink adhesion | |
| 3. Contamination on the fabric | 3. Ensure the fabric is clean and free of oils or residues before printing | |
| Color Fading | 1. Under-curing | 1. Increase curing time or temperature |
| 2. Using low-quality inks | 2. Switch to high-quality inks that are fade-resistant | |
| 3. Exposure to harsh detergents | 3. Use mild detergents and wash garments inside out | |
| Scorching | 1. Over-curing | 1. Decrease curing time or temperature |
| 2. Iron set too high | 2. Use a lower heat setting and monitor closely | |
| 3. Direct contact with heat source | 3. Use a protective sheet (parchment paper or Teflon) | |
| Bleeding | 1. Over-curing | 1. Decrease curing time or temperature |
| 2. Dye migration | 2. Use inks with bleed-resistant properties | |
| 3. Using improper pre-treatment | 3. Ensure proper pre-treatment for specific fabrics | |
| Uneven Finish | 1. Uneven heat distribution | 1. Use a heat press with even heat distribution |
| 2. Inconsistent pressure | 2. Apply consistent pressure across the entire design | |
| 3. Poor screen printing technique | 3. Ensure even ink application during printing | |
| Cracking After Washing | 1. Under-curing | 1. Increase curing time or temperature |
| 2. Low-quality ink | 2. Switch to high-quality, durable inks | |
| 3. Improper washing techniques | 3. Wash garments inside out, use cold water, and avoid harsh detergents | |
| Sticky Print | 1. Under-curing | 1. Increase curing time or temperature |
| 2. Excessive ink application | 2. Reduce the amount of ink applied during printing | |
| 3. Inadequate cooling | 3. Allow the garment to cool completely before handling or stacking | |
| Dull Colors | 1. Under-curing | 1. Increase curing time or temperature |
| 2. Insufficient ink opacity | 2. Use inks with higher opacity or apply multiple layers | |
| 3. Fabric color affecting the ink color | 3. Use a base layer of white ink for vibrant colors on dark fabrics | |
| Bubbling | 1. Over-curing | 1. Reduce curing time or temperature |
| 2. Moisture in the fabric | 2. Ensure fabric is completely dry before printing | |
| 3. Using improper ink additives | 3. Use the correct additives and follow the manufacturer’s instructions |
7. Tips for Achieving Professional Results
To achieve professional-quality results when curing screen printed shirts at home, keep these tips in mind:
- Invest in Quality Equipment: While you can get started with basic tools, investing in a heat press or a high-quality heat gun will provide more consistent and reliable results.
- Follow Ink Manufacturer Guidelines: Always refer to the ink manufacturer’s guidelines for specific curing instructions.
- Practice Makes Perfect: Experiment with different curing methods and techniques to find what works best for you.
- Be Patient: Curing takes time, so be patient and don’t rush the process.
- Take Notes: Keep track of your curing times, temperatures, and results so you can replicate successful outcomes in the future.
 screen printing journey
8. Advanced Curing Techniques
For those looking to refine their curing process further, exploring advanced techniques can enhance the quality and efficiency of your screen-printed shirts.
8.1 Conveyor Dryers
Conveyor dryers are professional-grade equipment that provides consistent and efficient curing, ideal for larger-scale operations.
- Consistent Heat: Provides even and consistent heat distribution throughout the curing process.
- High Production: Suitable for high-volume production due to its continuous operation.
- Precise Control: Allows for precise temperature and time control, ensuring optimal curing results.
8.2 Flash Curing Units
Flash curing units are used to partially cure the ink between layers, preventing colors from mixing and ensuring sharp, vibrant prints.
- Partial Curing: Partially cures the ink to prevent colors from mixing.
- Sharp Prints: Ensures sharp, vibrant prints by stabilizing each layer of ink.
- Quick Drying: Provides quick drying times, enhancing the efficiency of multi-layered designs.
8.3 Infrared Curing
Infrared curing uses infrared lamps to heat the ink, offering a faster and more energy-efficient curing process.
- Fast Curing: Offers faster curing times compared to traditional methods.
- Energy-Efficient: Uses infrared lamps for an energy-efficient curing process.
- Penetrating Heat: Provides penetrating heat that cures the ink from the inside out.
8.4 Vacuum Tables
Vacuum tables hold the fabric in place during printing and curing, preventing movement and ensuring precise registration.
- Fabric Stability: Holds the fabric securely in place during printing and curing.
- Precise Registration: Ensures precise registration of multi-color designs.
- Smooth Surface: Provides a smooth, even surface for printing and curing.
8.5 Automation
Automated screen printing systems integrate printing and curing processes, streamlining production and reducing manual labor.
- Streamlined Production: Integrates printing and curing processes for a seamless workflow.
- Reduced Labor: Reduces the need for manual labor, increasing efficiency.
- Consistent Results: Ensures consistent results through automated controls and precision.
9. Safety Measures for Curing
When curing screen-printed shirts at home, always prioritize safety to prevent accidents and health risks.
9.1 Ventilation
Ensure your workspace is well-ventilated to avoid inhaling harmful fumes from inks and chemicals.
- Open Windows: Open windows and doors to allow fresh air to circulate.
- Use Fans: Place fans to direct airflow and remove fumes from the work area.
- Wear a Mask: Use a respirator or mask designed to filter out harmful particles and vapors.
9.2 Protective Gear
Wear appropriate protective gear, such as gloves and eye protection, to prevent skin and eye irritation.
- Gloves: Wear heat-resistant gloves to protect your hands from burns when handling hot equipment and garments.
- Eye Protection: Use safety glasses or goggles to shield your eyes from splashes and fumes.
- Apron or Lab Coat: Wear an apron or lab coat to protect your clothing from ink and chemicals.
9.3 Heat Safety
Use caution when handling heat sources to avoid burns and fire hazards.
- Keep a Safe Distance: Maintain a safe distance from heat sources to prevent burns.
- Use Proper Tools: Use heat-resistant tools and equipment designed for high temperatures.
- Fire Extinguisher: Keep a fire extinguisher nearby in case of fire.
9.4 Material Safety Data Sheets (MSDS)
Review and understand the Material Safety Data Sheets (MSDS) for all inks and chemicals used in the screen-printing process.
- Know the Risks: Understand the potential health hazards and safety precautions for each material.
- Follow Instructions: Follow the manufacturer’s instructions for safe handling, storage, and disposal.
- Emergency Procedures: Know the emergency procedures for spills, exposure, and other accidents.
9.5 Safe Disposal
Dispose of waste materials, such as used inks, solvents, and rags, properly to prevent environmental contamination.
- Check Local Regulations: Check local regulations for proper disposal methods.
- Use Designated Containers: Use designated containers for collecting waste materials.
- Recycle When Possible: Recycle materials whenever possible to reduce environmental impact.
9.6 Emergency Preparedness
Be prepared for emergencies by having a first aid kit and knowing basic first aid procedures.
- First Aid Kit: Keep a well-stocked first aid kit in the work area.
- Emergency Contacts: Have a list of emergency contact numbers readily available.
- Basic First Aid: Know basic first aid procedures for burns, cuts, and chemical exposure.
10. Eco-Friendly Curing Practices
To minimize the environmental impact of your screen-printing activities, consider adopting eco-friendly curing practices.
10.1 Water-Based Inks
Use water-based inks, which are more environmentally friendly than plastisol inks.
- Lower VOCs: Water-based inks have lower VOC (Volatile Organic Compound) emissions.
- Biodegradable: They are often biodegradable and easier to clean up.
- Soft Feel: Provides a softer feel on the fabric compared to plastisol inks.
10.2 Energy Efficiency
Use energy-efficient curing equipment and techniques.
- LED Lighting: Use LED lighting in your workspace to reduce energy consumption.
- Insulation: Insulate your workspace to maintain consistent temperatures and reduce energy waste.
- Timer Controls: Use timer controls on equipment to prevent unnecessary energy usage.
10.3 Natural Drying
Utilize natural drying methods, such as air drying, whenever possible.
- Air Circulation: Use fans to improve air circulation and speed up the drying process.
- Sunlight: Take advantage of sunlight for natural drying (avoid direct sunlight for UV-sensitive materials).
- Reduced Energy Use: Natural drying reduces the need for energy-intensive equipment.
10.4 Recycling and Waste Reduction
Recycle materials and reduce waste in your screen-printing process.
- Recycle Inks: Recycle leftover inks or donate them to local art programs.
- Use Reclaimed Materials: Use reclaimed or recycled materials for packaging and shipping.
- Minimize Waste: Minimize waste by carefully planning your projects and using only the necessary materials.
10.5 Sustainable Sourcing
Source materials from sustainable and ethical suppliers.
- Eco-Friendly Fabrics: Use fabrics made from organic cotton, bamboo, or recycled materials.
- Ethical Suppliers: Choose suppliers committed to ethical labor practices and environmental responsibility.
- Certifications: Look for certifications such as GOTS (Global Organic Textile Standard) or Fair Trade.
By following these eco-friendly practices, you can reduce the environmental impact of your screen-printing activities while still achieving high-quality results.
Properly curing screen-printed shirts at home is a blend of science and technique. Whether you choose a heat press, heat gun, or even a household iron, understanding the nuances of ink types, temperatures, and safety measures is key. By investing in the right tools, practicing diligently, and staying informed, you can achieve professional-quality results from the comfort of your home.
For more detailed guides, innovative ideas, and expert advice, visit amazingprint.net, your comprehensive resource for all things printing. Explore our articles, compare options, and get inspired to elevate your printing projects.
Contact us at:
Address: 1600 Amphitheatre Parkway, Mountain View, CA 94043, United States
Phone: +1 (650) 253-0000
Website: amazingprint.net
Frequently Asked Questions (FAQs)
- What is the ideal temperature for curing plastisol ink at home?
Plastisol ink typically cures at around 290 – 330 degrees Fahrenheit (143 – 166 degrees Celsius). It’s crucial to monitor the temperature with a temperature gun for best results. - Can I use a regular household iron to cure screen-printed shirts?
Yes, a regular household iron can be used to cure small designs on screen-printed shirts. Place a piece of parchment paper or Teflon sheet over the design and iron over it, applying firm, even pressure while monitoring the temperature. - How long should I cure a screen-printed shirt with a heat press?
The curing time depends on the ink type and thickness. Generally, curing for 60-90 seconds at the recommended temperature is sufficient. Always refer to the ink manufacturer’s guidelines for precise timing. - What safety precautions should I take when curing screen-printed shirts at home?
Work in a well-ventilated area, wear gloves and eye protection, and use caution when handling heat sources. Keep a fire extinguisher nearby and review the Material Safety Data Sheets (MSDS) for all inks and chemicals used. - What is the best way to test if a screen-printed shirt has been properly cured?
Perform a stretch test and a wash test. Gently stretch the printed area to check for cracks, and launder the garment to see if the design fades or washes off. - How can I prevent scorching when curing screen-printed shirts with a heat gun?
Hold the heat gun several inches away from the design and move it in a slow, steady motion. Continuously monitor the temperature with a temperature gun to avoid overheating. - Is it possible to cure screen-printed shirts without specialized equipment?
Yes, you can use a household iron, oven, or hair dryer, but these methods require careful monitoring and may not provide consistent results compared to a heat press or heat gun. - What are the advantages of using water-based inks for screen printing?
Water-based inks offer a soft feel, are more eco-friendly, have lower VOC emissions, and are easier to clean up compared to plastisol inks. - How do I choose the right curing method for my screen-printed shirts?
Consider the ink type, fabric type, design size, and your budget. For professional results, invest in a heat press. For smaller projects, a heat gun or iron may suffice. - Can I air dry screen-printed shirts instead of using heat?
Air drying is suitable for specific water-based inks designed for air curing. Ensure proper airflow and use fast-drying additives to achieve a full cure within 24-48 hours.