Connecting your Mac to your printer doesn’t have to be a headache. With the right guidance, you can easily set up your devices for hassle-free printing. Amazingprint.net offers expert tips and solutions to ensure a smooth connection, allowing you to focus on creating stunning prints. Discover different printing options and find inspiration for your next printing project with us.
1. Why Won’t My Mac Connect to My Printer?
There could be several reasons why your Mac won’t connect to your printer. A common issue is outdated printer software, which can cause compatibility problems. Another reason could be network connectivity problems, preventing your Mac from finding the printer. Other causes might include incorrect printer settings on your Mac, or physical connection issues if you are using a USB cable.
Here’s a more detailed breakdown of possible causes:
- Outdated Printer Software: The printer driver on your Mac might be outdated or incompatible with the current macOS version.
- Network Issues: If you’re using a wireless printer, your Mac and printer might not be on the same Wi-Fi network, or there might be a problem with your network connection.
- Incorrect Printer Settings: The printer settings on your Mac might not be configured correctly.
- Physical Connection Problems: If you’re using a USB cable, the cable might be damaged, or the connection might be loose.
- Printer Errors: The printer itself might be displaying an error message, such as “Out of Paper” or “Toner Low.”
- Firewall Interference: Your firewall settings might be blocking communication between your Mac and the printer.
- Driver Conflicts: Conflicting printer drivers from previous installations can sometimes interfere with the current setup.
2. How Do I Update My Printer Software on My Mac?
Updating your printer software on your Mac is an easy way to ensure compatibility and resolve potential issues. The first thing to do is visit your printer manufacturer’s website to download the latest drivers for your printer model. You can also use the Software Update feature on your Mac to automatically check for and install available updates.
Here are the steps to update your printer software:
- Check the Printer Manufacturer’s Website:
- Visit the website of your printer’s manufacturer (e.g., HP, Epson, Canon).
- Navigate to the “Support” or “Downloads” section.
- Enter your printer model number to find the latest drivers for macOS.
- Download the driver installation package.
- Use Software Update on Your Mac:
- Click the Apple menu in the top-left corner of your screen.
- Choose “System Preferences” (or “System Settings” in newer macOS versions).
- Click “Software Update.”
- If updates are available for your printer, they will appear in the list.
- Click “Update Now” to install the updates.
- Install the Downloaded Drivers:
- Once the driver installation package is downloaded, double-click the file to open it.
- Follow the on-screen instructions to install the driver.
- You may need to restart your Mac after the installation is complete.
Table: Common Printer Manufacturer Websites
| Manufacturer | Website |
|---|---|
| HP | support.hp.com |
| Epson | epson.com/support |
| Canon | usa.canon.com/support |
| Brother | support.brother.com |
| Xerox | xerox.com/support |
3. How Do I Prepare My Printer for Connection to My Mac?
Preparing your printer is essential for a successful connection to your Mac. Firstly, unpack your printer and install the ink or toner cartridges. Make sure you add paper to the paper tray. Then, switch on the printer and confirm that it does not display any error messages.
Here’s a detailed checklist to prepare your printer:
- Unpack the Printer: Remove all packaging materials from the printer.
- Install Ink or Toner:
- Open the printer cover.
- Insert the ink or toner cartridges into their designated slots.
- Make sure they click into place.
- Add Paper:
- Open the paper tray.
- Load paper into the tray, making sure it’s aligned properly.
- Adjust the paper guides to fit the paper size.
- Power On: Turn on the printer and wait for it to initialize.
- Check for Errors: Ensure that the printer is not displaying any error messages on its display panel. Resolve any errors before proceeding.
- Print a Test Page: Print a test page to ensure that the printer is functioning correctly.
According to the Printing Industries of America (PIA), ensuring your printer is correctly set up is the first step to a smooth printing workflow.
4. What Are the Different Ways to Connect My Printer to My Mac?
There are multiple ways to connect your printer to your Mac, including using Wi-Fi, USB, or Ethernet. Wi-Fi is a popular choice for wireless printing, while USB offers a direct connection. Ethernet is suitable for wired network connections, providing a stable connection in office environments.
4.1. Connecting via Wi-Fi
Connecting your printer via Wi-Fi allows for wireless printing, giving you the flexibility to print from anywhere within your network range. This method requires both your Mac and printer to be connected to the same Wi-Fi network.
Steps to Connect via Wi-Fi:
- Connect the Printer to Wi-Fi:
- Go to the printer’s control panel.
- Navigate to the “Network” or “Wireless” settings.
- Select your Wi-Fi network and enter the password.
- Add the Printer on Your Mac:
- Go to “System Preferences” (or “System Settings”) on your Mac.
- Click “Printers & Scanners.”
- Click the “+” button to add a printer.
- Select your printer from the list.
- Click “Add.”
4.2. Connecting via USB
Connecting your printer via USB provides a direct and reliable connection. This method is straightforward and does not rely on a network connection.
Steps to Connect via USB:
- Connect the USB Cable:
- Plug one end of the USB cable into your printer.
- Plug the other end into a USB port on your Mac.
- Add the Printer on Your Mac:
- Go to “System Preferences” (or “System Settings”) on your Mac.
- Click “Printers & Scanners.”
- Click the “+” button to add a printer.
- Your printer should appear in the list. Select it and click “Add.”
4.3. Connecting via Ethernet
Connecting your printer via Ethernet provides a stable and reliable wired network connection, which is ideal for office environments.
Steps to Connect via Ethernet:
- Connect the Ethernet Cable:
- Plug one end of the Ethernet cable into the printer’s Ethernet port.
- Plug the other end into an Ethernet port on your network router or switch.
- Add the Printer on Your Mac:
- Go to “System Preferences” (or “System Settings”) on your Mac.
- Click “Printers & Scanners.”
- Click the “+” button to add a printer.
- Select your printer from the list. If it doesn’t appear, you may need to enter its IP address manually.
- Click “Add.”
5. How Do I Add a Printer to My List of Available Printers on Mac?
Adding a printer to your list of available printers on your Mac enables you to easily select and use the printer for your printing tasks. To do this, go to System Preferences, click on Printers & Scanners, and then click the Add Printer button. Your Mac will then search for available printers on your network.
Here are the detailed steps:
- Open System Preferences:
- Click the Apple menu in the top-left corner of your screen.
- Choose “System Preferences” (or “System Settings” in newer macOS versions).
- Go to Printers & Scanners:
- Click “Printers & Scanners.”
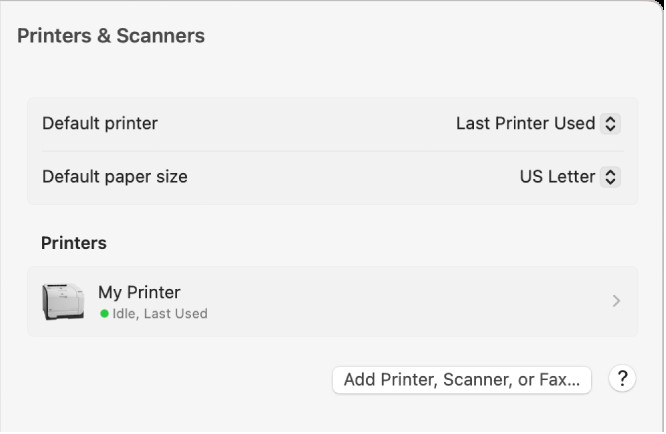 Printers & Scanners settings on macOS for adding a new printer
- Add a Printer:
- Click the “+” button to add a printer. A dialog box will appear, listing printers on your local network.
- Select Your Printer:
- When your printer appears in the list, select it.
- Click “Add.”
- If you see a message prompting you to download new software, make sure to download and install it.
6. What Should I Do If My Printer Doesn’t Appear in the List?
If your printer doesn’t appear in the list, it could be due to several reasons, such as network connectivity issues, printer discovery problems, or driver incompatibility. Begin by making sure that your printer is turned on and connected to the same network as your Mac. You might also need to manually add the printer by entering its IP address.
Here’s a detailed guide to troubleshoot:
- Check Printer Power and Connection: Ensure that your printer is turned on and connected to the same network as your Mac.
- Verify Network Connectivity: Make sure your Mac is connected to the internet and can access other devices on the network.
- Manual Addition Using IP Address:
- Find the IP address of your printer (usually found in the printer’s network settings).
- In the “Add Printer” dialog, click the “IP” tab.
- Enter the printer’s IP address, protocol (usually LPD or IPP), and other required information.
- Click “Add.”
- Troubleshoot Network Issues: Restart your router and printer to refresh the network connection.
- Check Firewall Settings: Ensure that your firewall settings are not blocking communication between your Mac and the printer.
- Update Printer Drivers: As mentioned earlier, outdated drivers can cause discovery issues. Update your printer drivers to the latest version.
7. How Do I Connect an AirPrint Printer to a Wi-Fi Network?
Connecting an AirPrint printer to a Wi-Fi network is usually straightforward because AirPrint printers are designed to work seamlessly with Apple devices. Ensure your printer is AirPrint-enabled, then connect it to your Wi-Fi network via the printer’s control panel. After that, your Mac should automatically detect the printer.
Here are the steps to connect an AirPrint printer to a Wi-Fi network:
- Check AirPrint Compatibility:
- Ensure that your printer supports AirPrint. You can usually find this information on the printer’s packaging or manufacturer’s website.
- Connect the Printer to Wi-Fi:
- Go to the printer’s control panel.
- Navigate to the “Network” or “Wireless” settings.
- Select your Wi-Fi network and enter the password.
- Add the Printer on Your Mac:
- Go to “System Preferences” (or “System Settings”) on your Mac.
- Click “Printers & Scanners.”
- Click the “+” button to add a printer.
- Your printer should appear in the list under the “AirPrint” section. Select it and click “Add.”
According to Apple Support, AirPrint printers do not require additional drivers, simplifying the setup process.
8. What Are Common Printing Problems and How Can I Fix Them?
Common printing problems include paper jams, poor print quality, and connectivity issues. Paper jams can usually be fixed by opening the printer and carefully removing the jammed paper. Poor print quality can be improved by cleaning the printer heads or replacing the ink cartridges.
Here are some common printing problems and their solutions:
- Paper Jams:
- Problem: Paper gets stuck inside the printer.
- Solution:
- Turn off the printer and unplug it.
- Open the printer cover and carefully remove any visible paper.
- Check for small pieces of paper that might be stuck in the rollers.
- Reload the paper tray and try printing again.
- Poor Print Quality:
- Problem: Prints are faded, blurry, or have streaks.
- Solution:
- Clean the printer heads using the printer’s maintenance utility.
- Replace low or empty ink cartridges.
- Check the printer settings to ensure the correct paper type and print quality are selected.
- Connectivity Issues:
- Problem: Printer is not connecting to the Mac or network.
- Solution:
- Restart the printer and your Mac.
- Check the Wi-Fi connection and ensure both devices are on the same network.
- Update printer drivers.
- Manually add the printer using its IP address.
- Printer Offline:
- Problem: The printer status shows as “Offline” on your Mac.
- Solution:
- Ensure the printer is turned on and connected to the network.
- Check the printer queue for any paused or stuck print jobs.
- Restart the print spooler service on your Mac.
- Incorrect Color Printing:
- Problem: Colors are not printing correctly.
- Solution:
- Check the printer settings to ensure the correct color profile is selected.
- Run a color calibration using the printer’s utility software.
- Replace low or empty ink cartridges.
9. Can I Print From My iPhone or iPad to My Mac-Connected Printer?
Yes, you can print from your iPhone or iPad to your Mac-connected printer using AirPrint. Make sure that your printer and iOS device are connected to the same Wi-Fi network. Then, select the print option on your iOS device and choose your printer from the list of available printers.
Here are the steps to print from your iPhone or iPad:
- Ensure AirPrint Compatibility: Verify that your printer supports AirPrint.
- Connect to the Same Wi-Fi Network: Make sure your iPhone or iPad and the printer are connected to the same Wi-Fi network.
- Print from Your iOS Device:
- Open the document, photo, or webpage you want to print.
- Tap the “Share” icon (usually a square with an arrow pointing up).
- Scroll down and tap “Print.”
- Select your printer from the list of available printers.
- Adjust the print settings (e.g., number of copies, paper size) as needed.
- Tap “Print.”
10. What Are the Benefits of Using AirPrint?
AirPrint offers several benefits, including easy setup, wireless printing, and compatibility with a wide range of Apple devices. With AirPrint, you don’t need to install additional drivers, simplifying the printing process. It supports various printing options, such as paper size, print quality, and double-sided printing.
Here’s a summary of the benefits of using AirPrint:
- Driverless Printing: No need to install additional drivers or software.
- Wireless Convenience: Print wirelessly from any AirPrint-enabled device on your network.
- Easy Setup: Simple and straightforward setup process.
- Wide Compatibility: Compatible with a wide range of Apple devices (iPhones, iPads, Macs).
- Versatile Printing Options: Supports various printing options, such as paper size, print quality, and double-sided printing.
- Automatic Discovery: Automatically detects AirPrint-enabled printers on your network.
11. How Do I Choose the Right Printer for My Mac?
Choosing the right printer for your Mac depends on your printing needs and usage patterns. Consider factors such as print volume, print quality, color vs. monochrome printing, and additional features like scanning and copying. Inkjet printers are suitable for occasional printing, while laser printers are better for high-volume printing.
Here’s a guide to help you choose the right printer:
- Consider Your Printing Needs:
- Print Volume: How much do you print regularly? If you print frequently, a laser printer might be more cost-effective.
- Print Quality: Do you need high-quality prints for photos and graphics? Inkjet printers generally offer better photo quality.
- Color vs. Monochrome: Do you need color printing, or is monochrome sufficient?
- Additional Features: Do you need scanning, copying, or faxing capabilities?
- Inkjet Printers:
- Pros:
- Excellent photo quality.
- Lower initial cost.
- Suitable for occasional printing.
- Cons:
- Higher cost per page.
- Slower printing speeds.
- Pros:
- Laser Printers:
- Pros:
- Lower cost per page.
- Faster printing speeds.
- Suitable for high-volume printing.
- Cons:
- Higher initial cost.
- Not as good for photo printing.
- Pros:
- All-in-One Printers:
- Pros:
- Combine printing, scanning, copying, and faxing capabilities.
- Convenient for home or small office use.
- Cons:
- Can be more expensive than single-function printers.
- Pros:
- AirPrint Compatibility:
- Ensure that the printer supports AirPrint for seamless integration with your Mac and other Apple devices.
Table: Comparison of Inkjet and Laser Printers
| Feature | Inkjet Printers | Laser Printers |
|---|---|---|
| Print Quality | Excellent for photos | Good for text, decent for graphics |
| Print Volume | Low to medium | Medium to high |
| Cost per Page | Higher | Lower |
| Initial Cost | Lower | Higher |
| Printing Speed | Slower | Faster |
| Best Use | Photos, graphics, occasional document printing | Text documents, high-volume printing |
12. What Are the Best Printer Settings for High-Quality Prints?
To achieve high-quality prints, adjust your printer settings to use the correct paper type, select the highest print quality, and enable any relevant options such as photo enhancement. You may also need to calibrate your printer for accurate color reproduction.
Here are the best printer settings for high-quality prints:
- Paper Type:
- Select the correct paper type in the printer settings to match the paper you are using (e.g., glossy photo paper, matte paper, plain paper).
- Print Quality:
- Choose the highest print quality setting (e.g., “Best,” “High Quality”).
- Color Settings:
- Select the appropriate color profile for your print job (e.g., sRGB, Adobe RGB).
- Photo Enhancement:
- Enable any photo enhancement options, such as “Auto Enhance” or “Vivid Colors.”
- Resolution:
- Set the resolution to the highest possible setting for detailed prints (e.g., 300 DPI or higher).
- Calibration:
- Calibrate your printer to ensure accurate color reproduction. Use the printer’s utility software to perform a color calibration.
13. How Do I Manage Printers and Print Jobs With Print Center on Mac?
Print Center on Mac allows you to manage printers and print jobs efficiently. You can use Print Center to add printers, view the print queue, pause or cancel print jobs, and troubleshoot printer issues.
Here’s how to use Print Center:
- Open Print Center:
- Go to the “Utilities” folder in “Applications.”
- Open “Print Center.”
- Add a Printer:
- Choose “Printer” > “Add Printer” to set up a new printer.
- View Print Queue:
- Select your printer in the Print Center window.
- The print queue will show you the list of print jobs waiting to be printed.
- Manage Print Jobs:
- Select a print job to pause, resume, or cancel it.
- Use the “Hold” button to pause a print job.
- Use the “Resume” button to continue a paused print job.
- Use the “Delete” button to cancel a print job.
- Troubleshoot Printer Issues:
- If your printer is experiencing problems, Print Center can provide error messages and troubleshooting tips.
According to Apple Support, Print Center is a useful tool for managing your printing workflow on macOS.
14. What Is the Best Way to Print Double-Sided on My Mac?
The best way to print double-sided on your Mac is to enable the two-sided printing option in the print dialog box. Ensure that your printer supports automatic duplex printing for seamless double-sided prints. If your printer doesn’t support automatic duplex printing, you may need to manually flip the pages and re-insert them into the printer.
Here are the steps to print double-sided:
- Open the Print Dialog:
- Choose “File” > “Print” from the application you are using.
- Enable Two-Sided Printing:
- In the print dialog box, look for a “Two-Sided” or “Duplex” option.
- Select the checkbox to enable two-sided printing.
- Choose Binding Options:
- Choose the binding option (e.g., “Long Edge Binding” for documents, “Short Edge Binding” for calendars).
- Print the Document:
- Click “Print” to start printing.
- Manual Duplex Printing (If Your Printer Doesn’t Support Automatic Duplex):
- After the first side is printed, the printer will prompt you to re-insert the pages.
- Follow the instructions to re-insert the pages correctly.
- Click “Continue” to print the second side.
15. How Do I Share My Printer With Other Users on My Network?
To share your printer with other users on your network, enable printer sharing in System Preferences. Other users on the same network will then be able to add the shared printer to their list of available printers.
Here are the steps to share your printer:
- Open System Preferences:
- Click the Apple menu in the top-left corner of your screen.
- Choose “System Preferences” (or “System Settings” in newer macOS versions).
- Go to Sharing:
- Click “Sharing.”
- Enable Printer Sharing:
- Select “Printer Sharing” in the list.
- Check the box next to the printer you want to share.
- Allow Access:
- Specify which users or groups can access the shared printer.
- On Other Macs:
- Go to “System Preferences” > “Printers & Scanners.”
- Click the “+” button to add a printer.
- The shared printer should appear in the list. Select it and click “Add.”
16. How Do I Print a Test Page on My Mac?
Printing a test page on your Mac helps you check the printer’s functionality and print quality. You can print a test page from the Printers & Scanners settings in System Preferences.
Here are the steps to print a test page:
- Open System Preferences:
- Click the Apple menu in the top-left corner of your screen.
- Choose “System Preferences” (or “System Settings” in newer macOS versions).
- Go to Printers & Scanners:
- Click “Printers & Scanners.”
- Select Your Printer:
- Select your printer from the list of available printers.
- Print a Test Page:
- Click the “Options & Supplies” button.
- Click the “Utility” tab.
- Click the “Print Test Page” button.
17. How Do I Find the IP Address of My Printer?
Finding the IP address of your printer is essential for manual network configuration and troubleshooting. The IP address is usually found in the printer’s network settings, which can be accessed via the printer’s control panel or through its web interface.
Here are the common ways to find the IP address of your printer:
- Printer’s Control Panel:
- Go to the printer’s control panel.
- Navigate to the “Network” or “Wireless” settings.
- Look for the “IP Address” or “TCP/IP Settings” section.
- The IP address will be displayed there.
- Print a Network Configuration Page:
- Many printers have an option to print a network configuration page.
- This page contains information about the printer’s network settings, including the IP address.
- Printer’s Web Interface:
- Open a web browser on your Mac.
- Enter the printer’s name or default IP address in the address bar.
- Log in to the printer’s web interface (if required).
- Navigate to the “Network” or “Wireless” settings.
- The IP address will be displayed there.
18. How Do I Reset My Printer on My Mac?
Resetting your printer on your Mac can resolve various issues, such as connectivity problems or incorrect settings. To reset your printer, you can remove it from the list of available printers and then add it again.
Here are the steps to reset your printer:
- Remove the Printer:
- Go to “System Preferences” (or “System Settings”) on your Mac.
- Click “Printers & Scanners.”
- Select your printer from the list.
- Click the “-” button to remove the printer.
- Add the Printer Again:
- Click the “+” button to add a printer.
- Select your printer from the list.
- Click “Add.”
19. How Do I Check Ink or Toner Levels on My Mac?
Checking ink or toner levels on your Mac is easy and can be done through the Printers & Scanners settings or via the printer’s utility software. Keeping an eye on your ink levels ensures you don’t run out unexpectedly during important print jobs.
Here’s how to check ink or toner levels:
- Through Printers & Scanners:
- Go to “System Preferences” (or “System Settings”) on your Mac.
- Click “Printers & Scanners.”
- Select your printer from the list.
- Click the “Options & Supplies” button.
- Click the “Supply Levels” tab to view the ink or toner levels.
- Using Printer’s Utility Software:
- Open the printer’s utility software (usually installed when you set up the printer).
- Look for the “Supply Levels” or “Maintenance” section to view the ink or toner levels.
20. What Are the Latest Printing Trends and Technologies in the USA?
The latest printing trends and technologies in the USA include sustainable printing practices, personalized printing solutions, and advanced printing technologies such as 3D printing and digital printing. Many businesses are also adopting cloud-based printing solutions for improved efficiency and accessibility.
Here are some of the latest trends and technologies:
- Sustainable Printing:
- Use of eco-friendly inks and recycled paper.
- Energy-efficient printing equipment.
- Reducing waste through efficient printing practices.
- Personalized Printing:
- Customized marketing materials and promotional items.
- Personalized packaging and labels.
- Variable data printing for targeted communications.
- 3D Printing:
- Rapid prototyping and manufacturing.
- Customized products and parts.
- Applications in healthcare, aerospace, and automotive industries.
- Digital Printing:
- On-demand printing for short-run jobs.
- High-quality color printing.
- Quick turnaround times.
- Cloud-Based Printing:
- Printing from anywhere with an internet connection.
- Centralized management of print resources.
- Improved security and control over printing costs.
According to a report by Smithers Pira, the printing industry is rapidly evolving, with digital printing and sustainable practices leading the way.
Table: Key Printing Trends in the USA
| Trend | Description | Impact |
|---|---|---|
| Sustainable Printing | Eco-friendly inks, recycled paper, energy-efficient equipment | Reduced environmental impact, improved brand image |
| Personalized Printing | Customized marketing materials, personalized packaging | Enhanced customer engagement, increased sales |
| 3D Printing | Rapid prototyping, customized products | Faster product development, innovative solutions |
| Digital Printing | On-demand printing, high-quality color printing | Short-run jobs, quick turnaround times |
| Cloud-Based Printing | Printing from anywhere, centralized management | Improved efficiency, reduced costs |
For more information and inspiration, visit amazingprint.net to explore our comprehensive range of printing services and solutions.
Ready to connect your Mac to your printer and start creating stunning prints? Visit amazingprint.net for more expert tips, service comparisons, and creative ideas for your next printing project. Discover how amazingprint.net can help you find the perfect printing solutions tailored to your needs in the USA. Contact us today and let’s bring your vision to life. Address: 1600 Amphitheatre Parkway, Mountain View, CA 94043, United States. Phone: +1 (650) 253-0000. Website: amazingprint.net.
FAQ Section
1. Can I use a printer that is not AirPrint-enabled with my Mac?
Yes, you can use a printer that is not AirPrint-enabled with your Mac. You will need to install the appropriate drivers for the printer to ensure compatibility. You can usually find the drivers on the printer manufacturer’s website.
2. What should I do if my Mac says “Printer is not responding”?
If your Mac says “Printer is not responding,” try the following steps:
- Ensure that the printer is turned on and connected to the same network as your Mac.
- Check the printer queue for any paused or stuck print jobs.
- Restart the printer and your Mac.
- Update printer drivers.
- Reset the printing system on your Mac.
3. How do I update the firmware on my printer?
To update the firmware on your printer, visit the printer manufacturer’s website and download the latest firmware update for your printer model. Follow the instructions provided by the manufacturer to install the firmware update.
4. What is the difference between a PostScript and a non-PostScript printer?
A PostScript printer uses the PostScript language to describe the appearance of a printed page, offering better graphics and font handling. Non-PostScript printers rely on the computer’s operating system to process print jobs, which may result in lower quality prints, especially with complex graphics.
5. Can I connect multiple printers to my Mac?
Yes, you can connect multiple printers to your Mac. Each printer will appear in the list of available printers, and you can select the desired printer when printing a document.
6. What is the best way to dispose of old ink cartridges?
The best way to dispose of old ink cartridges is to recycle them. Many printer manufacturers offer recycling programs, and you can also find recycling options at local office supply stores.
7. How do I calibrate my printer for accurate color printing?
To calibrate your printer for accurate color printing, use the printer’s utility software to perform a color calibration. This process involves printing a test page and using a scanner or colorimeter to measure the printed colors. The software will then adjust the printer settings to ensure accurate color reproduction.
8. Can I use generic ink cartridges in my printer?
Yes, you can use generic ink cartridges in your printer. However, using generic cartridges may void the printer’s warranty, and the print quality may not be as good as with genuine ink cartridges.
9. How do I clean the print heads on my printer?
To clean the print heads on your printer, use the printer’s maintenance utility. This utility will run a cleaning cycle that removes any clogs or debris from the print heads, improving print quality.
10. What should I do if my printer is printing blank pages?
If your printer is printing blank pages, try the following steps:
- Check the ink or toner levels.
- Clean the print heads.
- Ensure that the correct paper type is selected in the printer settings.
- Update printer drivers.
- Reset the printer.