Connecting your HP printer to your computer might seem daunting at first, but with the right guidance, it’s a straightforward process. Whether you prefer the reliability of a wired connection or the convenience of wireless printing, this guide will walk you through each method step-by-step. We’ll also cover connecting your HP printer to mobile devices and troubleshoot common connection issues, ensuring you can get your printing tasks done quickly and efficiently.
Getting Started with Your HP Printer
Before diving into connections, ensure your HP printer is ready. Unbox your printer carefully, removing all packing materials and tapes. Verify that you have all the necessary components, including the power cable and any included USB cables. Place your printer on a stable surface near your computer and a power outlet.
Once unpacked, connect the power cable to the printer and plug it into a power outlet. Turn on your HP printer. Some models power on automatically when plugged in, while others require pressing a power button. Let’s explore the different connection methods.
Connecting Your HP Printer via Wired USB Cable
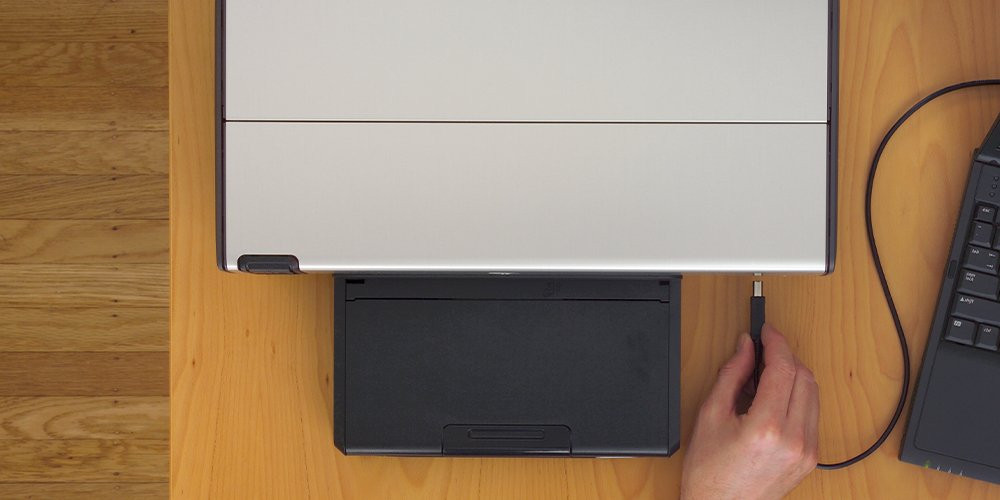 Connect HP Printer via USB Cable
A USB cable provides a direct and reliable connection between your HP printer and computer. This method is generally the simplest for initial setup and can be beneficial when wireless connectivity is unstable or unavailable.
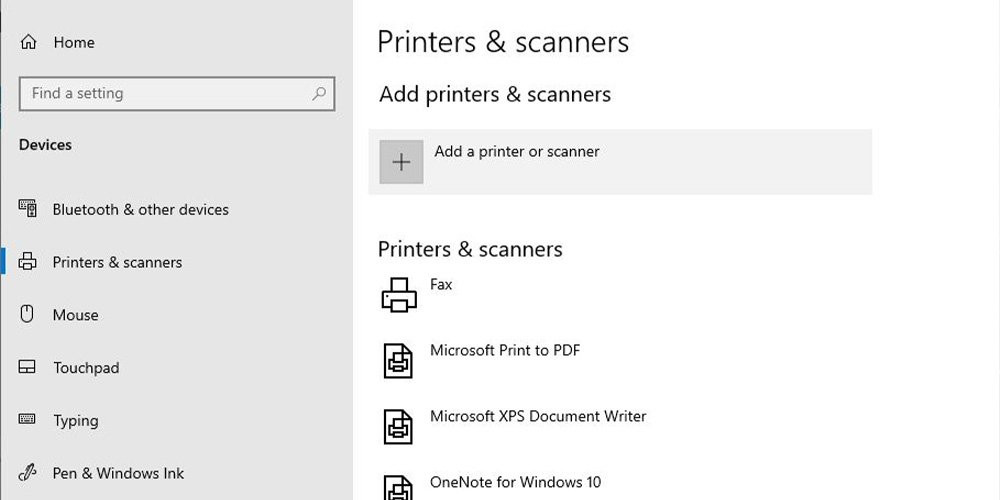
Step 1: Access Windows Settings
- Click the Windows icon in the bottom-left corner of your screen to open the Start Menu.
- Select the Settings icon (gear icon) from the Start Menu to open the Windows Settings window.
Step 2: Navigate to Devices
- In the Windows Settings window, click on Devices.
- In the Devices window, on the left sidebar, select Printers & scanners.
- Click Add a printer or scanner. Windows will begin searching for available printers.
Step 3: Connect Your HP Printer
- Connect the USB cable to the back of your HP printer and the other end to a USB port on your computer.
- Windows should detect your HP printer as a new device.
- If your printer is detected, it will likely appear in the list of available printers. Click on your HP printer’s name when it appears.
- Follow the on-screen instructions to install the printer driver. Windows will usually automatically download and install the necessary drivers.
- If prompted, allow the installation process to complete.
Once the installation is finished, your HP printer should be connected and ready for wired printing. You can typically find your newly installed printer in the Printers & scanners section of your Windows settings.
Connecting Your HP Printer via Wireless Network (Wi-Fi)
 Connect HP Printer via Wireless Network
Connecting your HP printer wirelessly offers flexibility and convenience, allowing multiple devices to print without being physically connected to the printer.
Step 1: Prepare Your HP Printer for Wireless Setup
- Turn on your HP printer and ensure it is in wireless setup mode.
- Many modern HP printers with LCD screens will automatically prompt you to set up a wireless connection upon initial power-up.
- If not, navigate to the printer’s control panel menu. Look for options like Network Setup, Wireless Setup Wizard, or Wi-Fi Setup. The exact menu names may vary depending on your HP printer model.
- Select Wireless Setup Wizard or similar option to start the wireless connection process directly from your printer.
Step 2: Connect to Your Wi-Fi Network
- The printer will scan for available Wi-Fi networks.
- Select your home or office Wi-Fi network (SSID) from the list displayed on the printer’s screen.
- Enter your Wi-Fi network password (network key) using the printer’s control panel buttons or touchscreen. Ensure you enter the password correctly.
- Once you’ve entered the password, the printer will attempt to connect to your Wi-Fi network. Wait for the printer to confirm successful connection. This might be indicated by a Wi-Fi icon appearing on the printer’s display or a “Connected” message.
Step 3: Add Your HP Wireless Printer to Your Computer
- On your computer, open Windows Settings as described in the wired connection steps.
- Go to Devices > Printers & scanners.
- Click Add a printer or scanner. Windows will search for printers on your network.
- Your HP printer should appear in the list of detected wireless printers. It might be listed by its model name or network name.
- Select your HP printer and click Add device.
- Windows will install the necessary drivers for the wireless connection. Follow any on-screen prompts to complete the installation.
After successful installation, your HP wireless printer will be ready for printing from your computer over the Wi-Fi network.
Connecting Your HP Printer to Your Mobile Devices (iPhone, iPad & Android)
Printing directly from your smartphone or tablet is incredibly convenient. HP printers offer seamless mobile printing capabilities with both Apple and Android devices.
How to Connect an HP Printer to Your iPhone or iPad (AirPrint)
HP printers that support AirPrint make wireless printing from Apple devices effortless. AirPrint is built into iOS and macOS, requiring no additional drivers or apps for most HP printers.
Step 1: Ensure Wi-Fi Connection
- Make sure both your HP printer and your iPhone or iPad are connected to the same Wi-Fi network.
Step 2: Print via AirPrint
- Open the app on your iPhone or iPad from which you want to print (e.g., Photos, Safari, Mail).
- Tap the Share icon (usually an upward-pointing arrow or three dots).
- Scroll through the options and tap Print.
- On the Printer Options screen, select Printer and choose your AirPrint-compatible HP printer from the list. If your printer is not listed, ensure it’s powered on and on the same Wi-Fi network.
- Adjust print settings like number of copies, paper size, and range if needed.
- Tap Print to send the print job to your HP printer.
How to Connect an HP Printer to Your Android Device
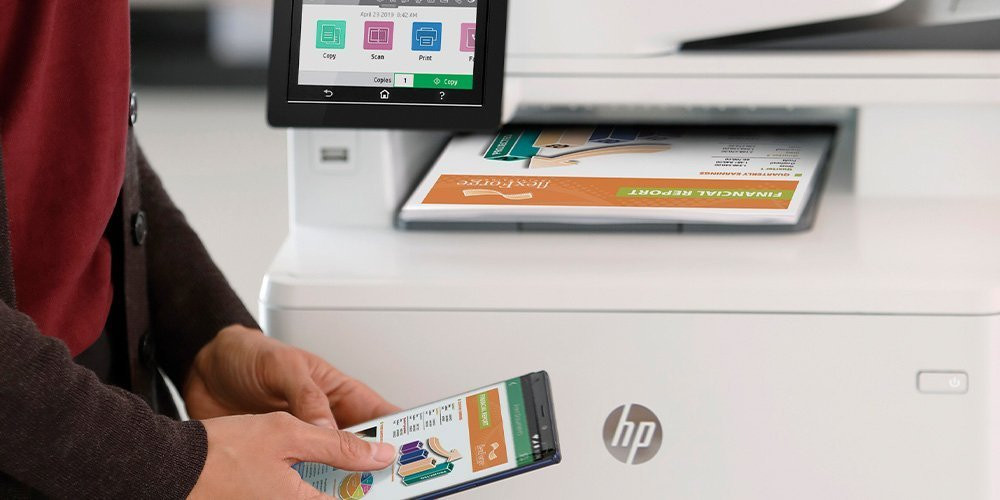
 Connect HP Printer to Android Device
For Android devices, connecting to your HP printer is also straightforward, typically using the HP Print Service Plugin or the printer manufacturer’s app.
Step 1: Install HP Print Service Plugin
- Go to the Google Play Store on your Android device.
- Search for HP Print Service Plugin and install it. This plugin enables printing to HP printers across a Wi-Fi network directly from your Android system.
- In some cases, it may be pre-installed or automatically installed when your printer is detected.
Step 2: Print from Your Android Device
- Ensure your HP printer and Android device are on the same Wi-Fi network.
- Open the file or content you want to print on your Android device (e.g., a document, photo, or email).
- Tap the Menu icon (usually three dots) and look for Print. The location of the Print option may vary depending on the app.
- Tap All printers or Select a printer if prompted.
- Choose your HP printer from the list of available printers. If your printer is not listed, ensure it’s powered on and connected to the same Wi-Fi network.
- Adjust print settings as needed and tap the Print icon to start printing.
Troubleshooting Common HP Printer Connection Problems
Encountering issues while connecting your HP printer is not uncommon. Here are some troubleshooting steps for typical problems:
My Computer Can’t Find My Printer
 Printer Not Found Troubleshooting
- Check Connections: Ensure your printer is powered on and properly connected, whether via USB or Wi-Fi. For Wi-Fi, verify that both your printer and computer are on the same network.
- Restart Devices: Restart both your HP printer and your computer. This simple step often resolves temporary glitches.
- Run Windows Printer Troubleshooter:
- Go to Windows Settings > Devices > Printers & scanners.
- Click Add a printer or scanner. If your printer is not found, click The printer that I want isn’t listed.
- Follow the prompts of the Windows Printer Troubleshooter, which can automatically diagnose and fix common printer connection problems.
- Update or Reinstall Drivers: Outdated or corrupted printer drivers can cause connection issues.
- Visit the HP support website (HP Support) and enter your printer model.
- Download the latest drivers for your operating system.
- Uninstall the existing drivers through Control Panel > Programs and Features (or Apps & features in Windows 10/11), then install the newly downloaded drivers.
My Computer Can’t Install the Printer Software
- USB Direct Connection: If you are trying to connect wirelessly, try temporarily connecting via USB cable. Sometimes, a USB connection can initiate the driver installation process more reliably. Once installed via USB, wireless connectivity can often be set up more easily.
- Check Device Installation Settings:
- Search for “Control Panel” in the Windows search bar and open it.
- Search for “Device installation settings” in the Control Panel search bar.
- Ensure that the option Yes, do this automatically (recommended) is selected. This allows Windows to automatically download driver software.
- Firewall or Antivirus Interference: Temporarily disable your firewall or antivirus software to see if they are blocking the printer installation. If this resolves the issue, configure your firewall/antivirus to allow printer connections. Remember to re-enable your security software afterward.
My Printer Is Unable to Print Over a Network
- Verify Network Connection: Double-check that your printer is connected to the correct Wi-Fi network. Review your printer’s wireless settings and compare with your computer’s network connection.
- Printer Proximity to Router: If the wireless signal is weak, move your printer closer to your Wi-Fi router to ensure a stronger connection.
- Check Printer Status: Ensure your printer is online and not in an error state. Check the printer’s display for any error messages.
- Reinstall Printer Driver (Wireless): If the connection was previously working, the driver may have become corrupted. Remove the printer from Printers & scanners and reinstall it, ensuring you select the wireless connection option during setup.
By following these steps, you should be able to successfully connect your HP printer to your computer and other devices. Regular checks on your printer’s connection and driver updates will ensure smooth and consistent printing performance.