Troubleshooting a wireless printer often feels like chasing a ghost. Unlike older, wired printers where a cable issue is usually the culprit, wireless printers introduce network complexity. When your wireless printer refuses to cooperate, finding its IP address is the essential first step to diagnosing and resolving the problem.
This guide provides comprehensive, easy-to-follow methods to check your printer’s IP address, regardless of your printer type or operating system. Knowing this address empowers you to secure a stable connection, troubleshoot network issues, and connect new devices seamlessly.
Printing a Network Configuration Page
For a straightforward, universal approach, printing a network configuration page directly from your printer is often the quickest solution. This method works across most printer brands and models.
- Access the Control Panel: Navigate to your printer’s control panel using the physical buttons on the device.
- Locate Settings: Look for a “Settings” or “Setup” option within the control panel menu.
- Find Wireless Settings: Within settings, search for “Wireless Settings” or “Network Settings.”
- Print Configuration Page: The option to “Print Network Configuration Page” or similar should be available. Select this to print the page.
- Locate IP Address: Once printed, the Network Configuration Page will display detailed network information, including your printer’s IP address, typically labeled as “IPv4 Address.”
» See Example: Printer Network Configuration Page Example (Illustrative example of what to look for).
Finding Your Printer IP Address on Windows
If you prefer using your Windows computer, you can retrieve the printer’s IP address through the operating system.
- Open Control Panel: Click the Windows “Start” button and type “Control Panel,” then select it from the results.
- Go to Hardware and Sound: In the Control Panel, click on “Hardware and Sound.”
- Open Devices and Printers: Select “Devices and Printers.”
- Printer Properties: Right-click on your printer’s icon and choose “Printer properties” (or just “Properties”).
- Check Tabs for IP Address:
- Web Services Tab: If you see a “Web Services” tab (usually three tabs total), your IP address may be listed there.
- Ports Tab: If you see a “Ports” tab (often five tabs total), click on it. Look for a checked port for your printer. Select ‘Configure Port’ and you may find the IP address there, or the port name itself may contain the IP address.
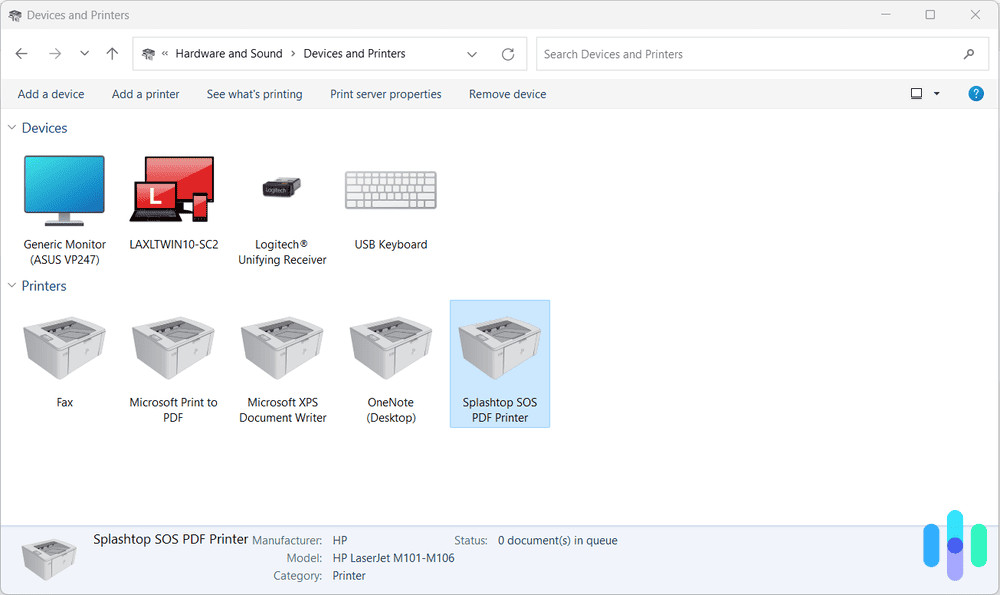 Devices and Printers page on Windows
Accessing Your Router’s Interface
Your router acts as the central hub of your network and keeps track of connected devices, including your printer. Accessing your router’s interface is another reliable way to find your printer’s IP address.
- Router Access: Ensure you have the necessary login credentials (username and password) for your router. Refer to your router’s documentation if needed.
- Enter Router IP in Browser: Open a web browser and type your router’s IP address into the address bar. Common router IPs are
192.168.1.1,192.168.0.1, or10.0.0.1. (If you need help finding your router’s IP, see: How to find your router’s IP address). - Router Login: Enter your router’s username and password when prompted.
- Find DHCP Client Table/Client List: Navigate through your router’s interface to find sections labeled “DHCP Client Table,” “Client List,” “Attached Devices,” or similar. The exact name varies by router brand.
- Locate Printer in List: Browse the list of connected devices to find your printer. It’s usually listed by its printer name or model.
- View Printer IP Address: Once you locate your printer, its corresponding IP address will be displayed in the list.
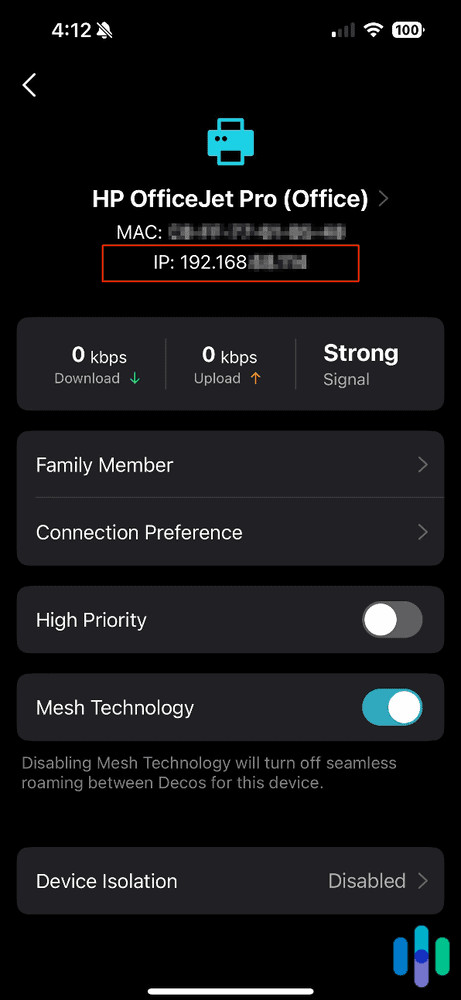 Finding printer IP address from router app interface
Using Command Prompt (Windows)
For more technical users, the Command Prompt in Windows offers a quick way to display network connections and potentially find your printer’s IP.
- Open Command Prompt: Press the Windows key, type “cmd,” and press Enter to open the Command Prompt.
- Run netstat -r Command: Type the command
netstat -rand press Enter. - Analyze Results: This command displays the routing table, which includes connected network devices. Look for entries that might correspond to your printer. Identifying the printer directly might be challenging with this method, especially on busy networks, but you may see IP addresses associated with your network. This method is less direct for finding the printer IP specifically compared to others.
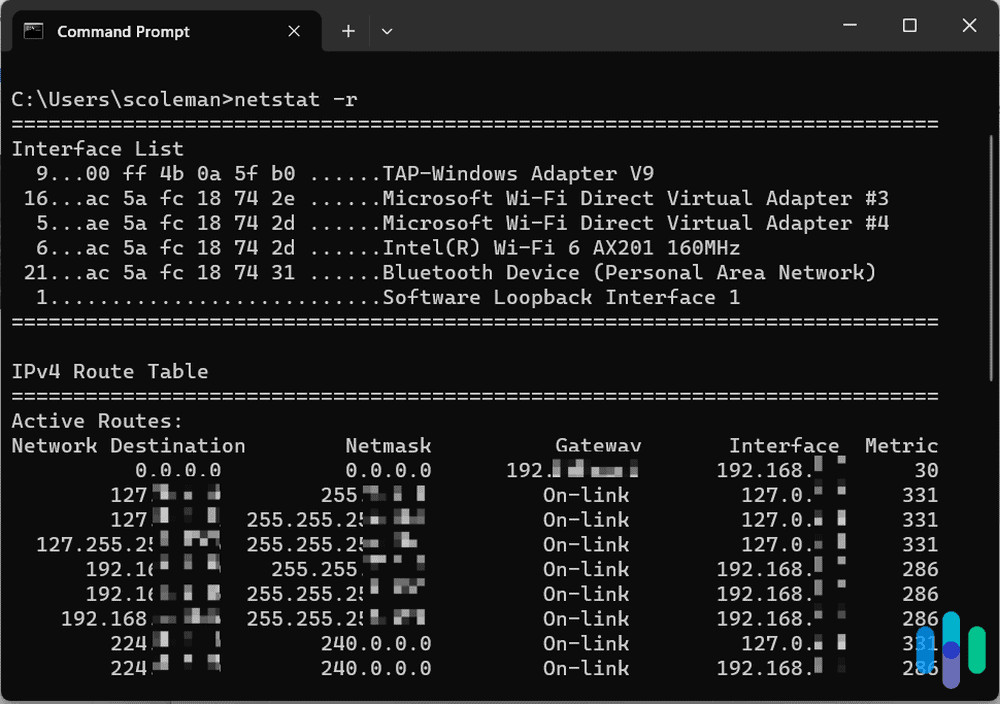 netstat -r command results on Command Prompt
Checking Printer IP on macOS
Mac users can easily find their printer’s IP address within System Settings.
- Open System Settings: Click on the Apple menu in the top-left corner and select “System Settings” (or “System Preferences” on older macOS versions).
- Go to Printers & Scanners: Select “Printers & Scanners.”
- Select Your Printer: Choose your printer from the list on the left.
- Find Location: On the right-hand side, under your printer’s name, you should see “Location.” The IP address of your printer is often listed as the location.
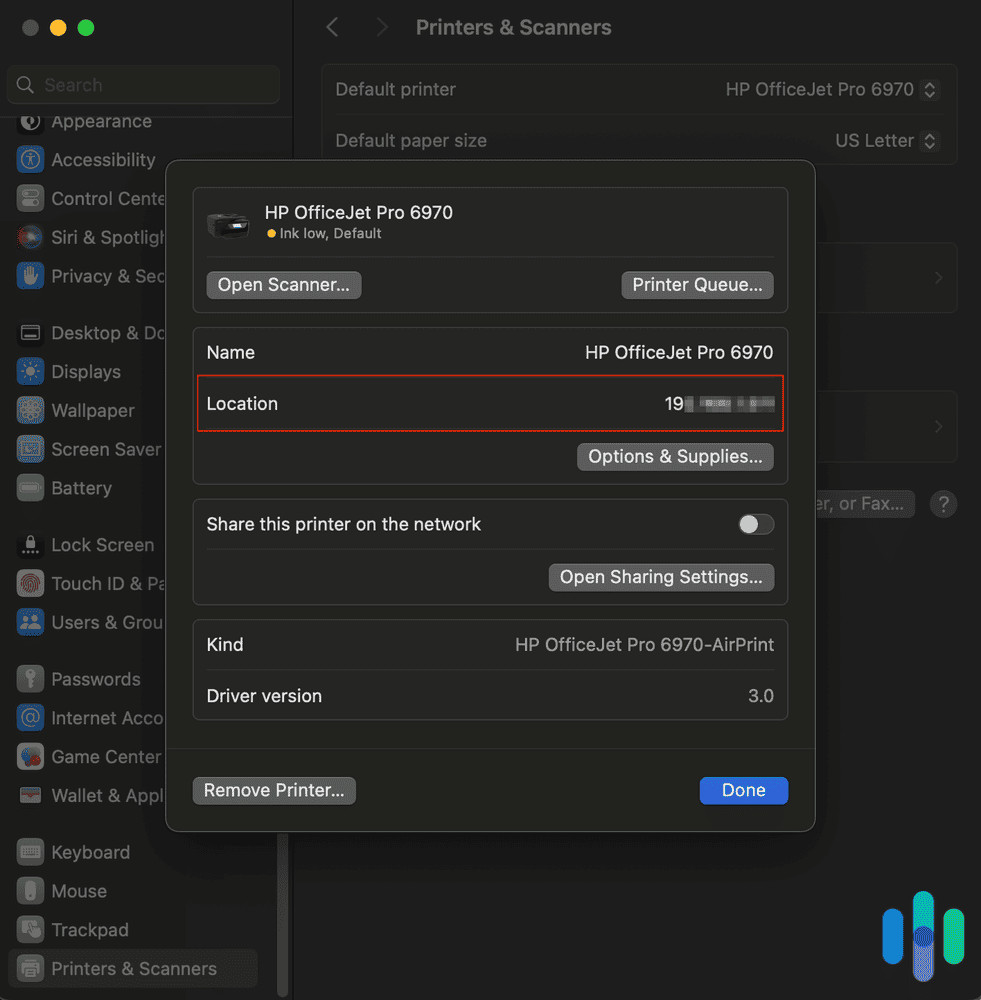 Printer IP address location on Mac settings
» Learn more: How to find the IP address on a Mac
HP Printer Specific Method
HP printers often offer a dedicated method through the HP Smart app or website.
- Open HP Smart App/Website: Launch the HP Smart application on your computer or go to hpsmart.com in a web browser.
- Printer Settings: Select your printer and navigate to “Printer Settings.”
- Printer Reports (Tools): Look for a “Tools” section and then “Printer Reports.”
- Network Configuration Report: Select “Network Configuration Report” to print.
- Locate IPv4 Address: The printed report will contain your printer’s IP address, labeled under the “IPv4” section.
CUPS Webpage for Mac
For advanced Mac users, the CUPS (Common Unix Printing System) webpage provides detailed printer configurations, including the IP address.
- Open Terminal: Open Finder, go to “Applications,” then “Utilities,” and launch “Terminal.”
- Enable Web Interface: Type the command
cupsctl WebInterface=yesand press Enter. - Access CUPS in Safari: Open Safari and type
localhost:631/printersin the address bar, then press Enter. - Find Printer and Location: Locate your printer in the list. Under the “Location” section for your printer, you’ll find its IP address.
Finding IP on a Chromebook
Chromebook users can find the printer IP within the Chrome OS settings.
- Open Settings: Click on the clock in the bottom-right corner and then the gear icon to open Settings.
- Advanced Settings: Click “Advanced” at the bottom of the Settings menu.
- Printers: Under “Printers,” select “Save the Available Printers.”
- Set Up Printer: In the list of saved printers, right-click on your printer and select “Set Up.”
- Access Printer Information: Click through “Model,” “Label,” and then “Add.”
- View IP Address: Under “Printer Information,” the IP address of your printer should now be visible.
Canon Printer IP Address Lookup
Canon printers often have a menu-driven system on the printer itself to display network settings.
- Access Settings/Adjustments: On your Canon printer’s control panel, find and select “Settings” or “Adjustments.”
- Set or Adjust Menu: Click “Set or Adjust Menu.”
- IP Address Menu: Navigate to and expand the “IP Address Menu.”
- Interface Setup: Select “Interface Setup.”
- TCP/IP Settings: Choose “TCP/IP.”
- IPv4 Settings: Open the next tab or scroll down to find and select “IPv4 Settings.”
- View IP Address: A display box or screen will show your Canon printer’s IPv4 address, typically starting with
192.168.
EXPERT TIP: Printing a network configuration page remains the most universally applicable method to find your printer’s IP address. If these instructions don’t perfectly match your printer, consult your printer’s manual or search online for “[your printer make and model] print network configuration page” for specific steps.
What You Can Do With Your Printer’s IP Address
Knowing your printer’s IP address is more than just technical trivia; it’s a practical key for managing and troubleshooting your printer. The primary uses are resolving connection problems and connecting new devices to your printer.
» Further reading: Understanding the risks associated with your IP address
Resolving Printer Connection Issues
Wireless printer connectivity can be disrupted by IP address changes. Unlike wired printers, wireless models rely on network addresses, which can sometimes become outdated or conflicted.
Dynamic IP addresses, commonly assigned by routers, are prone to change due to:
- Device Inactivity: Printers disconnected for extended periods may receive a new IP upon reconnection.
- Router Reboots: Restarting your router often leads to reassignment of IP addresses.
- IP Address Lease Expiration: Routers lease IP addresses for a limited time, requiring renewal or reassignment.
When a printer’s IP address changes, your computer may lose connection because it’s still trying to communicate with the printer at the old address. To prevent this, assigning a static IP address to your printer is recommended. A static IP ensures your printer retains the same IP address on your network, providing a stable connection.
Steps to set a static IP address for your printer on Windows:
- Open Start Menu: Click the Windows “Start” button.
- Devices and Printers: Select “Devices and Printers.”
- Print Server Properties: Click on any printer, then in the top menu, select “Print server properties.”
- Ports Tab: In the Print Server Properties window, go to the “Ports” tab.
- Add Port: Click “Add Port.”
- Standard TCP/IP Port: Choose “Standard TCP/IP Port” and click “New Port.”
- Enter New IP Address: Follow the wizard to enter your desired static IP address and a port name for your printer. Ensure this IP address is within your network’s range but outside the DHCP range to avoid conflicts (consult your router settings for DHCP range).
- Apply Changes: Click “Apply” to save the static IP configuration.
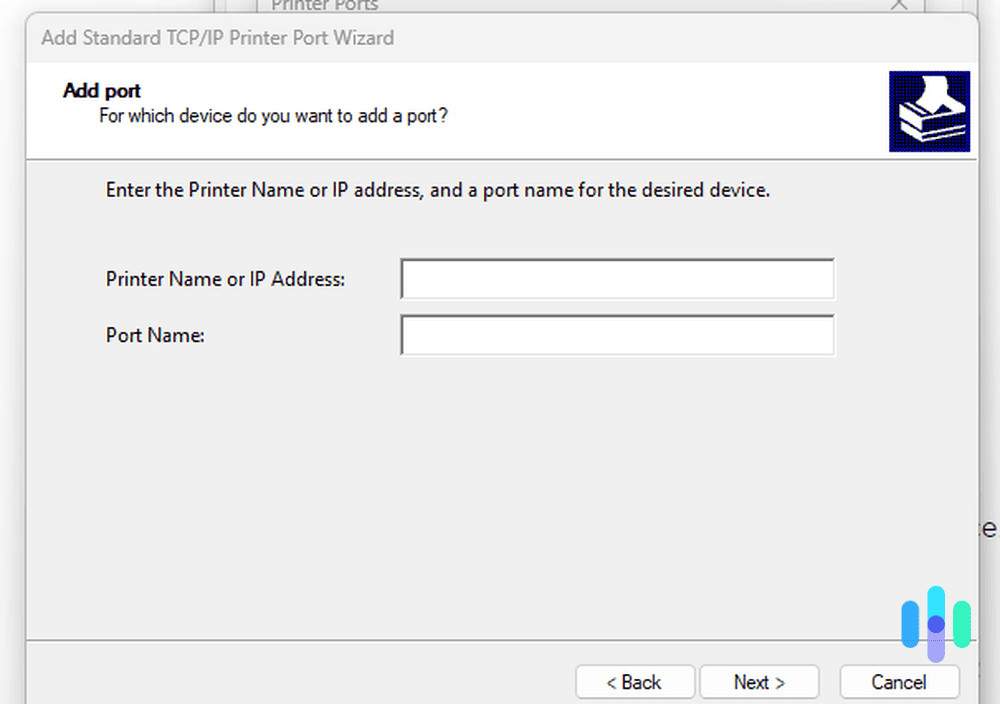 Add Standard TCP/IP Printer Port Wizard
Steps to set a static IP address on macOS:
- System Settings: Navigate to “System Settings” from the Apple menu.
- Printers & Scanners: Select “Printers & Scanners.”
- Select Printer and Options: Click on your printer, then click the “Options & Supplies…” button.
- Configure IP Address: In the “Options” tab, you may find fields to manually configure the IP address. The specific steps can vary based on the printer driver. You might need to access advanced network settings within the driver interface to set a static IP.
IMPORTANT TIP: Before changing your printer’s IP settings, it’s advisable to consult your printer manufacturer’s support resources or documentation for specific guidance tailored to your printer model and network setup. Incorrect static IP configuration can cause connection problems.
Connecting New Devices to Your Printer
When adding computers, smartphones, or tablets to your home or office network, you’ll need the printer’s IP address to establish a connection.
Connecting a Windows device using IP address:
- Start Menu: Click “Start.”
- Printers & Scanners: Type “Printers” and select “Printers & scanners.”
- Add Printer/Scanner: Click “Add printer or scanner.”
- Printer Not Listed: After a brief search, click “The printer that I want isn’t listed.”
- Add Manually: Choose “Add a printer using a TCP/IP address or hostname” and click “Next.”
- TCP/IP Device: Select “TCP/IP Device” as the device type.
- Enter IP Address: Enter your printer’s IP address in the “Hostname or IP address” field.
- Next and Install Driver: Click “Next” to proceed. Windows will attempt to connect to the printer and may prompt you to install drivers if needed.
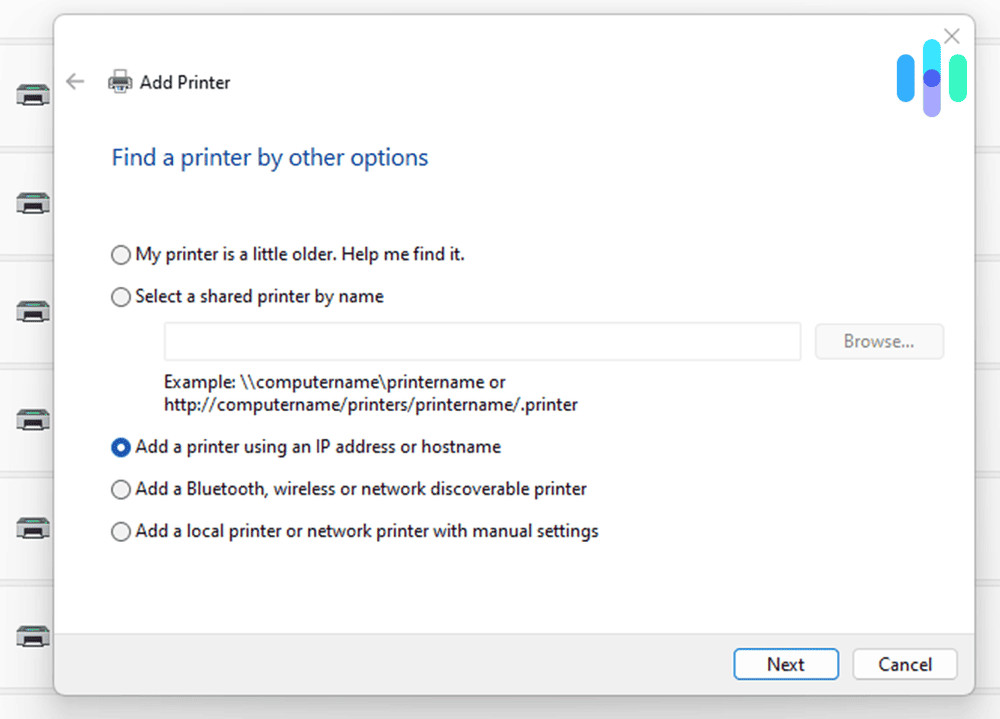 Add printer by IP address on Windows
Connecting an Apple device using IP address:
- System Settings: Go to “System Settings” on your Mac.
- Printers & Scanners: Select “Printers & Scanners.”
- Add Printer: Click “Add Printer, Scanner, or Fax…”.
- IP Tab: In the Add Printer window, select the “IP” tab (may be represented by an IP icon).
- Enter IP Address: Enter your printer’s IP address in the “Address” field.
- Add Printer: The system will attempt to find the printer. Once found, click “Add.”
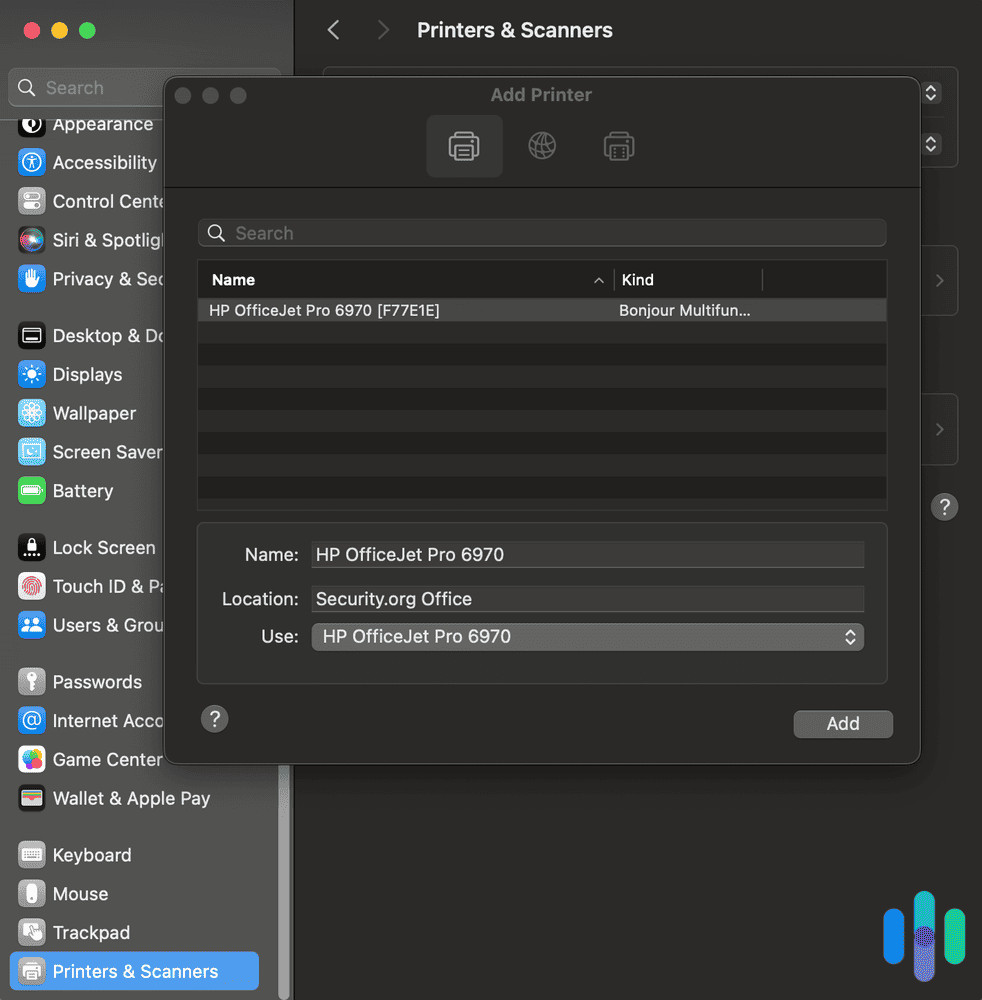 Adding new device connection to printer
» Further reading: Understanding static vs dynamic IP addresses
In Conclusion
Finding your printer’s IP address is a fundamental skill for anyone managing a home or office network with a wireless printer. Whether you’re facing connection issues or simply adding a new device, knowing how to locate this address is crucial for efficient printer management. By using methods ranging from printing configuration pages to accessing router settings or utilizing OS-specific tools, you can quickly obtain the necessary IP address and keep your printing tasks running smoothly.
FAQs About Printer IP Addresses
Why does my printer need an IP address?
Just like computers on a network, printers need an IP address to communicate over a network. This address allows devices to locate and send print jobs to the correct printer on the network.
Is my printer’s IP address the same as my computer’s IP address?
No, each device on your network (computers, printers, smartphones, etc.) has its own unique IP address. Your printer’s IP address is specific to the printer itself and distinguishes it from other devices on the network.
Can my printer’s IP address change?
Yes, if your printer is set to use a dynamic IP address (DHCP), which is the default setting for most home networks. The IP address can change when the printer is restarted, after a period of inactivity, or when the router is rebooted. Setting a static IP address for your printer prevents it from changing.
Is it safe to share my printer’s IP address?
Generally, sharing your printer’s private IP address (the one used on your home network, like 192.168.x.x) is not a significant security risk. This IP address is only relevant within your local network. However, you should never expose your public IP address unnecessarily and ensure your Wi-Fi network is secured with a strong password.
What if I can’t find my printer’s IP address using these methods?
If you are unable to find your printer’s IP address using these methods, double-check that your printer is actually connected to your Wi-Fi network. Restart both your printer and your router. Consult your printer’s manual or the manufacturer’s website for model-specific instructions or troubleshooting tips. You can also contact your printer’s customer support for assistance.