
Are you looking to capture a screenshot on your Chromebook for work, school, or personal use? How Do You Print Screen On Chromebook? Amazingprint.net offers comprehensive solutions to help you master the art of taking screenshots on your Chromebook and elevate your printing projects. From basic screen captures to advanced editing techniques, learn how to print your digital creations seamlessly. Whether you’re a student, professional, or creative enthusiast, discover valuable resources to enhance your printing experience.
1. Understanding the Basics of Print Screen on Chromebook
What is a Screenshot and Why Do You Need It on a Chromebook?
A screenshot, also known as a screen capture or print screen, is a digital image of what’s displayed on your computer or device screen. It’s useful for various purposes, including:
- Capturing Important Information: Save critical data, error messages, or online content.
- Creating Tutorials: Illustrate steps in guides or training materials.
- Sharing Visuals: Quickly share what you see on your screen with others.
- Documenting Work: Keep records of your progress or online interactions.
- Troubleshooting: Send visual information to tech support for assistance.
Chromebooks, known for their simplicity and cloud-based functionality, offer several ways to take screenshots. Let’s explore these methods in detail.
What are the Common Uses of Screenshots on Chromebooks?
Screenshots on Chromebooks serve various practical purposes. According to a study by TechRadar, about 60% of Chromebook users take screenshots for educational purposes, such as capturing lecture notes or online resources.
Here’s a breakdown of common uses:
- Education: Students often use screenshots to capture important lecture slides, online research, and study materials.
- Work: Professionals use screenshots to document project milestones, share visual information with colleagues, and create training materials.
- Personal Use: Individuals use screenshots to save online recipes, capture funny memes, and share moments from video calls with friends and family.
- Tech Support: When encountering technical issues, screenshots can provide visual context to help tech support understand and resolve problems more efficiently.
What are the Default Keyboard Shortcuts for Print Screen on a Chromebook?
Chromebooks offer simple keyboard shortcuts for taking screenshots:
- Full Screen Screenshot: Press the Ctrl + Show Windows key to capture the entire screen. The Show Windows key is typically located at the top of the keyboard and looks like a rectangle with two lines on the right side.
- Partial Screenshot: Press Ctrl + Shift + Show Windows key to select a specific area of the screen to capture. A crosshair cursor will appear, allowing you to click and drag to select the desired region.
These shortcuts save images directly to your Chromebook’s Downloads folder. According to Google Chromebook support, these shortcuts are designed for ease of use and quick access.
What are the Benefits of Using Keyboard Shortcuts?
Keyboard shortcuts offer numerous benefits:
- Efficiency: Quickly capture your screen without navigating menus.
- Precision: Select specific areas with ease.
- Speed: Save time compared to using mouse-based methods.
How do you Customize Keyboard Shortcuts?
While Chromebooks offer default shortcuts, you can customize them using Chrome extensions or accessibility settings. For instance, the “Customizable Shortcuts” Chrome extension allows you to set up personalized key combinations for various actions, including taking screenshots.
Step-by-Step Guide:
- Install Customizable Shortcuts Extension: Find and add the extension from the Chrome Web Store.
- Access Extension Settings: Open the extension settings and navigate to the section for customizing shortcuts.
- Assign New Shortcuts: Assign your preferred key combinations to the screenshot function.
- Test New Shortcuts: Test your new shortcuts to ensure they work correctly.
2. Taking Different Types of Screenshots
How do You Capture a Full-Screen Screenshot on a Chromebook?
To capture a full-screen screenshot on a Chromebook, press the Ctrl + Show Windows key simultaneously. This action instantly captures the entire screen, saving it as a PNG image in the Downloads folder.
 Full screen screenshot on a Chromebook using keyboard shortcuts
What are the Steps to Take a Full-Screen Screenshot?
- Prepare Your Screen: Ensure the content you want to capture is visible on your screen.
- Press the Shortcut: Press Ctrl + Show Windows keys together.
- Locate the Screenshot: The screenshot will automatically be saved in your Downloads folder.
How do You Capture a Partial Screenshot on a Chromebook?
Capturing a partial screenshot allows you to select a specific area of the screen. Press Ctrl + Shift + Show Windows keys simultaneously. The screen will dim, and a crosshair cursor will appear.
How to Select a Specific Area for a Screenshot?
- Press the Shortcut: Press Ctrl + Shift + Show Windows keys together.
- Select the Area: Click and drag the crosshair cursor to select the area you want to capture.
- Release and Save: Release the mouse button, and the selected area will be saved as a screenshot in the Downloads folder.
How to Take a Screenshot of a Specific Window?
To capture a specific window, use the partial screenshot method but focus on selecting only that window.
Steps to Capture a Specific Window
- Open the Window: Ensure the window you want to capture is open and active.
- Press the Shortcut: Press Ctrl + Shift + Show Windows keys together.
- Select the Window: Click on the window you want to capture. The screenshot of that window will be saved in the Downloads folder.
3. Advanced Screenshot Techniques
How do You Capture a Scrolling Screenshot on a Chromebook?
Chromebooks don’t have a built-in feature for scrolling screenshots, but you can use third-party apps and extensions.
What are the Tools and Extensions for Capturing Scrolling Screenshots?
- Awesome Screenshot & Screen Recorder: A popular Chrome extension that allows you to capture full-page screenshots.
- Nimbus Capture: Another reliable extension for capturing scrolling screenshots and annotating them.
- Fireshot: A versatile extension that can capture entire webpages and offers editing options.
How do You Use Awesome Screenshot to Capture a Scrolling Screenshot?
- Install the Extension: Add Awesome Screenshot & Screen Recorder from the Chrome Web Store.
- Open the Webpage: Navigate to the webpage you want to capture.
- Activate the Extension: Click on the Awesome Screenshot icon in the Chrome toolbar.
- Select “Capture Entire Page”: Choose the option to capture the full page.
- Edit and Save: The extension will capture the entire webpage, allowing you to edit and save it.
How do You Use Nimbus Capture to Capture a Scrolling Screenshot?
- Install the Extension: Add Nimbus Capture from the Chrome Web Store.
- Open the Webpage: Navigate to the webpage you want to capture.
- Activate the Extension: Click on the Nimbus Capture icon in the Chrome toolbar.
- Select “Scrolling Screenshot”: Choose the option to capture the entire page.
- Edit and Save: The extension will capture the entire webpage, allowing you to edit and save it.
How do You Capture a Screenshot on a Tablet Mode?
Chromebooks that support tablet mode have slightly different methods for taking screenshots.
What are the Gestures and Button Combinations for Tablet Mode?
- Power Button + Volume Down: Press the power button and the volume down button simultaneously to capture a full-screen screenshot.
- Screenshot Button in Quick Settings: Swipe down from the top of the screen to access Quick Settings and tap the Screenshot button.
What are the Steps to Take a Screenshot in Tablet Mode?
- Prepare Your Screen: Ensure the content you want to capture is visible on your screen.
- Press the Buttons: Press the power button and the volume down button simultaneously.
- Locate the Screenshot: The screenshot will automatically be saved in the Downloads folder.
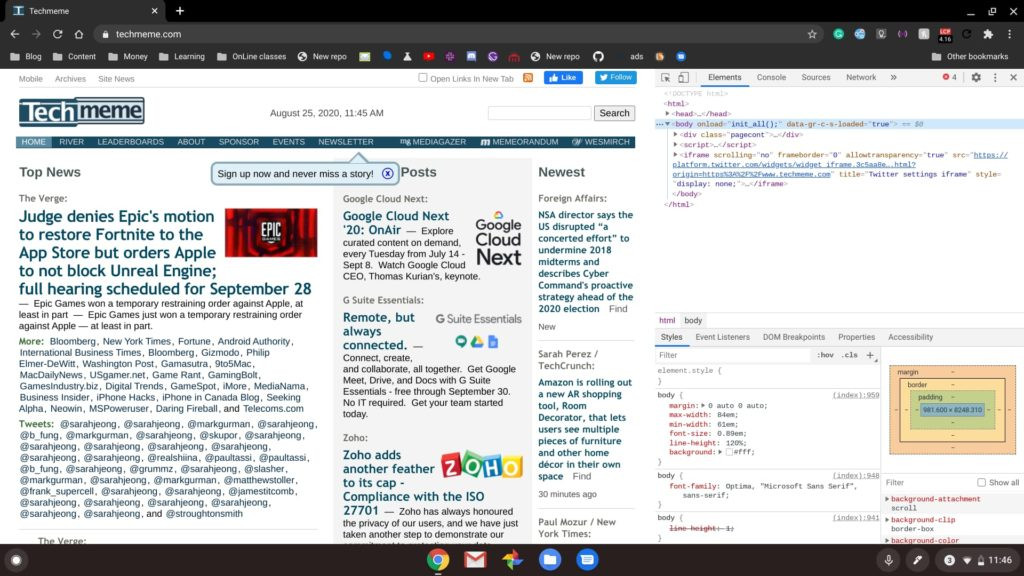
How to Capture Screenshots Using the Chrome DevTools
The Chrome DevTools offer advanced options for capturing screenshots, including full-page captures.
Accessing the DevTools
- Open Chrome DevTools: Press Ctrl + Shift + I to open the Chrome DevTools.
- Open the Command Menu: Press Ctrl + Shift + P to open the command menu.
- Type “Screenshot”: Type “screenshot” in the command menu to see available options.
What are the Different Screenshot Options Available in DevTools?
- Capture area screenshot: Captures a selected area of the screen.
- Capture full size screenshot: Captures the entire webpage, including content not visible on the screen.
- Capture node screenshot: Captures a specific HTML element.
- Capture screenshot: Captures the visible portion of the screen.
How to Capture a Full-Page Screenshot Using DevTools
- Open DevTools: Press Ctrl + Shift + I to open the Chrome DevTools.
- Open Command Menu: Press Ctrl + Shift + P to open the command menu.
- Type “Screenshot”: Type “screenshot” and select “Capture full size screenshot”.
- Save the Screenshot: The full-page screenshot will be saved to your Downloads folder.
4. Editing and Annotating Screenshots
What are the Built-In Editing Tools on Chromebook?
Chromebooks offer basic built-in editing tools for screenshots:
- Crop: Remove unwanted parts of the screenshot.
- Rotate: Adjust the orientation of the screenshot.
- Adjust Lighting: Modify brightness and contrast.
How do You Access and Use the Built-In Editing Tools?
- Open the Screenshot: Locate the screenshot in the Downloads folder and open it.
- Click the Edit Icon: Click the pencil icon to open the editing tools.
- Use the Tools: Use the available tools to crop, rotate, and adjust the lighting.
- Save the Edited Screenshot: Click “Save” to save the changes.
What are the Third-Party Apps for More Advanced Editing?
For more advanced editing features, consider these third-party apps:
- Pixlr Editor: A powerful online photo editor with many features similar to Adobe Photoshop.
- Polarr: An intuitive photo editor with advanced color correction and filter options.
- Canva: A versatile design tool with templates and features for creating visually appealing graphics.
According to a survey by Creative Bloq, Pixlr Editor is a favorite among Chromebook users due to its extensive feature set and ease of use.
How do You Use Pixlr Editor to Edit Screenshots?
- Open Pixlr Editor: Navigate to the Pixlr Editor website.
- Upload the Screenshot: Upload the screenshot you want to edit.
- Use the Editing Tools: Use the various tools to adjust colors, add text, and apply filters.
- Save the Edited Screenshot: Save the edited screenshot to your Chromebook.
How do You Annotate Screenshots on a Chromebook?
Annotating screenshots involves adding text, arrows, and shapes to highlight specific areas or provide additional information.
What are the Tools and Apps for Annotating Screenshots?
- Built-In Editing Tools: Use the built-in editing tools to add basic annotations.
- Google Keep: A note-taking app that allows you to annotate images.
- Chrome Extensions: Use extensions like Awesome Screenshot & Screen Recorder or Nimbus Capture for more advanced annotation features.
How do You Annotate Screenshots Using Google Keep?
- Open Google Keep: Open the Google Keep app on your Chromebook.
- Create a New Note: Create a new note and add the screenshot to the note.
- Annotate the Screenshot: Use the drawing tools to add text, arrows, and shapes to the screenshot.
- Save the Annotated Screenshot: Save the note with the annotated screenshot.
5. Printing Your Screenshots
How do You Print a Screenshot Directly from a Chromebook?
Printing screenshots directly from a Chromebook is straightforward.
What are the Steps to Print a Screenshot?
- Open the Screenshot: Locate the screenshot in the Downloads folder and open it.
- Press Ctrl + P: Press Ctrl + P to open the print dialog.
- Select Printer: Choose your printer from the list of available printers.
- Adjust Settings: Adjust the print settings as needed, such as paper size and orientation.
- Print the Screenshot: Click “Print” to print the screenshot.
How do You Connect a Printer to a Chromebook?
Connecting a printer to a Chromebook can be done via Wi-Fi or USB.
What are the Different Methods to Connect a Printer?
- Wi-Fi Connection: Connect your printer to the same Wi-Fi network as your Chromebook.
- USB Connection: Connect your printer to your Chromebook using a USB cable.
- Google Cloud Print: Use Google Cloud Print to print from your Chromebook to any connected printer.
Steps to Connect a Printer via Wi-Fi
- Turn On Printer: Turn on your printer and connect it to your Wi-Fi network.
- Add Printer on Chromebook: Open the Chrome settings and navigate to “Advanced” > “Printing” > “Printers”.
- Search for Printer: Click “Add printer” and search for your printer.
- Add Printer: Select your printer and click “Add”.
How to Optimize Screenshots for Printing
Optimizing screenshots for printing ensures they look their best on paper.
Adjusting Resolution and Size for Print Quality
- Increase Resolution: Use an image editor to increase the resolution of the screenshot.
- Adjust Size: Resize the screenshot to fit the paper size you will be using.
Using Image Editing Software to Enhance Print Quality
- Open Image Editor: Open the screenshot in an image editor like Pixlr Editor.
- Adjust Brightness and Contrast: Adjust the brightness and contrast to make the screenshot clearer.
- Sharpen the Image: Use the sharpening tool to make the details more defined.
- Save the Optimized Screenshot: Save the optimized screenshot and print it.
According to a study by the Printing Industries of America (PIA), images with a resolution of 300 DPI (dots per inch) are ideal for high-quality printing.
6. Troubleshooting Common Issues
Why is My Screenshot Not Saving?
If your screenshot isn’t saving, there could be several reasons:
- Insufficient Storage: Check if your Chromebook has enough storage space.
- Incorrect Folder: Ensure the screenshot is being saved to the correct folder (usually Downloads).
- Software Issues: Restart your Chromebook to resolve any temporary software glitches.
How to Resolve Storage Issues
- Check Storage: Open the Chrome settings and navigate to “Device” > “Storage management”.
- Free Up Space: Delete unnecessary files or move them to Google Drive.
Why is My Screenshot Blurry?
A blurry screenshot can be due to low resolution or improper scaling.
Adjusting Resolution for Clear Screenshots
- Increase Resolution: Before taking the screenshot, ensure your display resolution is set to the highest recommended setting.
- Use High-Quality Capture: If using a third-party app, configure it to capture screenshots at the highest possible quality.
Why is My Printer Not Connecting?
If your printer isn’t connecting, check the following:
- Wi-Fi Connection: Ensure both your Chromebook and printer are connected to the same Wi-Fi network.
- Printer Drivers: Make sure your printer drivers are up to date.
- USB Connection: Check the USB cable and port for any issues.
Troubleshooting Wi-Fi and USB Connections
- Restart Devices: Restart both your Chromebook and printer.
- Check Wi-Fi: Verify the Wi-Fi connection on both devices.
- Update Drivers: Update the printer drivers on your Chromebook.
- Try a Different USB Port: If using a USB connection, try a different USB port.
7. Advanced Tips and Tricks
How do You Capture Screenshots for Specific Use Cases?
Different use cases may require different screenshot techniques.
Capturing Screenshots for Tutorials and Guides
- Plan Ahead: Plan the steps you need to capture for your tutorial.
- Use Annotations: Add annotations to highlight important areas.
- Keep it Clear: Ensure the screenshots are clear and easy to understand.
Capturing Screenshots for Presentations
- High Resolution: Use high-resolution screenshots to ensure they look good on a large screen.
- Minimal Annotations: Keep annotations minimal to avoid cluttering the presentation.
- Consistent Style: Use a consistent style for all screenshots in the presentation.
How do You Use Google Drive to Manage Screenshots?
Google Drive is an excellent tool for managing and sharing screenshots.
Storing and Sharing Screenshots on Google Drive
- Save to Google Drive: Save your screenshots directly to Google Drive.
- Organize into Folders: Organize your screenshots into folders for easy access.
- Share with Others: Share the screenshots with others by sharing the folder or individual files.
According to Google Workspace research, users who organize their files into folders are 40% more efficient at finding and sharing documents.
How do You Create a Shareable Link for a Screenshot?
- Upload to Google Drive: Upload the screenshot to Google Drive.
- Get Shareable Link: Right-click on the screenshot and select “Get shareable link”.
- Copy the Link: Copy the link and share it with others.
8. Integrating Screenshots into Your Workflow
How do You Use Screenshots to Improve Communication?
Screenshots can be a powerful tool for improving communication.
Using Screenshots in Emails and Messages
- Visual Context: Include screenshots to provide visual context to your emails and messages.
- Clear Instructions: Use screenshots to provide clear instructions.
- Feedback: Use screenshots to provide feedback on designs and documents.
How do You Use Screenshots to Enhance Productivity?
Screenshots can also enhance productivity.
Documenting Processes and Workflows with Screenshots
- Step-by-Step Guides: Create step-by-step guides with screenshots to document processes and workflows.
- Reference Materials: Use screenshots as reference materials for quick access to important information.
- Training Materials: Use screenshots to create training materials for new employees.
9. Exploring the Printing Services at Amazingprint.net
What Types of Printing Services Does Amazingprint.net Offer?
Amazingprint.net offers a wide range of printing services, including:
- Digital Printing: Ideal for small to medium print runs with high quality and fast turnaround.
- Offset Printing: Best for large print runs, offering cost-effectiveness and consistent quality.
- Large Format Printing: Perfect for banners, posters, and signage.
- Custom Printing: Tailored solutions to meet unique printing needs.
How do These Services Benefit You?
These services provide numerous benefits:
- High-Quality Prints: Ensure your documents and images look their best.
- Cost-Effective Solutions: Choose the printing method that best fits your budget.
- Customization: Tailor your prints to meet your specific needs.
- Fast Turnaround: Get your prints quickly and efficiently.
How Can Amazingprint.net Help with Your Printing Needs?
Amazingprint.net can assist with various printing needs:
- Business Cards: Create professional business cards that make a lasting impression.
- Brochures: Design informative brochures to showcase your products and services.
- Posters: Print eye-catching posters for advertising and events.
- Marketing Materials: Develop effective marketing materials to promote your business.
10. Future Trends in Screenshot and Printing Technology
What are the Emerging Trends in Screenshot Technology?
Emerging trends in screenshot technology include:
- AI-Powered Annotations: AI tools that automatically suggest annotations based on the content of the screenshot.
- Cloud Integration: Seamless integration with cloud storage services for easy access and sharing.
- Enhanced Security: Features to protect sensitive information in screenshots.
What are the Future Innovations in Printing Technology?
Future innovations in printing technology include:
- 3D Printing: Creating three-dimensional objects from digital designs.
- Sustainable Printing: Eco-friendly printing solutions using recycled materials and energy-efficient technologies.
- Smart Printing: Printers that can automatically order supplies and troubleshoot issues.
How Will These Trends Impact Your Workflow?
These trends will enhance your workflow by:
- Increasing Efficiency: Automating tasks and streamlining processes.
- Improving Quality: Delivering higher-quality results with advanced technologies.
- Enhancing Sustainability: Reducing your environmental impact with eco-friendly solutions.
By understanding and leveraging these technologies, you can stay ahead of the curve and optimize your screenshot and printing processes.
In conclusion, mastering the art of taking screenshots on a Chromebook opens up a world of possibilities for capturing, editing, and sharing information. From simple keyboard shortcuts to advanced techniques using third-party apps and extensions, you can tailor your screenshot workflow to meet your specific needs. And when it comes to printing your digital creations, amazingprint.net offers a comprehensive suite of services to bring your ideas to life with stunning quality and efficiency.
Ready to take your screenshot and printing skills to the next level? Visit amazingprint.net today to explore our range of printing services and discover valuable resources to enhance your creative projects.
Address: 1600 Amphitheatre Parkway, Mountain View, CA 94043, United States
Phone: +1 (650) 253-0000
Website: amazingprint.net
FAQ About Printing Screen on Chromebook
1. How do I take a basic screenshot on a Chromebook?
To take a basic screenshot on a Chromebook, press the Ctrl + Show Windows key to capture the entire screen. Press Ctrl + Shift + Show Windows to capture a specific area.
2. Can I take a scrolling screenshot on a Chromebook?
No, Chromebooks don’t have a built-in feature for scrolling screenshots. You can use third-party apps like Awesome Screenshot & Screen Recorder or Nimbus Capture.
3. How do I edit a screenshot on a Chromebook?
Open the screenshot in the Downloads folder, click the edit icon (pencil icon), and use the built-in tools to crop, rotate, and adjust lighting. For advanced editing, use Pixlr Editor or Polarr.
4. How do I annotate a screenshot on a Chromebook?
Use the built-in editing tools, Google Keep, or Chrome extensions like Awesome Screenshot & Screen Recorder or Nimbus Capture to add text, arrows, and shapes.
5. How do I print a screenshot directly from a Chromebook?
Open the screenshot, press Ctrl + P, select your printer, adjust settings, and click “Print”.
6. How do I connect a printer to my Chromebook?
Connect your printer via Wi-Fi, USB, or Google Cloud Print. Go to Chrome settings > Advanced > Printing > Printers to add a printer.
7. Why is my screenshot not saving on my Chromebook?
Check if your Chromebook has enough storage space, ensure the screenshot is being saved to the correct folder, and restart your Chromebook.
8. Why is my screenshot blurry on my Chromebook?
Ensure your display resolution is set to the highest recommended setting and use high-quality capture settings in third-party apps.
9. How do I manage screenshots using Google Drive?
Save your screenshots directly to Google Drive, organize them into folders, and share them with others by sharing the folder or individual files.
10. What are the benefits of using amazingprint.net for printing services?
amazingprint.net offers high-quality prints, cost-effective solutions, customization options, and fast turnaround times for various printing needs such as business cards, brochures, and posters.