Double-sided printing, also known as duplex printing, is a fantastic way to save paper and create a more professional look for your documents. Whether you’re printing drafts, reports, or presentations in Microsoft Word, knowing how to print on both sides of the page can significantly reduce paper consumption and help the environment. This guide provides a step-by-step walkthrough for enabling double-sided printing on both Windows and Mac operating systems.
Printing Double-Sided on Windows
Microsoft Word on Windows offers a straightforward process to print on both sides of the paper. Follow these simple steps to enable duplex printing:
- Begin by opening the Microsoft Word document you intend to print.
 Word Document Interface in Windows
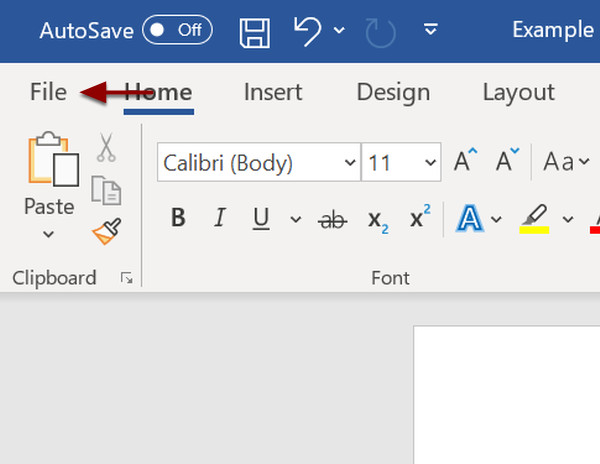
- Navigate to the File menu, located in the top left corner of the Word application window. Click on File to access the dropdown menu.
 File Menu Option in Microsoft Word for Windows
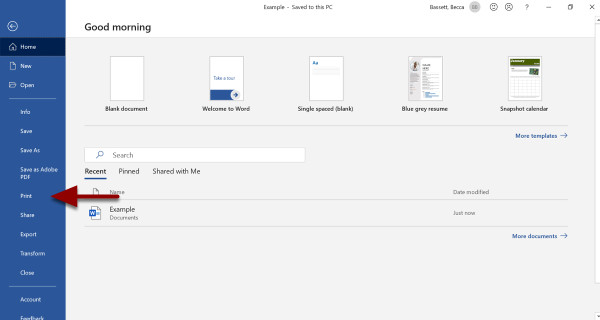
- From the File menu, select Print. This action will take you to the print settings interface where you can configure your printing preferences.
 Print Option in File Menu in Windows Word
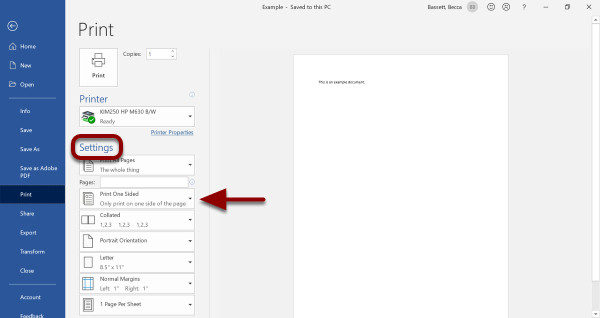
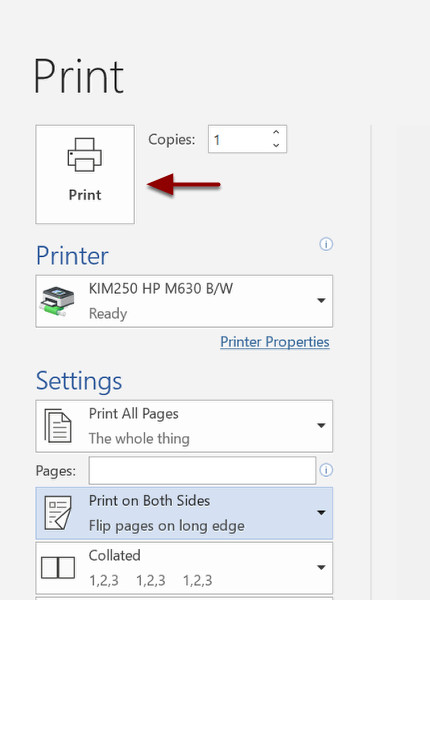
- Within the Settings section of the Print interface, you will typically see a dropdown menu that defaults to Print One Sided. Click on this menu to expand the available printing options.
 Print One Sided Setting Highlighted in Windows Print Settings
-
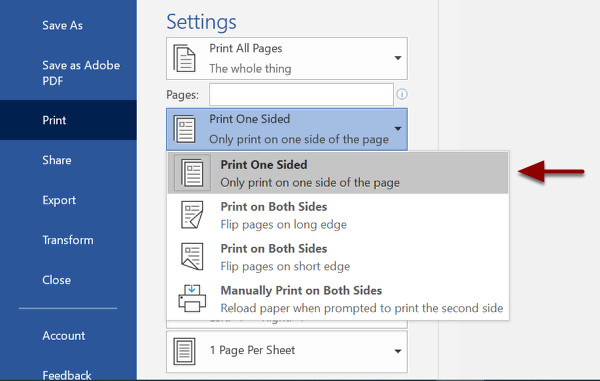
From the dropdown menu, choose either Print on Both Sides or Manually Print on Both Sides.
- Print on Both Sides: Select this option if your printer supports automatic duplex printing. The printer will automatically handle printing on both sides of the paper.
- Manually Print on Both Sides: Choose this if your printer does not automatically support duplex printing. Word will print all odd pages first, and then prompt you to reinsert the paper to print the even pages on the other side. Follow the on-screen instructions carefully when using this option.
 Print on Both Sides Options in Windows Word Print Settings
- After selecting your double-sided printing preference, you can adjust any other print settings as needed, such as the number of copies or the page range. Once you are satisfied with all settings, click the Print button to start printing your document double-sided.
 Print Button to Initiate Double Sided Printing in Windows Word
Printing Double-Sided on Mac
Printing double-sided in Microsoft Word on a Mac is also a simple process. Here’s how to do it:
- Open the Microsoft Word document you wish to print from your Mac.
 Microsoft Word Interface on macOS
- Click on File in the top menu bar, and then select Print from the dropdown menu. Alternatively, you can use the keyboard shortcut Command + P to directly open the Print dialog box.
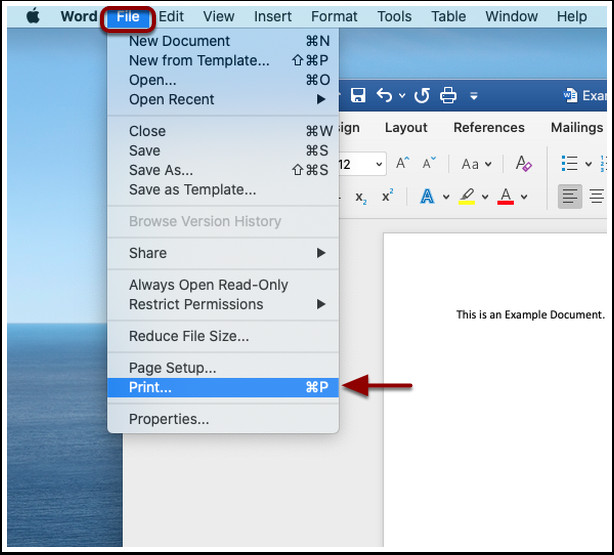 File Dropdown Menu with Print Option on macOS
- A Print window will appear, offering various print settings.
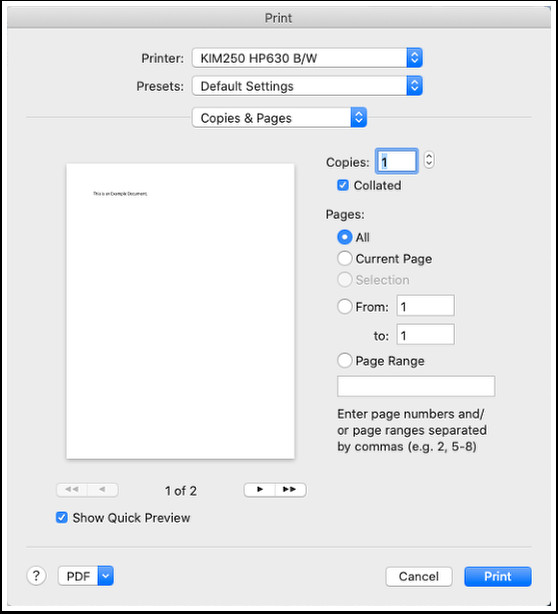 Print Window Interface on macOS
- Look for the dropdown menu, which may initially display Copies & Pages. Click on this dropdown to reveal more options and select Layout.
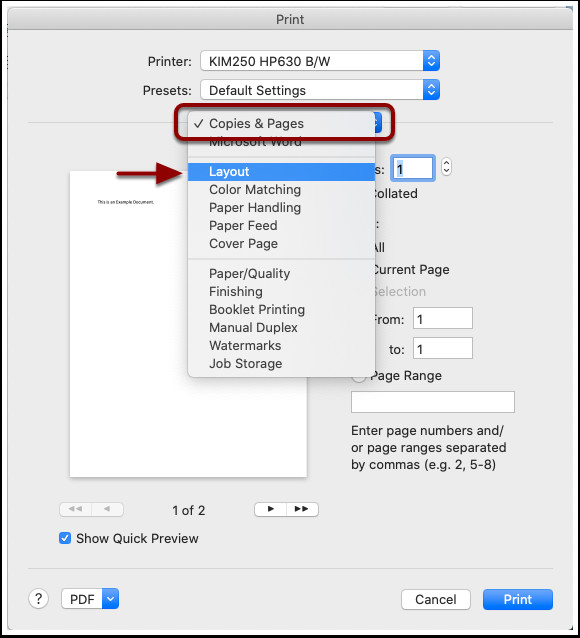 Copies and Pages Dropdown Menu Highlighting Layout Option on macOS Print Settings
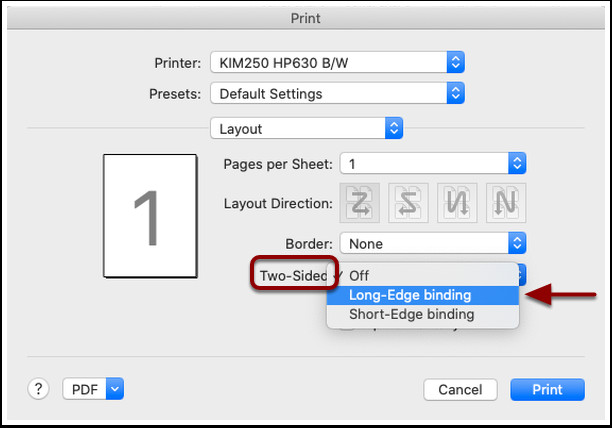
-
In the Layout settings, you will find a Two-Sided option. From the dropdown menu next to Two-Sided, choose Long-Edge binding.
- Long-Edge binding is typically used for documents that you read like a book, where the binding is on the long side of the paper.
- Short-Edge binding is more suitable for documents that are bound at the top, like calendars. For most documents, Long-Edge binding is the appropriate choice for double-sided printing.
 Two-Sided Dropdown Menu with Long-Edge Binding Selected on macOS Print Settings
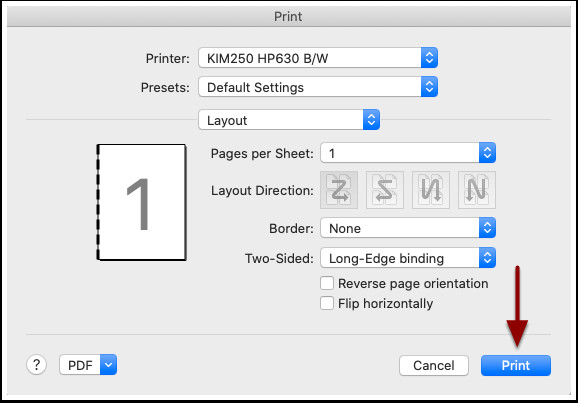
- Once you have selected Two-Sided printing and your preferred binding, click the Print button to proceed with double-sided printing on your Mac.
 Print Button to Start Double Sided Printing on macOS
By following these steps, you can easily print double-sided documents in Microsoft Word on both Windows and Mac, saving paper and contributing to a more sustainable printing practice. Always ensure your printer settings are correctly configured for optimal results.