Summer is a cherished time for families, filled with sunny days and unforgettable moments. For those lucky enough to live near the coast, the beach becomes a second home during these warm months. To celebrate the joy of summer and preserve those precious memories, creating a “footprints in the sand” keepsake is a wonderful DIY project. This craft allows you to literally freeze a moment in time, capturing the tiny footprints of your children as a lasting memento of a beautiful summer.
This guide will walk you through creating your own sand footprint molds using simple materials like a photo frame, sand, plaster of Paris, and decorative shells. It’s a fun and easy project that results in a unique piece of home décor, reminding you of sunny days spent at the beach.
Materials You’ll Need:
- Protective sheet or plastic tablecloth: To keep your workspace clean from sand and plaster spills.
- Photo frame: Choose a size that accommodates the number of footprints you want to display. Smaller frames work well for single footprints, while larger frames can capture multiple.
- Sand: Regular beach sand or play sand will work perfectly.
- Plaster of Paris: Easily found at craft and discount stores. A 1kg bag should be sufficient for a medium-sized frame.
- Water: For mixing the plaster of Paris.
- Cardboard: Recycled cardboard is ideal for smoothing the sand and plaster.
- Spray-on sealer: To protect the finished craft and prevent sand from shedding.
- Glue gun: For attaching decorative seashells.
- Seashells (optional): For adding a beachy touch to your keepsake.
Step-by-Step Guide to Creating Your Sand Footprint Mold:
-
Prepare Your Workspace: Begin by covering your work surface with a protective sheet or tablecloth. This will make cleanup much easier, especially when working with sand and plaster.
-
Frame Preparation: Remove the cardboard backing and glass from the photo frame. The glass will not be needed for this project, so set it aside safely. Place the cardboard backing over the front of the frame and flip it over. This creates a mold box where you will pour the sand.
-
Fill with Sand: Fill the frame box with sand, ensuring it is level with the inner groove where the glass originally sat. Use a flat piece of cardboard to smooth the sand surface, creating an even base for the footprints.
-
Create Footprints: Gently press each foot into the sand to make clear and defined impressions. If you’re working with young children, this step might require a little patience. Don’t worry if the first attempt isn’t perfect; you can always smooth the sand and try again until you are satisfied with the footprint impressions.
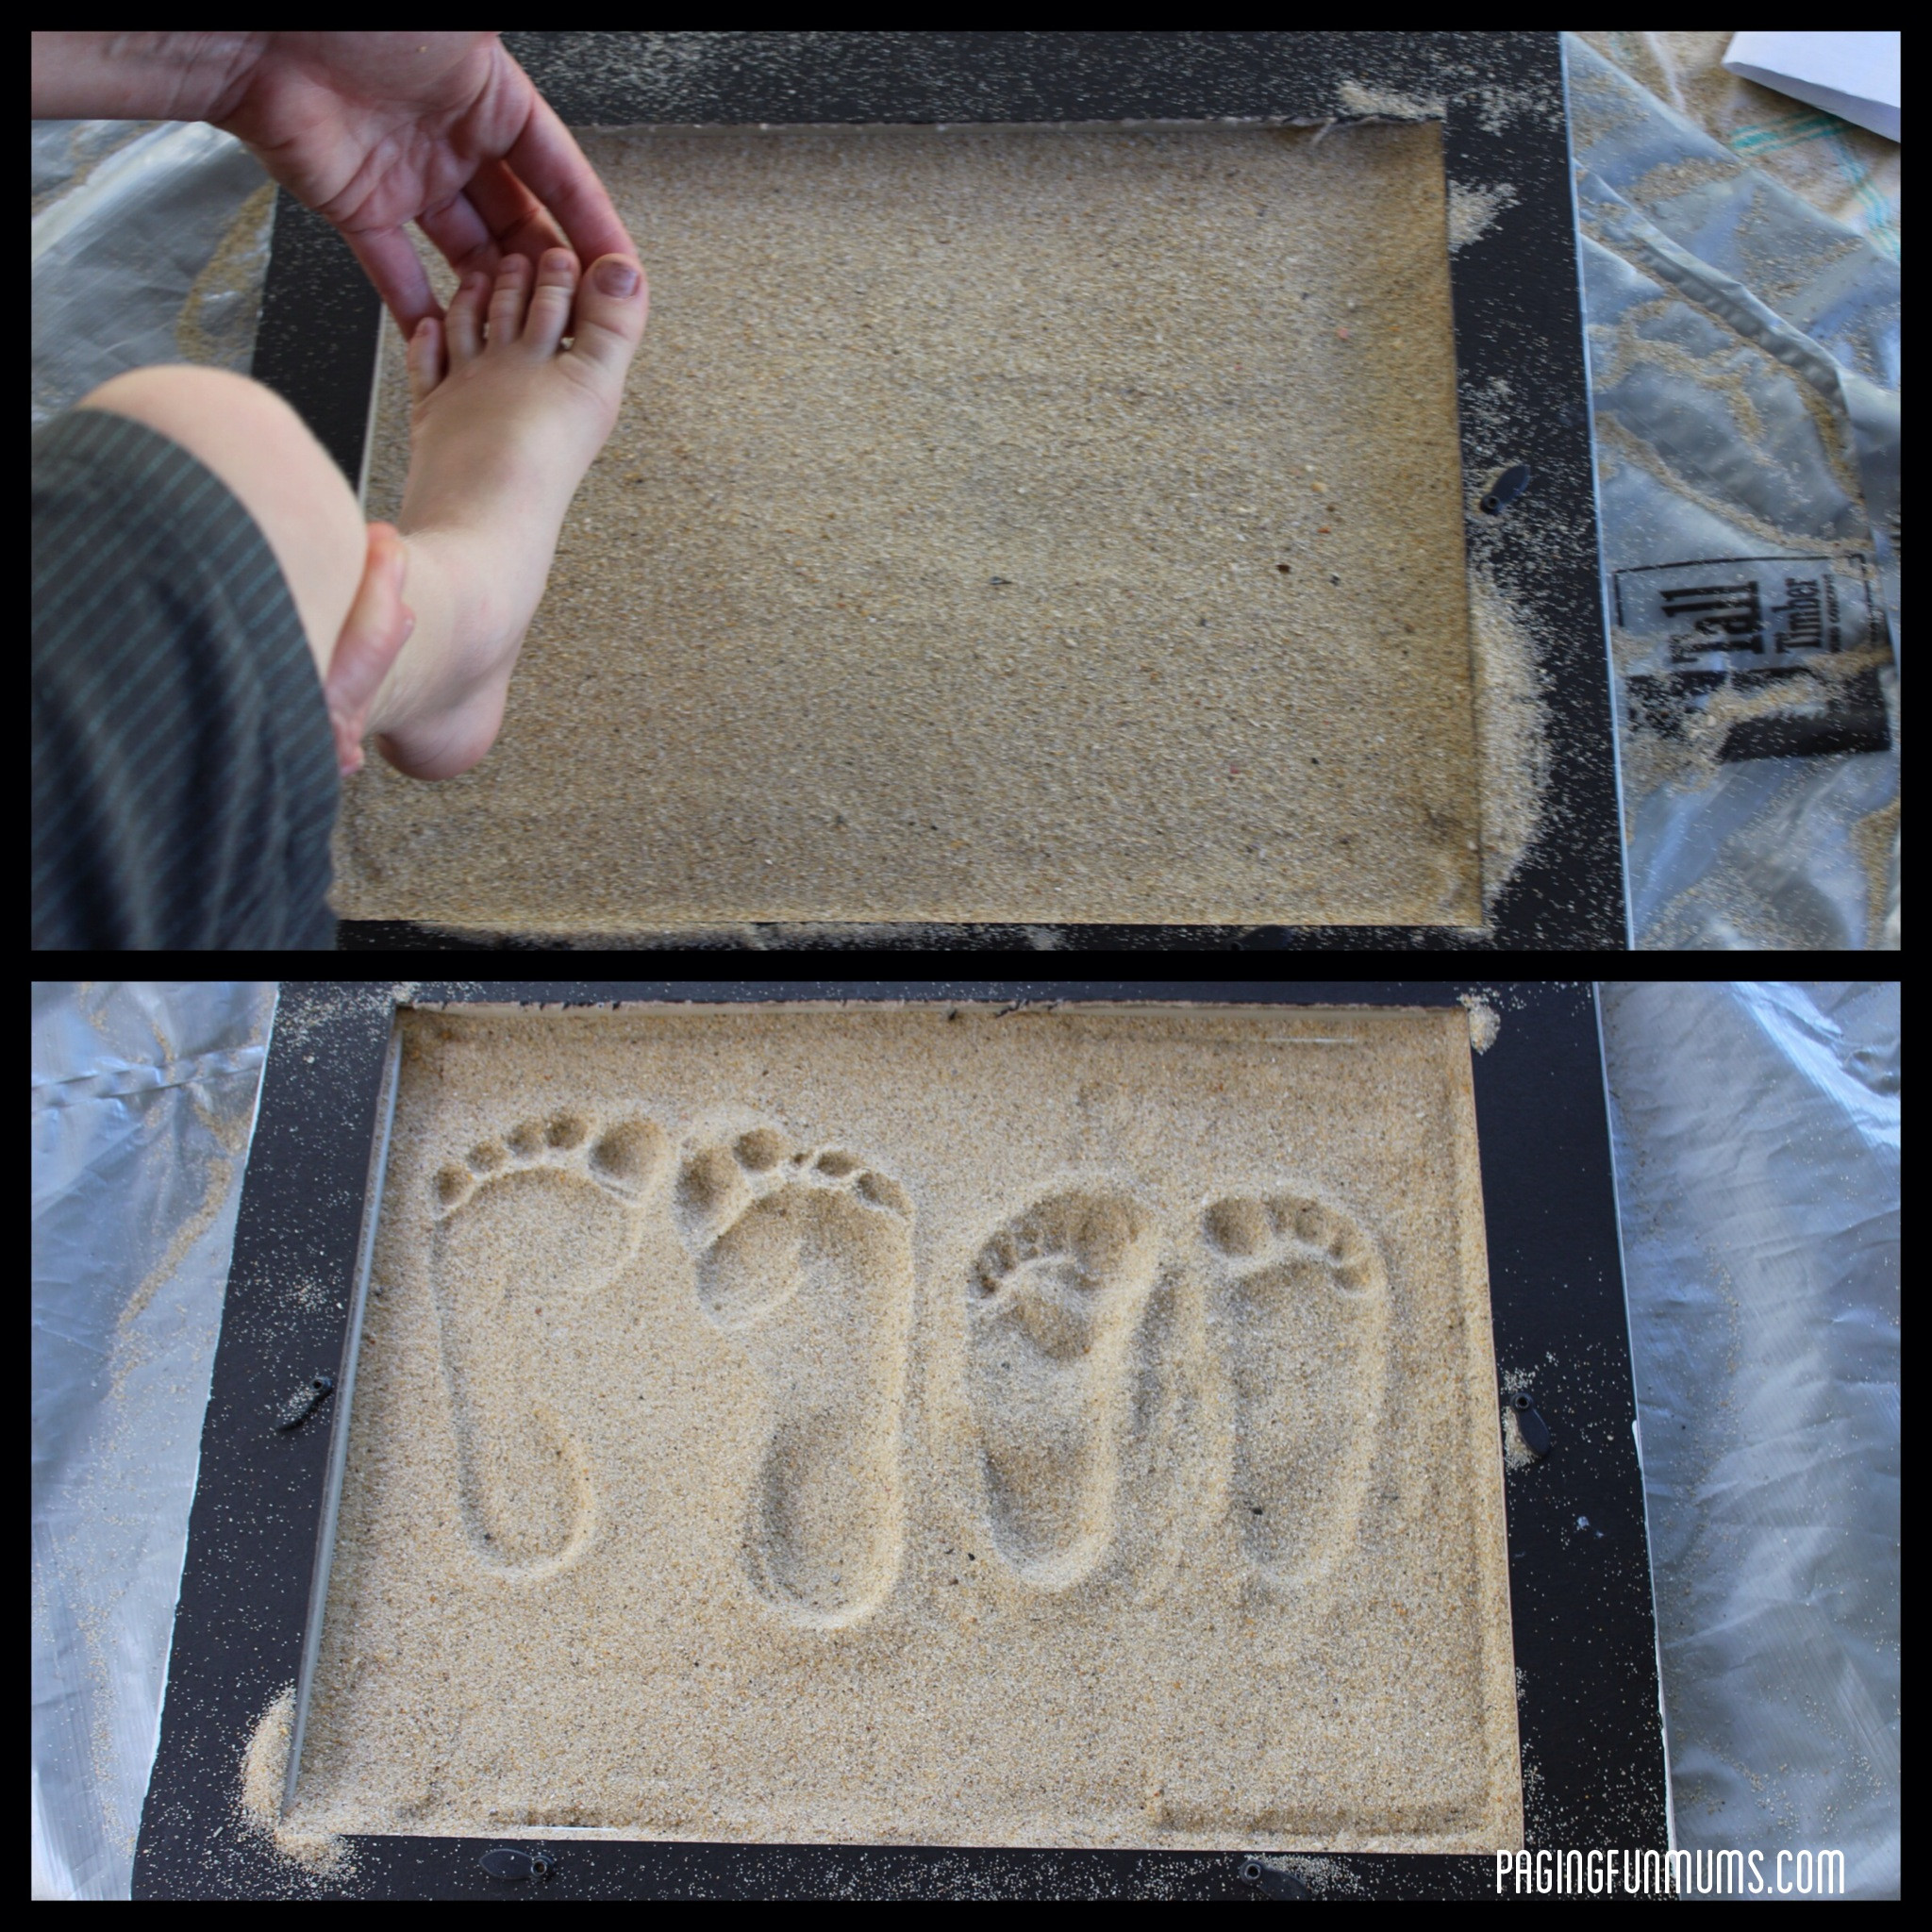 Stamping foot in sand for plaster mold
 -
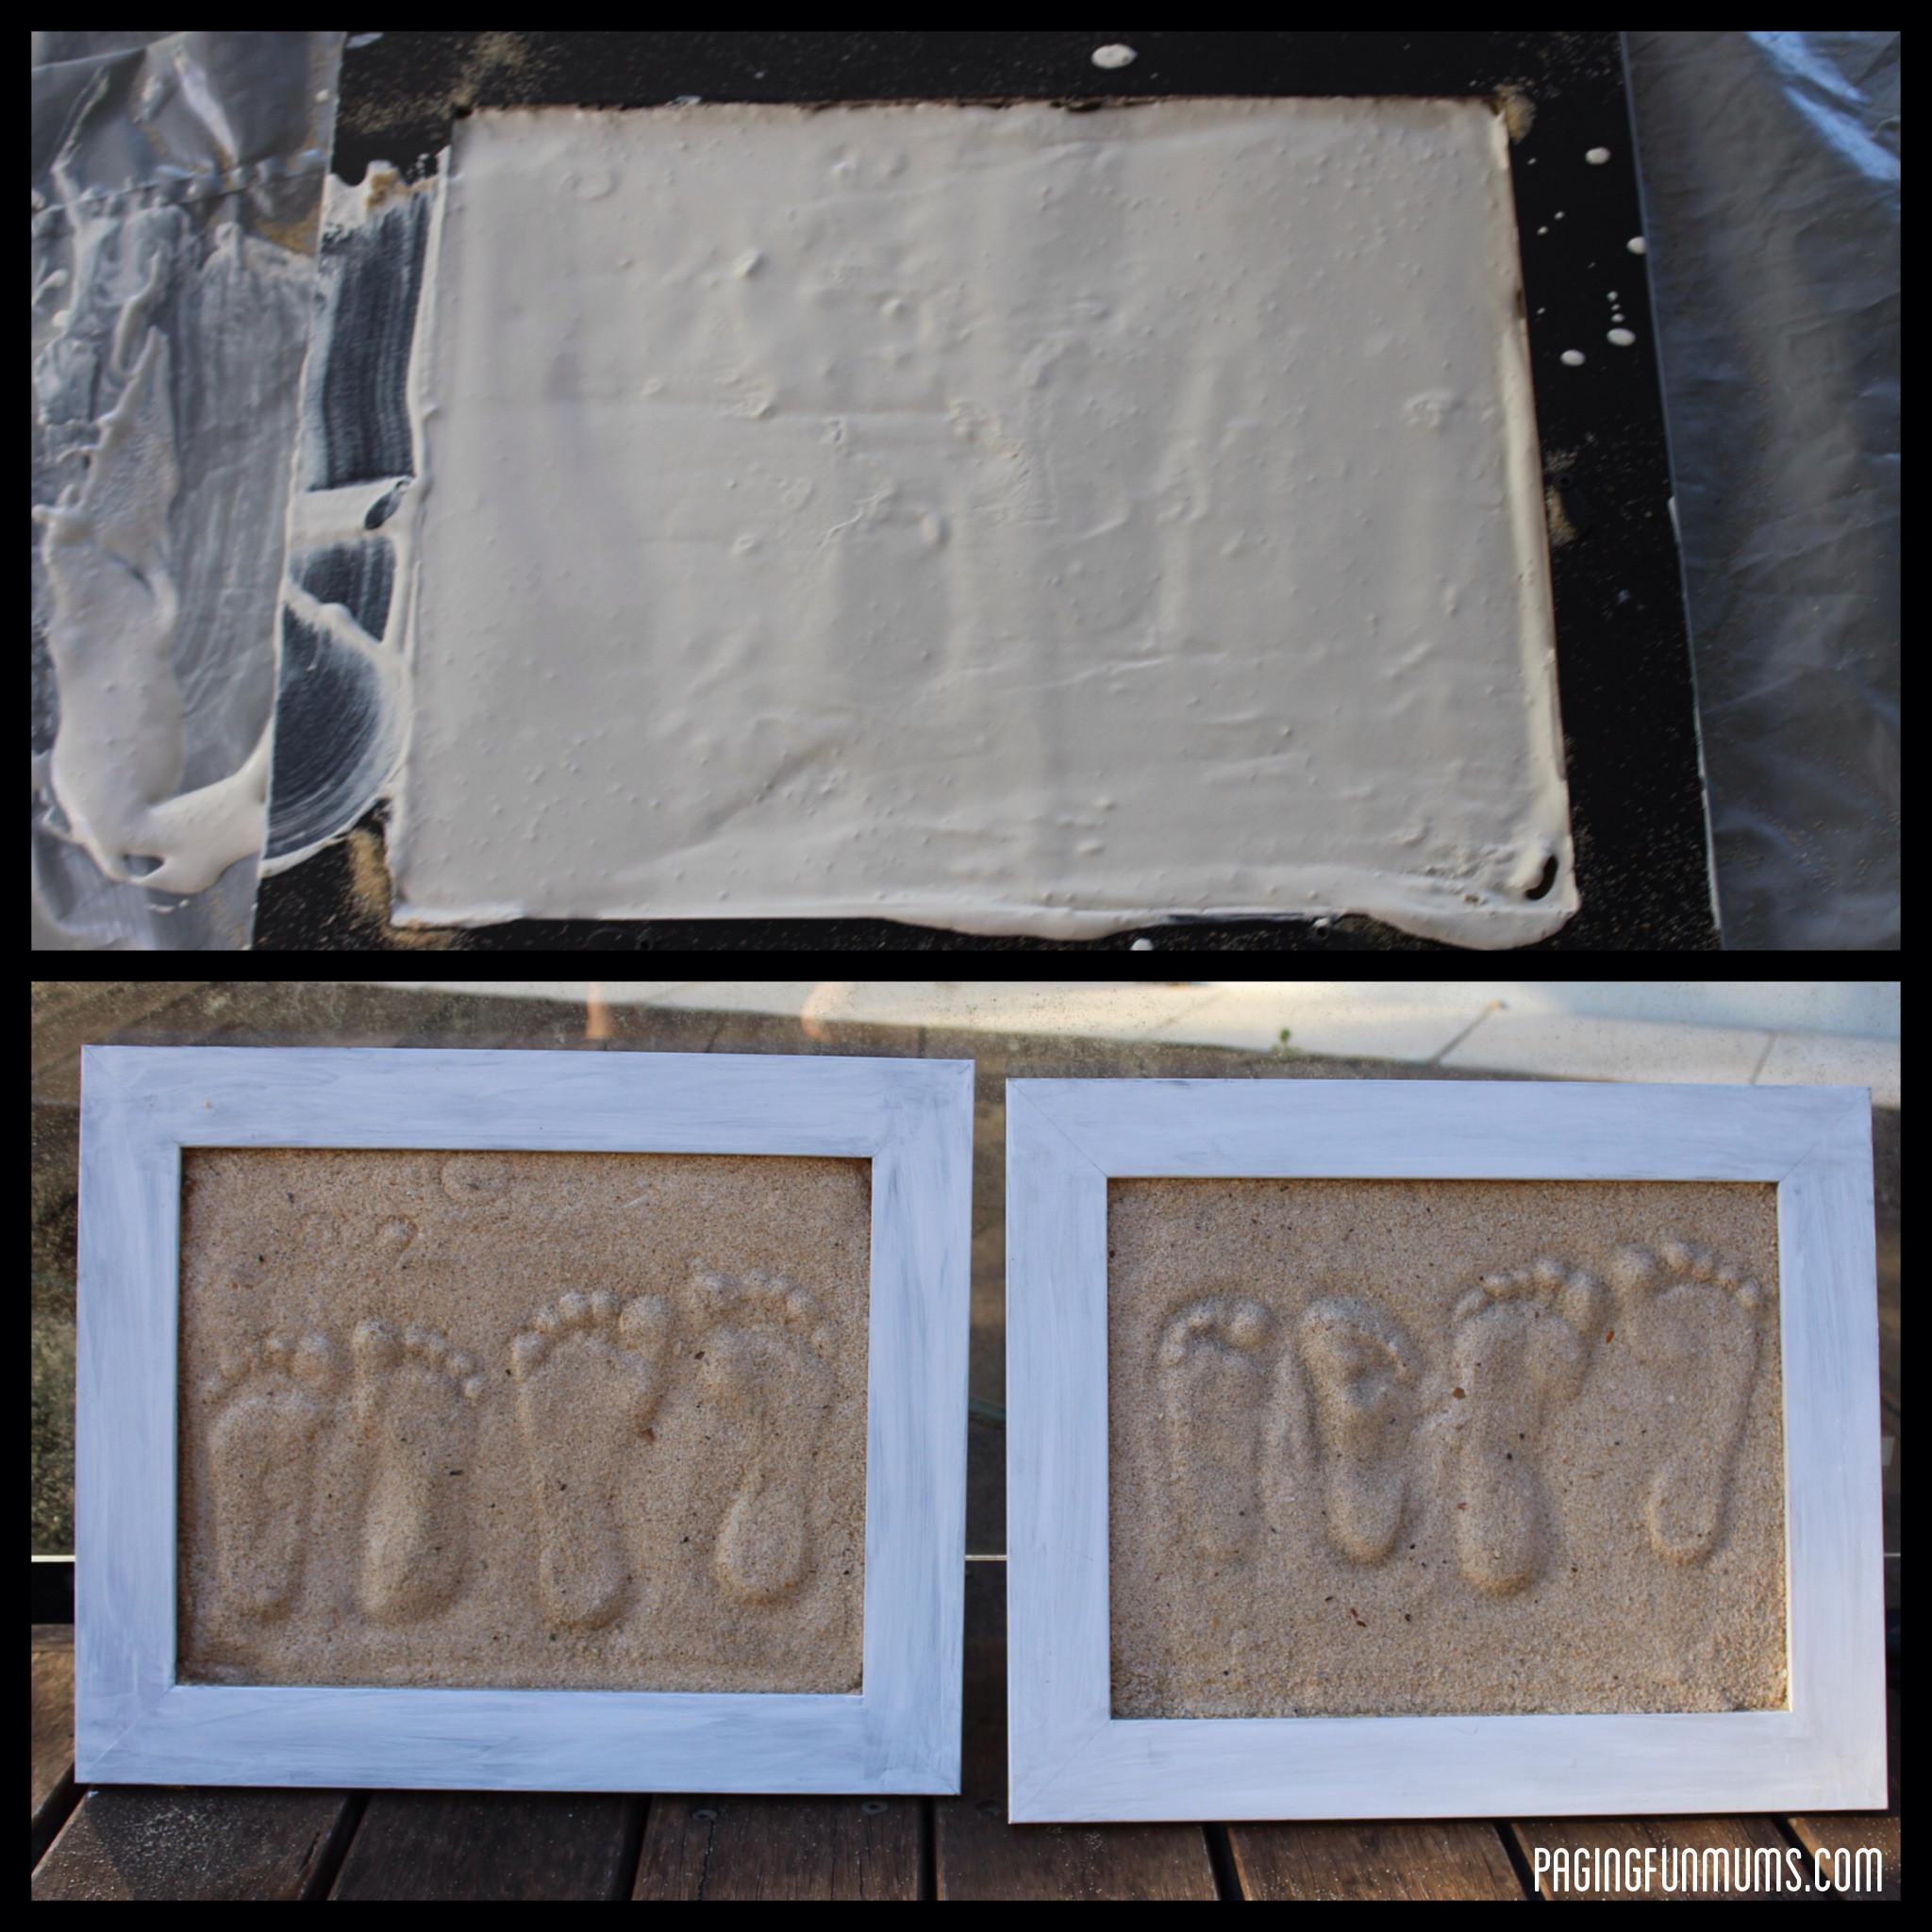
Mix and Pour Plaster of Paris: Follow the instructions on your Plaster of Paris packet to mix the plaster with water. Once mixed, slowly and gently pour the plaster mixture over the sand, starting from one corner and ensuring you cover the entire sand surface within the frame.
 Mixing and pouring plaster of Paris for footprint mold
 -
Level the Plaster: Use a piece of cardboard to gently level the plaster mixture within the frame. Avoid pressing down too firmly, as you want to maintain the footprint impressions in the sand underneath.
-
Setting Time: Allow the plaster to set completely, following the time indicated on the Plaster of Paris packaging. Drying time can vary based on humidity and temperature. In warm, dry conditions, it may set faster.
 Drying plaster footprint mold in the sun
 -
Remove Sand and Finish: Once the plaster is fully hardened, remove the cardboard backing from the frame. Turn the frame over and gently brush away the loose sand to reveal the plaster footprints. For thorough drying, you can leave it in the sun for a bit longer before sealing.
-
Sealing and Decoration: Apply a spray-on sealer to the plaster mold. This helps to secure any remaining sand particles and protects the plaster. If desired, use a glue gun to attach seashells or other beach-themed decorations around the frame for an extra personalized touch. You can also write the year or a special message on the back to further commemorate the summer.
-
Display Your Keepsake: Your DIY “footprints in the sand” keepsake is now ready to be displayed! Hang it on a wall or place it on a shelf to enjoy this tangible memory of summer fun for years to come.
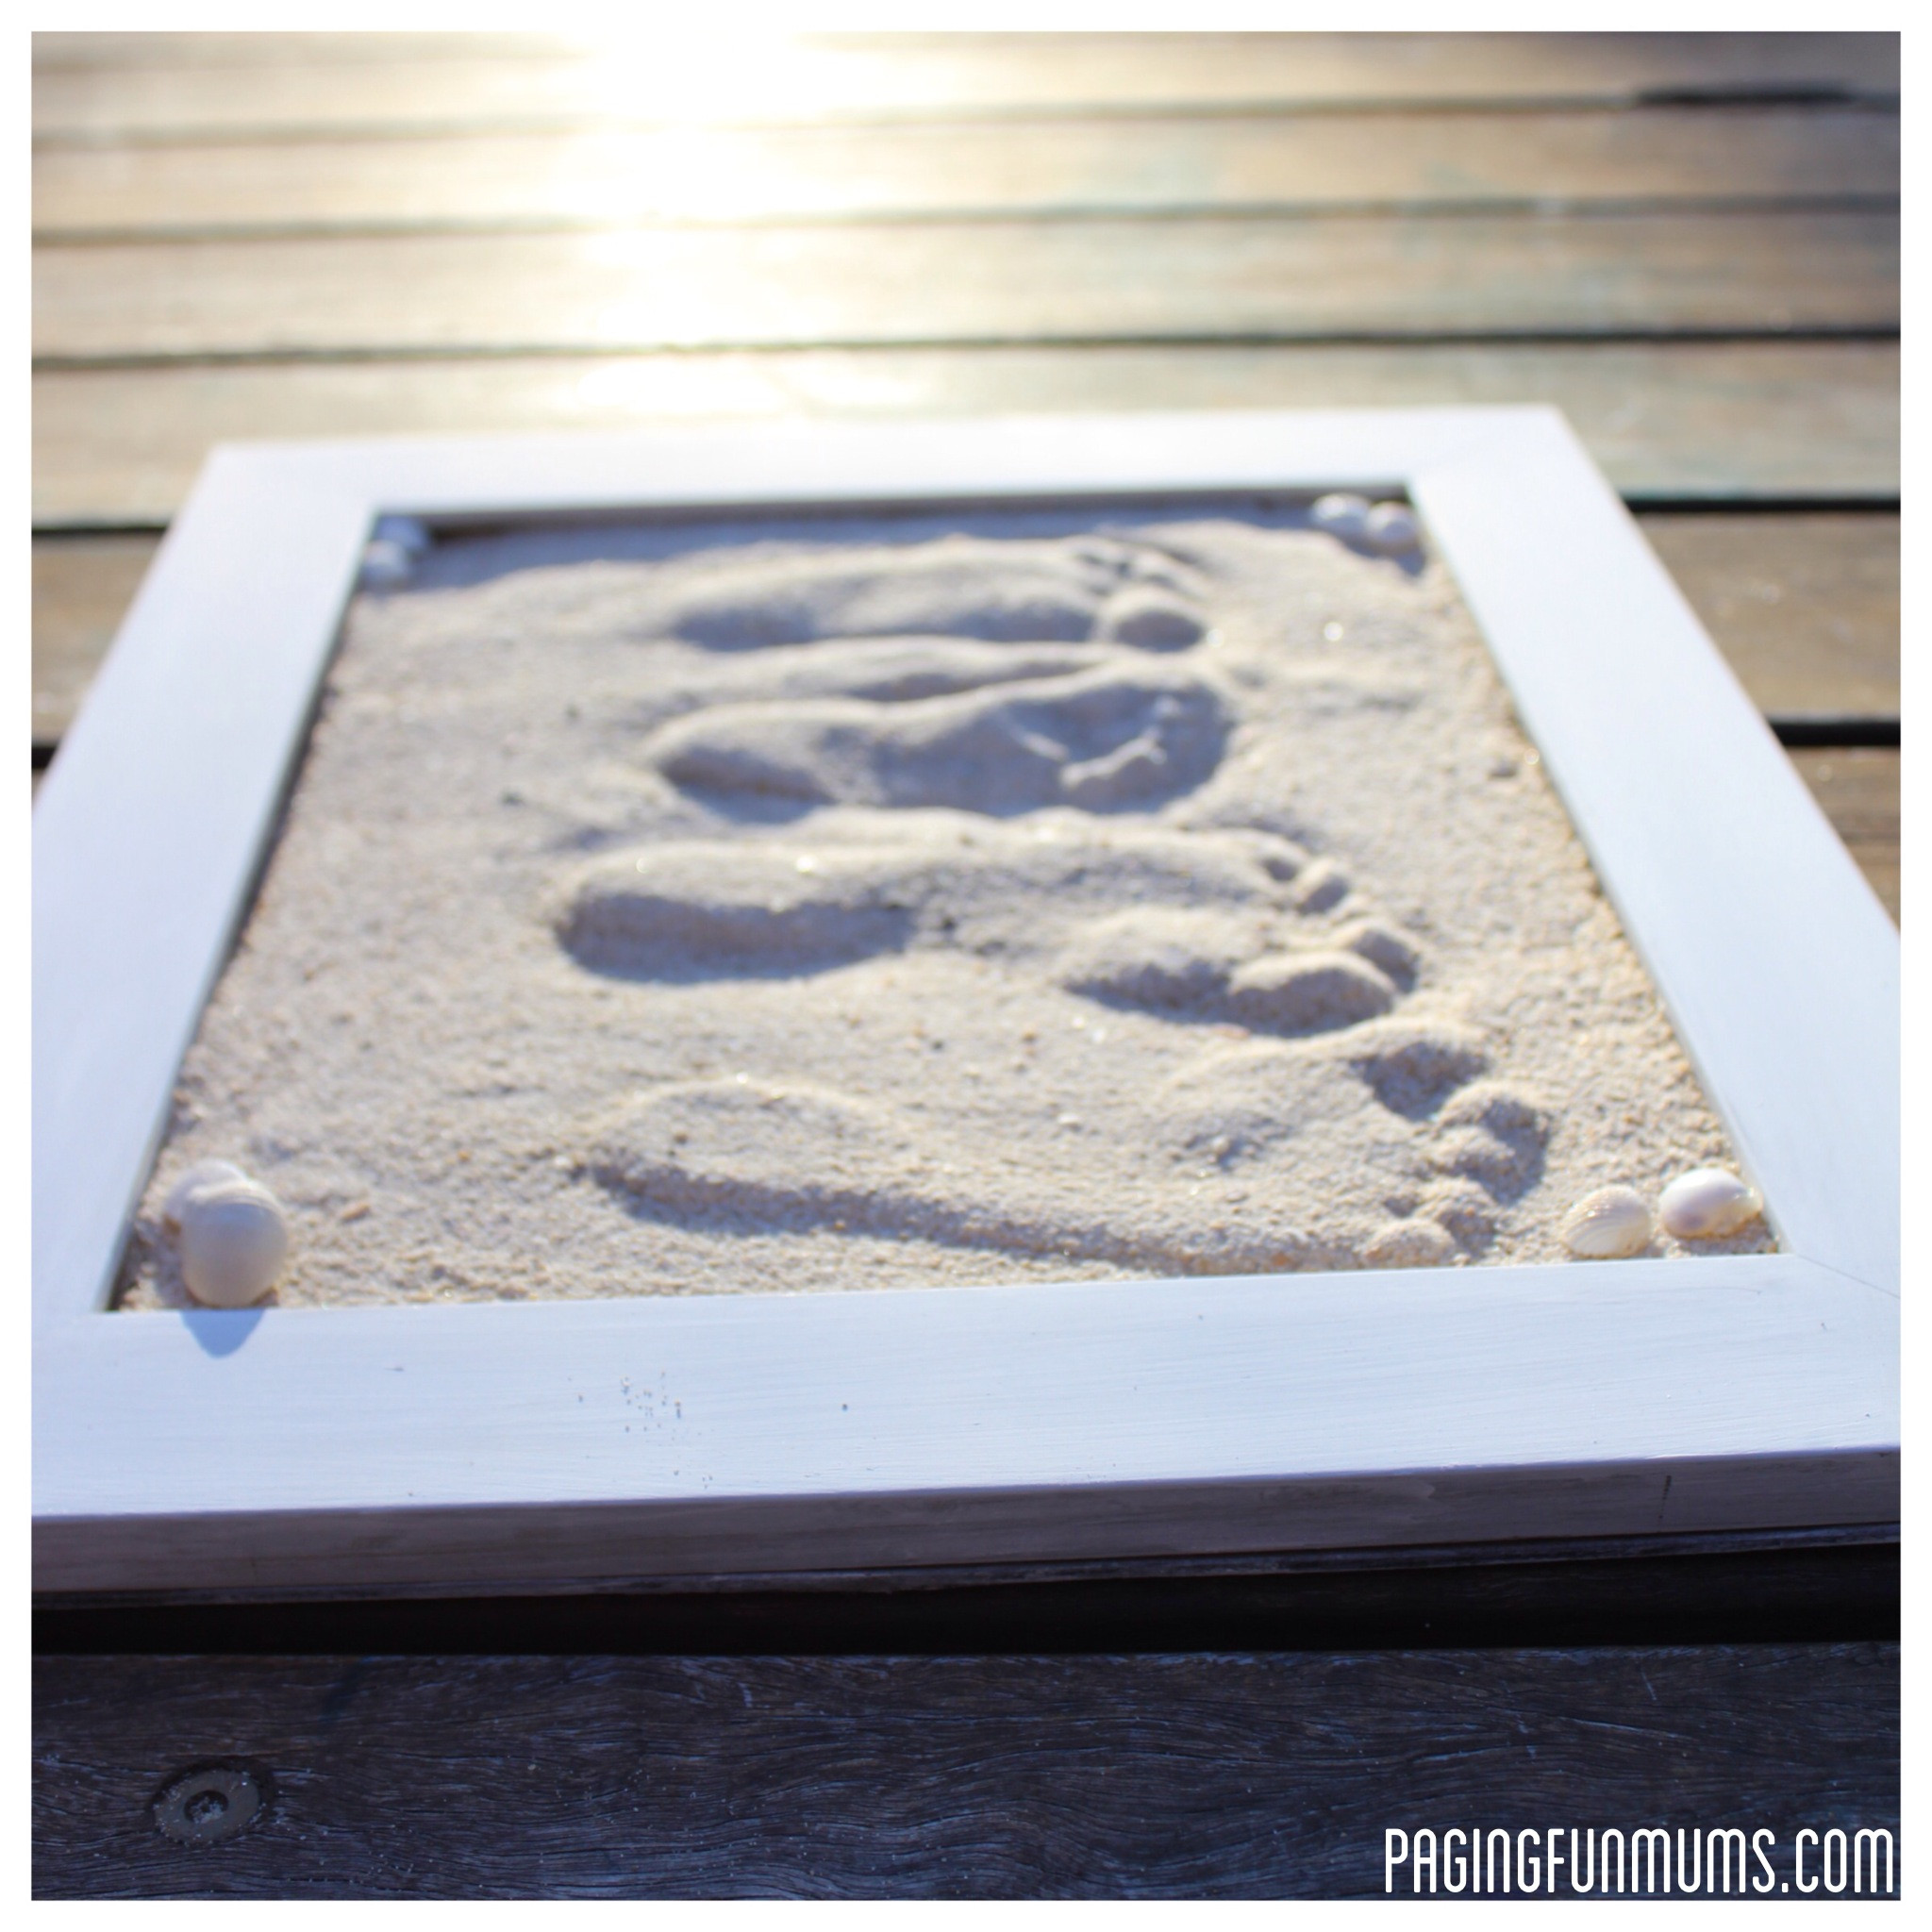 Finished plaster footprints in a frame
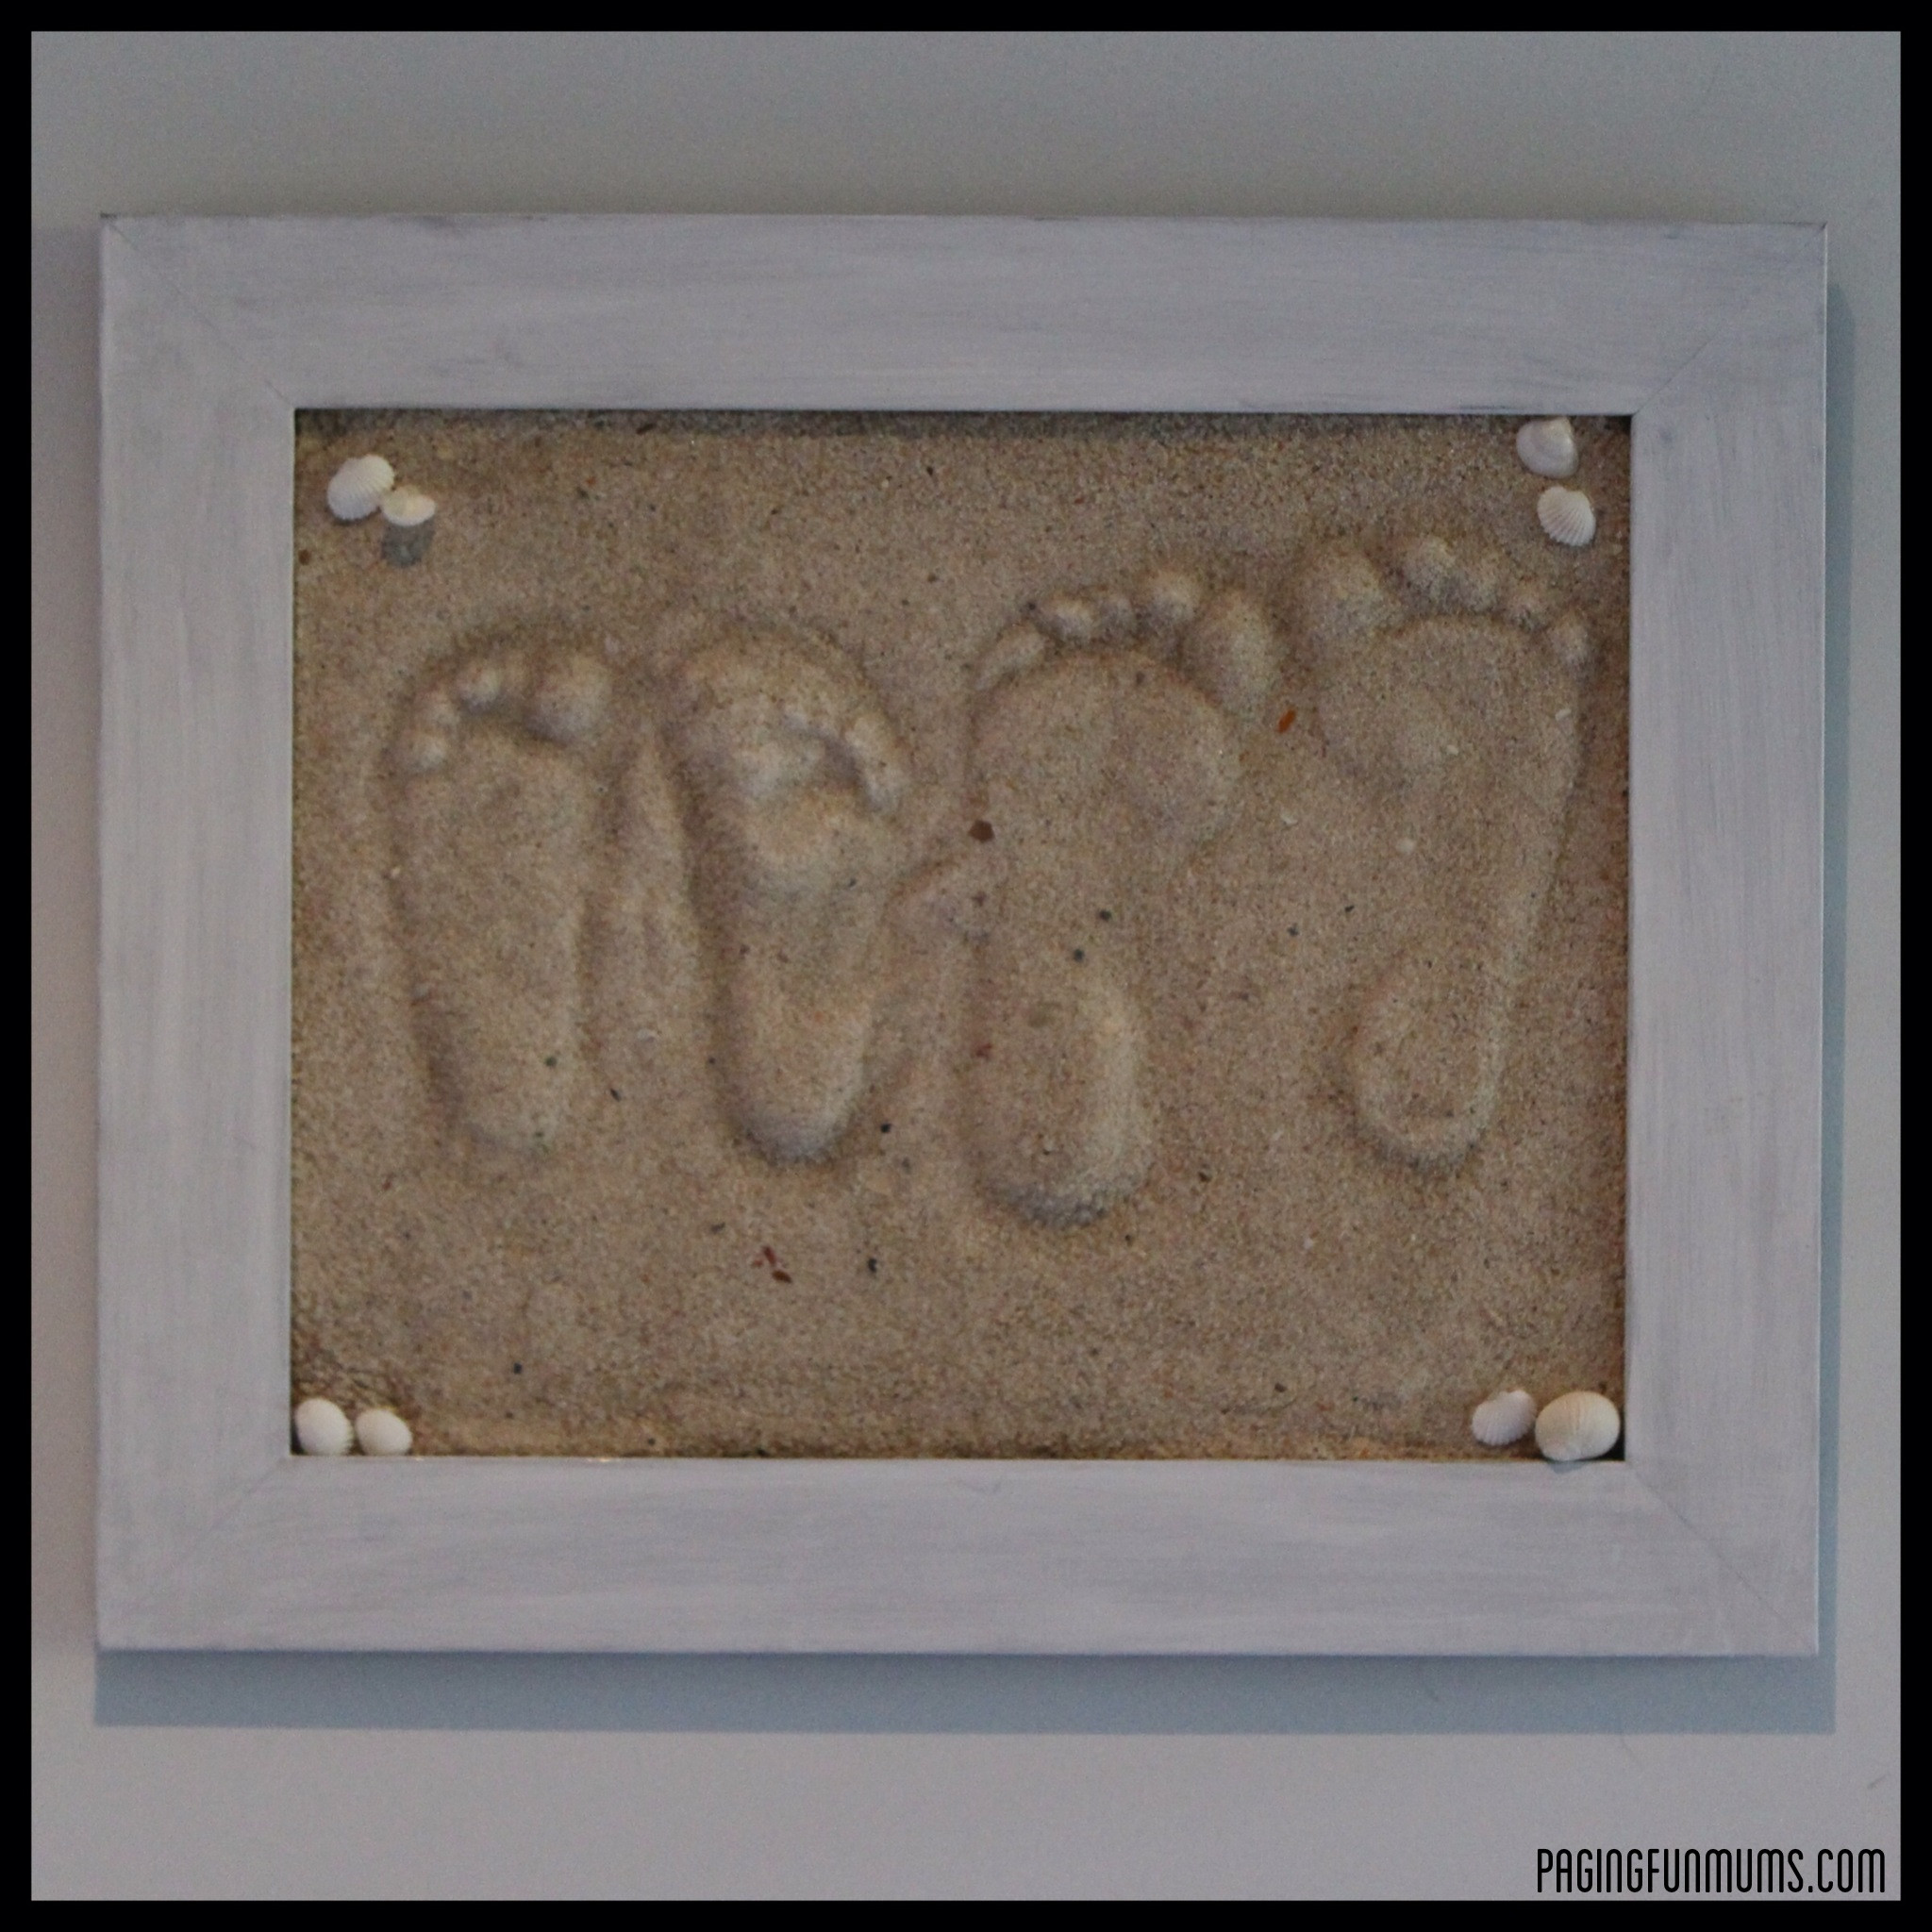 Footprint keepsake hanging on the wall
Creating a “footprints in the sand” keepsake is more than just a craft; it’s a way to capture the fleeting moments of childhood and the joy of summer. This simple DIY project allows you to create a personalized piece of art that holds sentimental value, serving as a beautiful reminder of sandy toes and sunny beach days. Why not try making your own footprint memories this summer?