Discover the beauty of nature and transform ordinary fabric into unique art pieces with plant-based Fabric Prints. This guide will walk you through the enchanting process of creating fabric prints using the simple yet effective hammering technique, focusing on a beautiful mandala design. Whether you’re a seasoned crafter or a beginner eager to explore eco-friendly art, this method offers a delightful way to personalize textiles and connect with nature’s vibrant palette.
Why Choose Natural Fabric Prints?
In a world increasingly conscious of sustainability, natural fabric prints offer an eco-conscious and artistic alternative to synthetic dyes. This technique not only allows you to create personalized and unique designs but also connects you with the natural world. Using flowers and leaves to dye fabric is a time-honored tradition, and the results are often surprising and always beautiful. Plus, it’s a fantastic way to use plants from your garden or local area, turning foraged finds into lasting textile art.
Materials You’ll Need for Plant-Based Fabric Prints
Before you begin your fabric printing journey, gather these simple supplies:
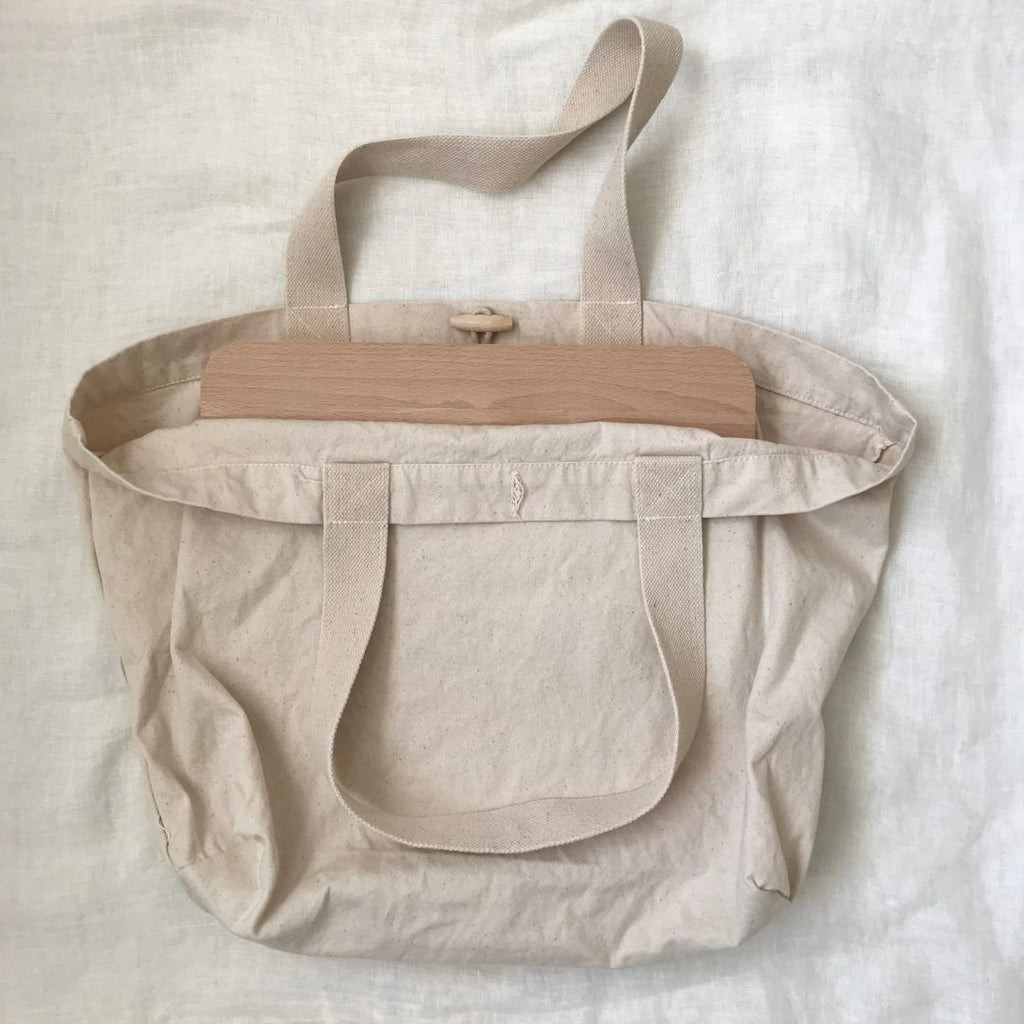
- Fabric: Opt for natural fabrics like cotton, linen, or silk for the best results. A smooth, light-colored fabric will showcase the plant prints most effectively. For this tutorial, we’ll be using a piece of cotton fabric and a canvas bag to demonstrate the print variations on different textures.
- Plants: Fresh flowers and leaves are your dyes! Choose non-poisonous plants with vibrant colors. For this mandala project, we’ll use violas, dyer’s knotweed (Japanese indigo), lemon balm, coreopsis, sage, and oregano. Experiment with what’s available in your garden or local area.
- Wooden board and hammer: These are essential for transferring the plant pigments onto the fabric. A sturdy wooden board provides a firm surface, and a hammer will gently release the natural dyes.
- Plastic bag or thick paper: To protect your wooden board and prevent the dye from bleeding through to the surface underneath.
- Two pieces of fabric: One to place under the plants and one on top, ensuring you get two prints from one hammering session.
- Iron and ironing board: For setting the prints after they dry.
- Optional: Natural detergent for washing the fabric after the print is set.
Step-by-Step Guide to Making Mandala Fabric Prints
Let’s dive into the creative process of making a stunning mandala fabric print:
1. Gathering Your Botanical Palette
Start by collecting your chosen flowers and leaves. Remember, you don’t need a vast amount of plants to achieve striking results. A small selection of vibrant flora is often enough to create intricate and beautiful patterns. For our mandala, we’ve gathered a colorful mix including violas, dyer’s knotweed, lemon balm, coreopsis, sage, and oregano. Ensure you’re using non-toxic plants for this project.
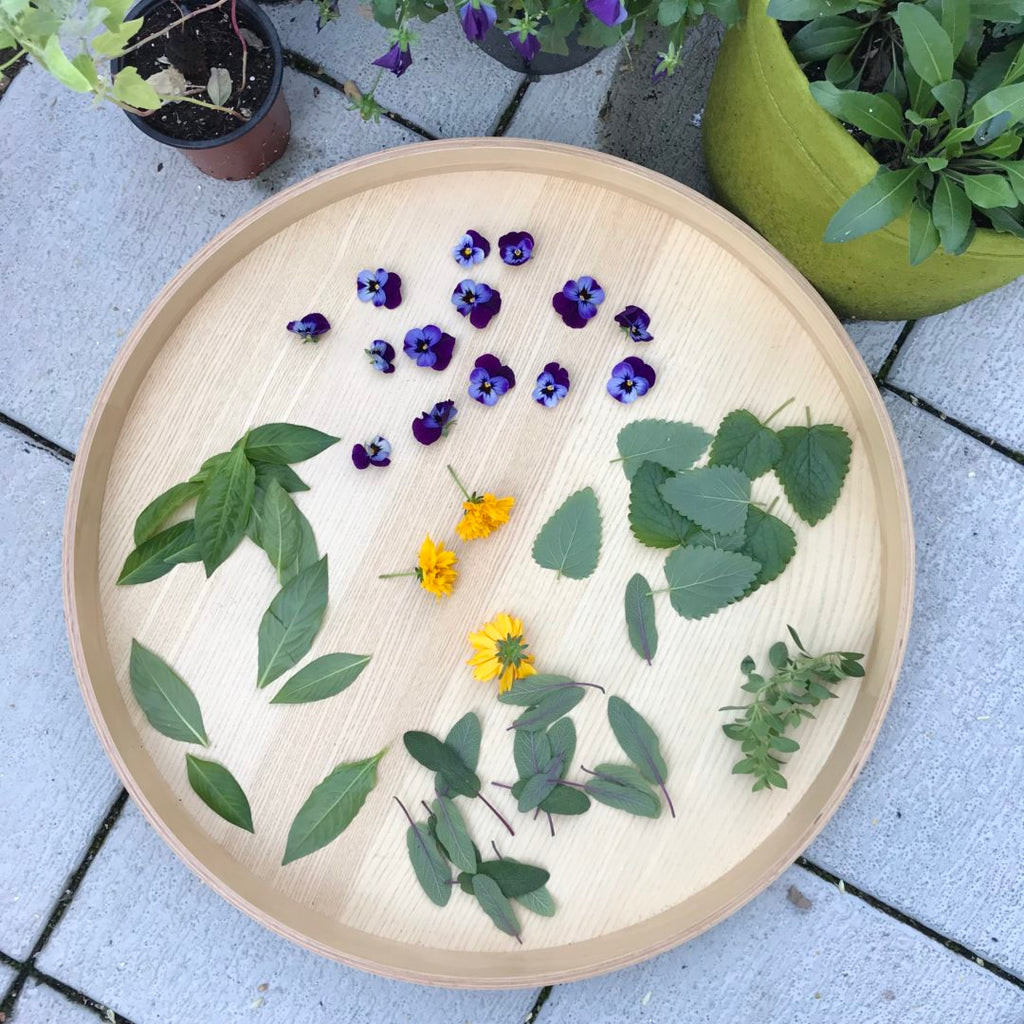 Selection of flowers and leaves including violas, dyer’s knotweed, lemon balm, coreopsis, sage, and oregano, ready for fabric printing
2. Setting Up Your Workspace
Protect your work surface by placing the wooden board inside a plastic bag or between layers of thick paper. This prevents the plant dyes from staining your board. Lay one piece of your chosen fabric over the protected wooden board, creating a base for your botanical arrangement.
 Wooden chopping board placed inside a clear plastic bag to protect it from plant dyes during the fabric printing process
3. Arranging Your Mandala Design
Now for the artistic part! Arrange your flowers and leaves on the fabric in a mandala pattern. Begin at the center and work your way outwards, creating a balanced and visually appealing design. Mandalas are known for their symmetry and meditative quality, making this a mindful and creative process.
 Flowers and leaves arranged in a mandala pattern on a piece of fabric, ready for the hammering technique
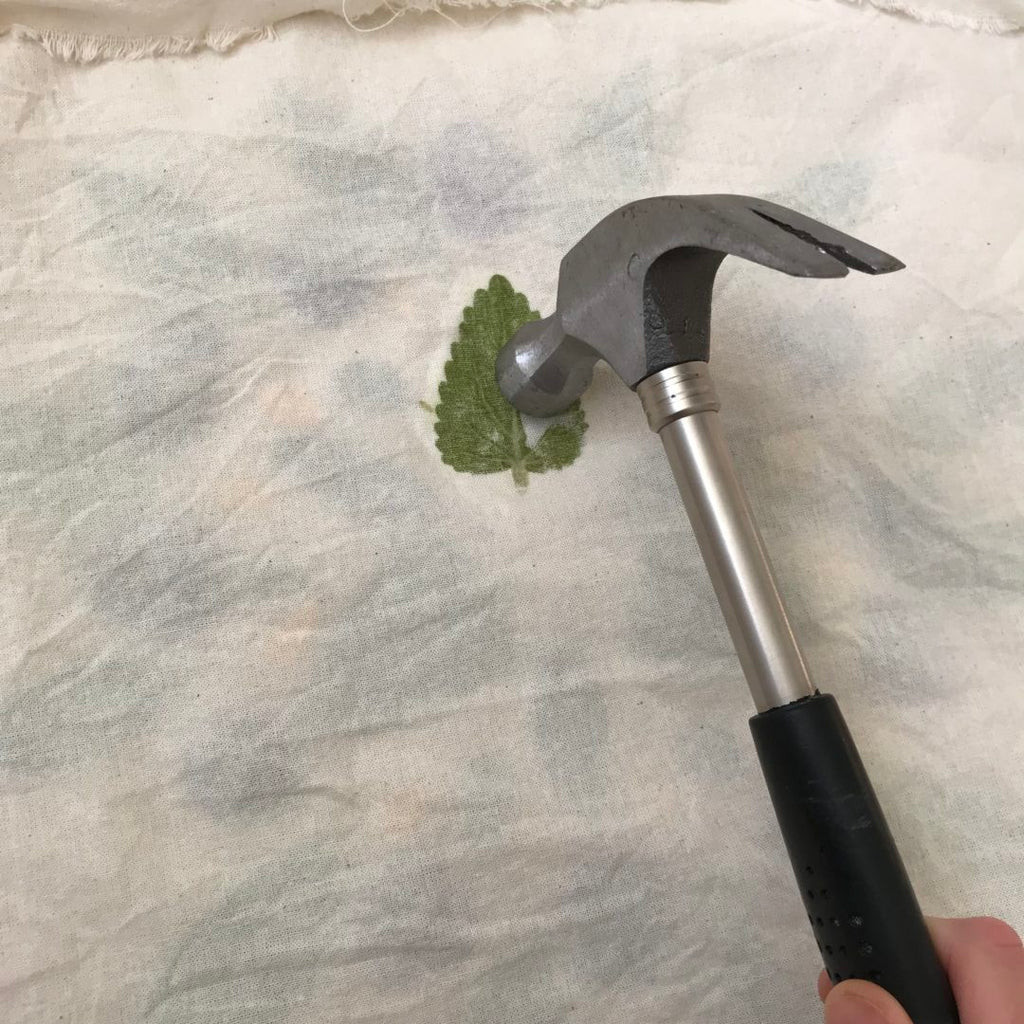
4. Hammering the Plants to Release Color
Carefully lay the second piece of fabric over your plant arrangement. Be gentle to avoid disturbing your design. Now, take your hammer and begin to pound the plants. Work slowly and with precision, hammering each plant to release its natural pigments. You’ll see the prints start to emerge through the top layer of fabric as you hammer. Focus on outlining each leaf and flower first to get a crisp print, then fill in the center. This technique will give you two fabric prints – one on each piece of fabric.
 Hammering flowers and leaves placed between two layers of fabric to create plant-based fabric prints
 Close-up of plant pigments transferring onto fabric as flowers and leaves are hammered to create fabric prints
Continue hammering until the entire mandala design is visible through the top layer of fabric, ensuring all parts of the plants have been pressed.
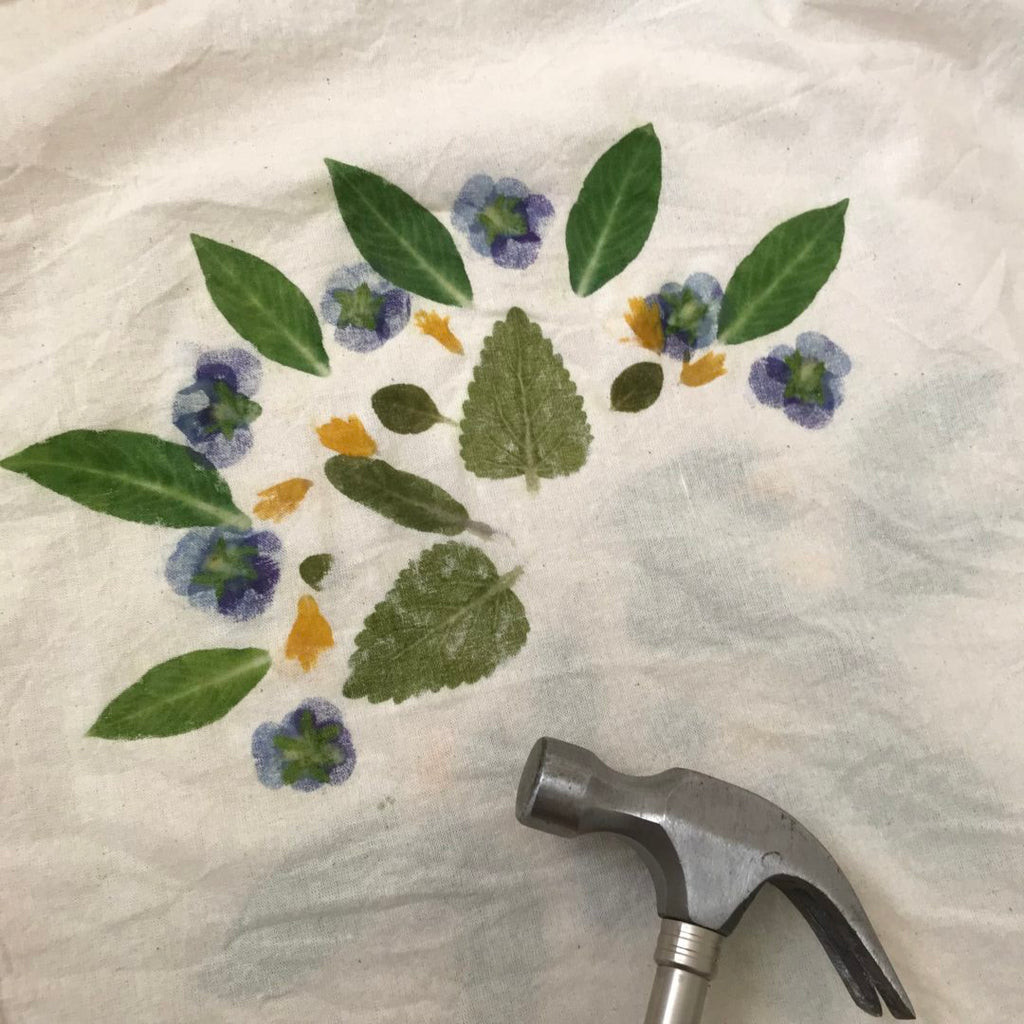 Mandala design fully visible through the top layer of fabric after hammering, indicating completion of the plant printing process
5. Adding Details and Enhancements
If you wish to add more to your design, like extra color accents, carefully lift the edges of the fabric and insert additional plant parts. In this mandala, we added more yellow coreopsis petals around the outer edge for a brighter border. Gently hammer again to imprint these new additions.
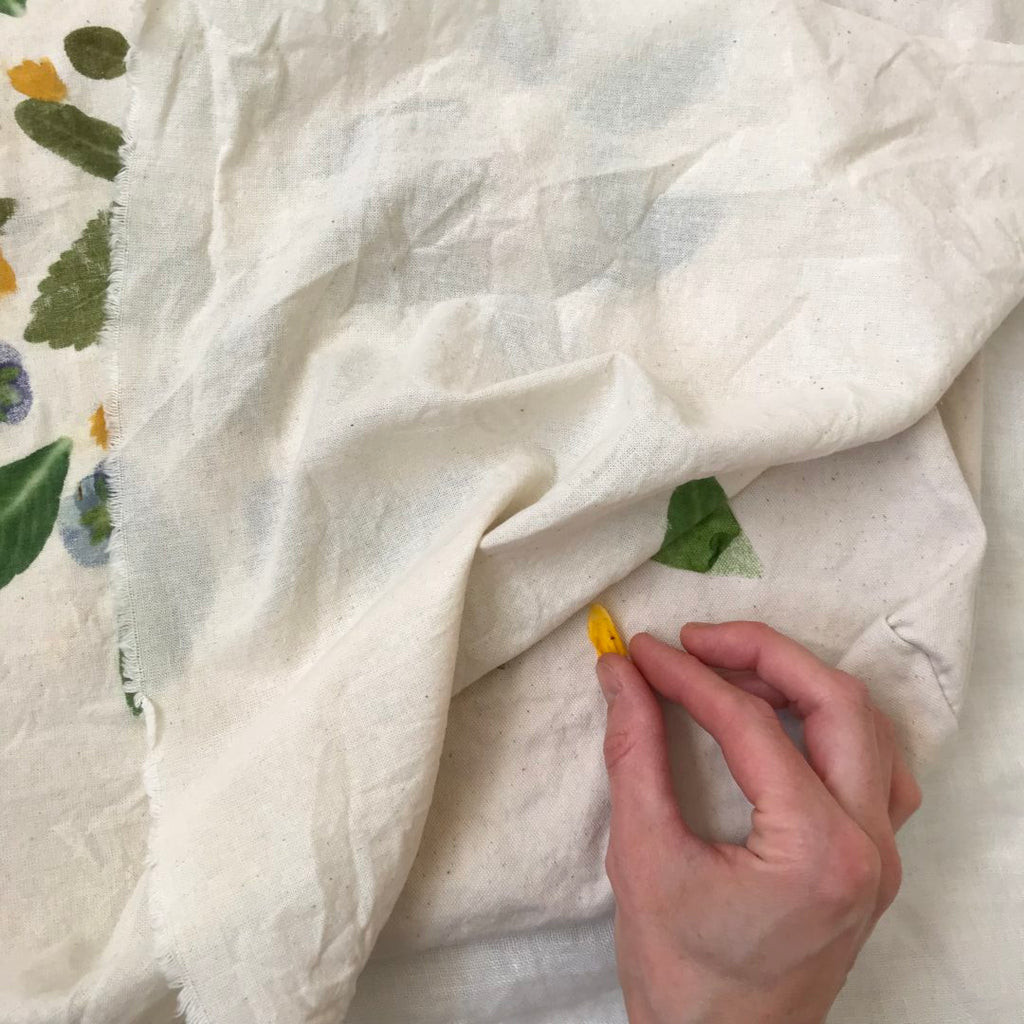 Adding yellow coreopsis petals to the outer edge of the mandala fabric print for enhanced color and design
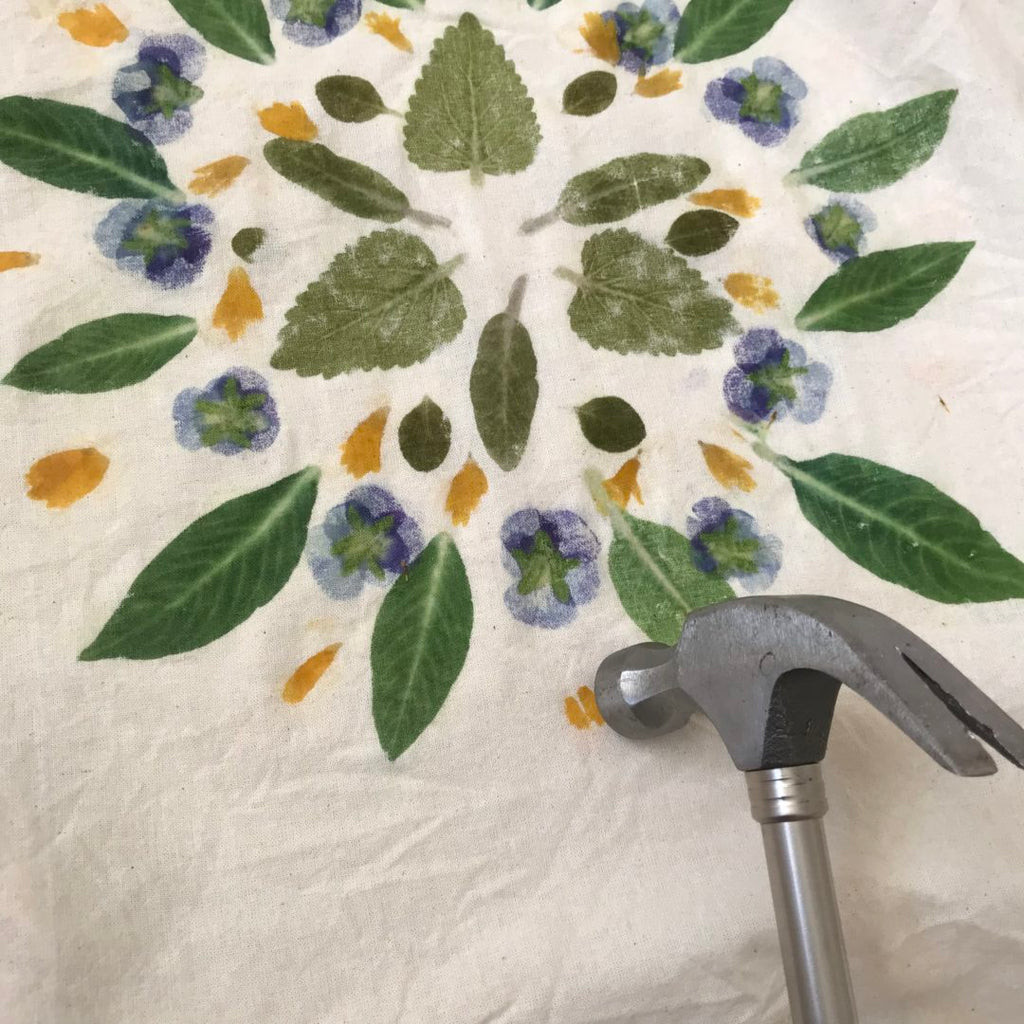 Close-up of adding coreopsis petals and refining the mandala fabric print design
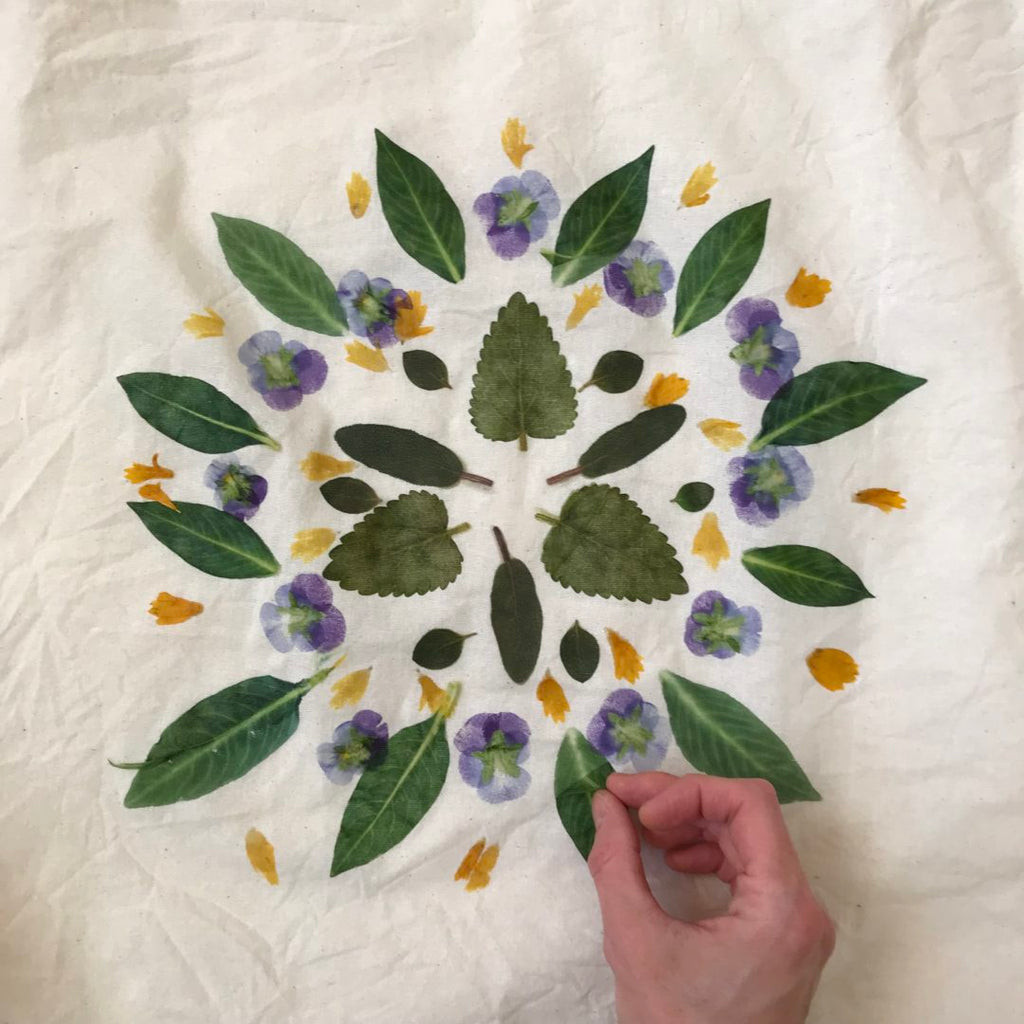
6. Revealing Your Botanical Prints
Once you’re satisfied with your hammering, carefully peel off the top layer of fabric to reveal your unique fabric prints on both pieces of material.
 Revealing two fabric prints after hammering plants, showcasing the mandala design on both layers of fabric
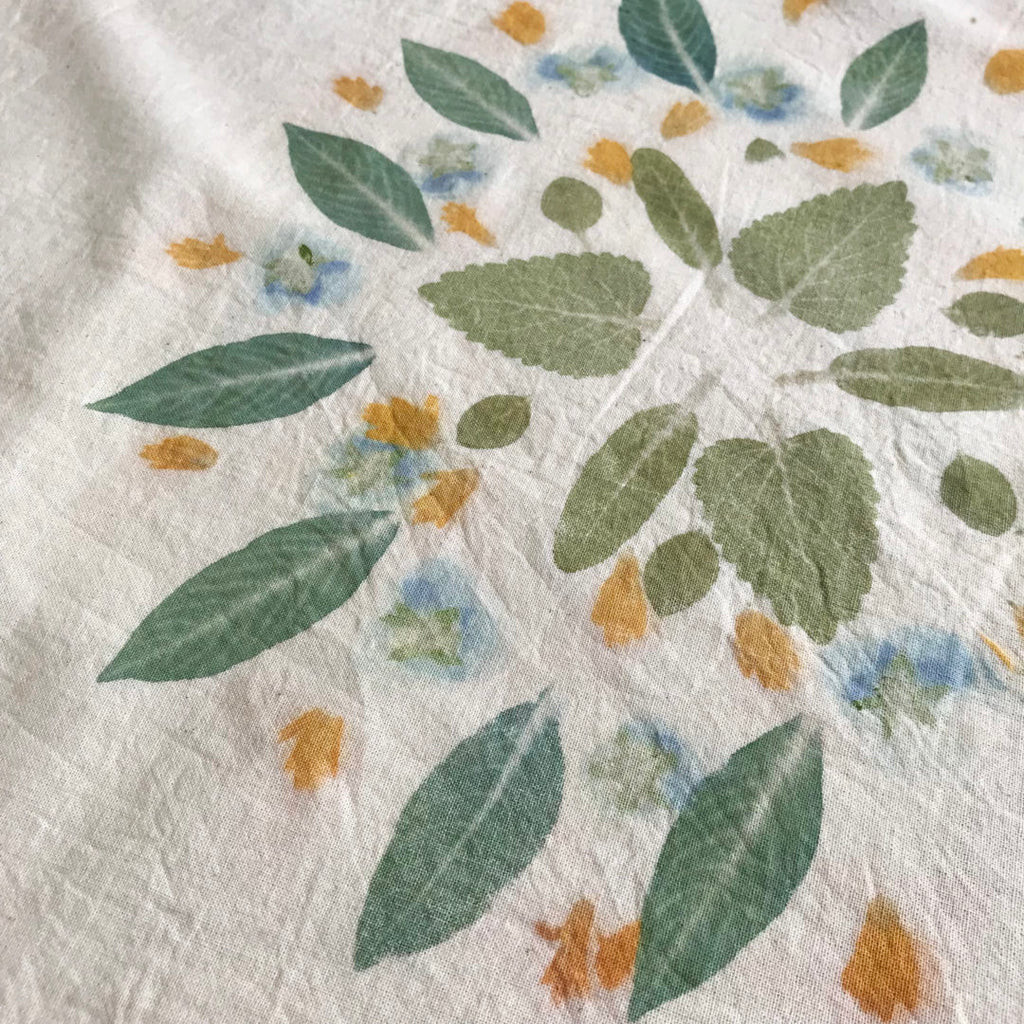
7. Drying and Finishing Your Fabric Prints
Allow the fabric prints to dry completely before removing the plant debris. It’s best to wait until the prints are fully dry, as the plants will become papery and easily brush off. Removing them while still wet can smudge your delicate prints. For juicy plants like violas, drying is essential before clean-up.
 Close-up of a fabric print with plant debris still attached, showing the texture and detail before clean-up
Once dry, gently peel off the plants and remove any loose pieces. To set the prints, iron the fabric using a pressing cloth between the iron and the print to protect the colors. After ironing, wait a few days before gently hand-washing your fabric with a mild, natural detergent to remove any remaining plant residue and further set the colors.
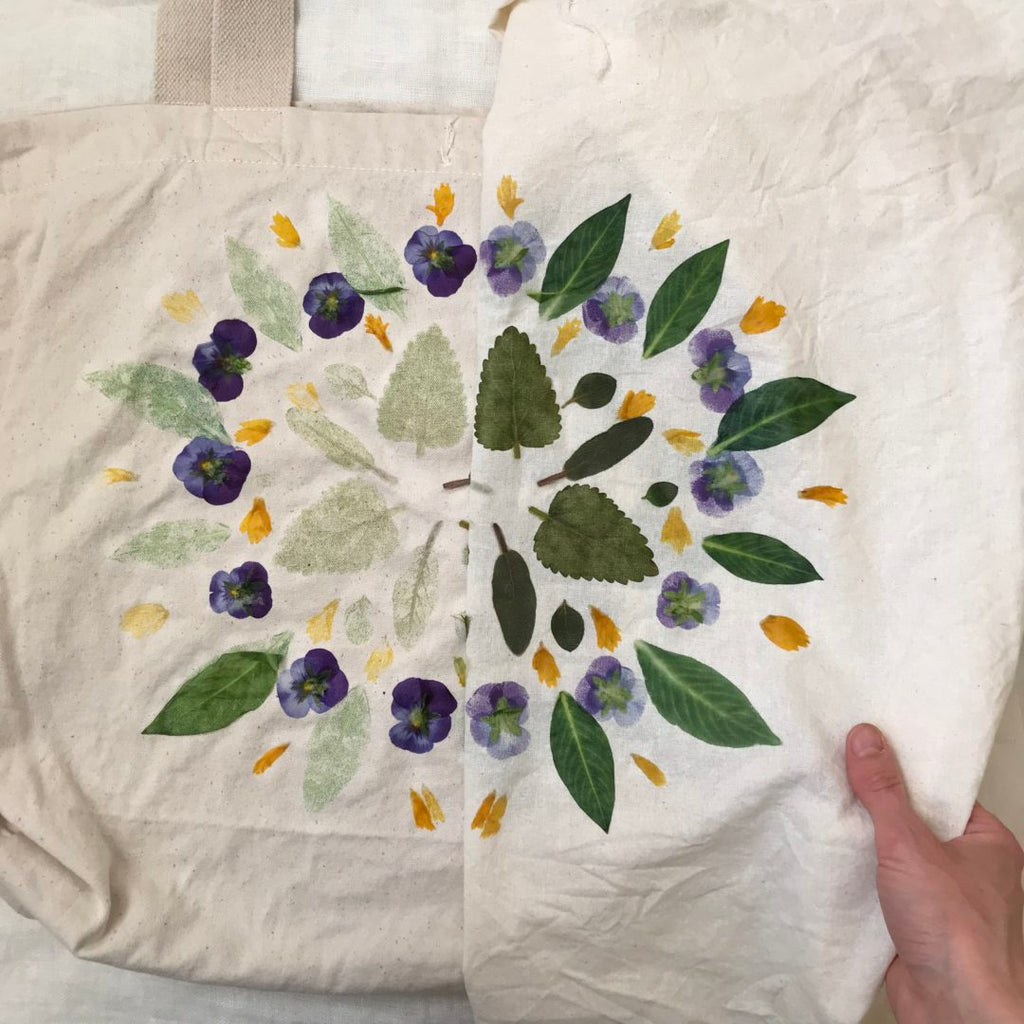
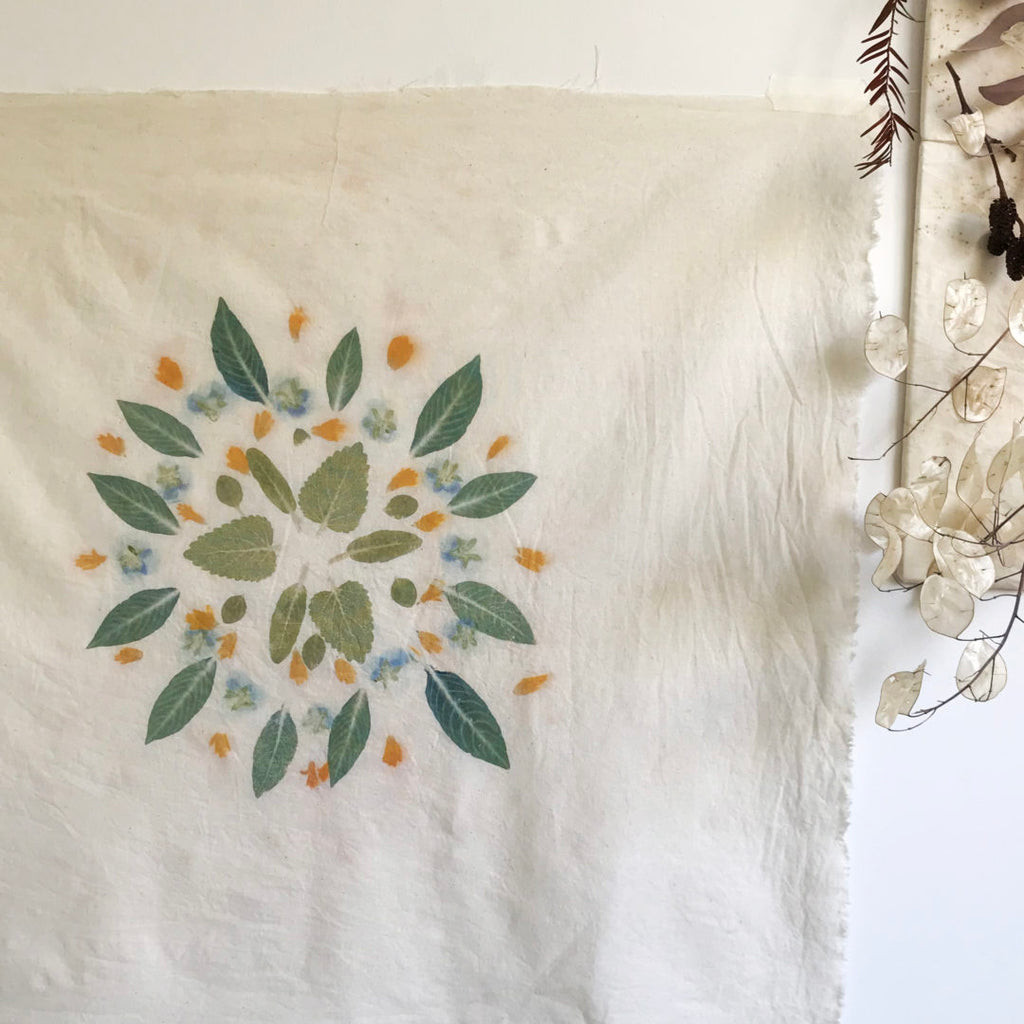
Exploring Different Fabrics and Print Results
As you can see, the print result can vary depending on the fabric type. In this example, the print on the cotton fabric is much clearer and more vibrant than the print on the canvas bag. The rougher texture of canvas creates a more diffused print due to the uneven surface. Pre-washing or scouring the fabric to remove oils might improve ink absorption on denser materials like canvas.
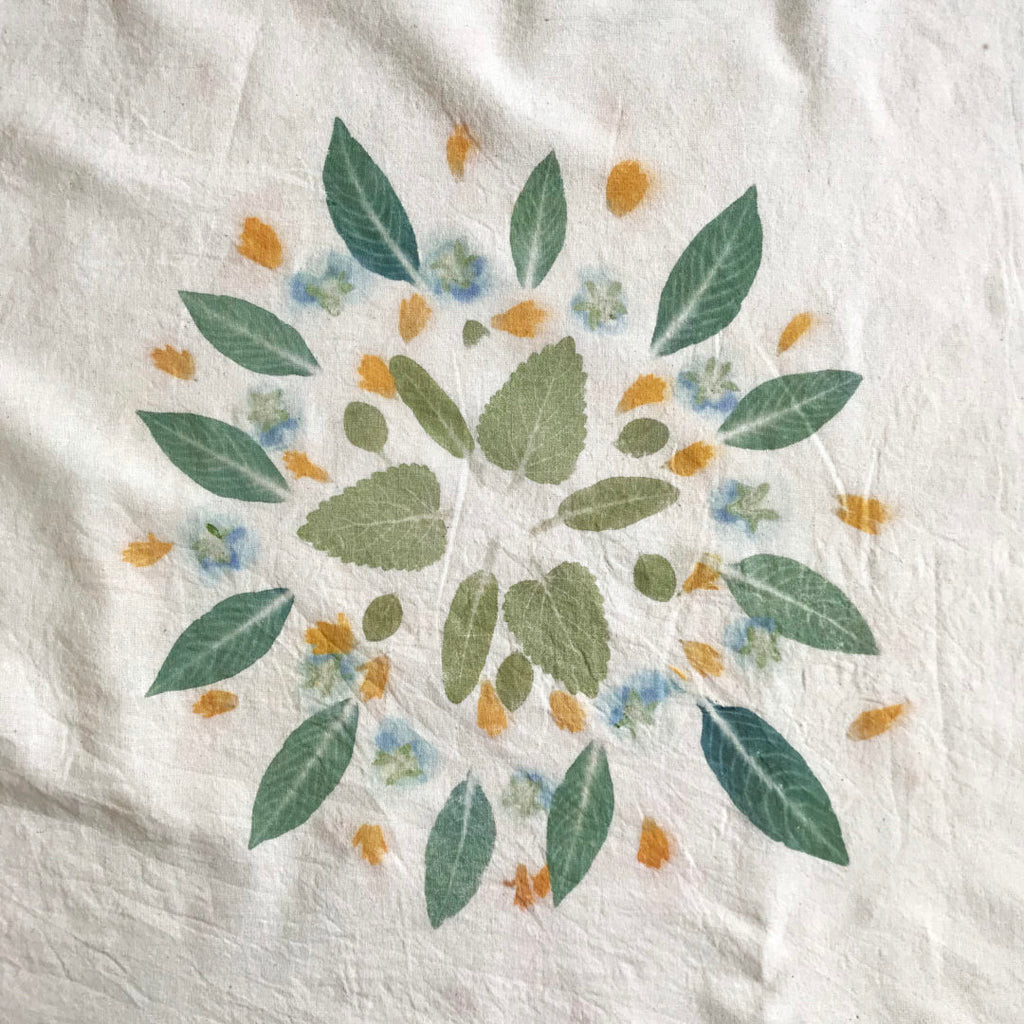
Cotton Fabric Print Result
The cotton fabric beautifully captured the intricate details and vibrant colors of the plants, resulting in a stunning mandala fabric print ideal for wall hangings or decorative pieces.
 Vibrant fabric print on cotton fabric, showcasing the clear and detailed mandala design
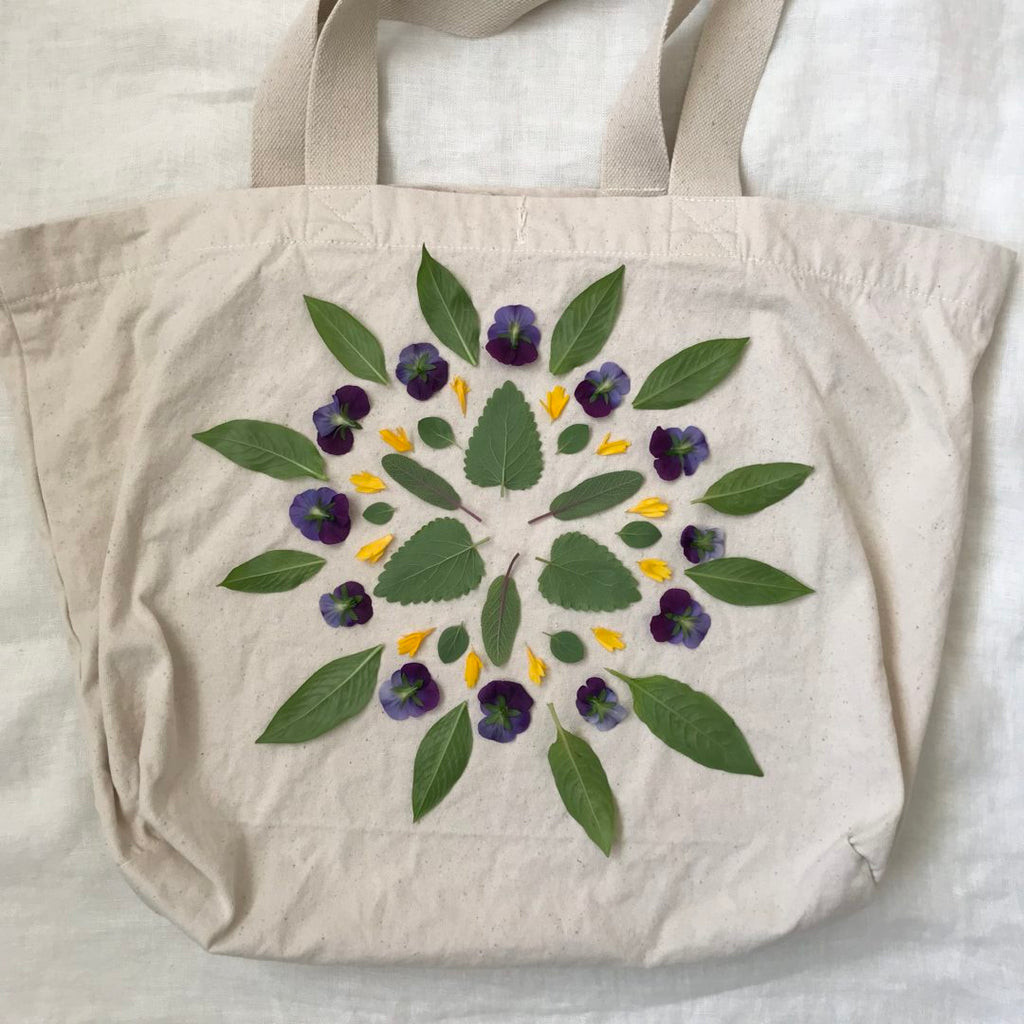
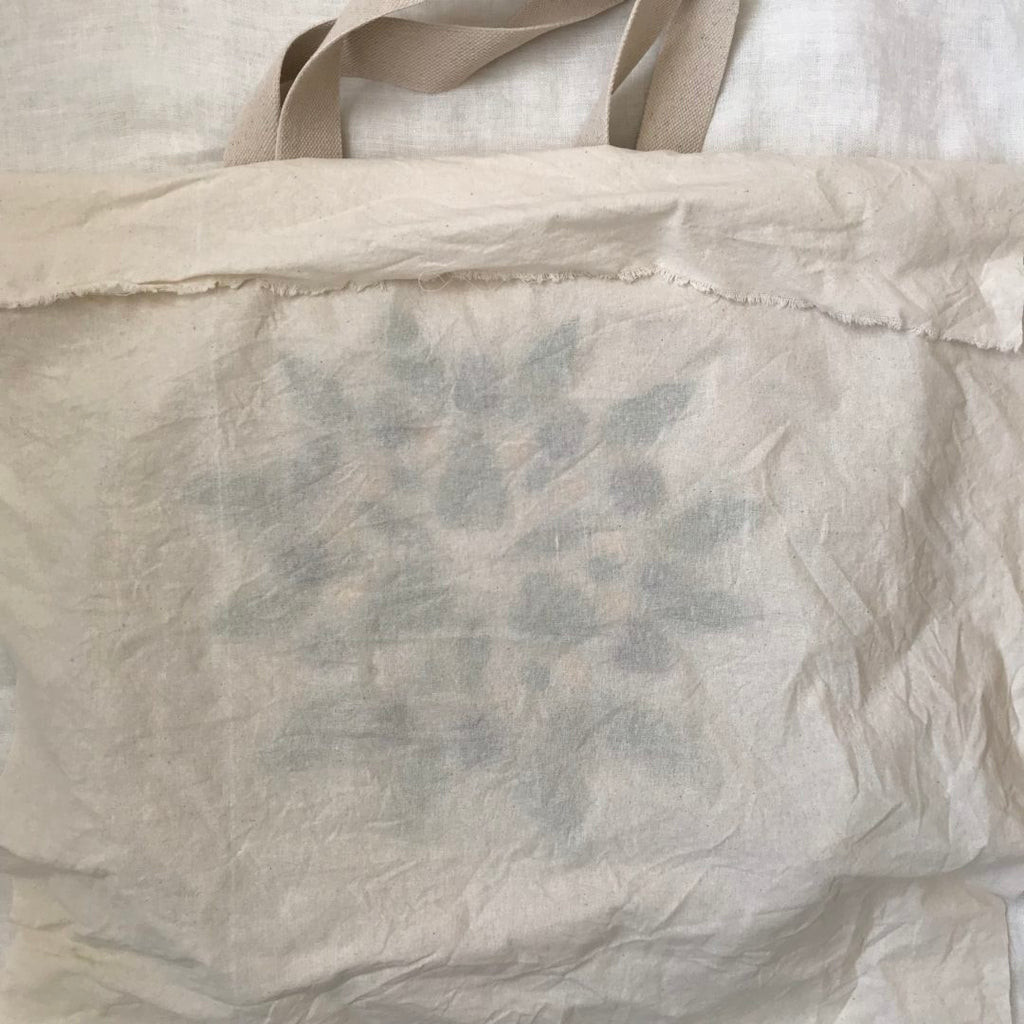
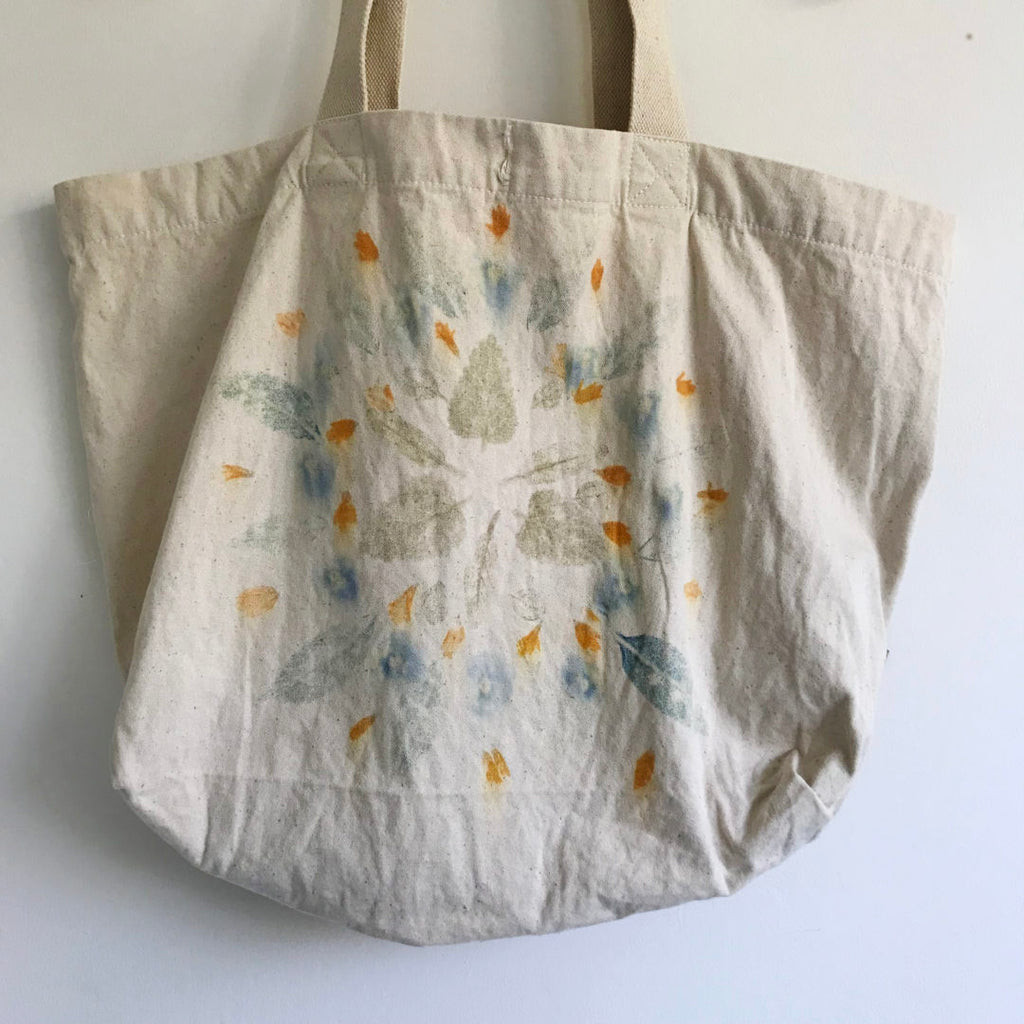
Canvas Bag Print Result
The print on the canvas bag is paler and less defined, demonstrating how fabric texture affects the final print. While less vivid, it still retains a charming, rustic appeal, perfect for everyday use with a naturally dyed touch.
 Paler fabric print on a canvas bag, illustrating the effect of fabric texture on the vibrancy of plant-based prints
Despite the difference in vibrancy, both prints offer unique aesthetic qualities, highlighting the versatility of plant-based fabric printing.
 Comparison of fabric prints on cotton fabric and a canvas bag, showing different levels of vibrancy and detail
The Aromatic Bonus of Plant Printing
An unexpected delight of this fabric printing method is the aromatic experience. As you hammer the plants, the fragrant scents are released, creating a truly sensory craft session. The lemon balm and oregano, in particular, offer a wonderfully uplifting aroma, making the process even more enjoyable.
 Close-up of flowers and leaves being hammered, emphasizing the aromatic and sensory aspects of plant-based fabric printing
Understanding Color Longevity in Natural Fabric Prints
Natural dyes, while beautiful, may not be as colorfast as synthetic dyes. As observed, the purple from violas tends to fade more than leaf prints after washing. To maximize color retention, consider waiting longer before washing your prints – perhaps even a few weeks. The yellow from coreopsis may shift to a darker orange hue due to pH changes in tap water, adding to the natural variations. Leaf prints, however, tend to be remarkably steadfast in color.
For projects intended as lasting artworks like wall hangings, you might even consider skipping washing altogether to preserve the initial vibrancy, especially of more delicate flower dyes.
Embracing Transient Beauty
Remember, the beauty of natural fabric prints lies in their unique, often transient nature. Like flowers in a garden, the colors may evolve and fade over time, adding to their charm. Instead of striving for permanent, unchanging color, embrace the ephemeral quality of botanical dyes. Create fabric art to enjoy in the present moment, appreciating its beauty for however long it lasts.
Consider creating new fabric prints seasonally to refresh your home décor, or re-print favorite clothing items as the designs gently fade. In a world saturated with permanent synthetics, there’s a special beauty in embracing art that reflects the natural cycles of change and impermanence. Enjoy the process, experiment with different plants and fabrics, and celebrate the unique fabric prints you create.