Creating custom labels and projects with Avery Design & Print Online is straightforward. This guide will walk you through the steps to design and print your own Avery products, from finding the right template to printing your finished project. Whether you’re making labels for mailing, organization, or crafting, Avery’s online tool offers a user-friendly experience.
Finding Your Avery Template Online
To begin, navigate to the Avery templates page at avery.com/templates. This is your starting point for all Avery design projects.
- Enter Your Product Number: Locate the Avery product number on your product packaging. Type this 4 or 5 digit code into the search box in the center of the templates page. Click the magnifying glass icon or press Enter to search.
- Start Designing: Once you find your product template page, click the red Start Designing button. This will take you to the design interface.
- Sign In or Create an Account: You’ll be prompted to sign in or create a free Avery account using your email and password. Having an account allows you to save your projects for future use.
- Choose Your Design: In Step #2 Choose Design, you’ll see options for pre-designed templates and blank templates. Browse the designs and click on the one you want to use as a starting point. In the Choose Design – Preview window, click Customize Design to proceed. If the Customize button is not visible, zoom out your browser view using Ctrl – (Windows) or Cmd – (Apple).
- Customize Screen: You are now in the Step #3 Customize screen, ready to personalize your Avery project.
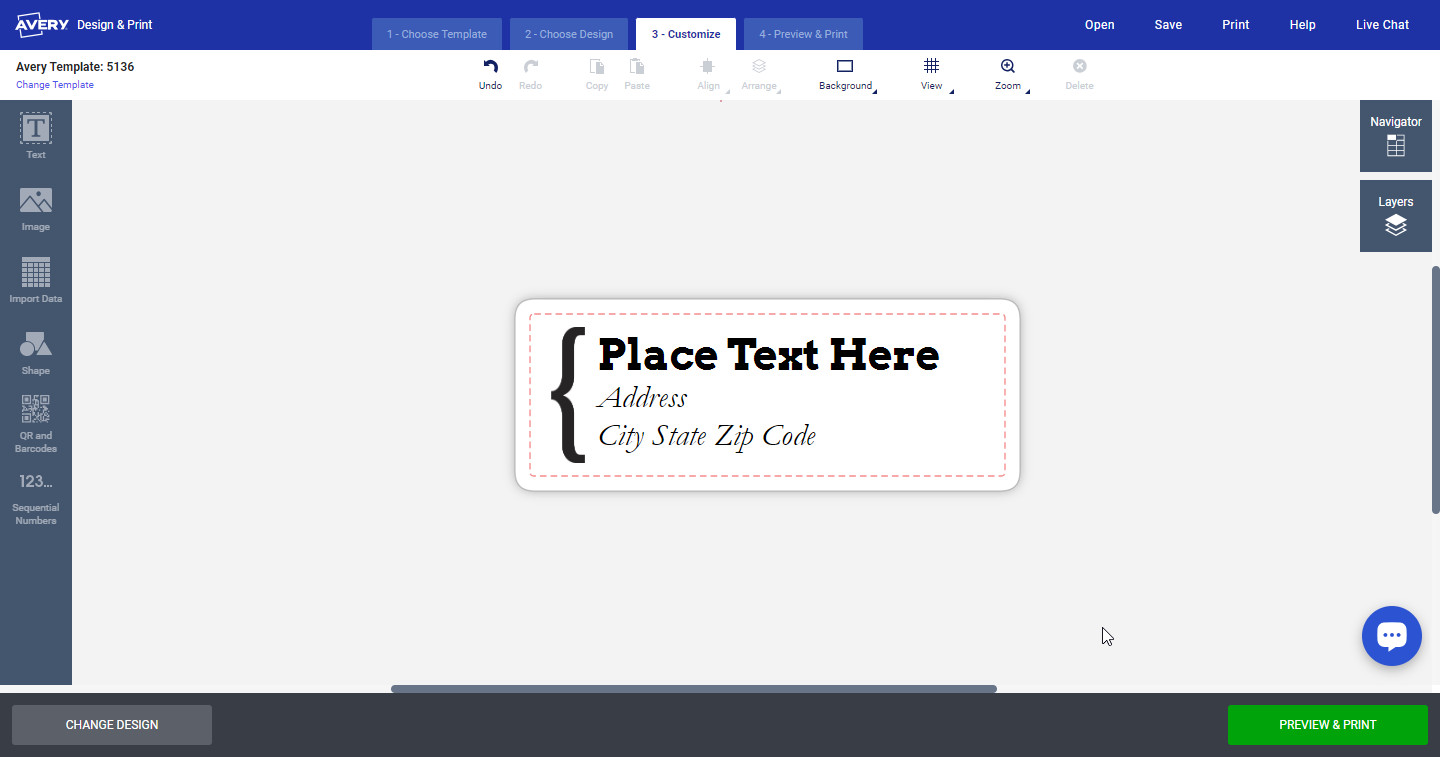 Customize Screen in Avery Design & Print Online
Adding and Formatting Text to Your Avery Design
The customization screen displays a single label and a Navigator preview of the entire sheet on the right. Adding text is simple:
- Add a Text Box: On the left side of the screen, click the T icon for text, and then click Add Text Box. A text box will appear on your label.
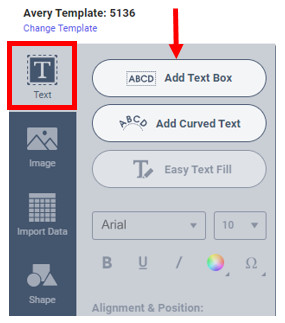 Add Text Box Button in Avery Design & Print Online
- Format Your Text: To change the font, size, style, or alignment of your text, click inside the text box. Highlight the placeholder text Type your Text by click-dragging across it. With the text highlighted, use the formatting options on the left side of the screen to make your desired changes. You can find more detailed instructions on text formatting in Avery’s help article: Change the Font Style, Size, and Text Colors.
- Edit All or Edit One: If you want the same information on every label on the sheet, ensure Edit All is selected in the Navigator on the right. This is the default setting for many projects.
If you need to add different information to each label, such as for name tags or personalized addresses, you’ll want to use the Edit One feature. For instructions on how to do this, see Avery’s guide on Edit One / Edit All. For more advanced projects like mail merges, which allow you to import data from spreadsheets, follow these steps: Import Data Mail Merge.
Printing Your Avery Project
Once you’ve finished designing your labels or project, it’s time to print:
- Preview & Print: Click on Step #4 Preview & Print at the top of the screen. This will show you a full-page preview of your project.
- Get PDF to Print: On the right side, click the blue Get PDF To Print button. This generates a PDF file of your project, optimized for printing on Avery products. Alternatively, you can choose the green Let Us Print For You button to use Avery WePrint services.
- Save Your Project: Before printing, remember to save your project to your online Avery account or your computer. This ensures you can easily access and reprint your design in the future.
- Printing Tips: A Printing Tips page will appear with important instructions. Follow these guidelines carefully to ensure your project prints correctly on your Avery product.
When using Google Chrome as your browser, click Open PDF after generating the PDF. This will open a preview.pdf file in a new window. Click the printer icon in the top right corner of the PDF viewer to print. For instructions specific to other browsers, search Avery’s help articles for detailed guidance.
Explore Avery’s comprehensive Help page here to learn more about features like Sequential Numbering, Adding Images, and more.
For a visual overview of the Design & Print Online tool, watch this video:
[Insert Video Here – if embed code is available, otherwise link to Avery Design & Print Online video]
By following these steps, you can effectively design and print a wide range of projects using Avery Design & Print Online, making it easier than ever to create professional-looking labels and more from your home or office.