Navigating student life at Harvard is challenging enough without printer woes adding to the stress. For many, including myself in the not-so-distant past, Crimson Print was less a helpful tool and more a source of frustration. Endless trips to Lamont Library’s basement, desperate pleas to unseen printing gods, and awkward encounters with tech-savvy strangers became routine in the quest to simply print a couple of pages. The struggle to print, especially when facing deadlines or needing study materials, was a significant, albeit avoidable, hurdle.
My turning point arrived when I finally demystified Crimson Print. Now, armed with the knowledge to conquer this campus printing system, I’m committed to sharing the solution. Forget the gatekeeping; this guide is designed to empower you to set up Crimson Print effortlessly. While my experience is primarily on macOS, Windows users should find the principles and steps broadly applicable.
While Harvard’s official guides exist, they can often be convoluted and challenging to troubleshoot. Consider this article your streamlined, picture-supported companion to successful Crimson Print setup. Let’s transform printing from a pain point into a seamless part of your Harvard experience.
Setting up your printer preferences is the first crucial step to utilize Crimson Print effectively.
Let’s dive into the step-by-step process to get you printing smoothly across campus.
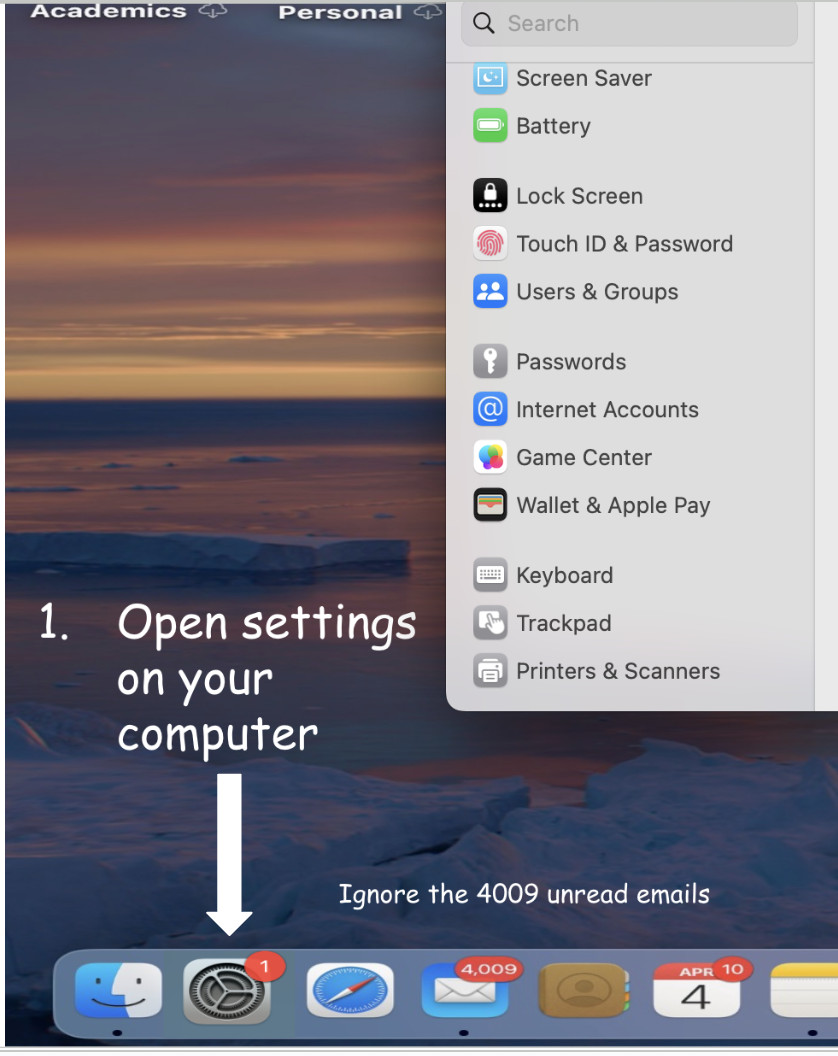
- Accessing Printer Settings: Begin by opening your System Preferences. This is your central hub for customizing your Mac’s settings, and printer setup is managed here. Click on the Apple icon in the top left corner of your screen and select “System Preferences” from the dropdown menu.
Navigating to ‘System Preferences’ from the Apple menu is the initial step in configuring Crimson Print on your Mac.
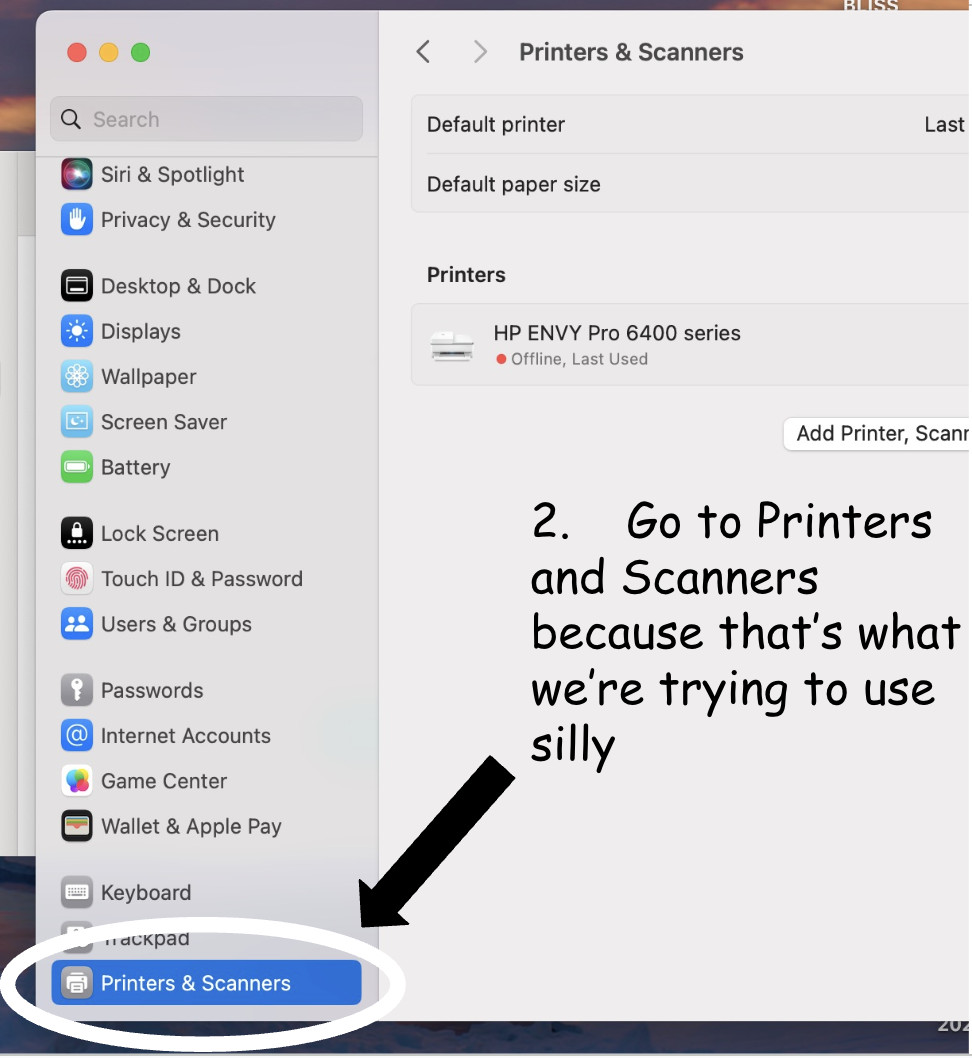
- Navigating to Printers & Scanners: Within System Preferences, locate and click on “Printers & Scanners.” This section is where you manage all connected printers and scanners for your computer, including adding new ones like Crimson Print.
The ‘Printers & Scanners’ pane in System Preferences is where you manage your printer configurations, including adding Crimson Print.
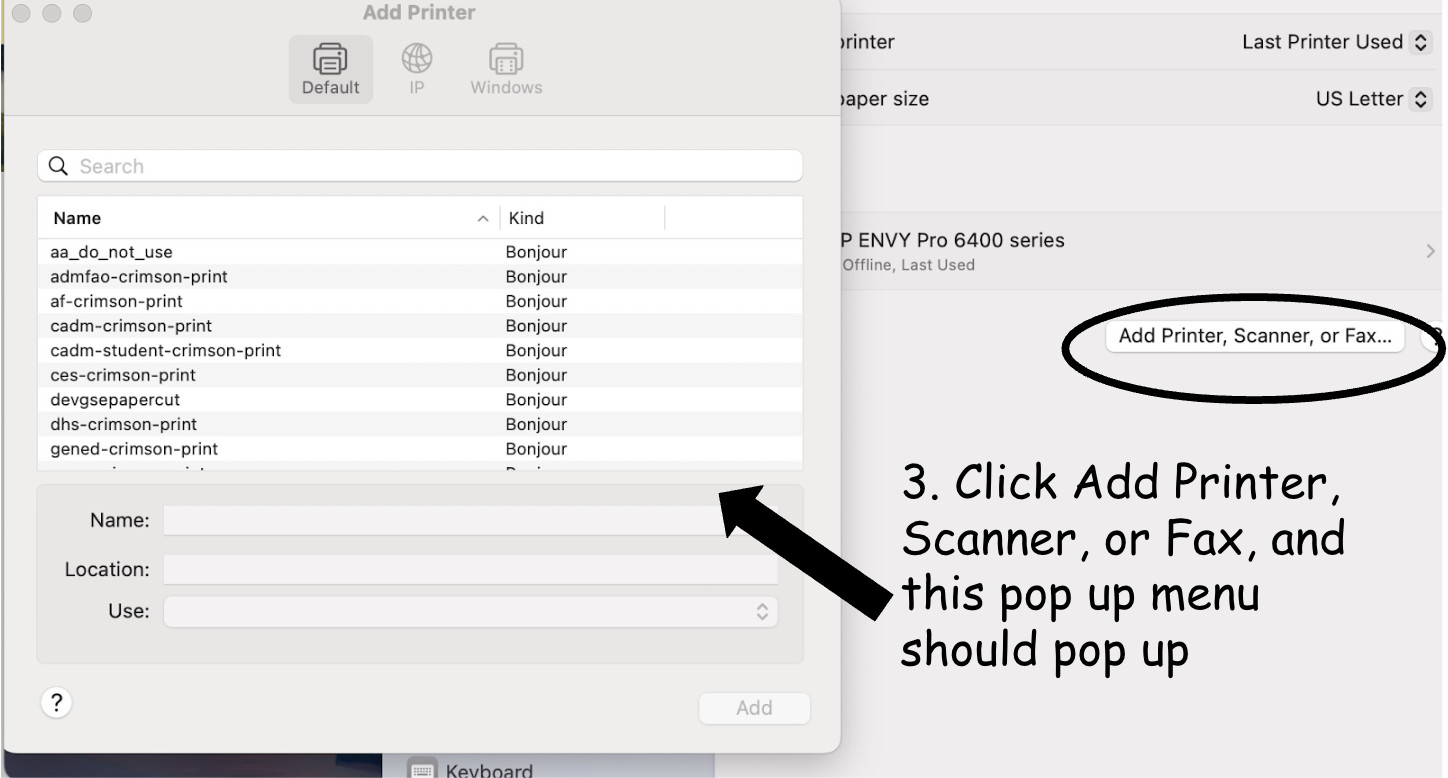
- Adding a New Printer: In the Printers & Scanners window, you will see a list of currently configured printers on the left side, if any. To add Crimson Print, click on the “+” button located at the bottom left of this pane. This action will open the “Add Printer” dialog box.
Clicking the ‘+’ button in the ‘Printers & Scanners’ pane initiates the process of adding a new printer, which is essential for setting up Crimson Print.
- Configuring IP Printer Settings: In the “Add Printer” dialog box, select the “IP” tab. This is crucial as Crimson Print is set up as an IP printer. Ensure that the “Protocol” is set to “Internet Printing Protocol – IPP”. In the “Address” field, type:
crimsonprint.huit.harvard.edu. This address directs your computer to the Crimson Print server. The “Queue” field should be left blank. For “Name”, you can enter “Crimson Print” or any name you prefer to easily identify the printer. The “Location” field is optional.
Entering the correct IP address and protocol settings is critical for your computer to communicate with the Crimson Print system.
- Selecting Printer Driver: The “Use” field is where you select the printer driver. It may auto-populate with “Generic PostScript Printer” or “Generic PCL Printer”. It is recommended to manually select a more suitable driver for optimal printing. Click on the dropdown menu for “Use” and select “Select Software…”.
Choosing the correct printer driver ensures compatibility and optimal printing performance with the Crimson Print system.
- Choosing the Driver Software: In the “Printer Software” list, search for and select “HP LaserJet Pro M404-M405 PCL-6” or a similar HP LaserJet PCL-6 driver. If you cannot find this exact model, a general “HP LaserJet PCL-6” driver should also work. Click “OK”.
Selecting ‘HP LaserJet Pro M404-M405 PCL-6’ or a comparable HP LaserJet PCL-6 driver from the software list is crucial for driver compatibility.
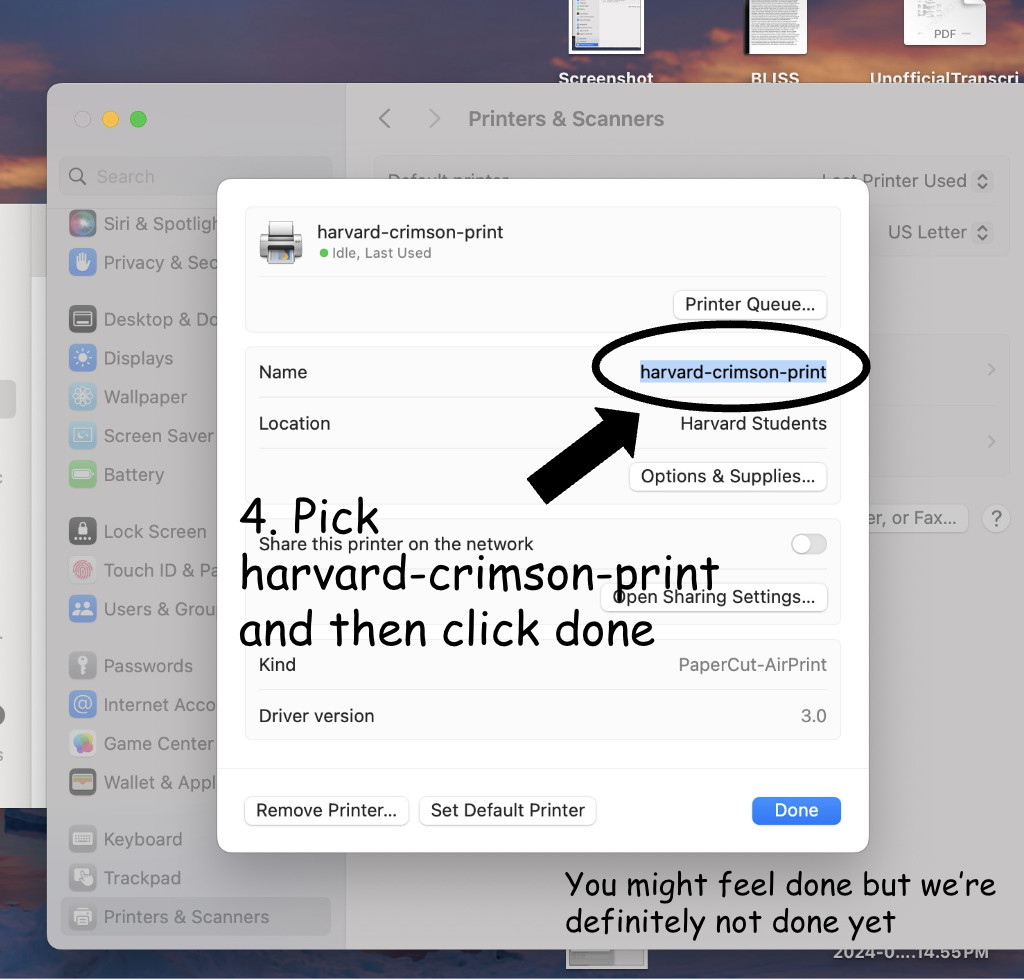
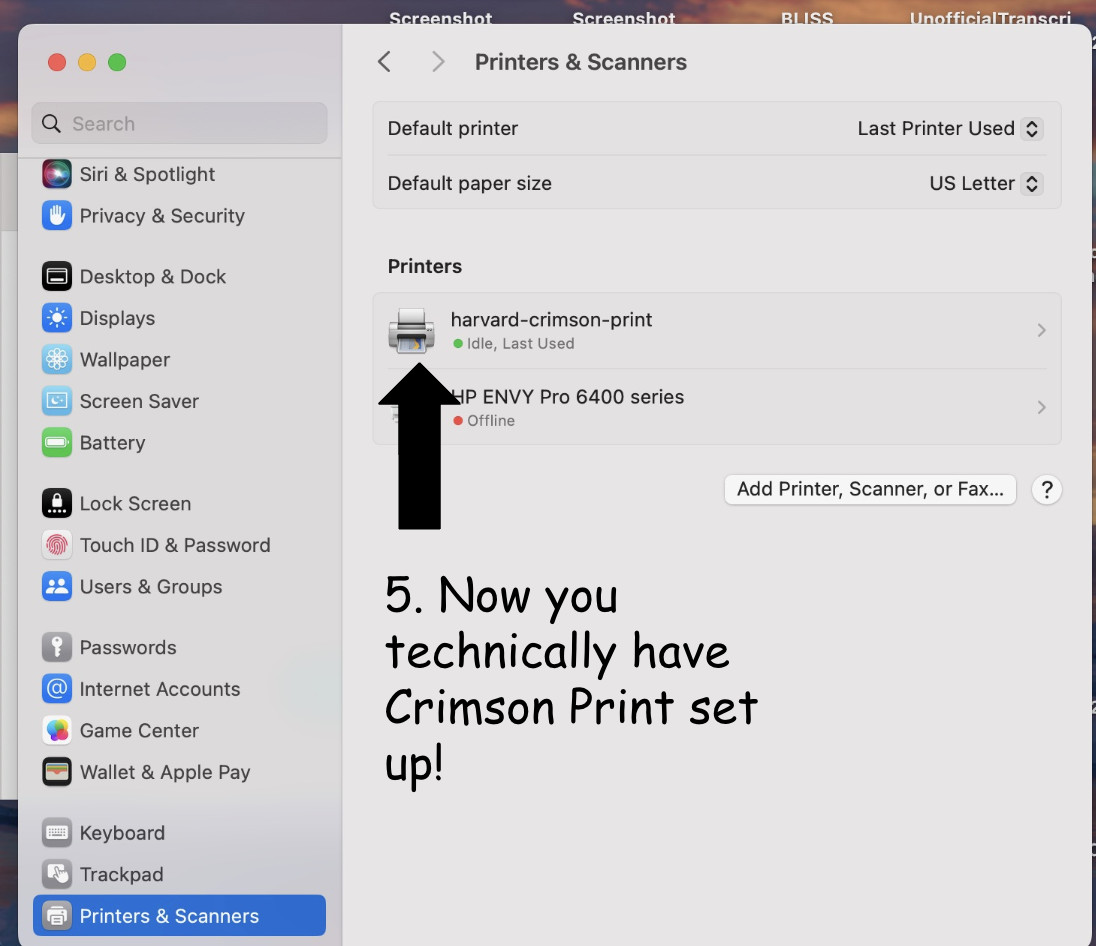
- Completing Printer Addition: Click the “Add” button in the “Add Printer” dialog box. Your computer will attempt to contact the Crimson Print server and set up the printer. If successful, “Crimson Print” will now appear in your list of printers in the “Printers & Scanners” window.
Clicking ‘Add’ finalizes the printer setup process and adds Crimson Print to your list of available printers on your Mac.
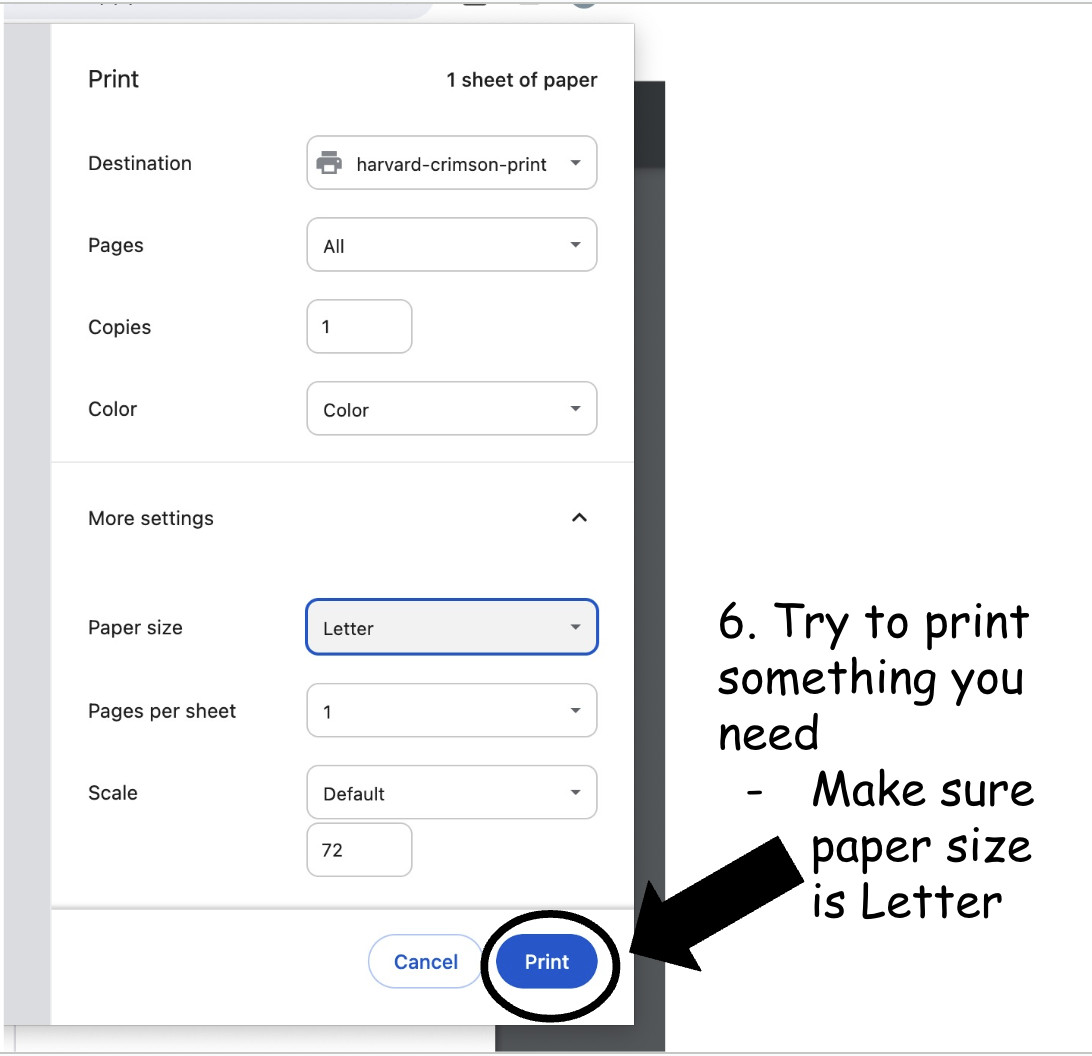
- Printing a Test Page (Optional but Recommended): To ensure Crimson Print is set up correctly, it is advisable to print a test page. In the “Printers & Scanners” window, select “Crimson Print” from the printer list and click the “Print Test Page” button. Follow the on-screen prompts to send a test print job.
Printing a test page is a valuable step to confirm that Crimson Print has been successfully installed and is functioning correctly.
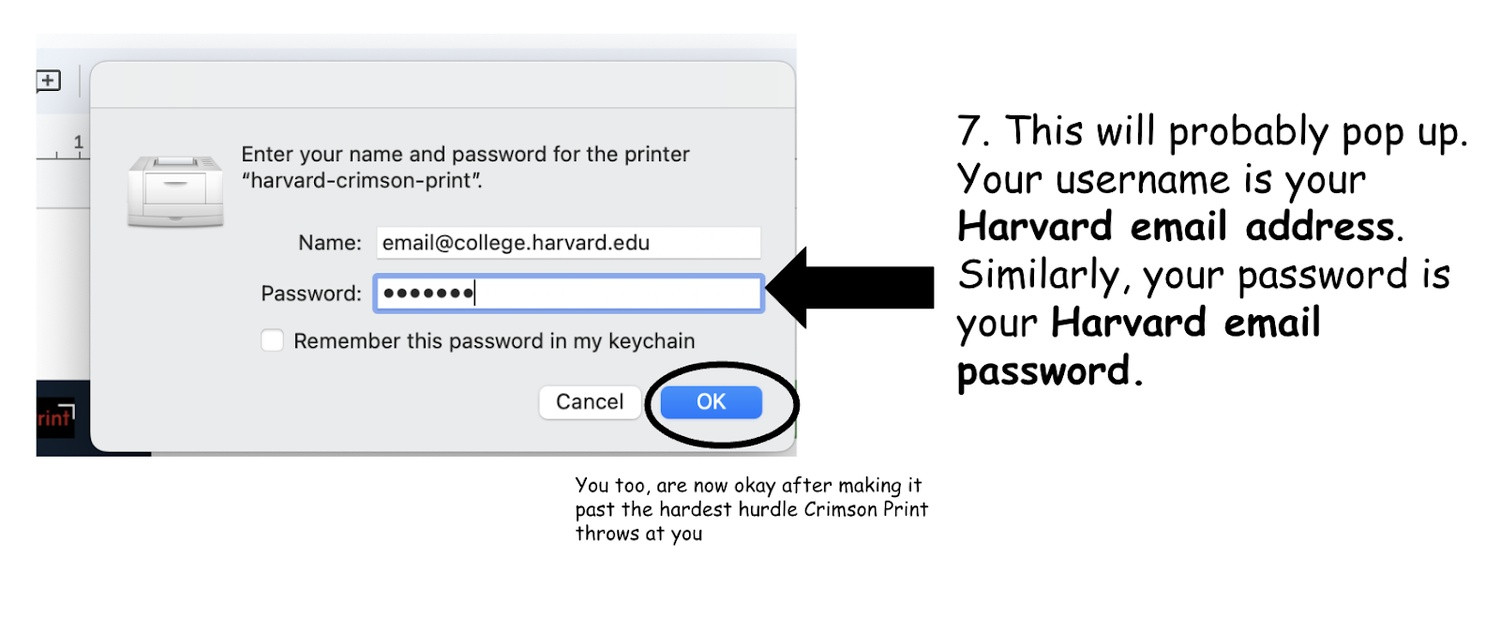
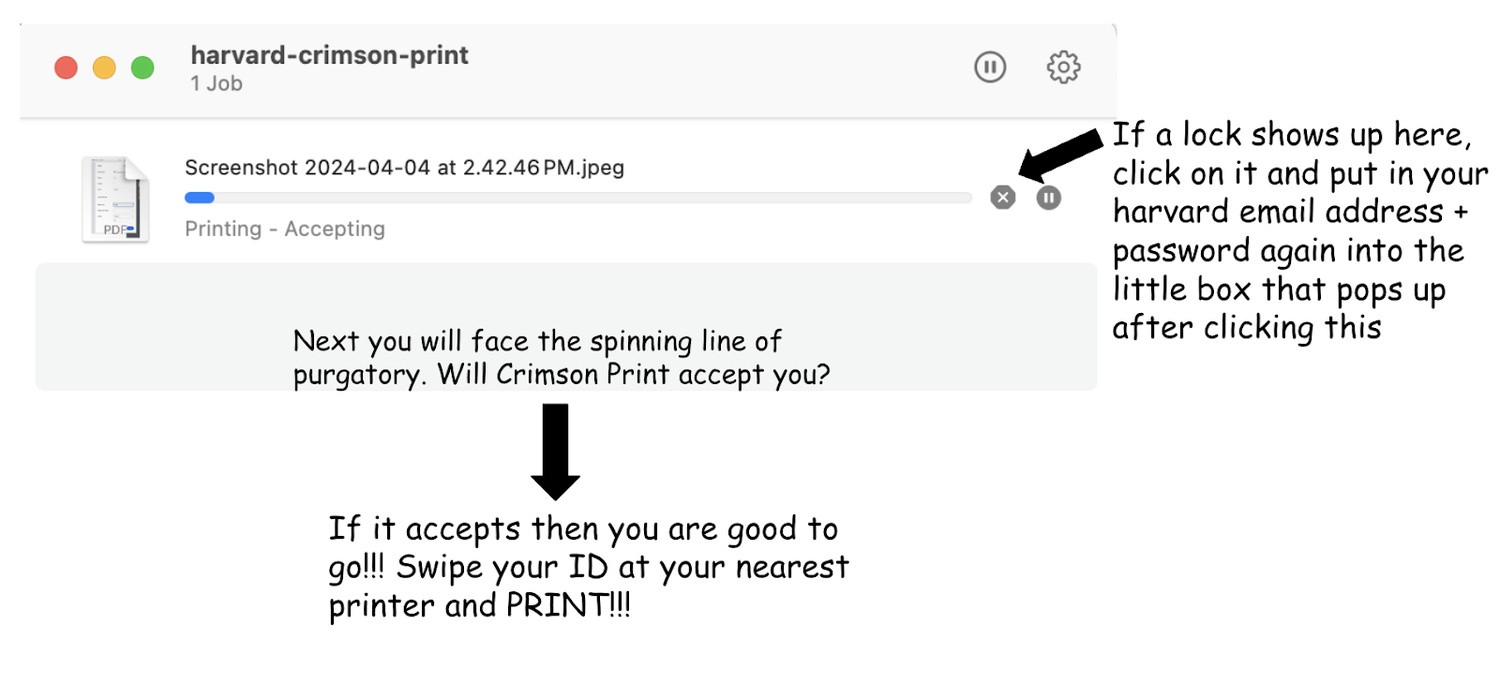
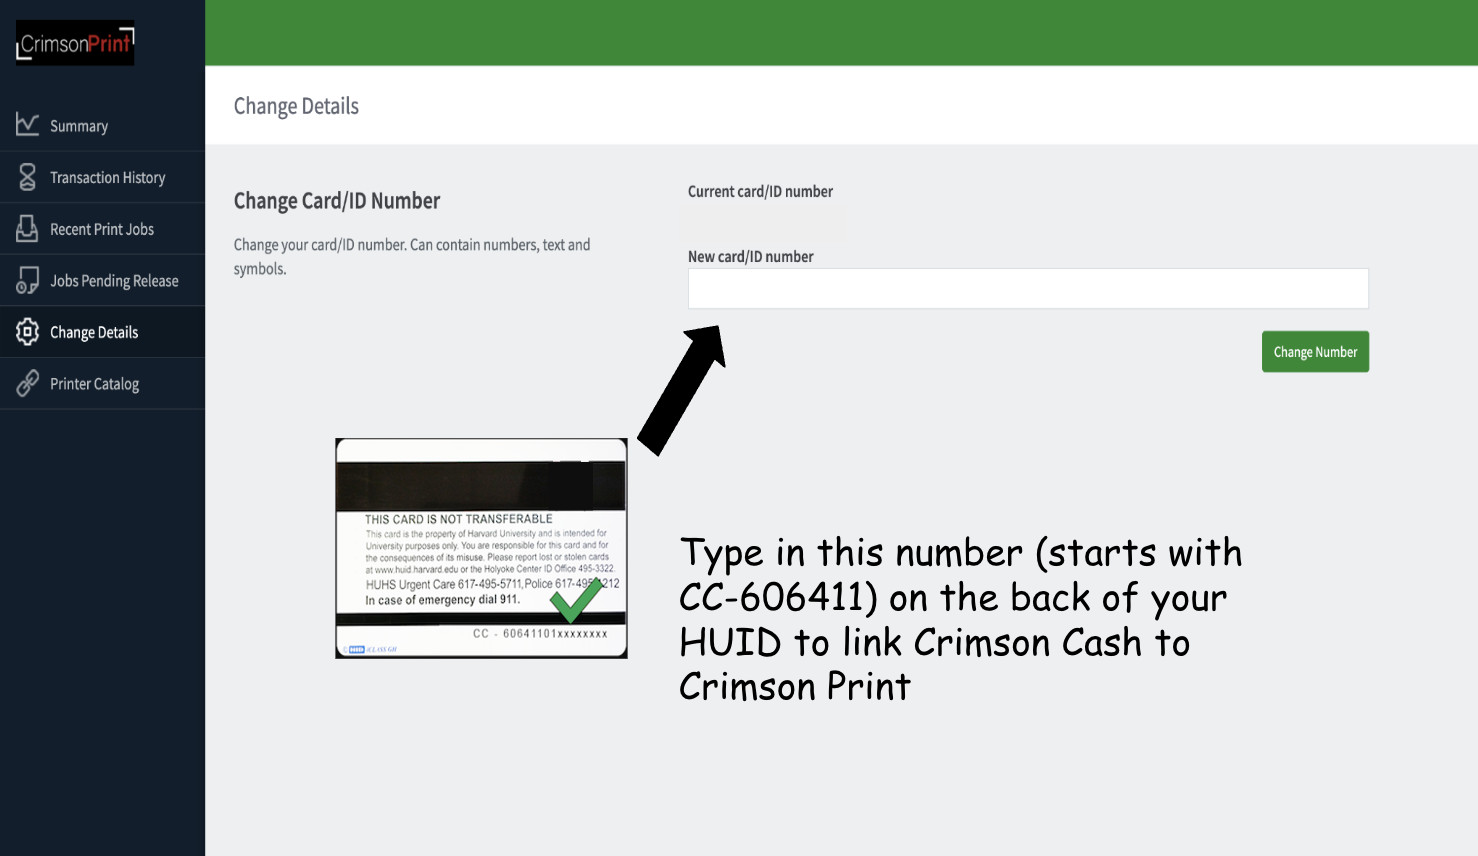
- Harvard Key Authentication: When you send your first print job to Crimson Print from your application (Word, PDF viewer, etc.), you will be prompted to authenticate with your Harvard Key. This is a one-time authentication step. Enter your Harvard Key username and password when prompted. Remember to use your HarvardKey to release your print jobs at any Crimson Print enabled printer across campus. You can manage your print jobs and check your print quota online at the Crimson Print website.
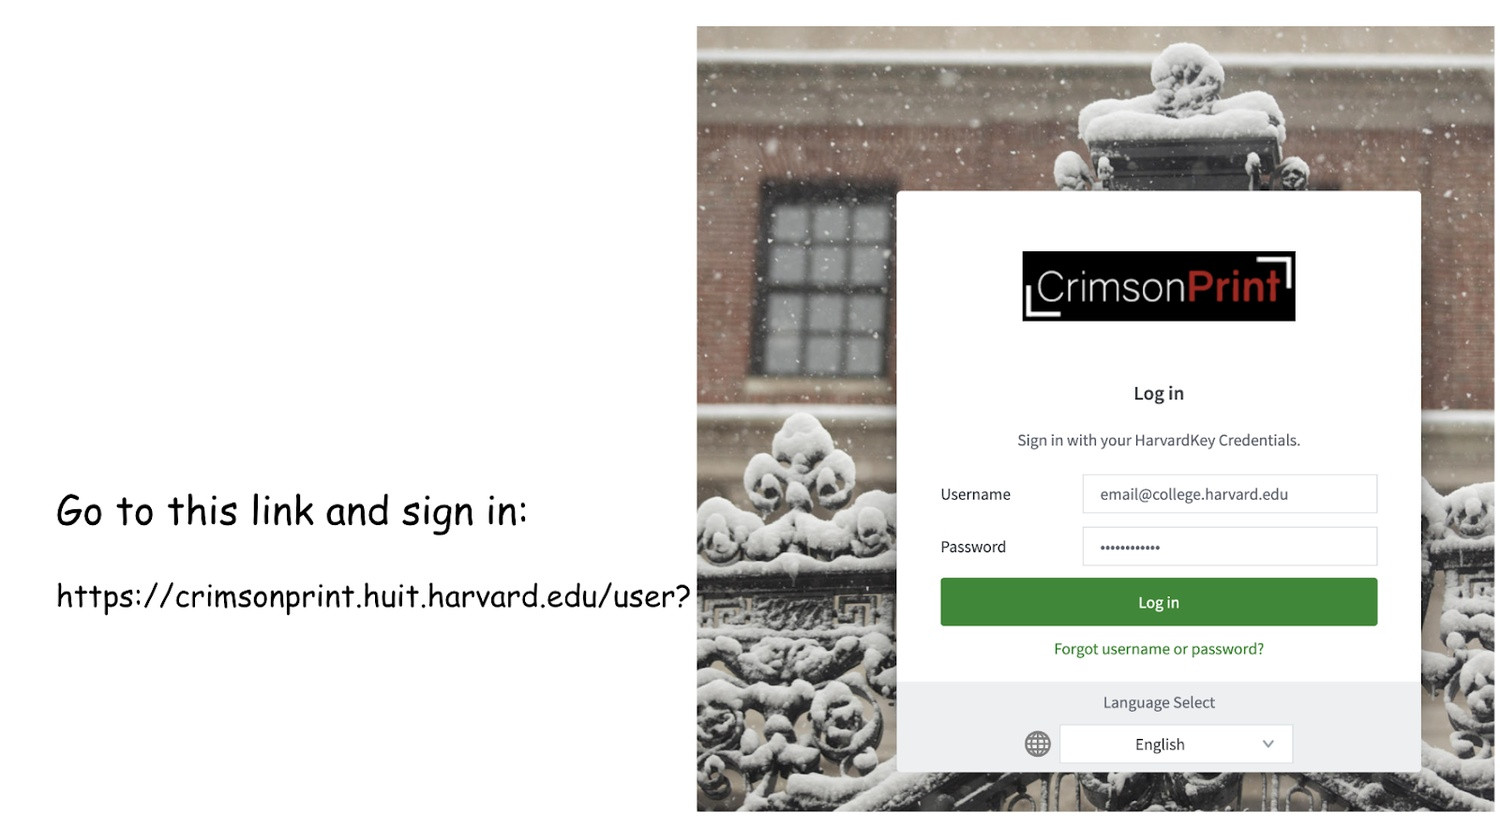
Harvard Key authentication is essential for securely releasing your print jobs and managing your Crimson Print account.
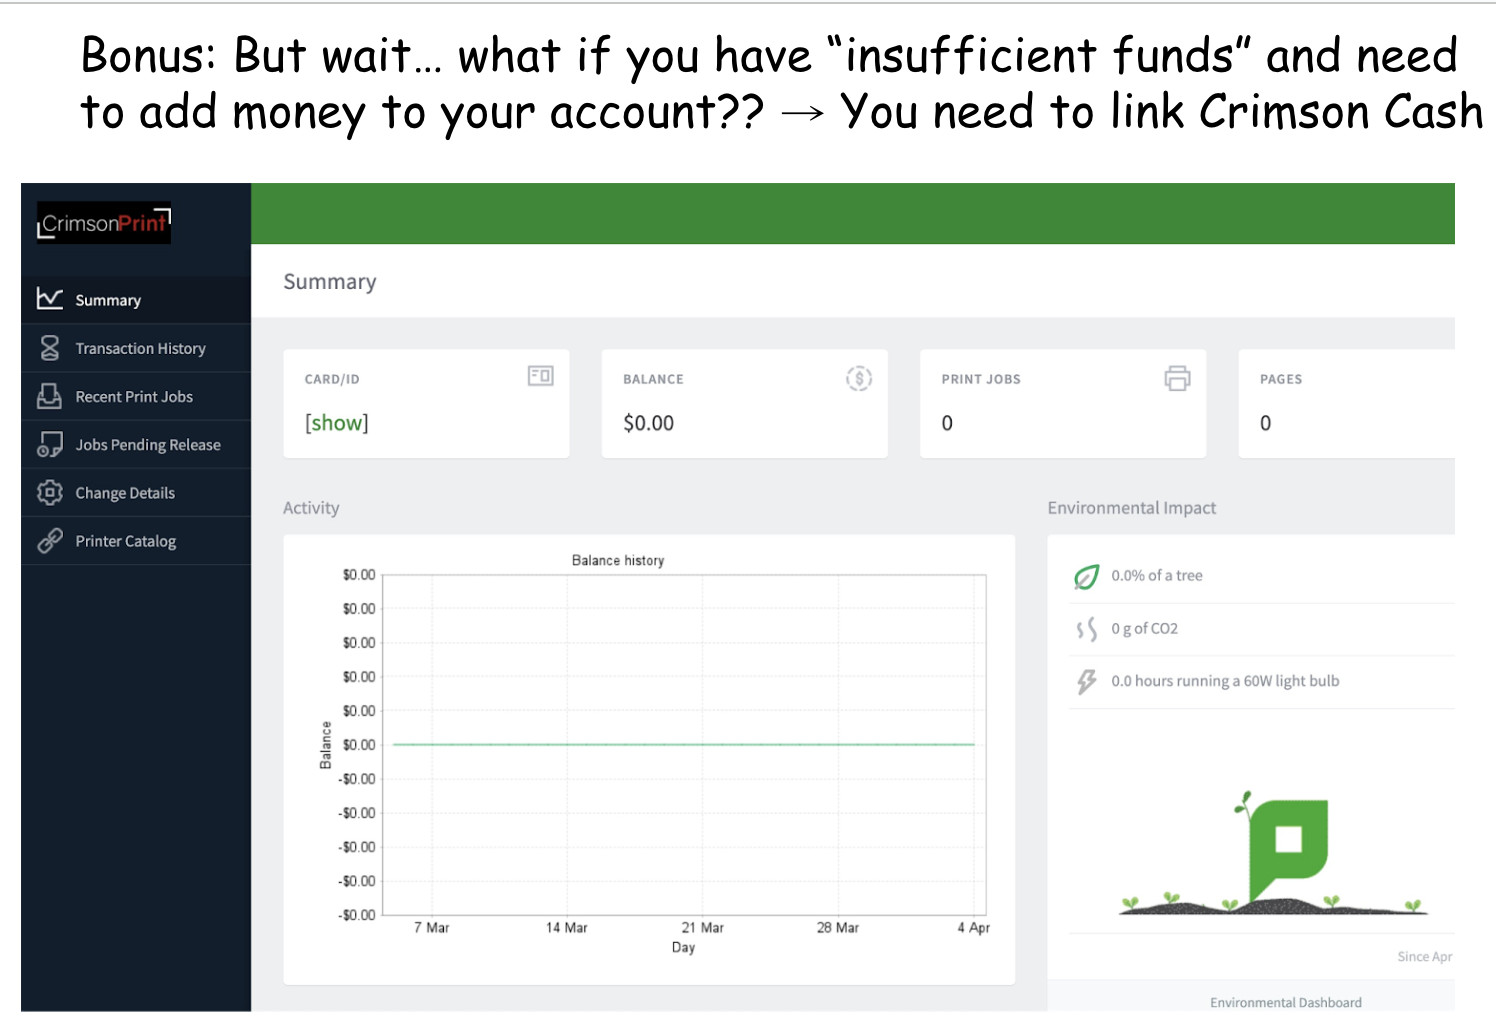
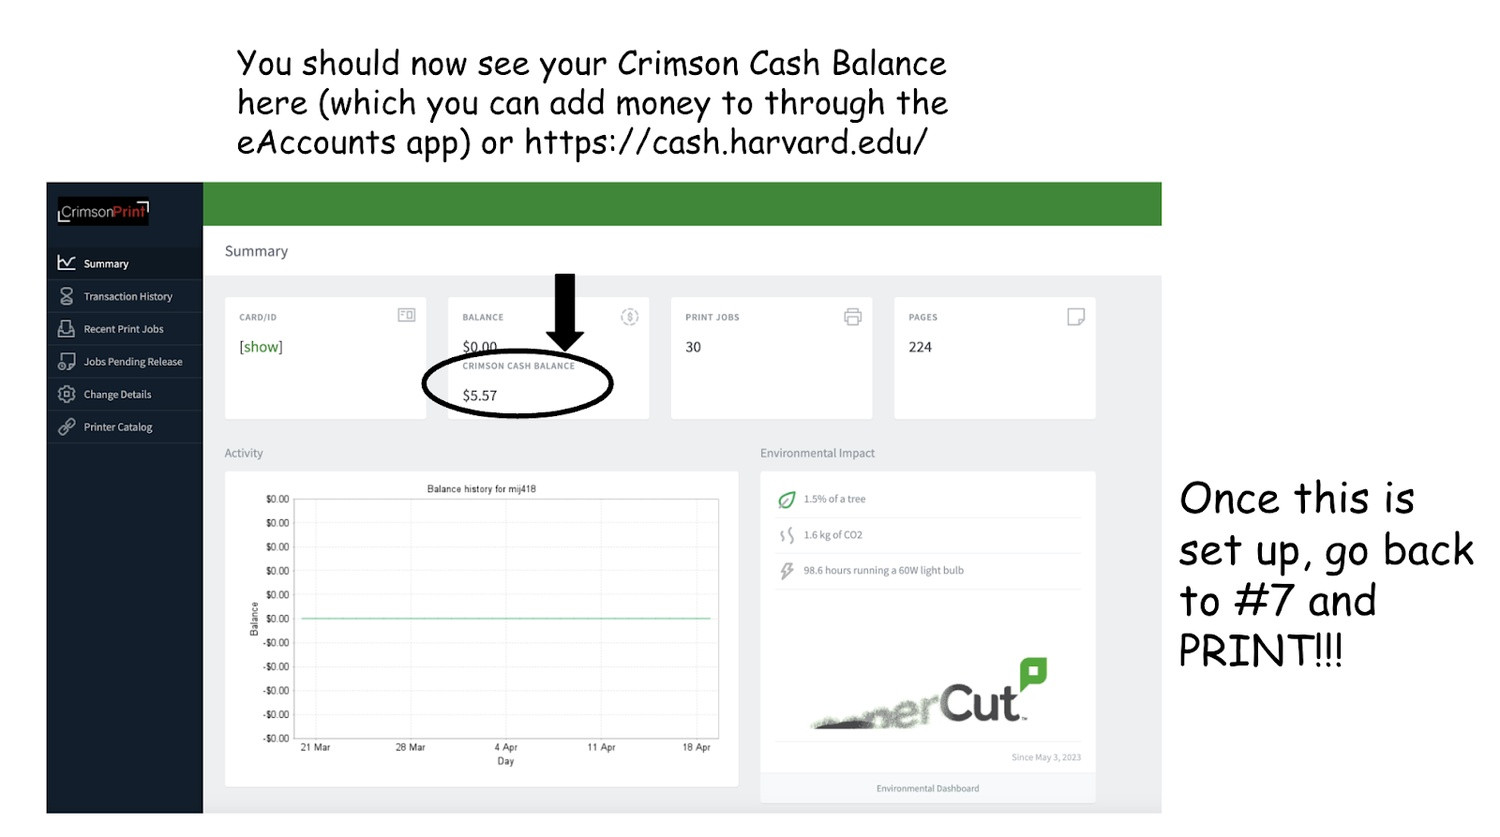
- Managing Funds for Printing: Crimson Print uses a prepaid system. Ensure you have funds in your Harvard Cash account to cover printing costs. You can add funds to your account through the Harvard Cash website. Regularly check your account balance to avoid printing interruptions.
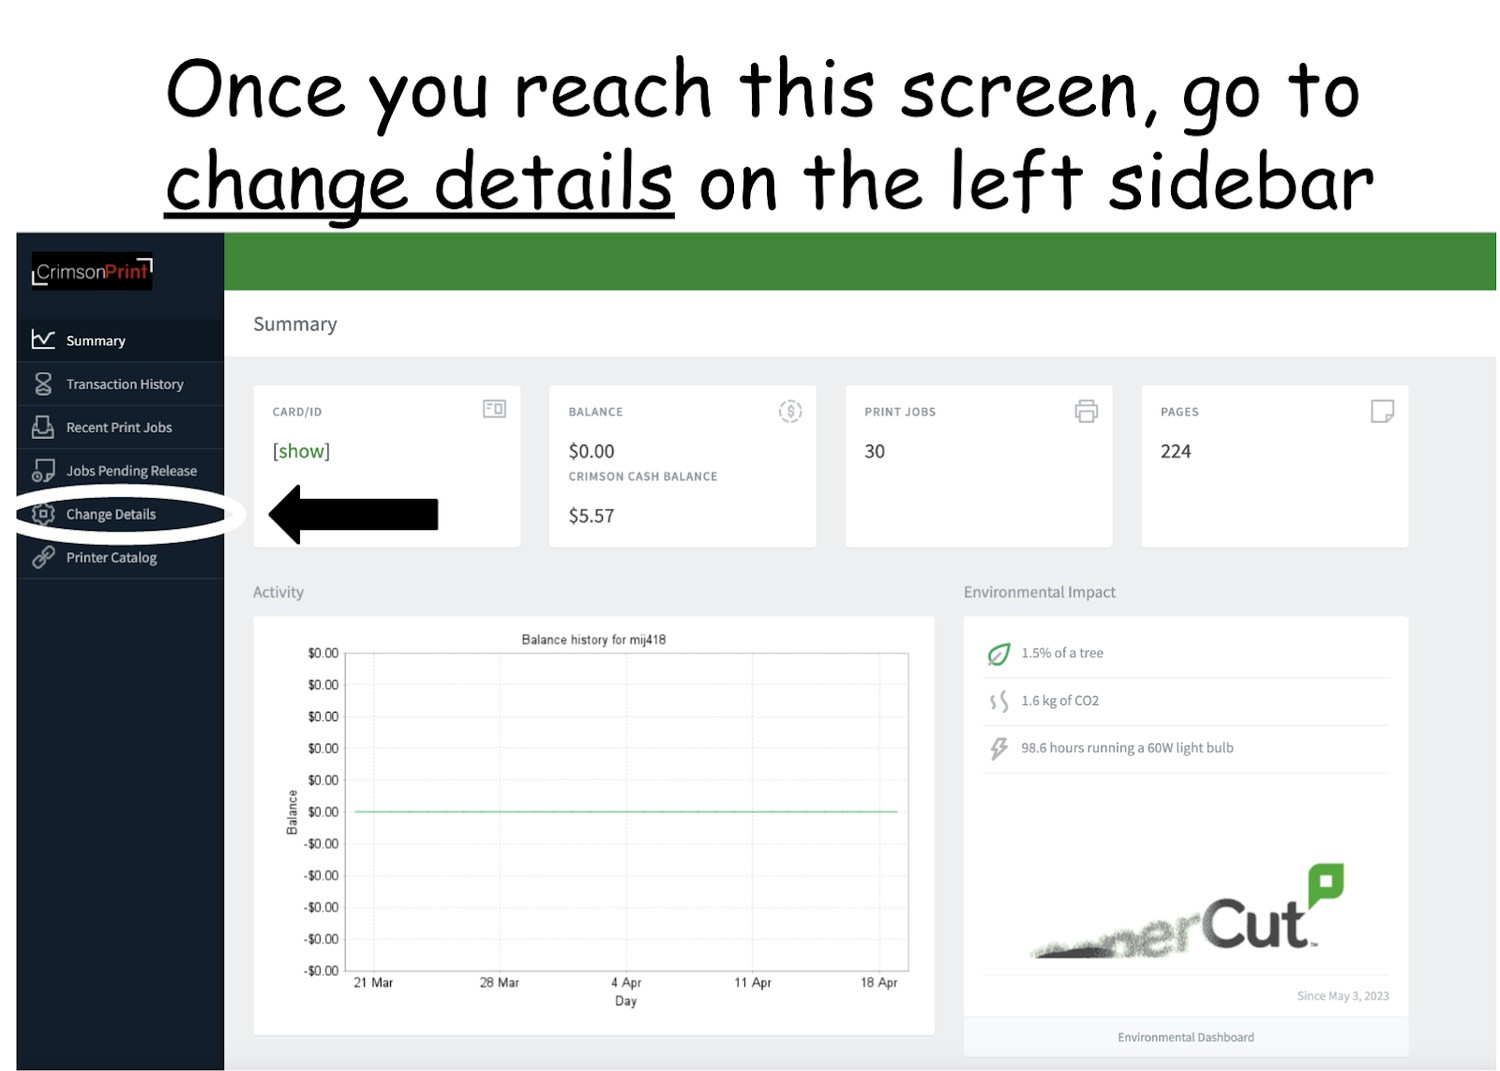
Maintaining sufficient funds in your Harvard Cash account is necessary to ensure uninterrupted access to Crimson Print services.
- Locating Crimson Printers: Crimson Print printers are conveniently located throughout the Harvard campus, including libraries, computer labs, and common areas. Refer to the Harvard University IT website or campus maps for specific printer locations near you.
Knowing the locations of Crimson Print printers across campus ensures easy access to printing facilities when needed.
- Releasing Your Print Job: Once you’ve sent your print job and authenticated with your Harvard Key, go to any Crimson Print enabled printer. Swipe your Harvard ID card at the printer’s card reader or manually log in using your Harvard Key on the printer’s touchscreen interface. Select your print job from the queue and release it to print. Remember to collect your printed documents!
Releasing your print job at a Crimson Print printer, either via Harvard ID or Harvard Key login, is the final step to obtain your printed documents.
Printing at Harvard, especially with Crimson Print, doesn’t have to be a daunting task. By following these straightforward steps, you can easily set up Crimson Print on your Mac and print documents across campus without the previous hassles. May your printing experience now be seamless and efficient, and may Crimson Print truly be in your favor throughout your Harvard journey.