
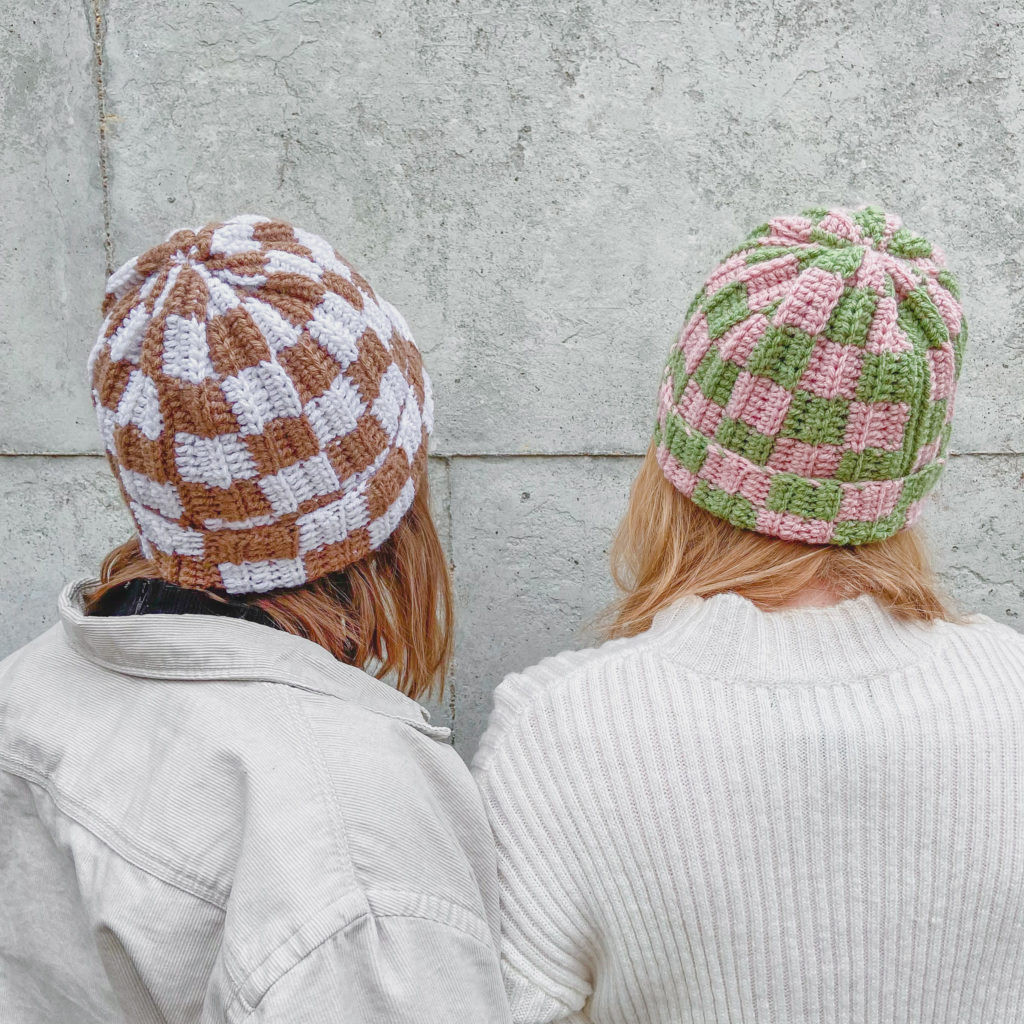
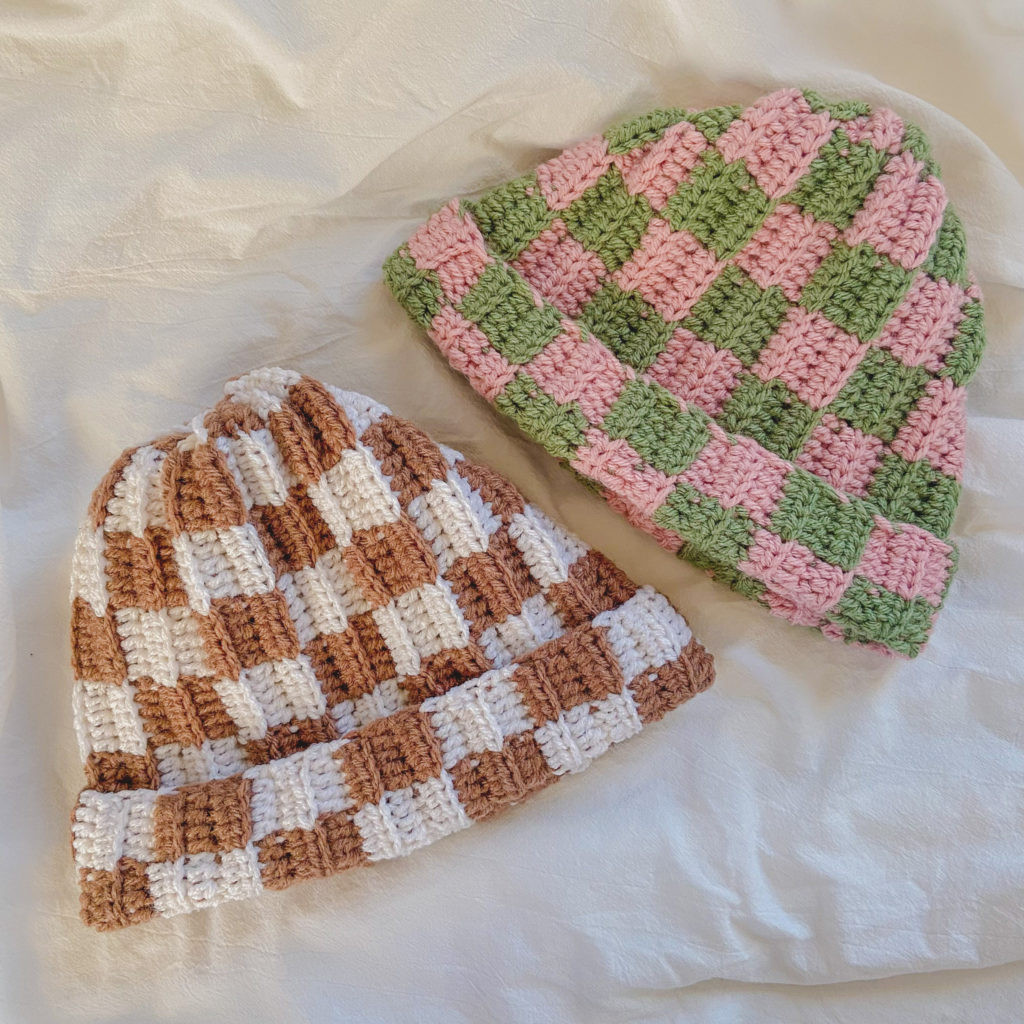
The Checkered Print trend is everywhere right now, and what better way to embrace it than by creating your own stylish accessory? This easy-to-follow crochet pattern will guide you through making a “Check Me Out” Beanie, a comfortable and fashionable hat perfect for adding a subtle yet trendy touch to your wardrobe. Whether you’re new to crochet or looking for a quick and satisfying project, this checkered beanie pattern is ideal for crafting a personalized piece or creating thoughtful handmade gifts.
 Close up of a brown and white checkered beanie showing stitch detail.
This beanie works up quickly using mostly half double crochet stitches, making it a great project for those looking for a fast and rewarding craft. The checkered design is achieved through simple color changes, and the pattern provides clear instructions on how to manage two colors of yarn seamlessly. Get ready to jump on the checker trend and create a beanie that’s uniquely yours!
These checkered beanies are not only fashionable but also incredibly practical, especially as the colder months approach. They make wonderful gifts for birthdays, holidays, or just because! Imagine the joy of gifting a cozy, handmade checkered beanie to your loved ones this winter season.
Ready to get started? Let’s crochet!
Materials You’ll Need
To create your checkered beanie, you’ll need the following materials:
- Medium Weight (4) Yarn: You’ll need approximately 92 grams of yarn in total. Feel free to use your favorite brand! Lion Brand, Yarn Bee, and Red Heart are all great options. The pattern is versatile and works well with different medium-weight yarns.
- 5.00mm Crochet Hook: This hook size is ideal for achieving the correct gauge and creating a beanie with a comfortable texture.
- Darning Needle: Essential for weaving in ends and sewing the beanie closed neatly.
- Scissors: For cutting your yarn.
- Stitch Markers (Optional): Especially helpful for beginners or if you tend to lose track of your starting stitch.
Stitches and Abbreviations to Know
Before you begin, familiarize yourself with these common crochet stitches and abbreviations used in this pattern:
- Ch = Chain
- St(s) = Stitch(es)
- Hdc = Half Double Crochet
- Hdc Blo = Half Double Crochet Back Loop Only
- Sc = Single Crochet
- Sc Blo = Single Crochet Back Loop Only
Measurements and Gauge
Getting the gauge right is important to ensure your beanie fits as expected. Here are the measurements and gauge for this pattern:
-
Gauge: 4″x 4″ square = 20 stitches wide x 8 rows tall in half double crochet in the back loop
-
Finished Size (Laid Flat Before Seaming): Approximately 8.5 inches tall x 17.5 inches wide. Keep in mind that the ribbing stitches provide stretch, allowing the hat to fit a range of head sizes comfortably.
Important Pattern Notes
- One Size Pattern: This pattern is designed as a one-size-fits-most adult beanie. However, adjustments for different sizes are provided below.
- US Crochet Terms: The pattern uses standard US crochet terminology.
- Turning Chain: The turning chain 1 at the beginning of each row does not count as a stitch.
- Color Designations: The two colors you choose for your checkered beanie will be referred to as Color A and Color B throughout the pattern for clarity.
- Stitch Counts: The number of stitches for each row is indicated in parentheses at the end of each row instruction.
“Check Me Out” Beanie Crochet Pattern
Follow these step-by-step instructions to create your own checkered beanie:
Starting Chain:
- With Color A, Chain 46. (To adjust the size, chain more for a longer beanie and less for a smaller beanie. Make sure to increase or decrease in multiples of 5 to maintain the checker pattern.)
Row 1:
- Hdc in the 2nd chain from the hook, hdc in the next 4 chains. Before completing the 4th hdc, pick up Color B and pull through the last 3 loops on your hook to change color.
- *Hdc in the next 5 chains, and before completing the 5th hdc, pick up Color A and pull through the last 3 loops on your hook to change color.*
- Repeat from * to * switching between Color B and Color A every 5 hdc until you have 5 chains left. Before working in the last 5 chains, change the yarn color as you have been doing and sc in the last 5 stitches. Turn your work. (You should finish this row with Color A, unless you adjusted the starting chain.)
Tip: When working with two colors, carry the color not in use along the row and crochet over it until needed. This technique is explained visually in this video tutorial.
Row 2:
- Chain 1, sc in the first stitch of the row, sc blo in the next 4 stitches. Before completing the 4th sc, pick up Color B and pull through the last 2 loops on your hook.
- *Hdc blo in the next 5 stitches, and before completing the 5th hdc, pick up Color A and pull through the last 3 loops on your hook.*
- Repeat from * to * switching between colors every 5 hdc blo until you have 1 stitch left. Work a regular hdc in the last stitch. Turn your work.
Note: Using regular sc and hdc stitches (not back loop only) for the first and last stitch of each row helps create a cleaner edge for the beanie. The 5 sc stitches in each row will indicate the top of the hat, and slightly decreasing the width at the top helps prevent bunching.
Row 3:
- Chain 1, hdc in the first stitch of the row, hdc blo in the next 4 stitches. Before completing the 4th hdc, pick up Color B and pull through the last 3 loops on your hook.
- *Hdc blo in the next 5 stitches, and before completing the 5th hdc, pick up Color A and pull through the last 3 loops on your hook.*
- Repeat from * to * switching between colors every 5 hdc blo until you have 5 stitches left. Sc blo in the next 4 stitches, work a regular sc in the last stitch. Turn your work.
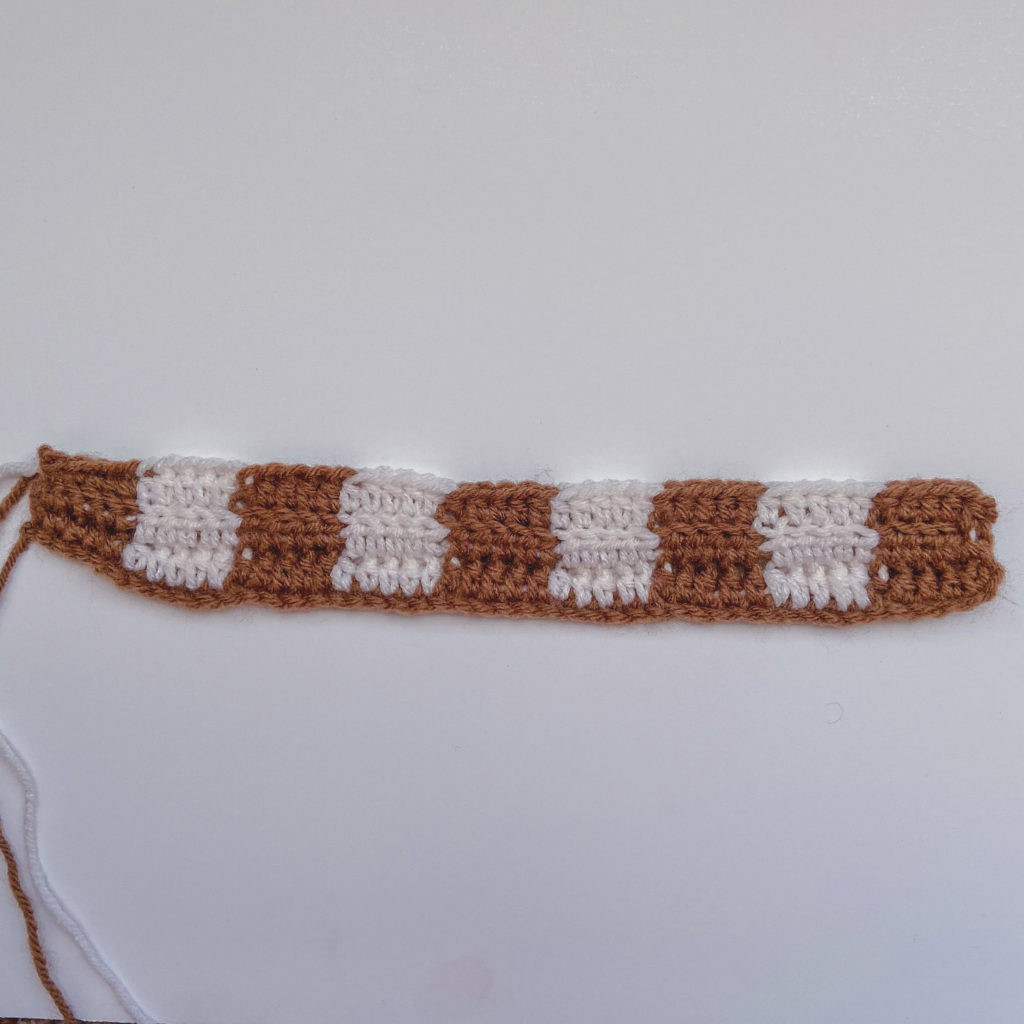 Close up showing the alternating color pattern in rows of the checkered beanie.
Color Pattern Shift: To create the checkered effect, every 3 rows we will shift the color stacking. For example, if you started with “Color A, Color B, Color A, Color B, etc.”, you will shift to “Color B, Color A, Color B, Color A, etc.”
Row 4:
- Chain 1 with Color B, sc in the first stitch of the row, sc blo in the next 4 stitches. Before completing the 4th sc, pick up Color A and pull through the last 2 loops on your hook.
- *Hdc blo in the next 5 stitches, and before completing the 5th hdc, pick up Color B and pull through the last 3 loops on your hook.*
- Repeat from * to * switching between colors every 5 hdc blo until you have 1 stitch left. Work a regular hdc in the last stitch of the row. Turn your work.
Row 5:
- Chain 1, work a regular hdc in the first stitch of the row, hdc blo in the next 4 stitches.
- *Hdc blo in the next 5 stitches, and before completing the 5th hdc, pick up Color A and pull through the last 3 loops on your hook.*
- Repeat from * to * switching between colors every 5 hdc blo until you have 5 stitches left. Sc blo in the next 4 stitches, work a regular sc in the last stitch of the row. Turn your work.
Row 6:
- Chain 1, sc in the first stitch of the row, sc blo in the next 4 stitches. Before completing the 4th sc, pick up Color A and pull through the last 2 loops on your hook.
- *Hdc blo in the next 5 stitches, and before completing the 5th hdc, pick up Color B and pull through the last 3 loops on your hook.*
- Repeat from * to * switching between colors every 5 hdc blo until you have 1 stitch left. Work a regular hdc in the last stitch of the row. Turn your work.
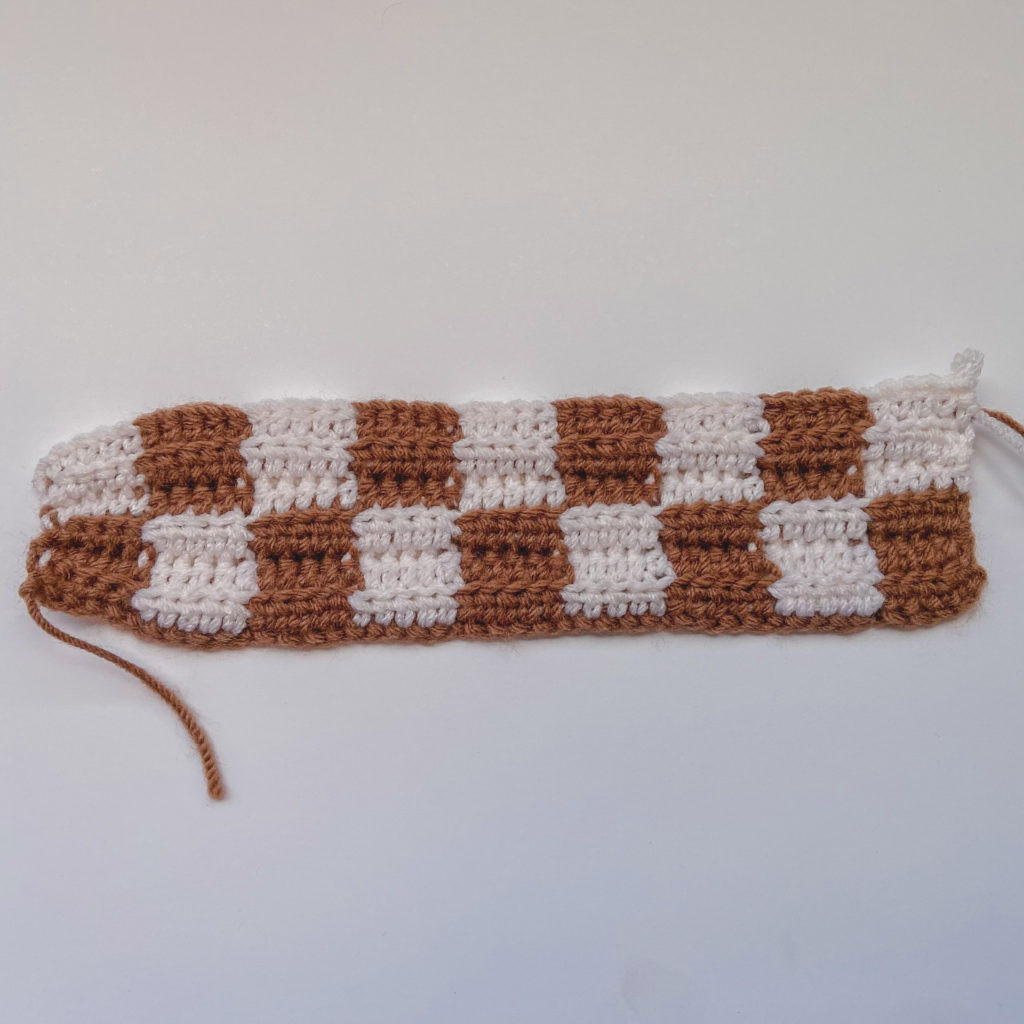 Image showing the progression of the checkered pattern with alternating colors.
Repeating Rows:
- Repeat Rows 1-6 until you have completed a total of 42 rows.
Note: Adjust the number of rows to fit your head size. 42 rows is a general size, but you may need more or fewer rows.
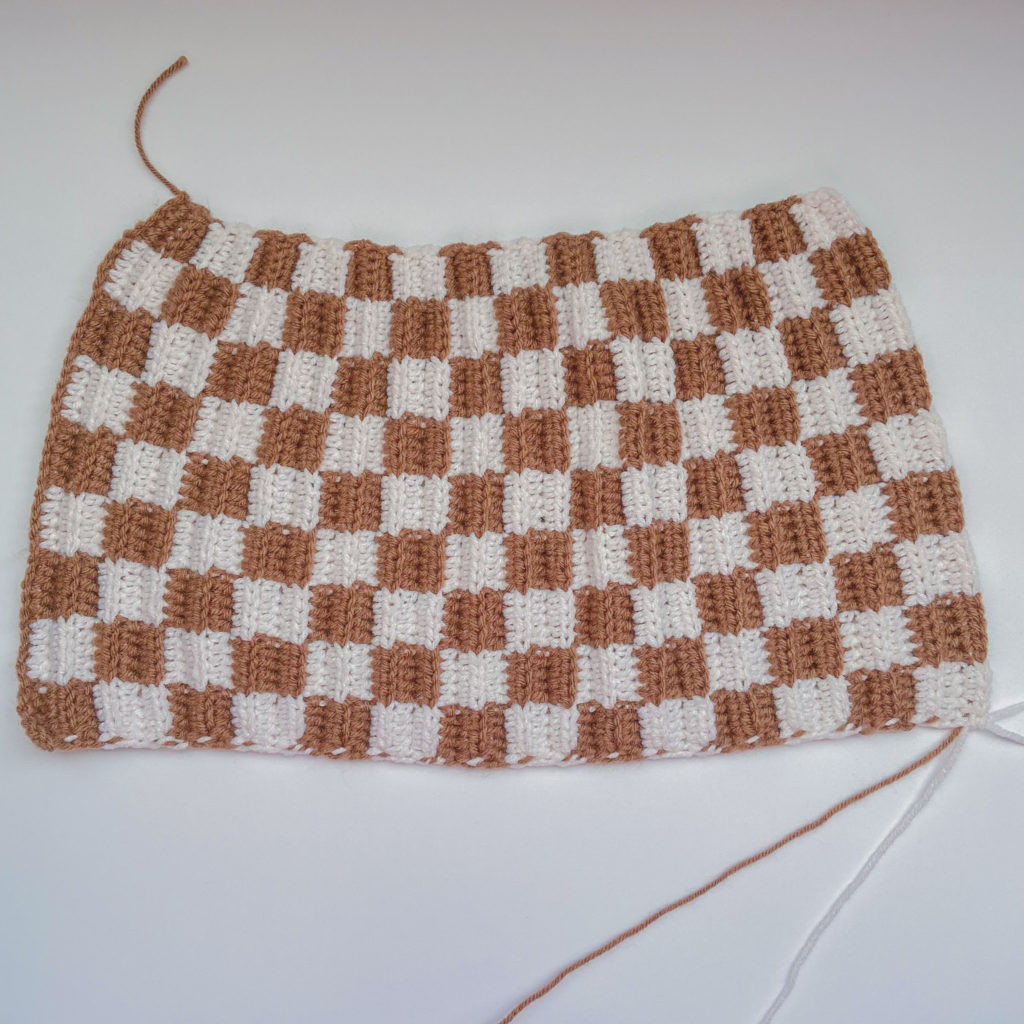 Image of the crocheted checkered beanie panel before sewing, showing the full length and pattern.
Finishing:
- Fasten off, leaving a long tail of yarn from one of your colors for sewing.
- Use the darning needle and the long yarn tail to sew the two short ends of the beanie together, creating a tube shape.
- To close the top of the beanie, thread the yarn tail through the top edge, weaving in and out of every other row around the entire circumference. Pull the yarn tail tight to cinch the top closed and secure it with a knot.
- Weave in all loose ends to give your checkered beanie a clean and professional finish.
For visual guidance on the finishing steps, you can refer to this helpful Video Tutorial.
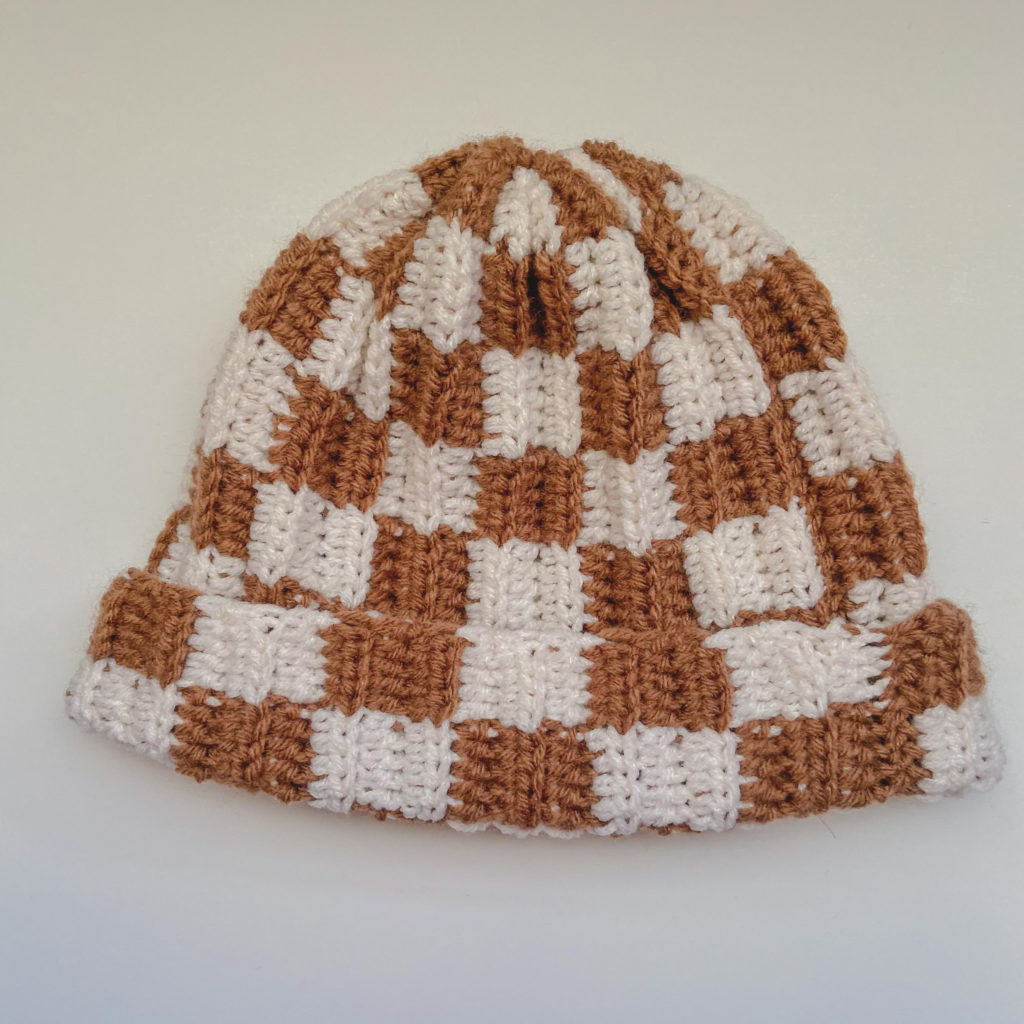 Completed checkered beanie being held up, showcasing the finished product.
Congratulations, your checkered beanie is complete!
 Model wearing the finished checkered beanie, demonstrating style and fit.
Share your creations! If you make this checkered beanie, please tag @hayhaycrochet on Instagram or TikTok – we’d love to see your unique color combinations and finished beanies!
Happy Crocheting!