
Discover the charming art of botanical prints! Learn how to create beautiful, budget-friendly artwork by pounding flowers onto paper. This simple technique, perfect for all ages, transforms foraged blooms and herbs into unique botanical art for cards, gift wrap, and more. Embrace nature’s beauty and get crafty with this easy guide to making your own botanical prints.
Botanical Prints offer a delightful way to capture the ephemeral beauty of nature. Beyond the sophisticated, framed botanical illustrations found in galleries and museums, there’s a wonderfully accessible form of botanical printing that you can explore right in your own backyard. Forget complicated techniques – this is all about a simple, hands-on process that connects you directly with the natural world.
What Exactly Are Botanical Prints?
Homemade botanical prints are created by directly transferring the natural pigments of flowers, leaves, and grasses onto paper or fabric through pounding. This direct method releases the vibrant colors within the plants, leaving behind delicate and unique impressions. It’s a fantastic way to make art directly from nature, requiring minimal supplies and offering maximum creative satisfaction. You are essentially creating art using nature’s own palette.
This craft is not only about creating beautiful images; it’s also about embracing the present moment and finding joy in the natural cycles around us. Inspired by Kathie Lapcevic’s book, Fiercely DIY Guide to Seasonal Living, the process encourages us to appreciate the beauty that surrounds us right now, in this season. It’s a gentle reminder to find creativity and inspiration in our immediate environment, transforming readily available natural materials into something beautiful and personal.
Why You’ll Love Making Botanical Prints
- Budget-Friendly Beauty: This is an incredibly affordable craft. You likely already have many of the supplies at home, and nature provides the most important element – the botanicals – for free!
- Easy and Accessible for All Ages: From children to adults, anyone can enjoy this simple technique. It’s a wonderful family activity that gets everyone outdoors and engaged with nature.
- Connect with Nature: Foraging for flowers and leaves encourages observation and appreciation of the natural world. It’s a hands-on way to learn about different plants and their unique colors and textures.
- Create Unique and Personalized Art: Each botanical print is one-of-a-kind, reflecting the specific plants used and the way they release their pigments. These prints make wonderful personalized cards, gift tags, wrapping paper, and even framed art.
- Therapeutic and Relaxing: The process of gently pounding flowers can be surprisingly meditative and relaxing. It’s a great way to de-stress and enjoy a mindful creative activity.
Supplies for Paper Botanical Prints
Ready to start your botanical printing journey? Here’s what you’ll need to gather:
- Heavy Artist Paper: Watercolor paper or card stock works best as it can withstand the pounding and absorb the pigments effectively.
- Mallet or Hammer: A medium-sized mallet, a smooth hammer, or even a kitchen meat tenderizer can be used for pounding. A smooth surface is key to avoid tearing the paper.
- Parchment Paper: This is essential to protect your paper and the pounding surface, and to prevent the flowers from sticking.
- Fresh Flowers and Leaves: Gather a variety of blooms, leaves, and even grasses from your garden or local area. Experiment with different colors and textures to see the diverse prints they create. Violets, pansies, small wildflowers, ferns, and interesting leaf shapes work particularly well.
- Optional: Artist Fixative or Vinegar: To help preserve the colors of your botanical prints for longer, you can use a light spray of artist fixative or even plain vinegar after the prints are dry.
Step-by-Step Guide: Creating Botanical Prints on Paper
Let’s get started with the fun part – making your botanical prints! Follow these simple steps to transform flowers into art:
-
Gather Your Botanicals and Prepare Paper: Collect your chosen flowers and leaves. Cut your heavy paper into the desired sizes for your project – whether you’re making cards, bookmarks, or small prints.
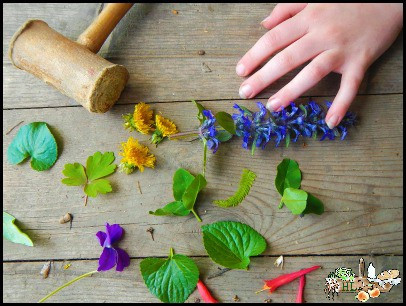 Assortment of leaves and flowers with a wooden pounder, alongside a girl's hand, ready for botanical printing
 -
Set Up Your Pounding Station: Choose a flat, sturdy surface for pounding – a concrete patio, workbench, or even a thick cutting board will work. Lay down a piece of parchment paper to protect your surface. Place your artist paper on top of the parchment paper.
-
Arrange Your Flowers: Carefully place your foraged flowers and leaves directly onto the artist paper. Arrange them in a design that appeals to you. Consider the composition, colors, and shapes as you position each botanical element.
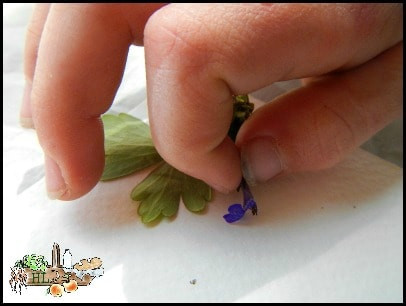 Close-up of a girl's hand delicately placing vibrant flowers onto paper to create botanical prints
 -
Cover and Prepare to Pound: Once you are happy with your arrangement, gently cover the flowers and leaves with another piece of parchment paper. This top layer will protect the flowers from sticking to your pounding tool and ensure a cleaner print.
-
Pound to Release the Color: Now for the pounding! Using your mallet or hammer, gently but firmly tap all over the parchment paper covering the flowers. Focus on pounding each flower and leaf to ensure the pigments are fully released and transferred onto the paper below. You don’t need to smash the paper, just apply firm, even pressure. If you’re doing this with children, scratch paper practice is a great idea to get a feel for the pressure needed.
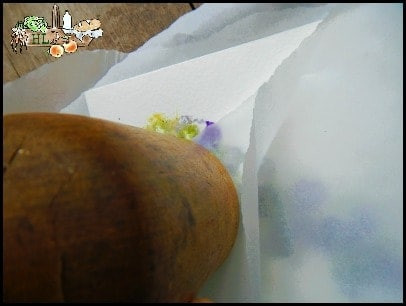 Hands using a wooden pounder to gently hammer violets onto paper for botanical printing
 -
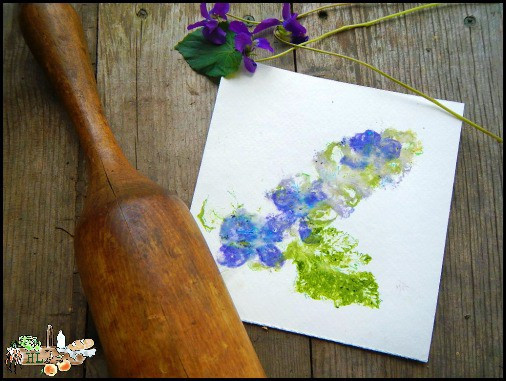
Reveal Your Botanical Print: Carefully peel back the top layer of parchment paper to reveal your botanical print! Gently scrape off the mashed plant material using your fingernail or tweezers. Some people like to leave small bits of plant for a more textured, “messy” look, which can add to the natural charm.
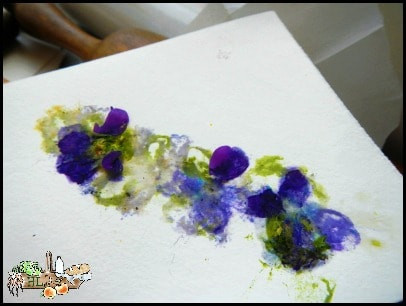 Close-up of botanical print paper with violets and peeled pounded flowers, showcasing the delicate floral impressions
 -
Finishing Touches and Embellishments: If you’re not completely satisfied with your initial print, you can add more flowers or leaves and pound again to intensify the colors or fill in any gaps. Experimentation is key to discovering your favorite botanical combinations and techniques. Once you’re happy with the print, you can further enhance it by outlining details or adding embellishments with crayons, colored pencils, or pens to highlight certain features or add artistic flair.
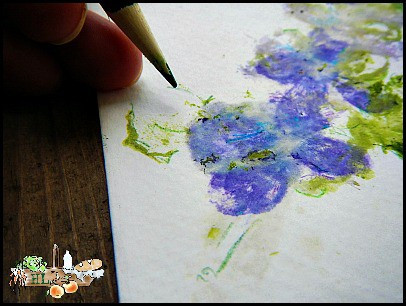 Botanical print art featuring violets on paper, embellished with colored pencils and surrounded by fresh violets and a wooden pounder
 -
Preserve Your Prints: To help preserve the vibrant colors of your botanical prints, lightly spray them with an artist fixative, hairspray (use sparingly as it can be sticky), or a mist of plain vinegar. Apply a very light mist and allow it to dry completely. This step can help prevent the colors from fading over time, allowing you to enjoy your botanical art for longer.
 Botanical print creation process showing violets, printed paper, and wooden pounder, highlighting homemade cardstock crafted with children
Beyond Paper: Exploring Fabric Botanical Prints
While this guide focuses on paper botanical prints, you can also create stunning prints on fabric. Fabric printing requires a few extra steps to prepare the fabric beforehand to ensure the colors set properly and last. To learn more about preparing fabric for pounded botanical art, resources like this guide offer detailed instructions. Fabric prints open up a range of creative possibilities, from custom tea towels and napkins to unique clothing embellishments.
Botanical Prints: A Creative Connection to Nature
Making botanical prints is more than just a craft; it’s an engaging way to connect with the natural world, appreciate seasonal beauty, and create personalized art. Whether you’re looking for a fun activity for kids, a relaxing solo project, or a unique way to create handmade gifts, botanical printing offers a rewarding and beautiful experience. Gather some flowers, grab your hammer, and start pounding your way to natural art today!