
Block printing is a fantastic art form to explore with children and adults alike. It’s an accessible and engaging way to create unique designs and patterns. In anticipation of exploring Japanese woodblock prints later, this guide will introduce you to the basics of creating your own block prints at home. We’ll focus on two simple and fun methods: foam printing and linocut printing.
What is Block Print Art?
Block Print Art is essentially creating your own stamp to transfer an image onto paper or fabric. Imagine carving away parts of a surface, leaving behind a raised design. This raised design is then inked and pressed onto your chosen material to create a print. Historically, materials like wood (for woodcut) and linoleum (for linocut) were used by professional printmakers to produce intricate and multi-layered artworks. You too can achieve impressive results using similar principles with readily available materials and simpler techniques. While multi-color prints are possible, starting with a single color is highly recommended for beginners to grasp the fundamentals of block print art.
 Example of block printing process
Foam Printing: An Easy Start to Block Printing
Foam printing is the most budget-friendly, safest, and easiest method to introduce block print art, especially to young artists. It involves creating an image by pressing lines into a foam surface, which then becomes your printing block. When inked, the raised areas of the foam transfer the design onto paper.
To get started with foam printing, you’ll need:
- Styrofoam plates or foam sheets: These serve as your printing blocks. Flat foam disks work best if using plates, so cut off the rims.
- Dull pencils, sticks, or ballpoint pens: These are used to draw and create lines on the foam.
- Printing ink or tempera paint: Ink provides cleaner results, but slightly thinned tempera paint can also work.
- Paintbrushes or rollers: For spreading ink or paint evenly on the foam.
- Paper: To print your designs on.
- Spoons or rollers: To apply pressure and transfer the image.
Step-by-step Foam Printing Instructions:
- Prepare your foam block: If using a Styrofoam plate, remove the rim to create a flat surface.
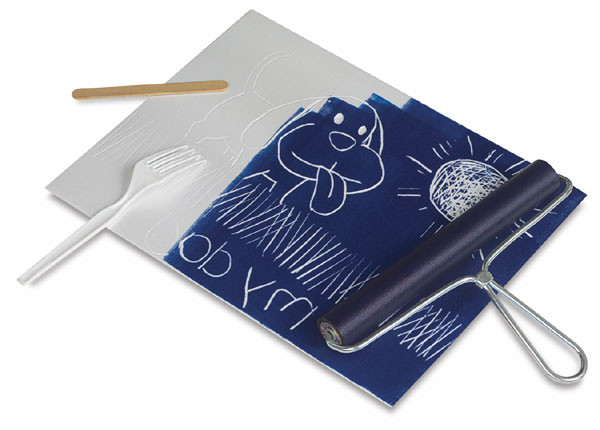
- Create your design: Use a pencil, stick, or pen to draw your design directly onto the foam. Press firmly to create deep lines. Remember that the pressed lines will be the unprinted (white or paper color) areas in your final print.
- Apply ink: Spread a thin, even layer of printing ink or slightly thinned tempera paint over the foam surface using a brush or roller. Ensure all raised areas are covered, but avoid flooding the carved lines.
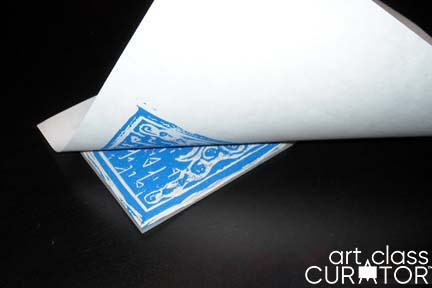
- Print your design: Place a sheet of paper on top of the inked foam block. Gently press down firmly and evenly over the entire surface of the paper using the back of a spoon or a roller.
- Reveal your print: Carefully peel the paper away from the foam block to reveal your foam print!
 Child demonstrating foam printing technique
Tips for Successful Foam Printing:
- Press firmly: Ensure your lines are deeply impressed into the foam for a clear print.
- Use printing ink for best results: Ink provides sharper and cleaner prints compared to paint.
- Experiment with pressure: Practice a few times to find the right amount of pressure for image transfer.
- Consider foam printing plates: For convenience and consistent results, pre-cut foam printing plates are available in various sizes.
Linocut Printing: Stepping Up Your Block Printing Skills
Linocut printing offers a more refined block printing experience, closely resembling traditional linoleum or woodcut techniques. While requiring specialized tools and closer supervision, especially for younger users, linocut allows for greater detail and durability in your prints.
For linocut printing, gather these supplies:
- Easy-cut rubber blocks: These are safer and easier to carve than traditional linoleum, especially for beginners and children.
- Linoleum cutters: These tools have interchangeable blades for creating different line widths.
- Transfer paper (optional): For transferring complex designs onto the block.
- Permanent markers: For tracing designs on the block.
- Printing ink (water-based recommended): Specifically formulated for block printing.
- Inking plate (glass, plexiglass, or non-porous surface): For rolling out ink evenly.
- Soft rubber roller (brayer): For applying ink to the block.
- Paper: For printing.
- Spoons or rollers: For burnishing (applying pressure).
Linocut Printing Process:
- Sketch your design: Draw your design directly onto the rubber block or use transfer paper to transfer a pre-drawn image. Remember to reverse any text or numbers in your design as the print will be a mirror image. Tracing your design with a permanent marker can make it easier to see while carving.
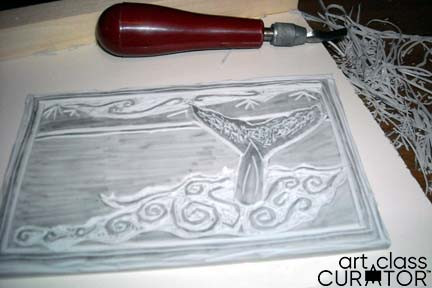
- Carve your block: Using a linoleum cutter, carefully carve away the areas of your design that you want to remain unprinted (white or paper color). Start with a thinner blade for outlines and switch to wider blades for clearing larger areas. Always cut away from your body and fingers for safety.
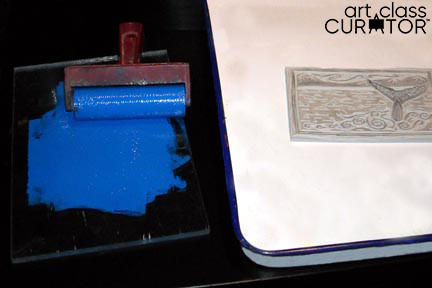
- Prepare your ink: Place a small amount of water-based printing ink onto your inking plate. Use the soft rubber roller (brayer) to spread the ink evenly into a thin, smooth layer. Roll in multiple directions to ensure even distribution on the roller.
- Ink the block: Roll the inked brayer across the surface of your carved rubber block, applying a thin, even layer of ink.
- Print your design: Place paper on top of the inked block. Use a spoon or a clean roller to burnish, firmly and evenly pressing the paper onto the block to transfer the ink.
- Reveal your print: Carefully peel the paper away to reveal your linocut print.
 Linocut printing in progress
Safety First When Linocut Printing: Always cut away from your body and hands when using linoleum cutters. These tools are sharp, and caution is essential to prevent injury.
 Demonstration of safe linocut carving technique
Essential Supplies for Block Print Art
Whether you choose foam printing or linocut, having the right supplies makes the process smoother and more enjoyable. Here’s a list of essential materials for block print art:
- Foam plates or foam sheets
- Foam printing plates (optional)
- Easy-cut rubber blocks
- Linoleum cutters with various blades
- Water-based printing ink
- Tempera paint (for foam printing, optional)
- Brayer (soft rubber roller)
- Inking plate (glass, plexiglass, or non-porous surface)
- Paper (various types for experimentation)
- Pencils, pens, markers
- Transfer paper (optional)
These supplies can be found at most art supply stores and online retailers, making block print art accessible for everyone.
Embark on Your Block Printing Journey
Block print art is a rewarding and versatile art form. Whether you begin with the simplicity of foam printing or delve into the more detailed world of linocut, you’ll discover the joy of creating your own unique printed artworks. Experiment with different designs, colors, and paper types to explore the full potential of block print art. We encourage you to try these techniques and share your block print creations!