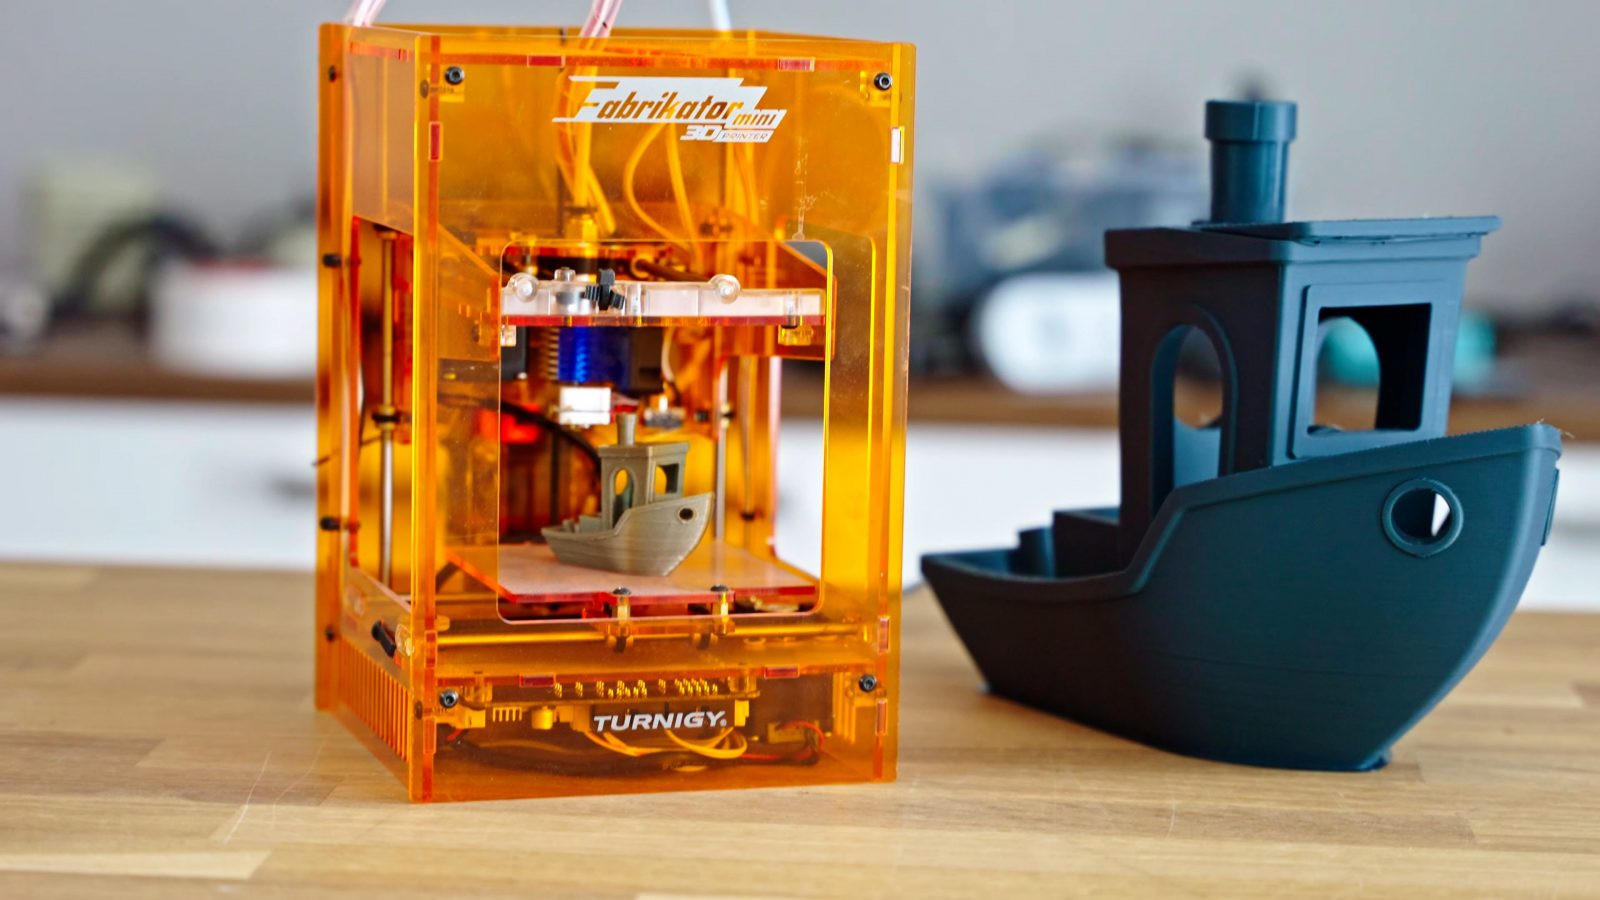
If you’re involved in the world of 3D printing, chances are you’re already familiar with the 3DBenchy. This small, iconic 3D model boat has become a ubiquitous test print, instantly recognizable across the community. But is it just a cute plastic trinket, or does it serve a more profound purpose? We argue that the 3DBenchy is far more than just a demonstration print; it’s arguably the ultimate all-in-one calibration and benchmark tool for your 3D printer. Forget wasteful calibration cubes – the Benchy packs a wealth of diagnostic features into a surprisingly small amount of material. Let’s dive into how to effectively use the 3DBenchy to understand and optimize your 3D printing process.
One common misconception we need to address right away is the idea that printing 3DBenchys is wasteful or environmentally irresponsible. In reality, the material used for a single Benchy is minimal. A typical 3DBenchy weighs around 13.5 grams. When printed with PLA, a bioplastic derived from corn, the total carbon footprint, including material production and printer electricity consumption, is approximately 60 grams of CO2 equivalent. To put this into perspective, a quick acceleration from 0 to 60 mph in a gasoline-powered car consumes about 80ml of fuel, releasing roughly 250 grams of CO2. Essentially, a few seconds of hard acceleration has a greater environmental impact in terms of CO2 emissions than printing a 3DBenchy.
Furthermore, printing a 3DBenchy is an investment in reducing waste in the long run. By using this small test print to fine-tune your printer, you can prevent larger, more material-intensive prints from failing due to unforeseen issues. Think of it as preventative maintenance for your 3D printer.
And let’s not forget, these little boats can be quite decorative!
The true genius of the 3DBenchy lies in its comprehensive design. It’s not designed to test just one aspect of your printer’s performance. When you adjust settings on your 3D printer, you’re rarely tweaking a single parameter in isolation. Most settings have ripple effects, improving certain aspects of print quality while potentially degrading others. For example, increasing print temperature (within reasonable limits) can lead to stronger parts, but it can also introduce drooping in overhangs, more stringing, and a decrease in top surface quality.
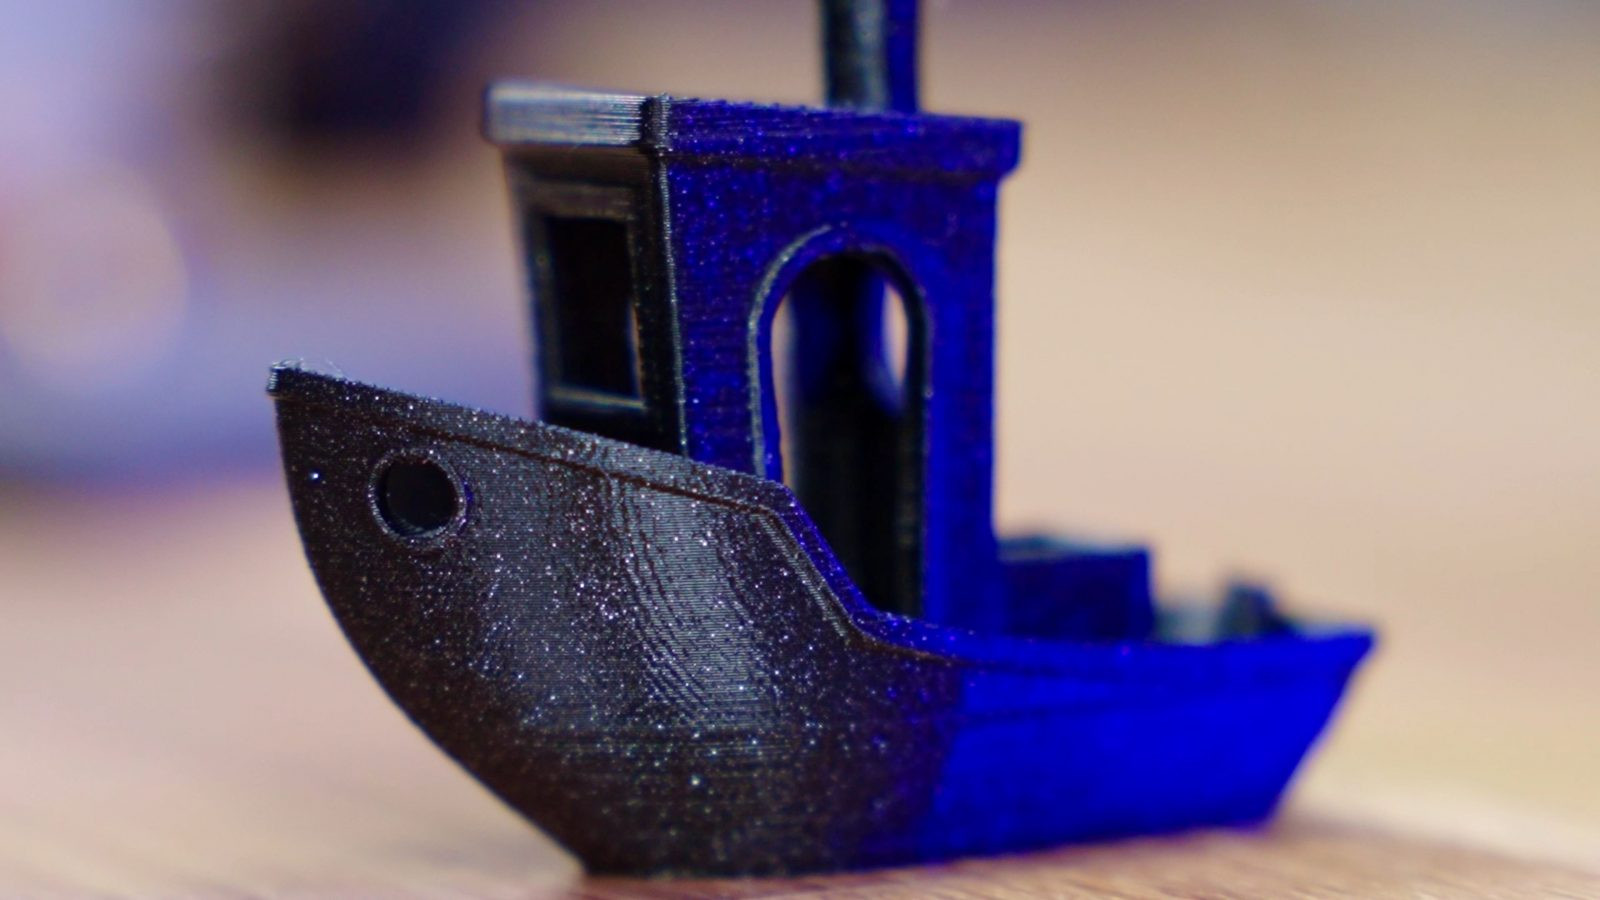
 Close-up view of a 3D printed Benchy, highlighting the bow and deck surfaces
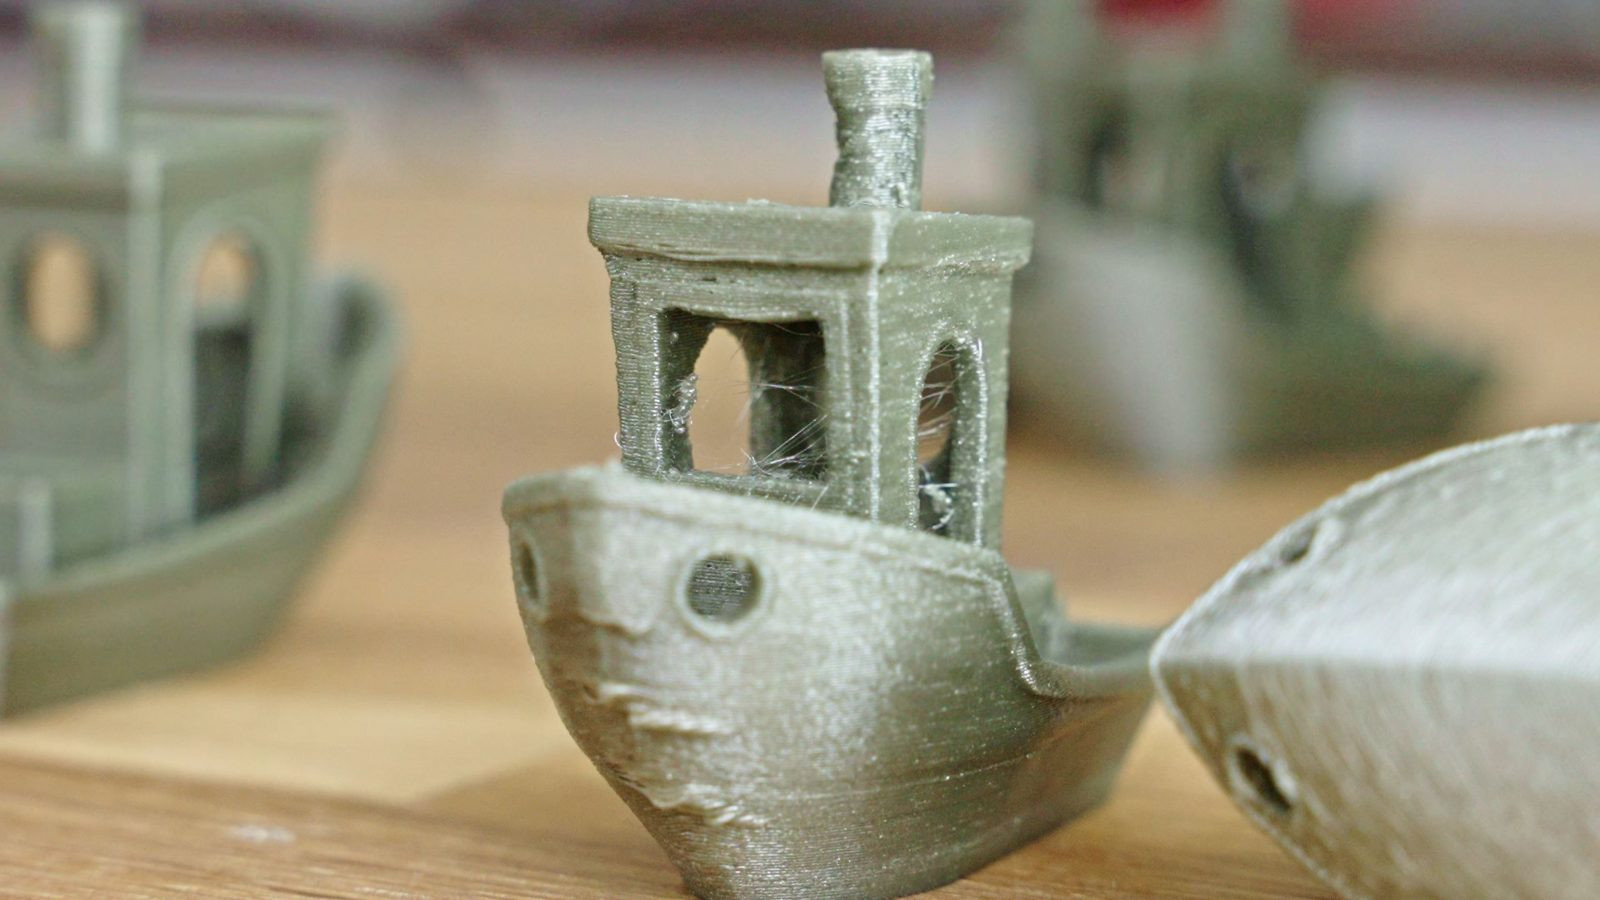
 Another close-up of the Benchy, focusing on the cabin and chimney
 Detailed shot of the Benchy's stern, showing the text and small features
Similarly, increasing jerk and acceleration settings can reduce the appearance of ridges on curved surfaces, but it can also introduce ringing artifacts and extruder control problems. The 3DBenchy’s design incorporates a wide array of features, sizes, and geometries. This means that when you print a Benchy, you’re simultaneously evaluating your printer’s performance across numerous critical areas, catching potential regressions as you optimize for specific improvements.
The 3DBenchy is not just about abstract benchmarking; it’s designed to be representative of real-world 3D printing scenarios.
 Side view of a 3D printed Benchy in gray filament, emphasizing its overall shape and proportions
Unlike some extreme “torture tests,” the Benchy doesn’t feature overly long bridges, details smaller than a typical nozzle, or excessively steep overhangs. Instead, it mirrors the complexity and challenges found in many everyday 3D printing projects. Most parts you design or download are likely to be optimized for 3D printing to some extent, avoiding truly unprintable features.
However, the Benchy’s very accessibility has become a slight disadvantage as a “torture test.” When it was first introduced, the 3DBenchy was a genuine benchmark, clearly highlighting performance differences between printers. Modern 3D printers have advanced significantly. Today, a capable off-the-shelf 3D printer should be able to produce a near-flawless 3DBenchy right out of the box. If a new printer struggles significantly with a Benchy, it might indicate fundamental issues with the machine’s quality, assembly, or design.
How to Print a Benchy for Optimal Testing
Before we delve into the specific details to examine on your 3DBenchy print, let’s briefly discuss the correct approach to printing one for testing purposes. Firstly, and this should be a golden rule, avoid using specialized profiles or settings specifically for printing a Benchy. The goal is to assess your standard printing configuration. Print the Benchy using the exact same slicer profile and settings you would use for any other typical 3D print. If your general-purpose profile has weaknesses that manifest in a 3DBenchy print, these same weaknesses will inevitably surface in your other prints as well.
Secondly, print the Benchy at its original, intended size. Do not scale it up or down.
 A large-scale 3D printed Benchy in a matte gray filament, alongside a standard-sized Benchy for size comparison
 Close up of the large Benchy showing layer lines and smooth surface finish
While a larger Benchy, printed with thicker layers and a smooth finish can look aesthetically pleasing, especially in materials like Prusament Gentlemen’s Grey PLA, it loses its value as a benchmark. Scaling alters the proportions of the features, making some easier and others harder to print. A scaled Benchy print becomes incomparable to standard-sized Benchys printed on other machines, defeating the purpose of a universal benchmark.
 A standard-sized 3D printed Benchy in white filament, highlighting its small and detailed features
The original 3DBenchy is intentionally designed to be small enough to fit on virtually any 3D printer bed, a crucial aspect of its widespread adoption and utility.
Key Details to Evaluate on Your 3D Benchy Print
Let’s walk through the specific aspects of a 3DBenchy that provide valuable insights into your printer’s performance and slicer settings. We’ll start with some of the more immediately obvious issues.
Begin by looking for major flaws like warping, excessive stringing, holes in the hull, or layer skips. These are fundamental problems that need to be addressed before you can assess the finer details of the Benchy. A successful Benchy needs to be a reasonably solid print that resembles the intended model.
- Holes in perimeters: Investigate your extruder and hotend for potential issues like clogs or insufficient extrusion.
- Warping or bed adhesion problems: Ensure your nozzle is at the correct distance from the bed, and that your bed surface is appropriate and clean for the filament you are using.
- Excessive stringing: Dry your filament, as moisture absorption is a common cause of stringing. Also, check your printing temperature; printing too hot can exacerbate stringing.
Once these basic issues are resolved, you can move on to using the Benchy for fine-tuning and optimizing your print profiles.
Visual Inspection: Bow, Top Surface, Backlash, and Corners
The next set of details to examine on your 3DBenchy can be assessed visually, without needing calipers or measuring tools. While the Benchy offers opportunities for precise measurements (which we’ll cover later), these initial visual checks provide a quick and effective diagnostic overview.
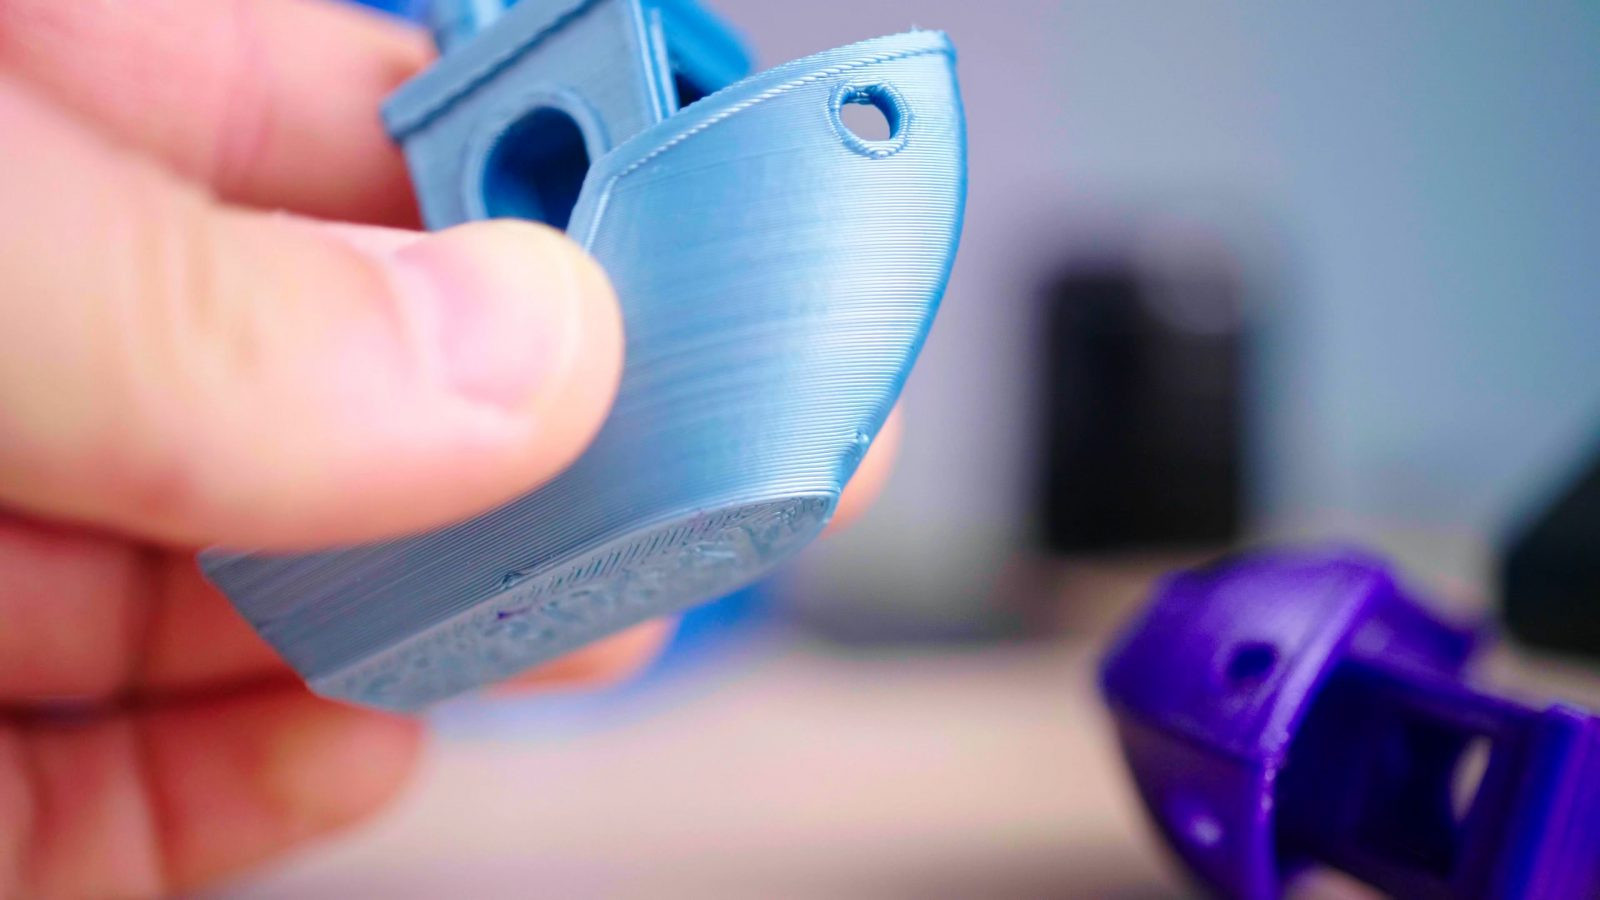
1. The Bow (Overhang Performance): The bow of the Benchy features a 40° overhang, presenting a moderate challenge for most 3D printers. A well-printed bow should be smooth and consistent.
 Close-up of a Benchy's bow showing a smooth, well-printed overhang
- “Kick-in” at the bottom of the bow: If the bottom layers of the bow curve inwards, it often indicates that your bed temperature is too high. The heat from the bed prevents the lower layers from solidifying quickly enough to resist the pulling forces from subsequent layers.
 Close-up of a Benchy's bow with a "kick-in" at the bottom, indicating excessive bed temperature
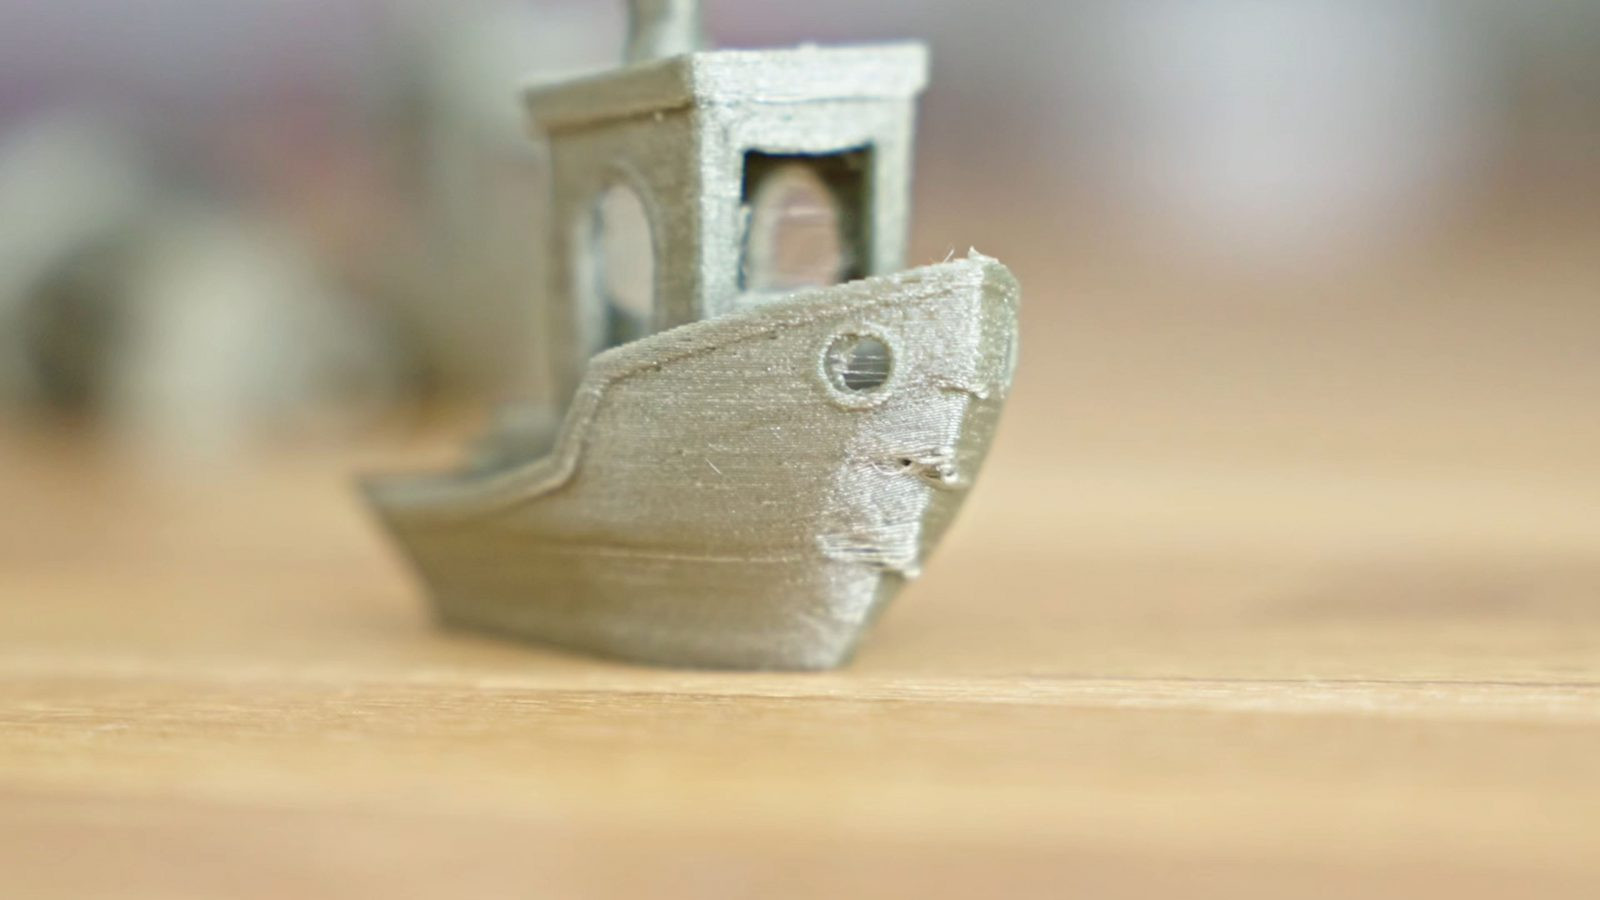
- Crimping further up the bow: More pronounced crimping or drooping higher up on the bow suggests printing at too high a temperature overall, insufficient part cooling, or potentially an inadequate minimum layer time setting in your slicer.
- Melted or Blobby Chimney: A chimney that prints as a melted blob instead of a crisp, sharp cylinder is another indicator of excessive temperature, insufficient cooling, or too short a minimum layer time.
 Close-up of a Benchy's bow with crimping further up, indicating temperature or cooling issues
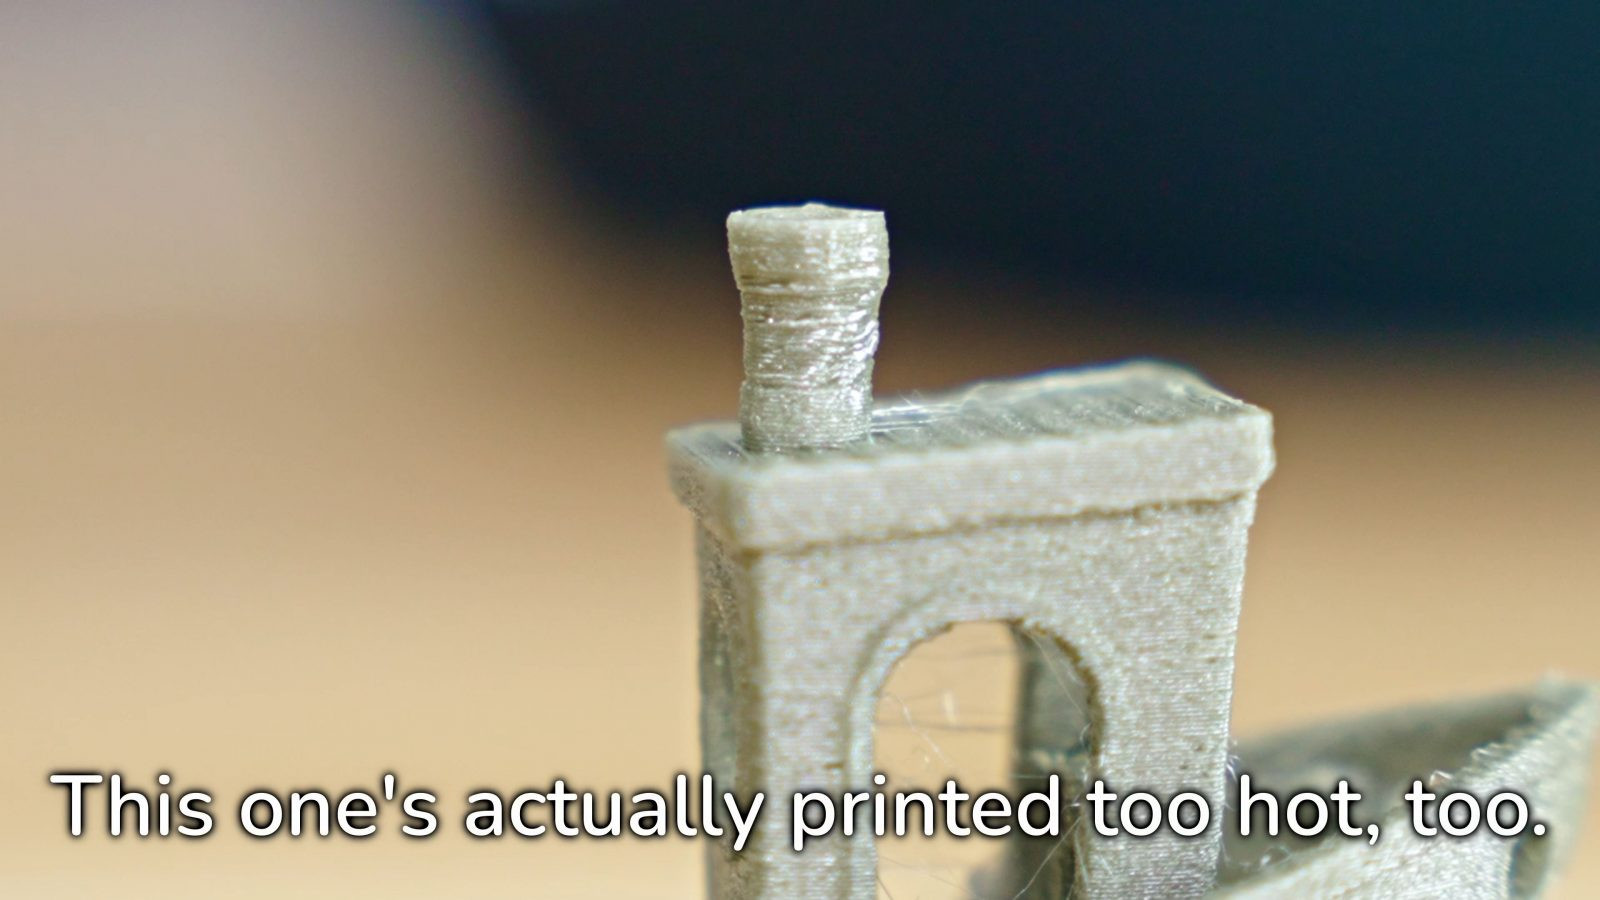 Close-up of a Benchy's chimney showing a melted and deformed appearance due to temperature issues
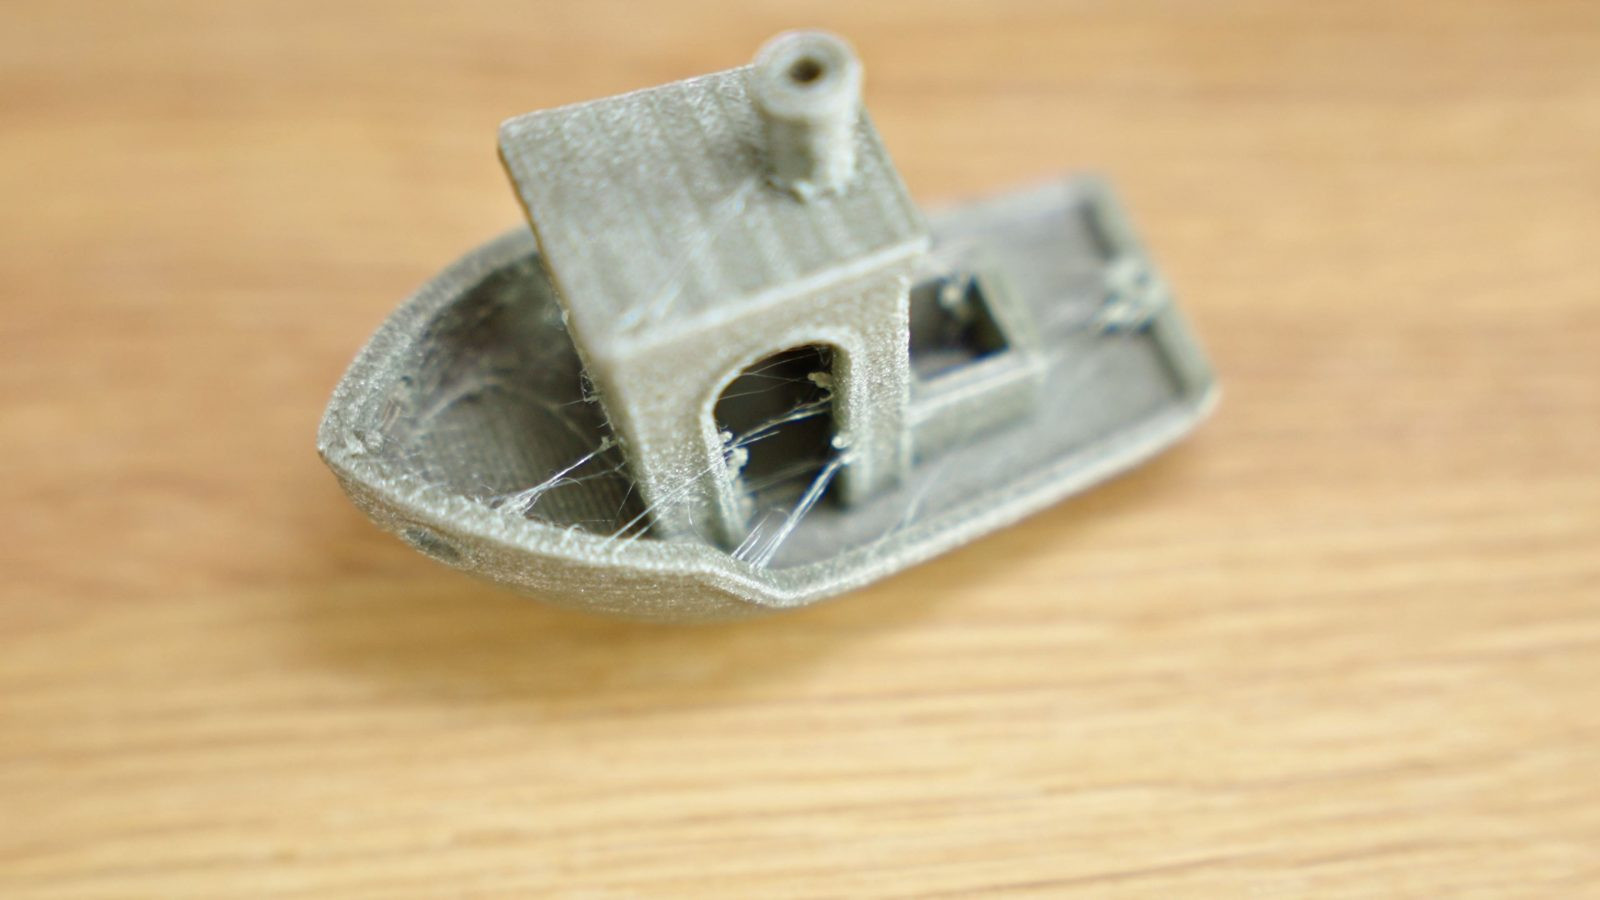
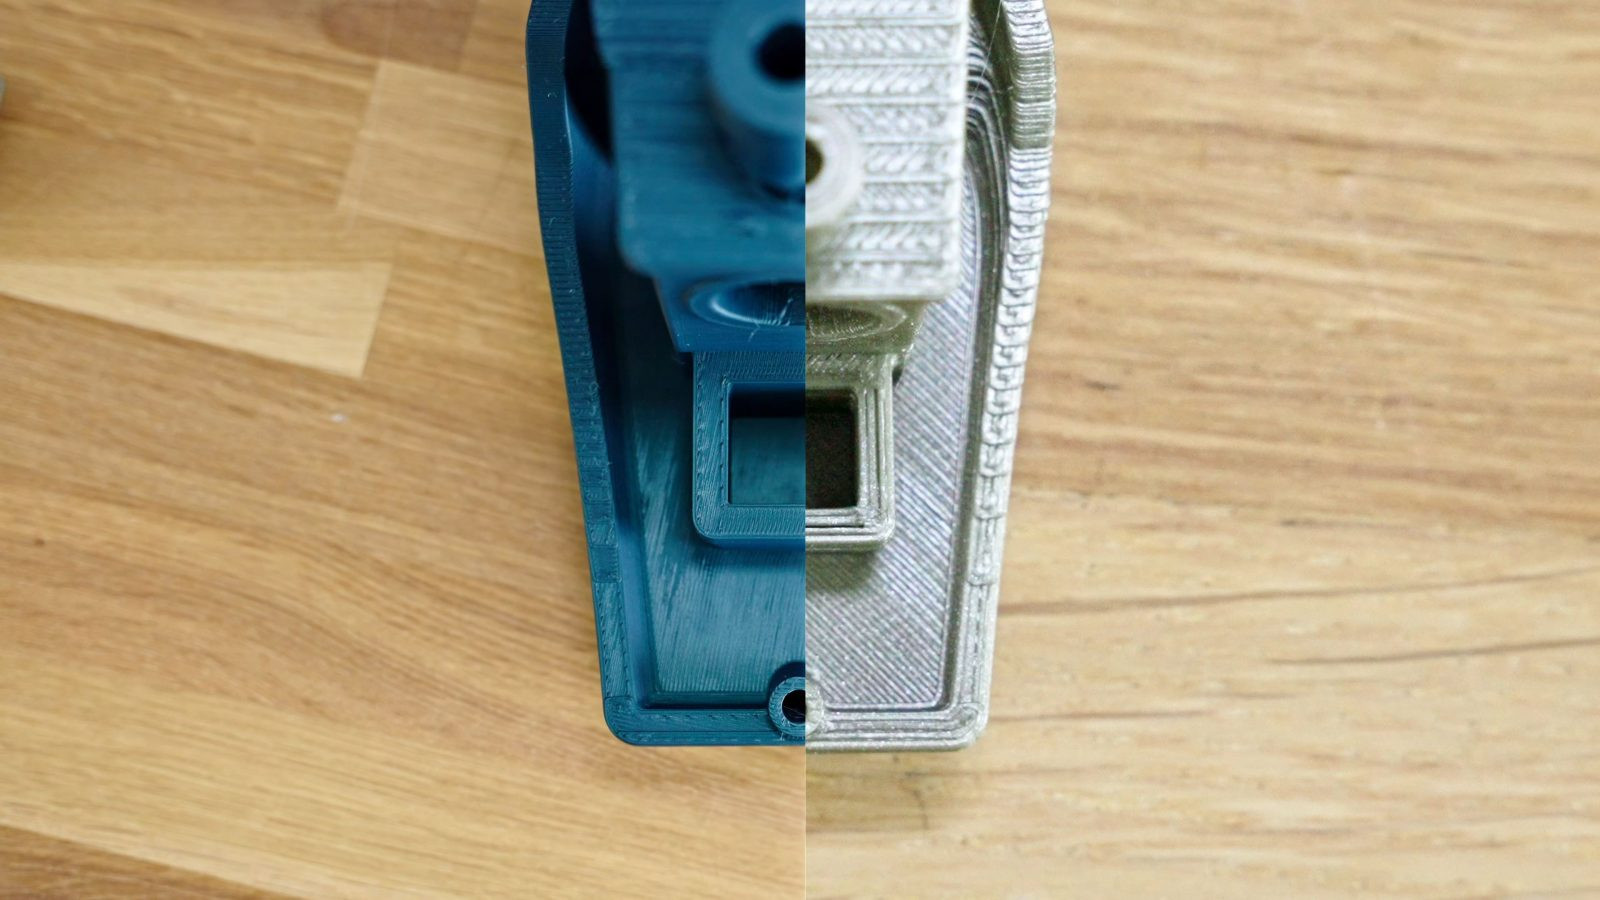
2. Top Surface Quality (Deck Area): Examine the top surfaces on the deck of the Benchy, particularly the flat areas at the back.
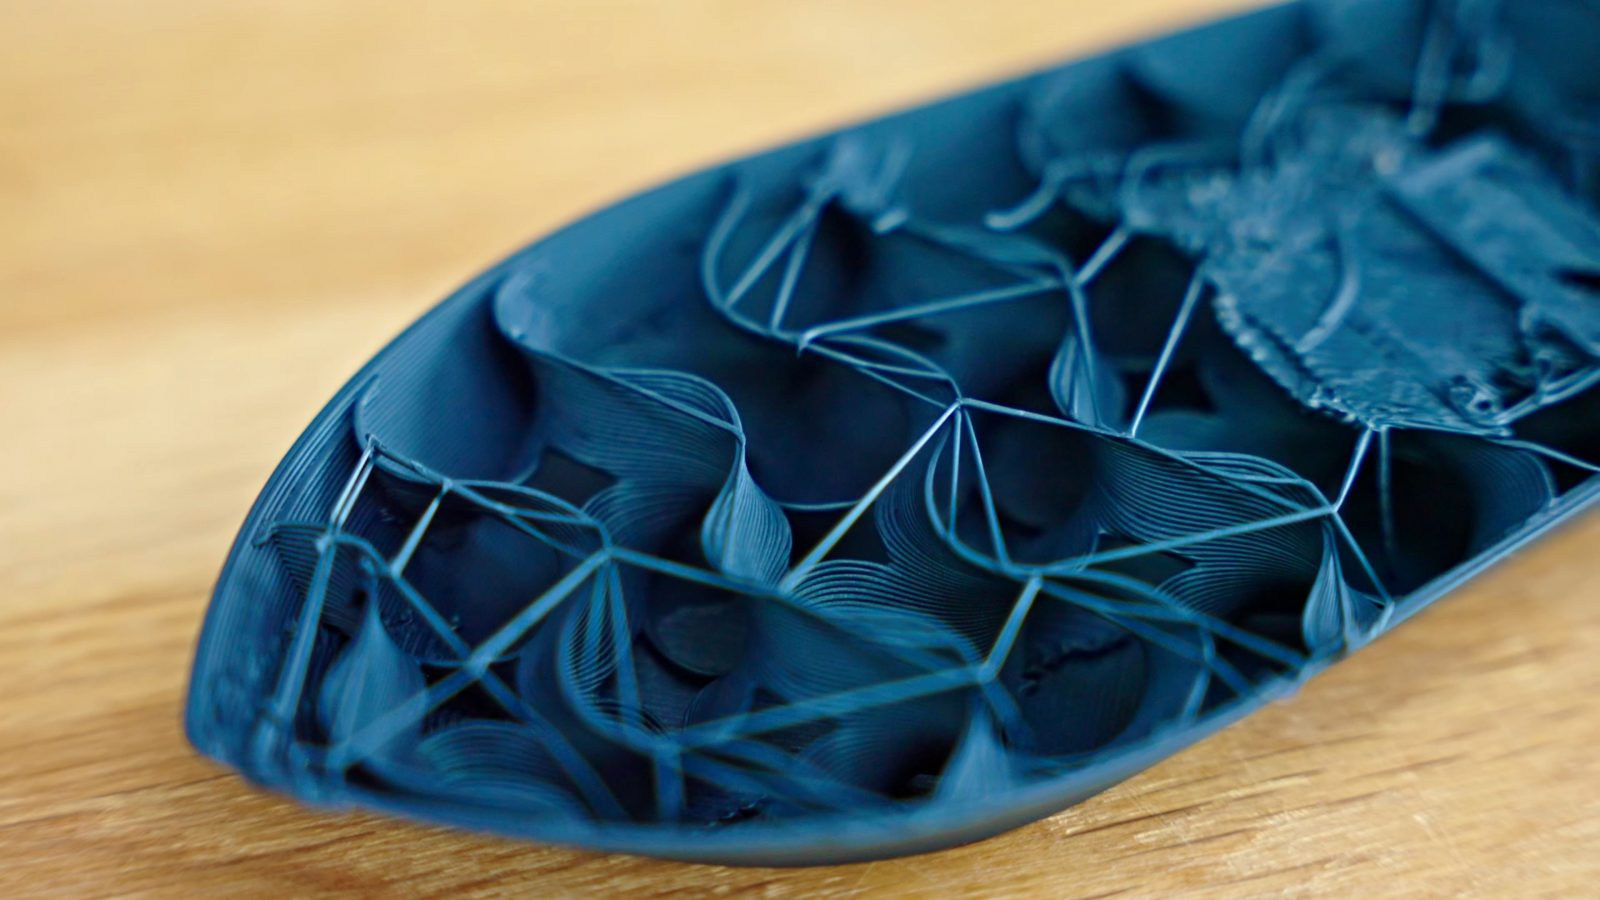
- Infill visible through the top layer: If you can see the infill pattern through the top surface, it could mean you have too few top solid layers for your chosen infill percentage. Lower infill densities require more top layers to bridge cleanly over the gaps. Alternatively, again, it could indicate printing at too high a temperature, causing the molten filament to sag into the infill gaps.
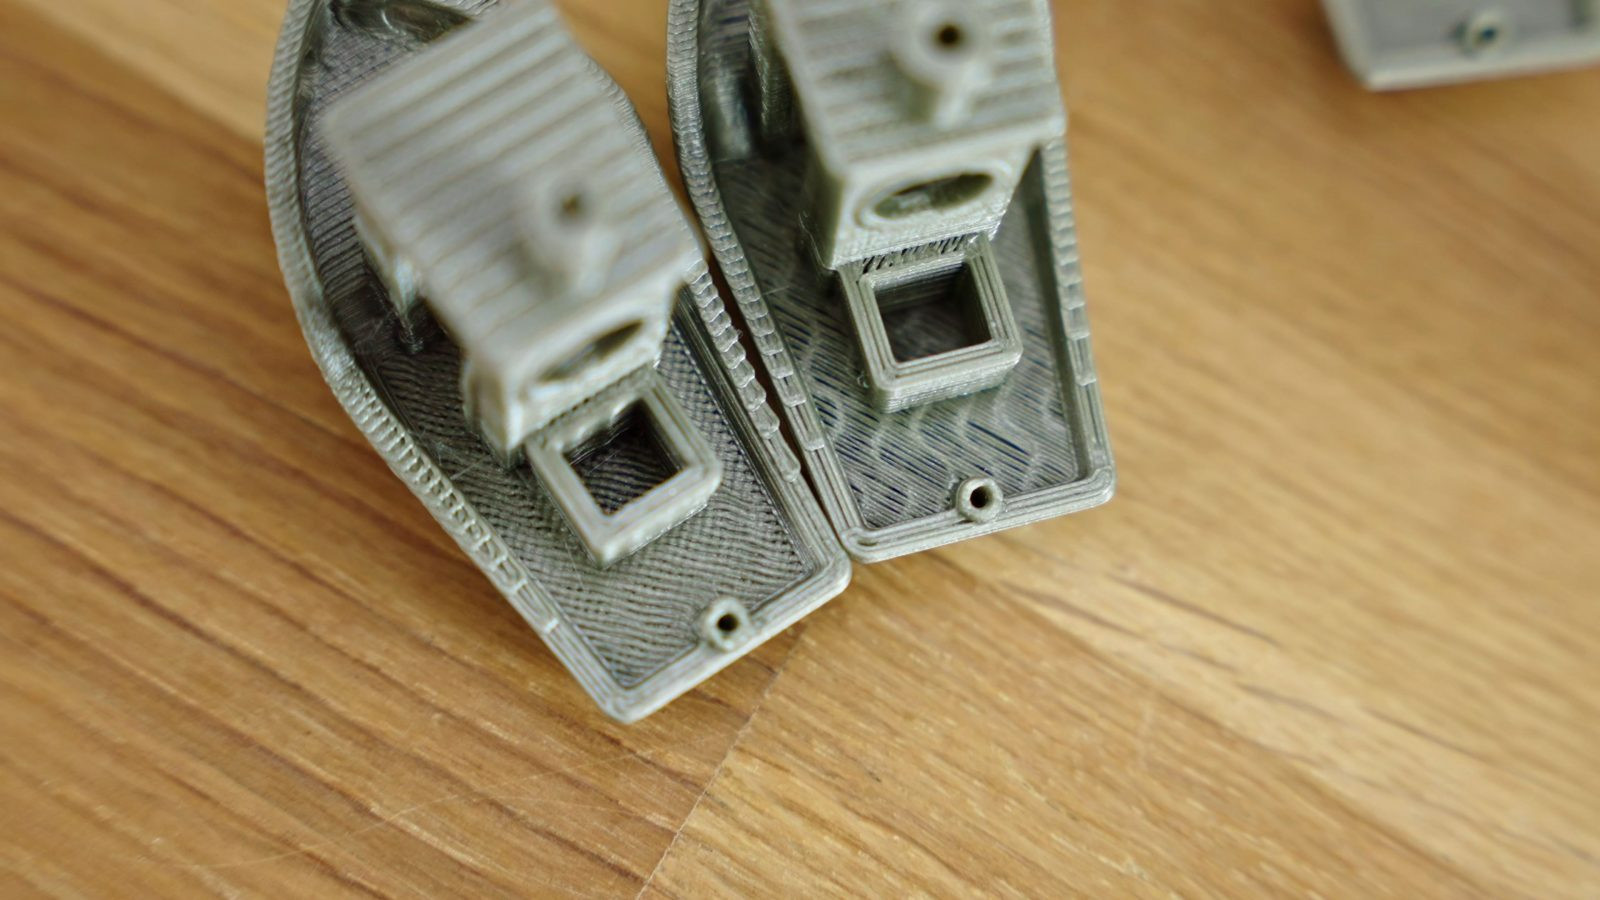 Close-up of a Benchy's deck area showing infill pattern visible through the top surface
 Another close-up of the deck area with visible infill, emphasizing the bridging issue
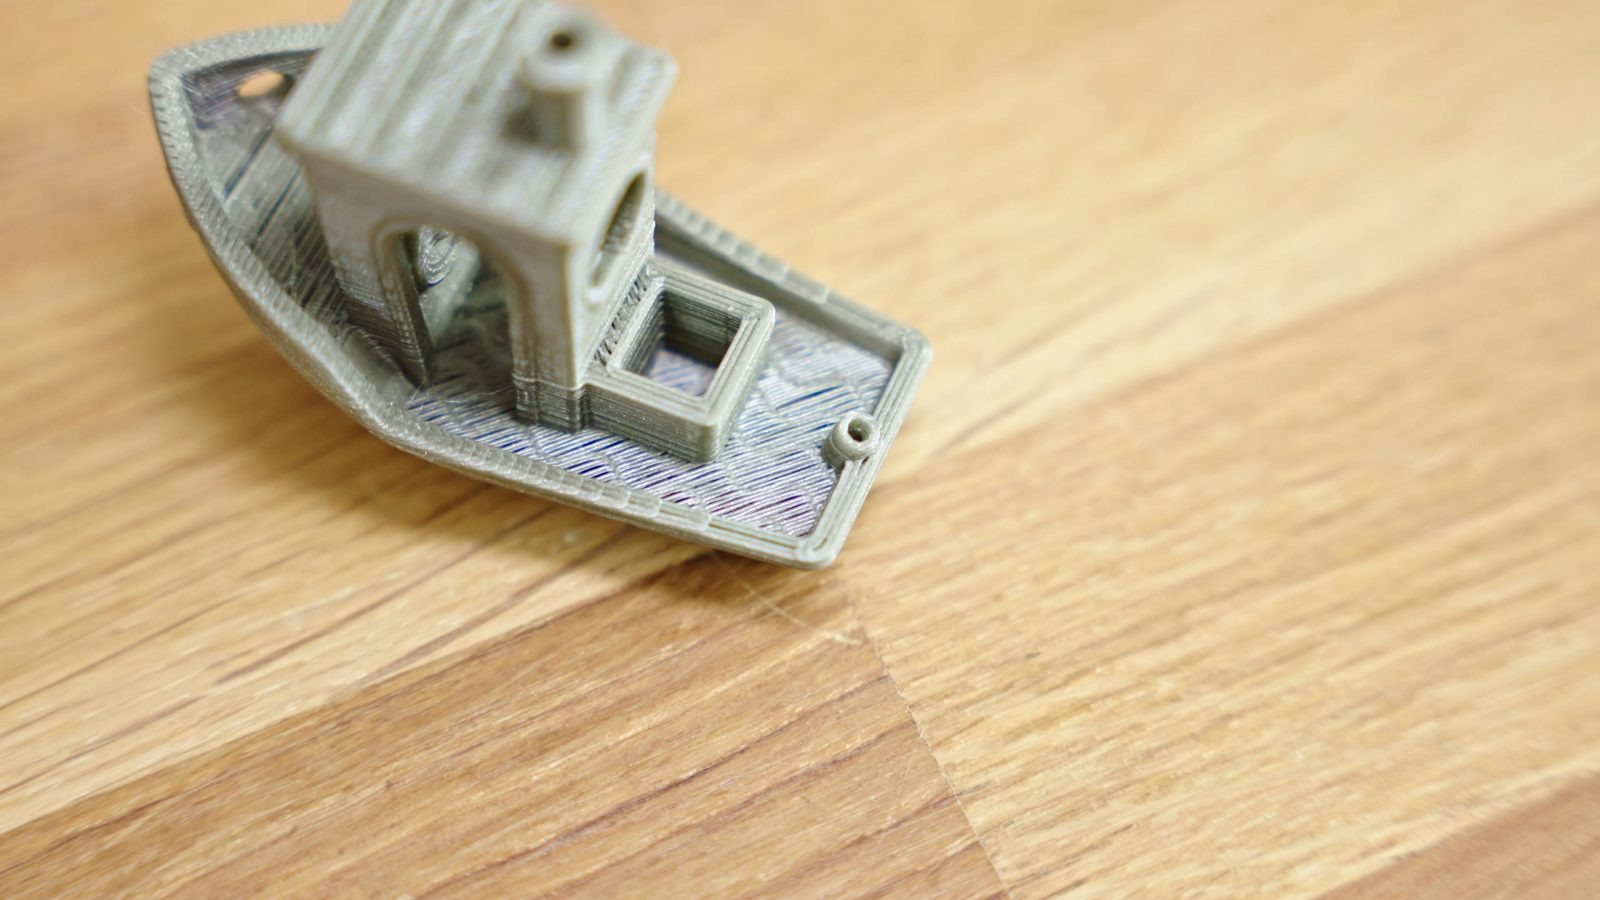
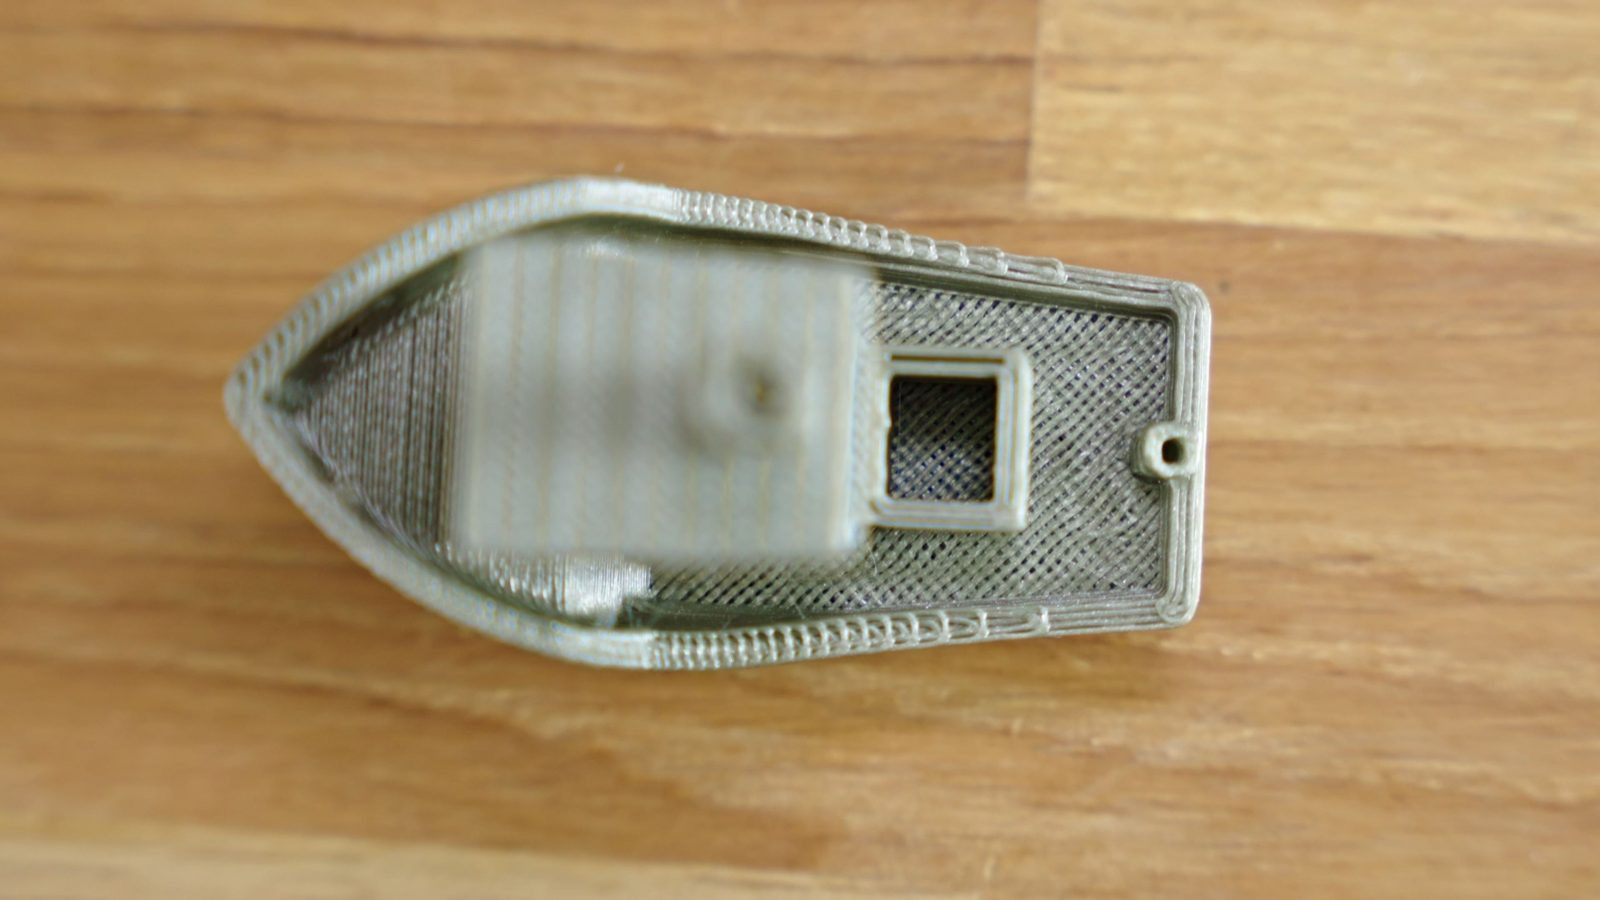
- Gaps between infill lines (flat deck): If the deck is bridging well (flat) but still shows gaps between individual infill lines, this can point to underextrusion. However, it can also be a sign of backlash.
3. Backlash: Backlash, or mechanical slop in your printer’s axes, can manifest in several ways on a Benchy.
- Gaps in top infill and between infill and perimeters: These can be subtle indicators.
- Deformed Chimney (Coffee Bean Shape): The most striking indicator of backlash is often a deformation of the chimney. The chimney should be perfectly round at the top (nominal diameter of 7mm). If it appears oval or “coffee bean” shaped, with one axis significantly shorter than the other, it strongly suggests backlash in the axis corresponding to the shorter dimension.
 Close-up of a Benchy's chimney showing a deformed, oval shape indicative of backlash
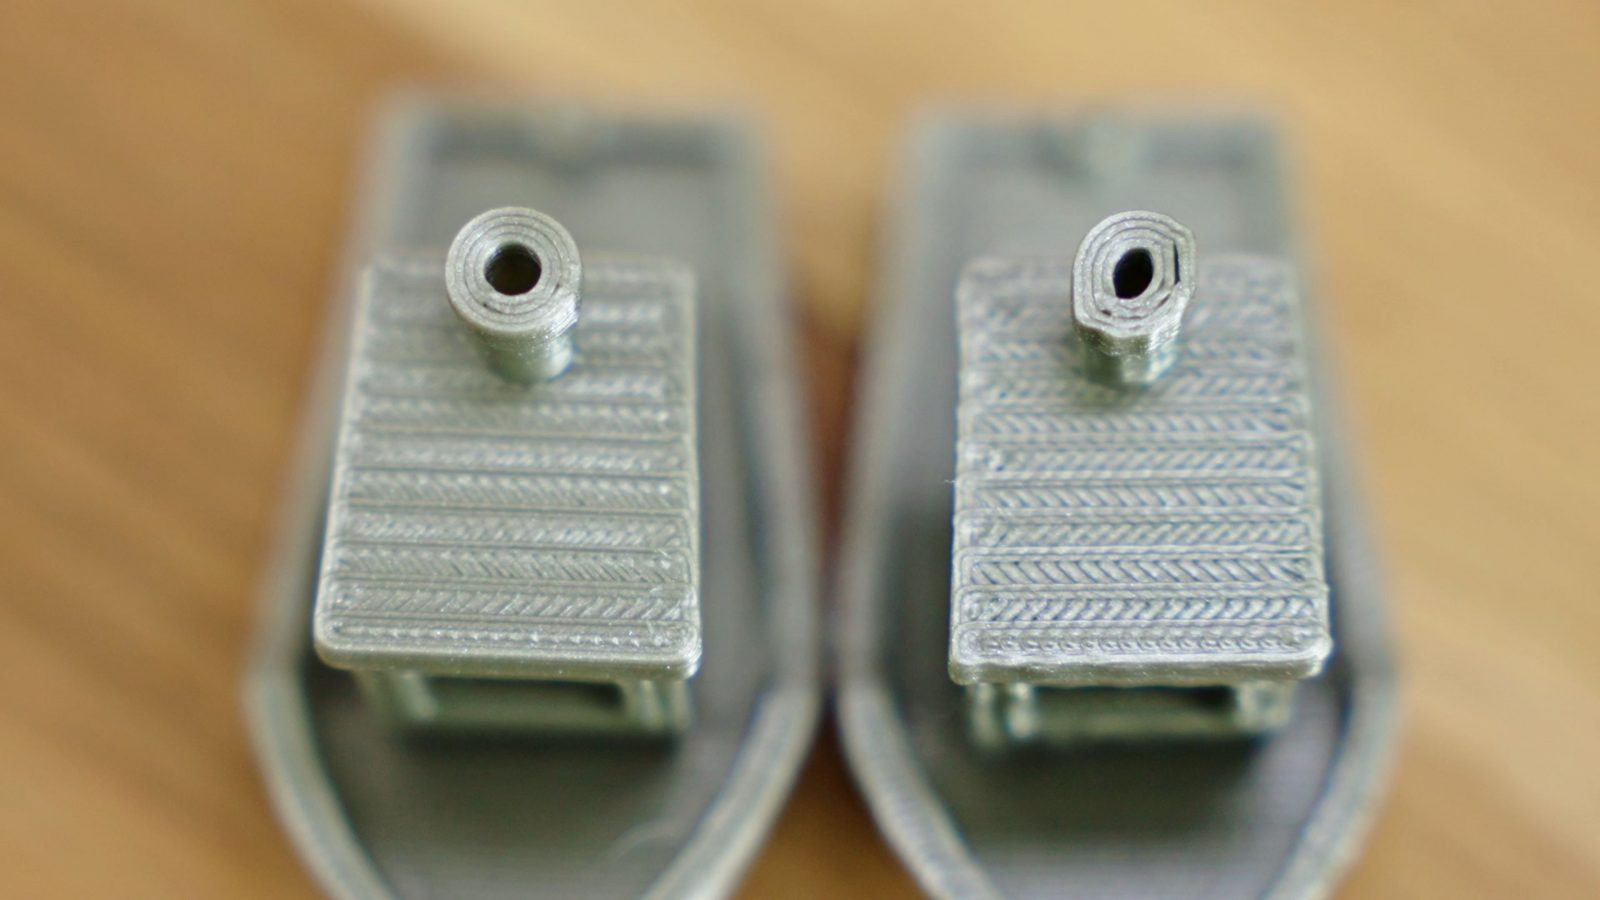 Another view of a deformed chimney, further highlighting the backlash issue
- Reproducing Backlash Issues: Backlash can often be simulated by intentionally loosening belts on your printer. The example shown was created on a Prusa Mini by loosening the Y-axis belt, introducing noticeable play in the bed movement.
 Close-up of a Benchy showing print quality issues induced by intentionally loosened belts
 Demonstration of a printer with a loosened belt, causing backlash and print defects
4. Ringing at Corners and Loss of Corner Detail: Observe the sharp corners of the Benchy, particularly around the bow and the edges of the cabin.
- Ringing (Ghosting): Ringing manifests as a rippling or echoing effect around sharp corners and edges. It is most apparent on the bow ridge, where the printer makes rapid, short movements. Ringing arises from vibrations and resonances in the printer’s motion system when it changes direction quickly.
 Close-up of a Benchy's bow exhibiting ringing artifacts due to motion system vibrations
 Another example of ringing on a Benchy, showing the rippling effect around edges
Ringing is influenced by acceleration and jerk settings, the flexibility of the printer’s frame, and the type of belts used. Printers with long, rubbery belts are more prone to ringing than those with shorter belt paths and stiffer belts like Gates belts.
- Rounded Corners (Loss of Detail): Conversely, overly soft or dampened motion systems can lead to rounded corners and a loss of detail. This is generally less noticeable than ringing and often less critical to overall print quality.
While the Benchy does test overhang performance to some extent, it’s not its strongest suit. For dedicated overhang testing, specialized test prints with progressively more challenging overhang angles are more effective. Modern printers generally handle the Benchy’s overhangs with ease.
Dimensional Accuracy Checks with the 3DBenchy
Beyond visual inspection, the 3DBenchy is also designed for dimensional accuracy assessment. Every feature on the Benchy has a specified nominal dimension, readily available on the official 3DBenchy website.
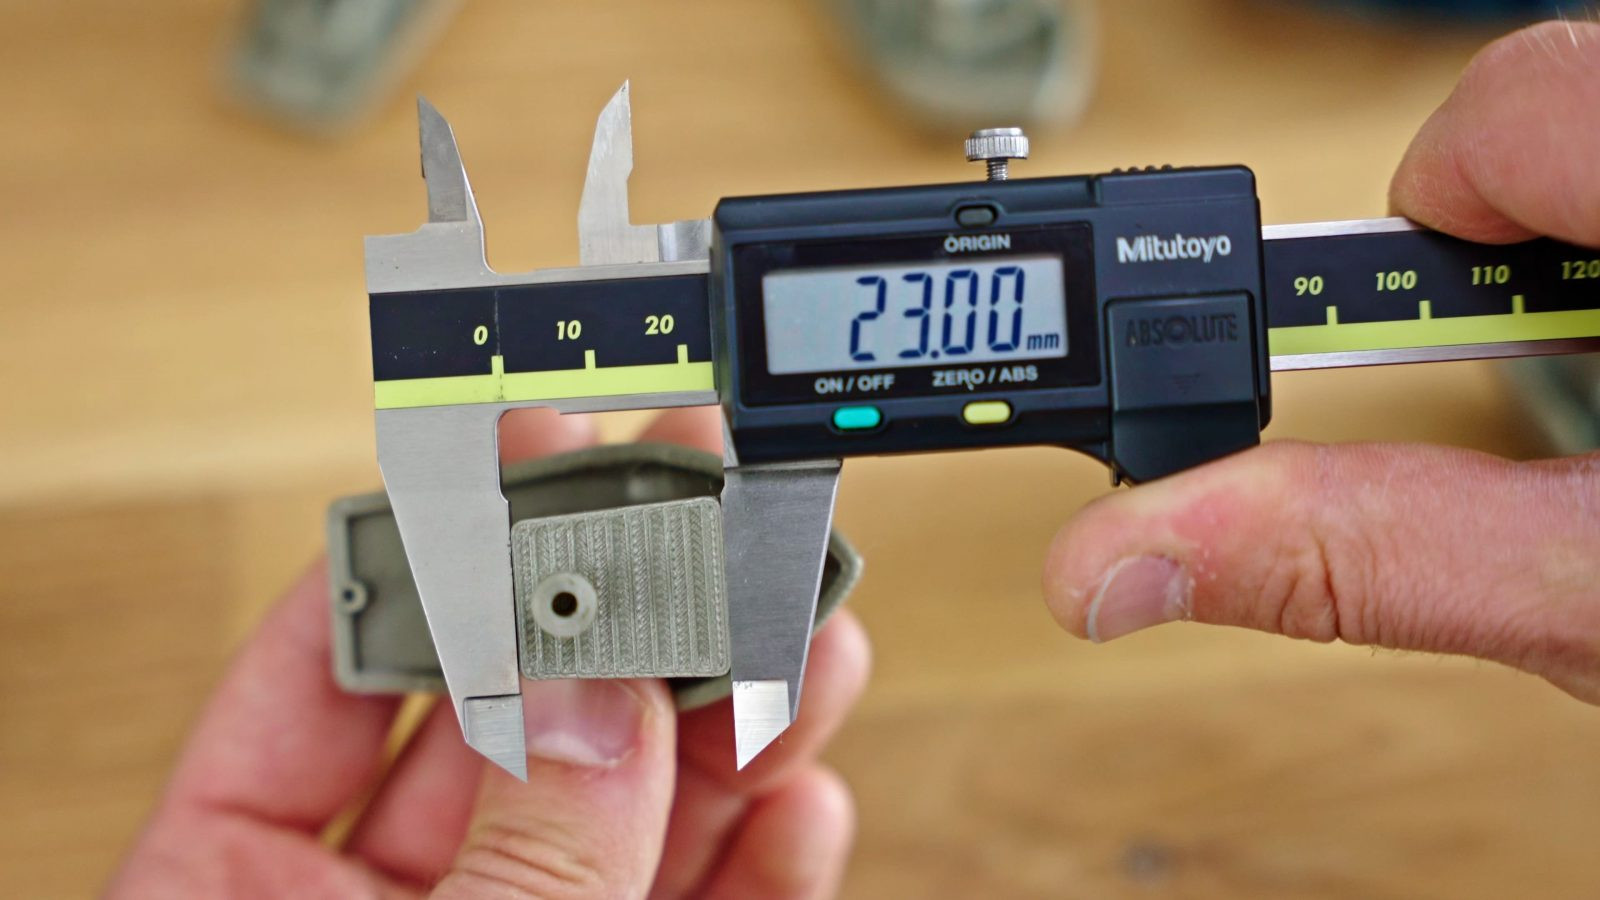 Diagram showing key dimensions to measure on a 3DBenchy
However, interpreting dimensional measurements from a 3D printed model requires understanding what you’re actually measuring. When you measure a dimension on a printed part, you’re essentially measuring two combined effects:
- Printer Movement Accuracy: This is the more intuitive aspect – when you instruct your printer to move, say, 70mm, does it actually move precisely 70mm? Traditional calibration guides often focus on adjusting steps per mm to correct for these discrepancies.
- Material “Bloat” or Shrinkage: More significantly, especially for smaller dimensions, you’re measuring how much the printed part has expanded or contracted in the XY plane due to the inherent characteristics of the filament and the printing process itself. This is often referred to as “bloat” or contour deviation.
It’s crucial to understand that these are distinct effects. Simply adjusting steps per mm based on a small feature measurement (like a 10mm cube on the Benchy) can lead to inaccurate scaling for larger prints. While that specific 10mm dimension might become accurate, the overall scale of larger parts will likely be incorrect.
The recommended approach for dimensional calibration is to first calibrate the overall scaling of your printer using a large-scale test object, such as calibration sticks or a large single-wall square. Once the overall steps per mm are accurately calibrated, then you can fine-tune the “bloat” or contour accuracy using the XY contour compensation or XY size compensation setting in your slicer. However, significant adjustments in either scaling or contour compensation often indicate underlying mechanical issues with your printer that should be addressed first.
Tips for Taking Dimensional Measurements:
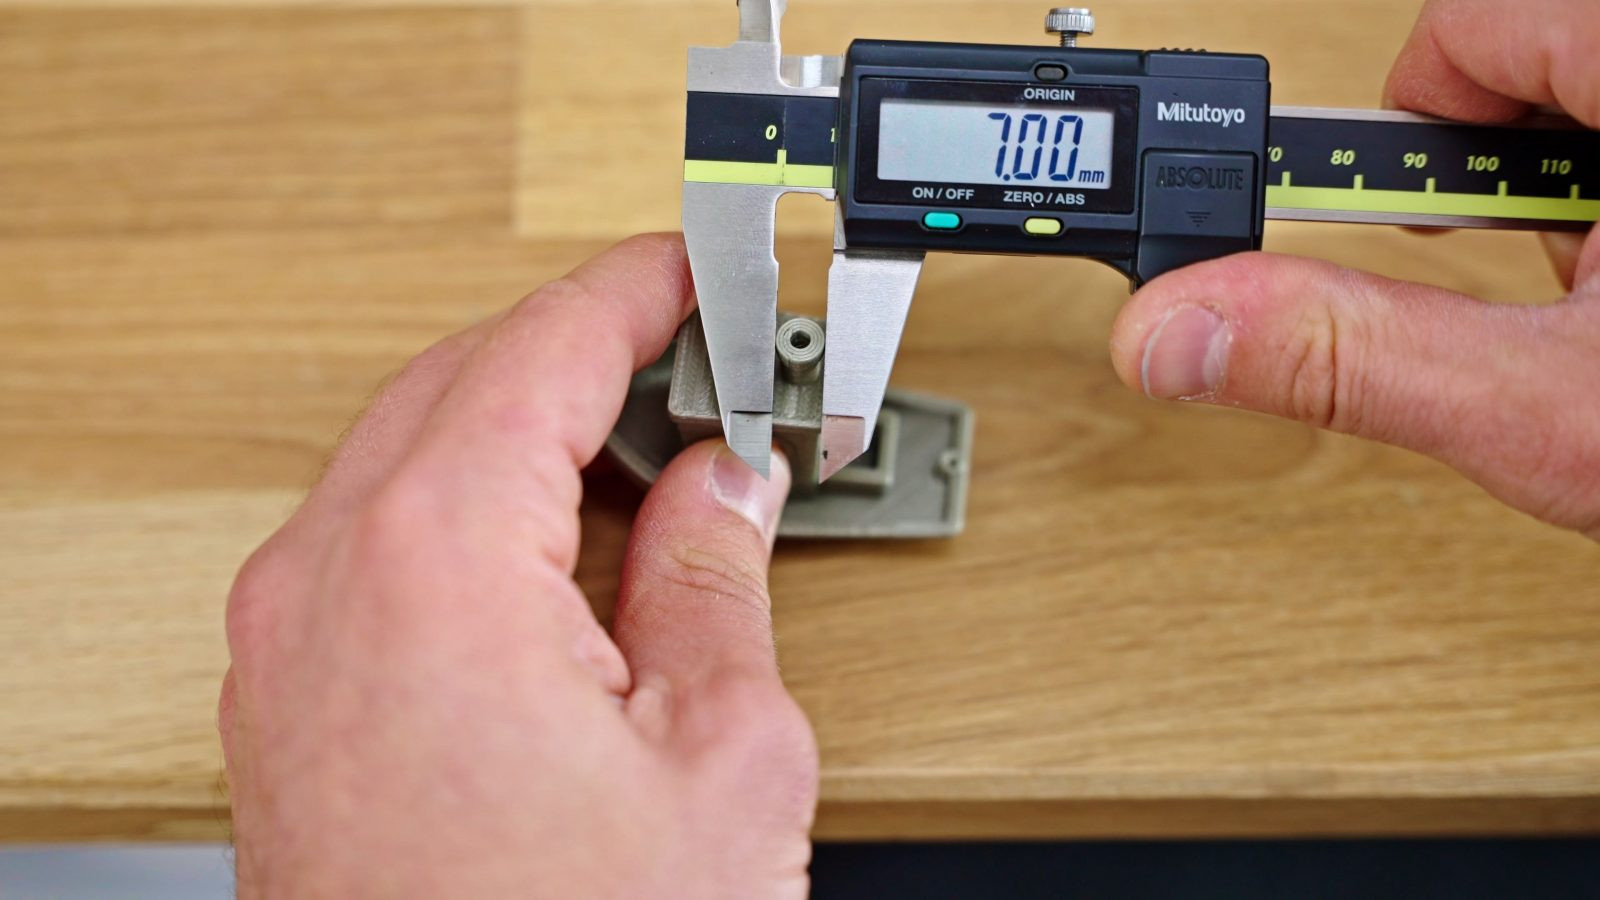
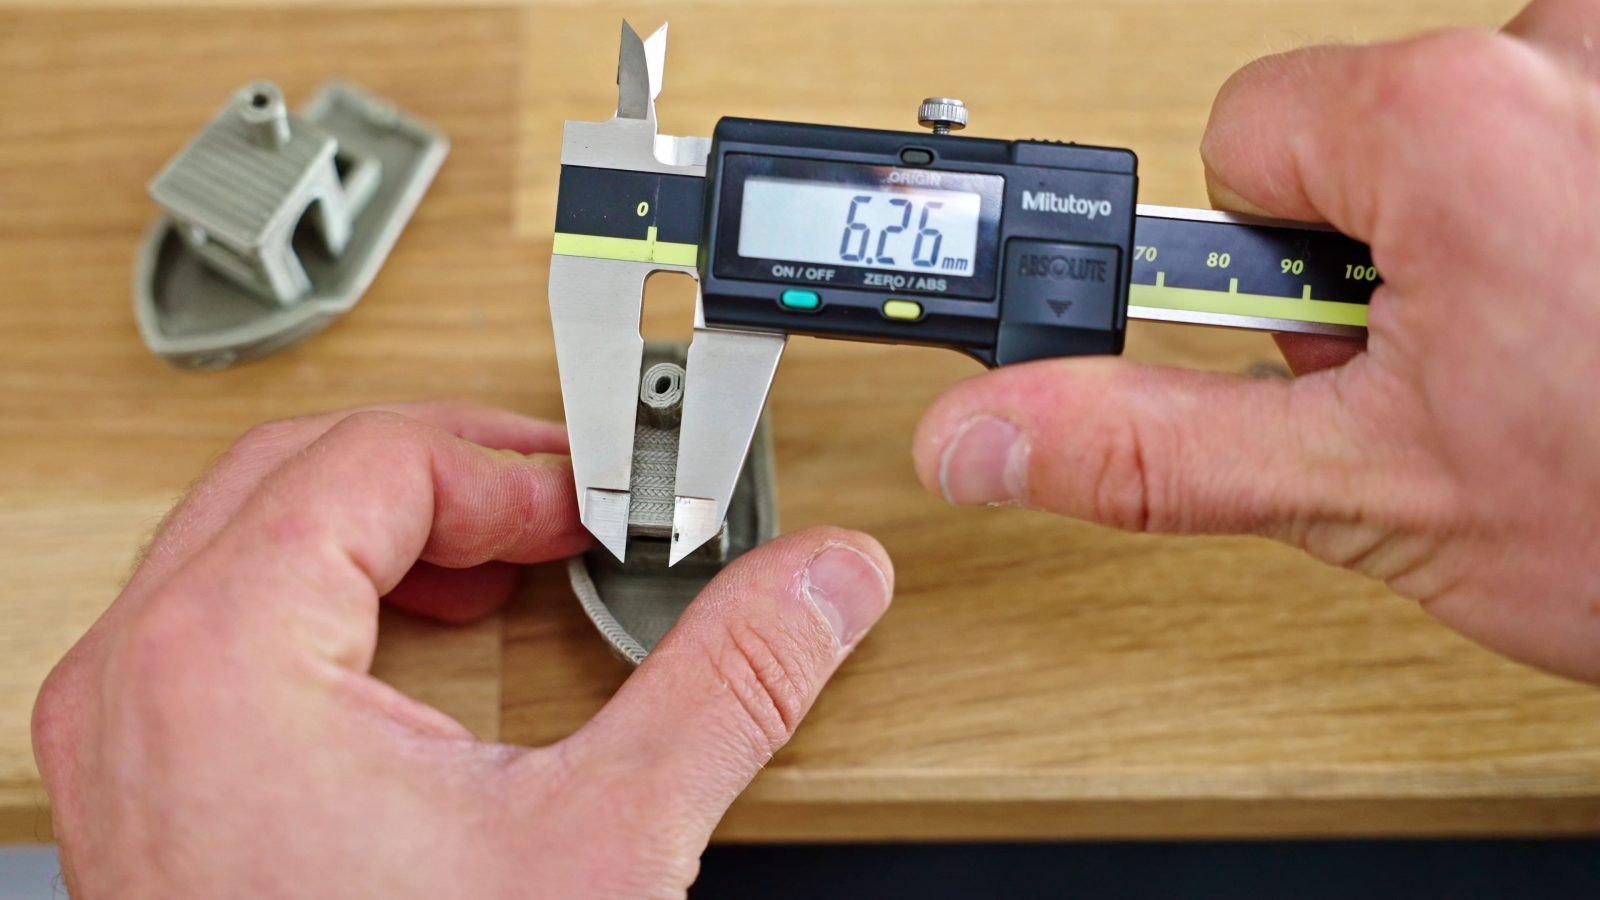
When measuring your 3DBenchy for dimensional accuracy, always aim to measure between two surfaces that are oriented in the same direction. This technique helps to cancel out the effect of “bloat.” If both surfaces are equally affected by contour deviation in the same direction, the measurement between them will be more representative of the intended dimension.
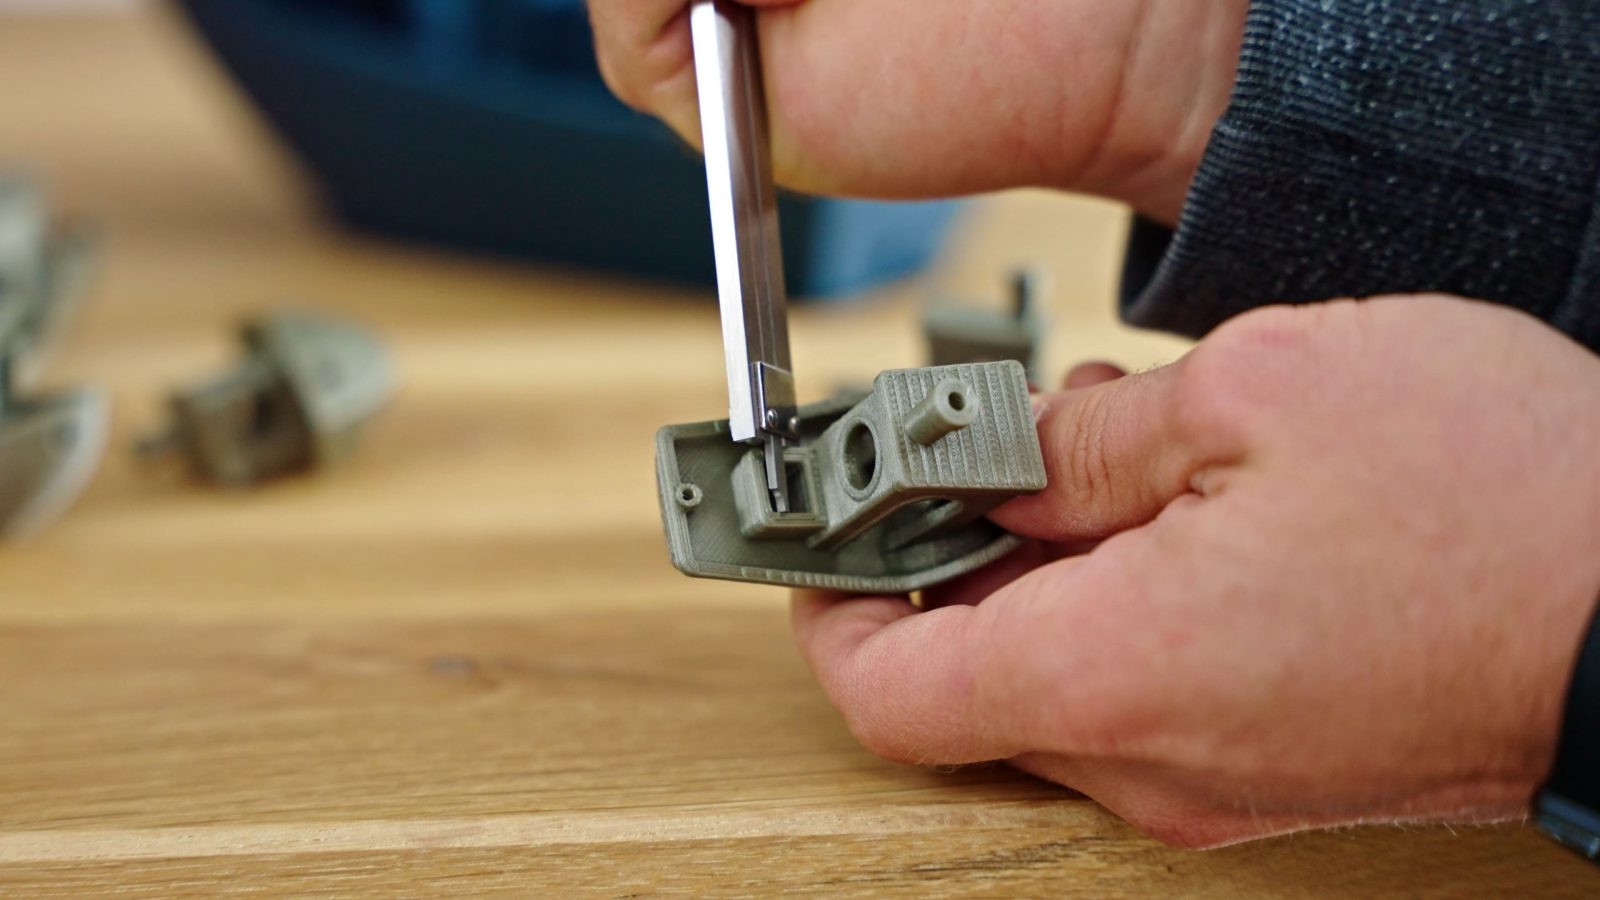 Example of measuring the distance between two parallel surfaces on a Benchy for dimensional accuracy
 Another example showing measurement between parallel surfaces on the Benchy
For example, measure the distance between the tip of the chimney and the top surface of the box (nominally 32.5mm), or the distance between the right side of the left box wall and the right side of the right box wall (nominally 10mm). Avoid measuring the overall width of the box (nominally 12mm), as this measurement is primarily influenced by contour compensation.
For a complete list of nominal dimensions for every feature of the 3DBenchy, refer to the official 3DBenchy website (https://www.3dbenchy.com/dimensions/).
Limitations of the 3DBenchy: When to Use Other Tests
While the 3DBenchy is an incredibly versatile test model, it’s essential to recognize its limitations. For a comprehensive assessment of your 3D printer’s capabilities, you may need to supplement it with other specialized tests.
1. Dimensional Accuracy (Large Scale): As mentioned earlier, while the Benchy is useful for understanding dimensional deviations, it’s not ideal for precise dimensional calibration, especially for large parts. To accurately calibrate scaling, use larger test objects.
2. Z-Axis Wobble: If your printer has mechanical instabilities in the Z-axis, such as wobble or binding, these issues may become more pronounced at higher Z-heights. The 3DBenchy, being relatively short, may not fully expose these problems. For taller prints, consider printing a taller test tower to check for Z-wobble artifacts, which often manifest as periodic layer inconsistencies along the Z-axis.
3. Fine Detail Resolution: The 3DBenchy is not designed to test the limits of fine detail resolution, particularly in the XY plane. It doesn’t have extremely small features that would challenge high-resolution resin printers or highlight differences between very small nozzle sizes (like 0.4mm vs. 0.25mm) or advanced slicing algorithms like Arachne.
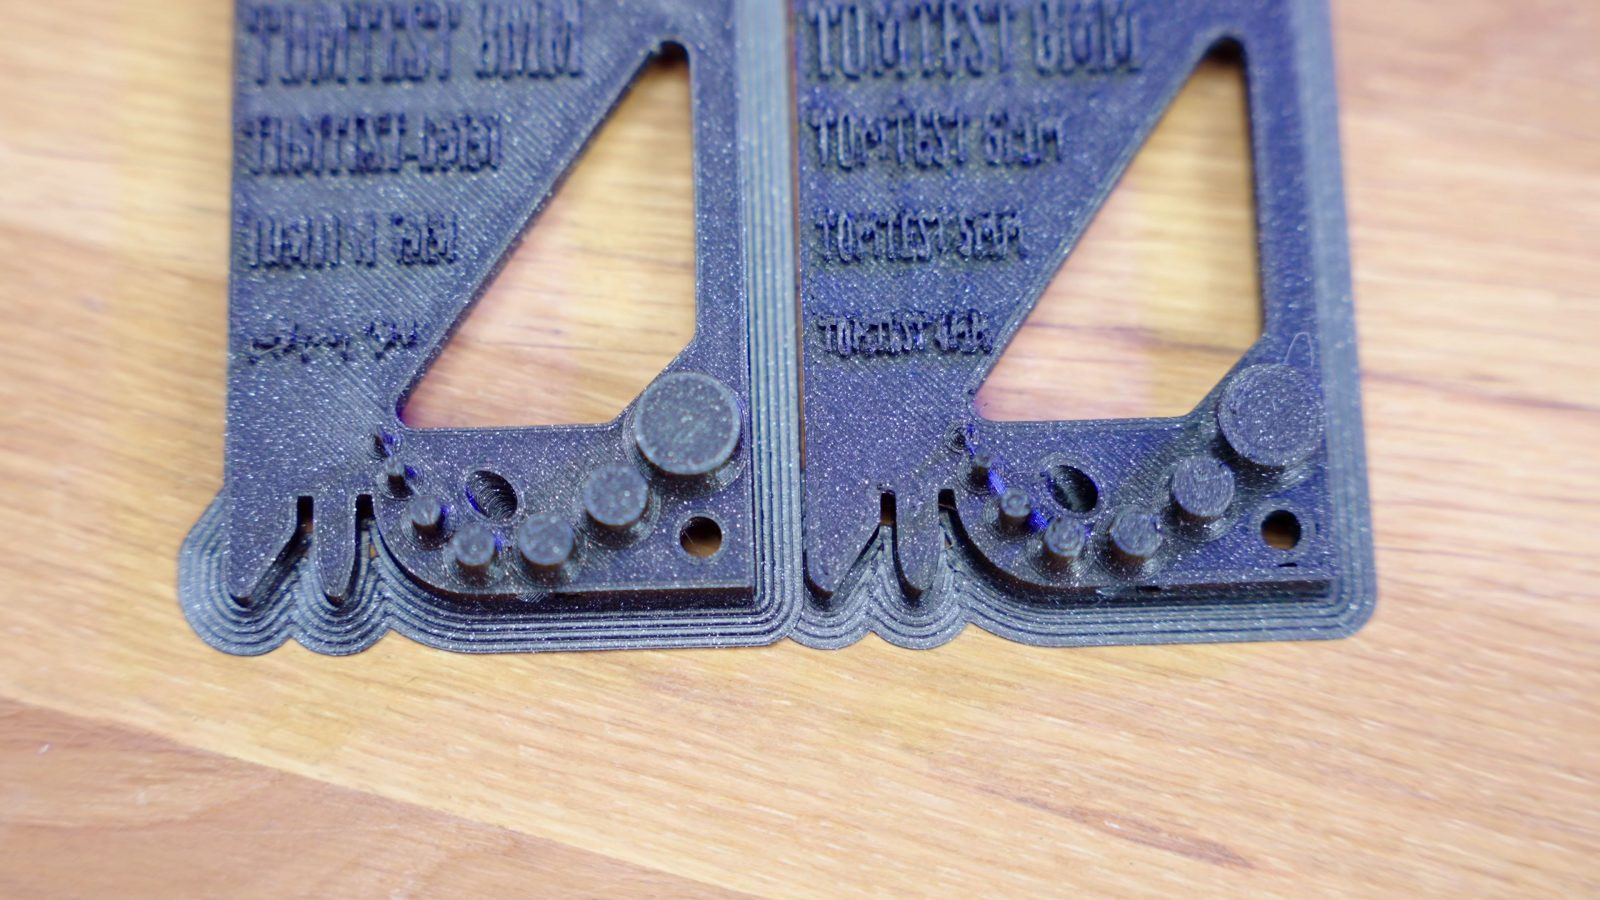
 Close-up of the text on the Benchy's stern, showing its limited resolution testing capability
 Another close-up of the text, emphasizing its role as a basic detail test but not a high-resolution benchmark
The 0.1mm tall text on the stern is a basic attempt at detail testing, but because it’s integrated into the perimeter and not a free-standing feature, it’s not a particularly demanding test. For high-resolution detail evaluation, especially for resin printers, dedicated resolution test models are necessary.
And finally, perhaps the most significant flaw of the 3DBenchy:
It. Doesn’t. Float.
 A 3D printed Benchy sinking in water, humorously highlighting its inability to float
(Unless printed with specific low-density or waterproof materials and designs).
Despite its minor shortcomings, the 3DBenchy remains an invaluable tool in the 3D printing toolkit. By understanding how to print it correctly and what details to look for, you can gain significant insights into your 3D printer’s performance and optimize your print quality. So, keep printing Benchys, keep experimenting, and keep making!
Models Shown:
- 3DBenchy
- Low-poly Pokemon by Flowalistik
- Prusament PLA Pearl Mouse and Gentlemen’s Grey
- Prusa Mini and MK3
Sources for CO2 emission data:
All my video gear