Printing directly from your iPhone or iPad has never been easier, thanks to Apple’s AirPrint technology. This built-in feature allows you to wirelessly print documents, photos, emails, and more, without the need for complicated setups or drivers. This guide will walk you through everything you need to know about using Air Print from your iOS devices, ensuring a smooth and efficient printing experience.
Understanding AirPrint: Wireless Printing at Your Fingertips
AirPrint is Apple’s innovative technology that enables seamless wireless printing from iPhones, iPads, and Macs to compatible printers. It eliminates the hassle of installing printer-specific drivers or using intermediary software. As long as your printer supports air print and is connected to the same Wi-Fi network as your iOS device, you’re ready to print.
Getting Started with AirPrint: Preparation is Key
Before you begin printing with air print, there are a couple of essential steps to ensure a smooth process:
1. Confirm AirPrint Printer Compatibility
First and foremost, you need to verify that your printer is AirPrint-enabled. Most modern printers from major manufacturers like HP, Canon, Epson, Brother, and others support air print. A quick way to check is to:
- Consult your printer’s documentation: Look for “AirPrint” mentioned in the printer’s manual or specifications.
- Visit the manufacturer’s website: Search for your printer model on the manufacturer’s website and check the product specifications or features for air print support.
- Apple’s Support Page: Apple maintains a list of AirPrint-compatible printers on their support website, which can be a helpful resource.
If you are unsure, contacting your printer manufacturer directly is always a reliable way to confirm air print compatibility.
2. Ensure Network Connectivity
For air print to work, both your iPhone or iPad and your AirPrint-enabled printer must be connected to the same Wi-Fi network. Here’s how to check:
- iPhone/iPad: Go to Settings > Wi-Fi and ensure Wi-Fi is turned on and connected to your desired network.
- Printer: Refer to your printer’s manual for instructions on connecting it to your Wi-Fi network. Most AirPrint printers offer wireless setup options through their control panel or accompanying software.
Make sure both devices are on the same network and within a reasonable wireless range of your router for optimal performance.
Step-by-Step Guide: Printing with AirPrint from iPhone or iPad
Once you’ve confirmed printer compatibility and network connectivity, printing with air print is incredibly straightforward. Here’s a step-by-step guide:
-
Open the App and Locate the Print Option: Begin by opening the application containing the document, photo, email, or webpage you wish to print. The print option is usually found within the app’s Share menu or Actions menu. Look for the Share icon, which often resembles an upward-pointing arrow in a box.
-
Access the Print Menu: Tap the Share button or Actions button within the app. Scroll through the options that appear. You should find a “Print” button or icon. It might be directly visible or located under a “More” or “Actions” submenu, depending on the app. Tap on “Print” to proceed. The Print icon typically looks like a printer.
Note: If you cannot locate the print option, it’s possible that the app you are using does not support air print. Check the app’s user guide or help section for more information. While many apps support air print, some may not.
-
Select Your AirPrint Printer: After tapping “Print,” a “Printer Options” screen will appear. Initially, it will likely display “No Printer Selected.” Tap on “No Printer Selected” to view a list of available AirPrint-enabled printers on your network. Choose your desired printer from the list.
-
Configure Print Settings: Once you’ve selected your printer, you can adjust various print settings, such as:
- Copies: Specify the number of copies you want to print.
- Page Range: Choose to print all pages or a specific range of pages.
- Double-Sided Printing: If your printer supports it, you may have the option to print on both sides of the paper.
- Color/Black & White: Select your desired print mode.
- Paper Size: Choose the appropriate paper size if necessary.
-
Initiate Printing: After configuring your desired settings, tap the “Print” button, usually located in the upper-right corner of the screen. Your print job will now be sent wirelessly to your AirPrint printer.
Managing Your Print Jobs: View and Cancel
While your document is printing via air print, you have the ability to monitor and manage the print job directly from your iPhone or iPad. iOS provides a “Print Center” to view and cancel print jobs in progress.
Viewing a Print Job in Progress
To view the status of your air print job:
- Open the App Switcher: Quickly double-click the Home button (on iPhones/iPads with a Home button) or swipe up from the bottom of the screen and hold briefly in the middle of the screen (on iPhones/iPads without a Home button) to access the App Switcher.
- Locate Print Center: In the App Switcher, look for the “Print Center” app. It will appear as an icon, often displaying the document name being printed and a progress indicator. Tap on “Print Center” to open it.
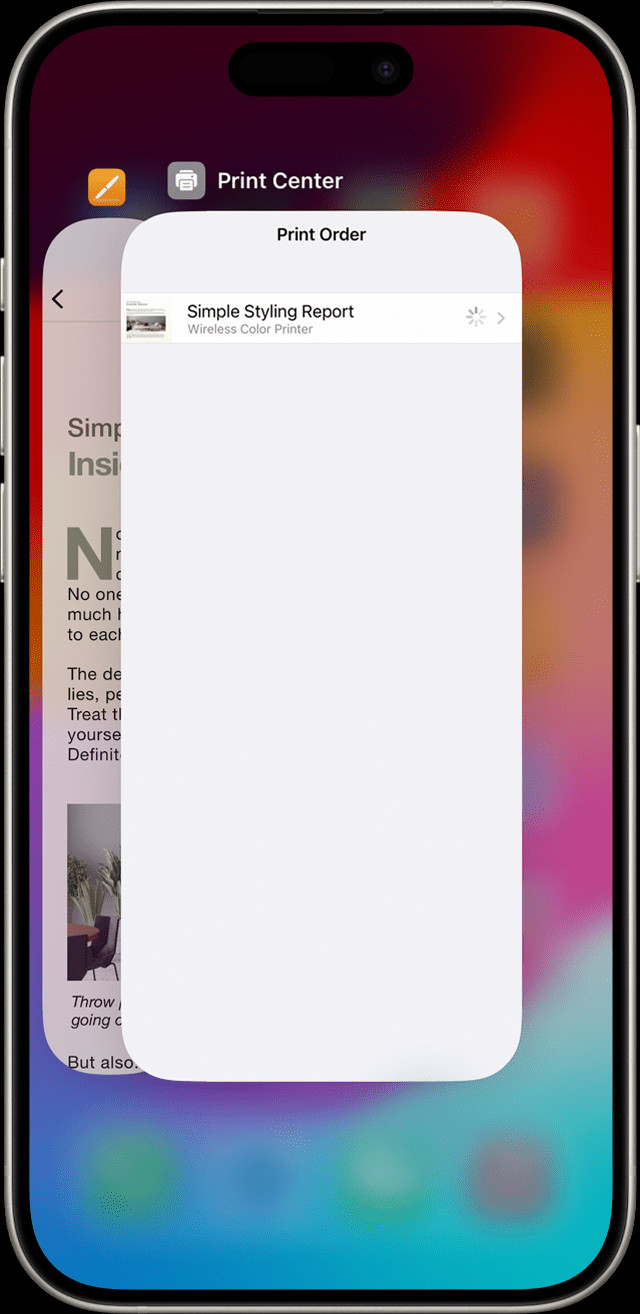 View print jobs in Print Center
Within Print Center, you can see the print job in the queue, its status (e.g., “Processing,” “Printing”), and the printer it’s being sent to.
Canceling a Print Job
If you need to cancel an air print job for any reason:
- Access Print Center: Follow the steps above to open the “Print Center” via the App Switcher.
- Cancel Printing: In Print Center, tap on the print job you want to cancel. Then, tap the “Cancel Printing” button. This will stop the print job from proceeding to your printer.
AirPrint and Network Connections: What You Need to Know
AirPrint is designed to function seamlessly over Wi-Fi networks. It also supports wired network connections (Ethernet) for printers that are connected to your network via an Ethernet cable.
However, it’s important to note that AirPrint does not work in the following scenarios:
- USB Connection to AirPort Base Station/Time Capsule: AirPrint printers connected to the USB port of an Apple AirPort Base Station or AirPort Time Capsule are not supported.
- Bluetooth Connection to Computer: Similarly, printers connected to your computer via Bluetooth cannot be used with AirPrint.
For air print to function correctly, the printer must be directly connected to your Wi-Fi or wired network and accessible to your iOS devices over that network.
Conclusion: Embrace the Convenience of AirPrint
AirPrint offers a remarkably convenient and user-friendly way to print wirelessly from your iPhone and iPad. By ensuring your printer is compatible and properly connected to your Wi-Fi network, you can enjoy effortless printing of your important documents and cherished photos directly from your iOS devices. Say goodbye to tangled cables and complicated driver installations, and embrace the simplicity of air print for all your mobile printing needs.
Disclaimer: Information about products not manufactured by Apple, or independent websites not controlled or tested by Apple, is provided without recommendation or endorsement. Apple assumes no responsibility with regard to the selection, performance, or use of third-party websites or products. Apple makes no representations regarding third-party website accuracy or reliability. Contact the vendor for additional information.