
Setting up your Canon printer to work wirelessly over Wi-Fi can greatly enhance your printing convenience, allowing you to print from various devices without the need for direct cable connections. If you’re struggling to connect your Canon printer to your Wi-Fi network, this guide provides step-by-step instructions and troubleshooting tips to get you printing wirelessly in no time.
Connecting your Canon printer to Wi-Fi essentially involves making it discoverable on your wireless network so your computers and other devices can send print jobs wirelessly. The process typically involves a few key steps, and we’ll cover the most common methods to ensure a smooth setup.
Step-by-Step Guide to Connect Your Canon Printer to Wi-Fi
There are several ways to connect your Canon printer to your Wi-Fi network, and the best method can depend on your printer model and your existing setup. Here are the primary approaches:
Method 1: Using the Printer’s Control Panel (WPS or Auto Setup)
Many modern Canon printers come equipped with a control panel that allows for direct Wi-Fi setup. This is often the simplest method if your printer supports it.
-
Enter Setup Mode on Your Printer: Navigate through your printer’s control panel menu to find the “Wireless LAN setup” or “Wi-Fi setup” option. The exact wording may vary depending on your Canon printer model, so consult your printer’s manual for specific instructions.
-
Select a Connection Method: You might be presented with options like “WPS (Wi-Fi Protected Setup)” or “Auto setup.”
-
WPS Connection: If your Wi-Fi router supports WPS, this is often the quickest method. Select “WPS” on your printer and then press the WPS button on your router. The devices should automatically find and connect to each other.
-
Auto Setup/Cableless Setup: Some printers offer an “Auto setup” or “Cableless setup” option. Selecting this usually initiates a process where the printer temporarily creates its own wireless network. You then connect your computer or smartphone to this temporary network to configure the Wi-Fi settings for your home network. Follow the on-screen prompts on your computer or the printer’s control panel to complete this setup.
-
-
Enter Wi-Fi Password (if prompted): If you are not using WPS or auto setup, you may need to manually select your Wi-Fi network name (SSID) from a list displayed on the printer’s control panel and enter your Wi-Fi password using the printer’s keypad or touch screen.
Method 2: Using the Canon Software (Wireless Setup Assistant)
Canon provides software and drivers for their printers that often include a “Wireless Setup Assistant.” This tool can guide you through the process of connecting your printer to Wi-Fi from your computer.
-
Install Canon Drivers and Software: If you haven’t already, download and install the latest drivers and software for your Canon printer model from the official Canon support website. Ensure you select the software compatible with your computer’s operating system (Windows or macOS).
-
Run the Wireless Setup Assistant: During the software installation, or from the installed Canon software utilities, look for the “Wireless Setup Assistant” or a similar tool. Launch this assistant.
-
Follow On-Screen Instructions: The Wireless Setup Assistant will guide you through connecting your printer to your Wi-Fi network. It will typically search for nearby wireless networks, prompt you to select yours, and ask for the Wi-Fi password. Follow each step carefully as indicated by the software.
Method 3: Adding Printer via IP Address (Manual Setup)
In some cases, you might need to manually add your Canon printer using its IP address. This is particularly useful if automatic discovery isn’t working or for more advanced network setups.
-
Find Your Printer’s IP Address: You’ll need to determine the IP address assigned to your Canon printer on your Wi-Fi network. This is usually found in your printer’s network settings menu, often under “Network Settings” or “Wi-Fi Settings.” You may need to print a network configuration page from your printer to find this information.
-
Access Printer Settings on Your Computer:
- On macOS: Go to “System Preferences” > “Printers & Scanners.”
- On Windows: Go to “Control Panel” > “Devices and Printers” > “Add a printer.”
-
Add a Printer Using IP Address:
- On macOS: Click the “+” button to add a printer. Select the “IP” tab at the top. In the “Address” field, enter the IP address of your Canon printer. macOS will usually attempt to auto-detect the printer driver. If it doesn’t, you may need to manually select your Canon printer model from the “Use” dropdown menu or provide a driver file if prompted.
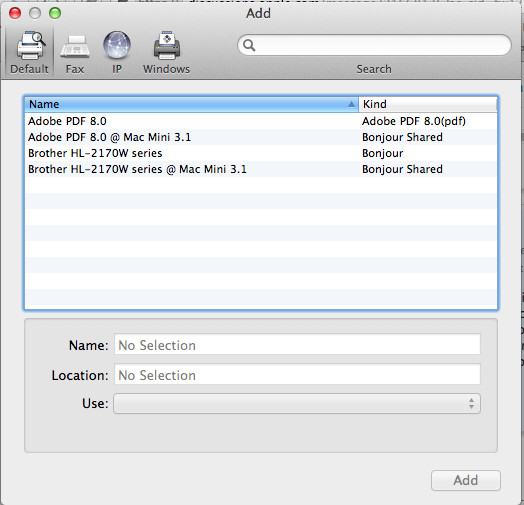 macOS Print & Scan settings showing the 'Add Printer' dialog, highlighting the IP tab for manual Wi-Fi printer setup.
- On Windows: In the “Add Printer” wizard, choose “Add a network, wireless or Bluetooth printer.” If your printer isn’t automatically listed, select “The printer that I want isn’t listed.” Then choose “Add a printer using a TCP/IP address or hostname” and click “Next.” Enter “TCP/IP Device” as the device type and input the printer’s IP address in the “Hostname or IP address” field. Windows will typically search for and install the appropriate driver.
Troubleshooting Common Issues
If you encounter problems while trying to add your Canon printer to Wi-Fi, consider these troubleshooting steps:
- Ensure Printer and Computer are on the Same Network: Verify that both your Canon printer and your computer are connected to the same Wi-Fi network.
- Check Wi-Fi Password: Double-check that you are entering the correct Wi-Fi password. Passwords are case-sensitive.
- Restart Devices: Restart your Canon printer, your computer, and your Wi-Fi router. This can often resolve temporary network glitches.
- Driver Compatibility: Make sure you have installed the correct and latest drivers for your Canon printer and your operating system. Outdated or incorrect drivers are a common cause of connection problems.
- Firewall or Security Software: Temporarily disable any firewall or security software on your computer to see if they are blocking the printer connection. If this resolves the issue, you may need to configure your firewall to allow communication with your printer.
- Printer Manual: Refer to your Canon printer’s manual for model-specific Wi-Fi setup instructions and troubleshooting tips. Canon’s manuals often provide detailed guidance and diagrams.
Conclusion
Connecting your Canon printer to Wi-Fi offers significant convenience and flexibility. By following these methods and troubleshooting tips, you should be able to successfully set up your printer for wireless printing. Whether you choose to use the printer’s control panel, Canon’s software, or manual IP address setup, the key is to ensure your printer is correctly configured on your Wi-Fi network and that your computer has the necessary drivers to communicate with it. Once connected, you can enjoy seamless wireless printing from all your devices.