Adding a printer on your Mac can unlock seamless printing capabilities. Are you wondering how to add a printer to your Mac? This comprehensive guide provides a detailed, step-by-step process to help you connect your printer and start printing effortlessly. With amazingprint.net, you’ll discover that setting up a printer on macOS is straightforward, enhancing your productivity and document management. Let’s explore the best methods to add and manage your printers, ensuring optimal printing solutions and efficient output using print management.
1. Preparing to Add a Printer on Mac
Before diving into the process of adding a printer to your Mac, there are several preliminary steps to ensure a smooth and successful setup. These steps include updating printer software, physically preparing your printer, and understanding the different connection methods available. These initial actions will save you time and effort in the long run, ensuring that your printer integrates seamlessly with your macOS environment.
1.1. Updating Printer Software on Mac
Question: Why is updating printer software important when you Add A Printer On Mac?
Updating your printer software is crucial for ensuring compatibility and optimal performance when you add a printer on Mac. Keeping your printer drivers up to date helps resolve potential conflicts, improves functionality, and allows you to take advantage of the latest features and security enhancements.
According to a study by the Printing Industries of America (PIA), outdated printer drivers are a common cause of printing issues, leading to frustration and decreased productivity. Regularly updating your printer software ensures that your Mac can communicate effectively with the printer, resulting in reliable and high-quality printing.
To update your printer software:
- Check the Manufacturer’s Website: Visit the official website of your printer manufacturer (e.g., HP, Epson, Canon) and navigate to the support or downloads section.
- Enter Your Printer Model: Input your specific printer model to find the latest drivers and software compatible with macOS.
- Download and Install: Download the appropriate software and follow the installation instructions provided by the manufacturer.
For AirPrint printers, Apple automatically handles software updates, so manual updates are typically unnecessary. However, it’s still a good practice to ensure your macOS is up to date to receive the latest AirPrint enhancements.
1.2. Preparing Your Printer Physically
Question: What physical preparations are needed before you add a printer on Mac?
Preparing your printer physically involves unpacking, installing ink or toner, loading paper, and powering on the device. These steps are essential to ensure that the printer is ready for connection and operation.
Follow these steps to prepare your printer:
- Unpacking: Remove the printer from its packaging and take out all protective materials, such as tapes and films.
- Ink/Toner Installation: Install the ink cartridges or toner as per the manufacturer’s instructions. Ensure they are properly seated to avoid printing errors.
- Paper Loading: Load paper into the paper tray, following the guidelines for paper type and capacity.
- Powering On: Connect the printer to a power source and turn it on. Check for any error messages or status indicators.
1.3. Understanding Printer Connection Methods
Question: What are the different ways to connect a printer when you add a printer on Mac?
Understanding the various printer connection methods is key to a successful setup when you add a printer on Mac. The primary connection methods include Wi-Fi, USB, and Ethernet. Each method has its advantages and is suitable for different scenarios.
| Connection Method | Advantages | Disadvantages |
|---|---|---|
| Wi-Fi | Wireless convenience, allows multiple devices to connect, easy to integrate into existing networks. | Can be affected by network congestion, requires a stable Wi-Fi connection, initial setup might need a USB connection. |
| USB | Direct connection, simple setup, reliable data transfer. | Limited to one device, can restrict printer placement due to cable length. |
| Ethernet | Stable and fast connection, ideal for high-volume printing, secure data transfer. | Requires an Ethernet port on both the printer and Mac, less convenient for mobile devices. |
| AirPrint | Seamless integration with Apple devices, automatic discovery and setup, no need for additional drivers. | Limited to AirPrint-enabled printers, functionality might be limited compared to manufacturer-specific drivers. |
2. Step-by-Step Guide to Adding a Printer on Mac
Adding a printer on Mac involves a series of steps that are generally straightforward but can vary slightly depending on the connection method and printer model. This section provides a detailed guide to help you navigate the process, ensuring your printer is correctly installed and ready for use.
2.1. Adding a Wi-Fi Printer on Mac
Question: How do I add a Wi-Fi printer when I add a printer on Mac?
Adding a Wi-Fi printer on your Mac allows you to print wirelessly from anywhere within your network’s range. Here’s how to do it:
-
Connect to the Same Wi-Fi Network: Ensure that both your Mac and the printer are connected to the same Wi-Fi network.
-
Open System Settings: Go to the Apple menu and select “System Settings.”
-
Navigate to Printers & Scanners: Click on “Printers & Scanners” in the sidebar.
-
Add Printer: If your printer is not listed, click the “Add Printer, Scanner, or Fax” button on the right.
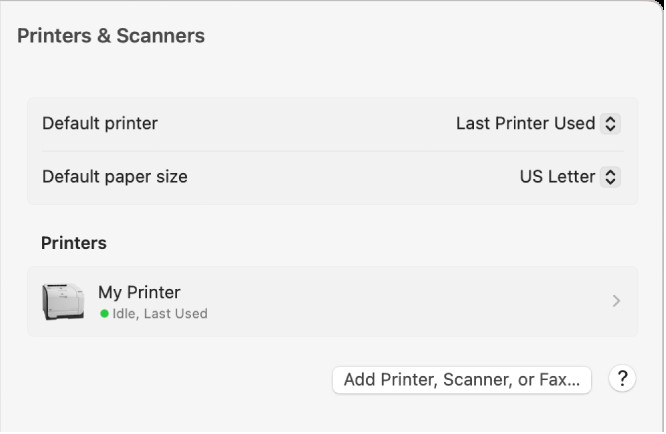 Printers & Scanners dialog showing options for setting up a printer and a printers list with an Add Printer, Scanner, or Fax button.
 -
Select Your Printer: A dialog box will appear listing printers on your local network. Select your printer from the list.
-
Add the Printer: Click “Add.” macOS will attempt to automatically configure the printer. If prompted to download additional software, follow the instructions to install it.
If your printer doesn’t appear in the list, ensure it is turned on, connected to the Wi-Fi network, and that its wireless functionality is enabled. You might need to refer to the printer’s manual for specific instructions on connecting it to your Wi-Fi network.
2.2. Adding a USB Printer on Mac
Question: How do I add a USB printer when I add a printer on Mac?
Adding a USB printer on your Mac is one of the simplest methods, providing a direct and reliable connection. Here’s how:
- Connect the Printer: Plug the USB cable into both your printer and your Mac.
- Turn On the Printer: Ensure the printer is powered on.
- Open System Settings: Go to the Apple menu and select “System Settings.”
- Navigate to Printers & Scanners: Click on “Printers & Scanners” in the sidebar.
- Add Printer: If your printer is not listed, click the “Add Printer, Scanner, or Fax” button on the right.
- Select Your Printer: Your printer should appear in the list of available printers. Select it and click “Add.”
macOS will typically detect the printer automatically and install the necessary drivers. If prompted to download additional software, follow the instructions to install it.
2.3. Adding an AirPrint Printer on Mac
Question: How do I add an AirPrint printer when I add a printer on Mac?
AirPrint is Apple’s technology that allows you to print wirelessly without needing to install drivers. Here’s how to add an AirPrint printer on your Mac:
- Connect to the Same Wi-Fi Network: Ensure that both your Mac and the AirPrint printer are connected to the same Wi-Fi network.
- Open System Settings: Go to the Apple menu and select “System Settings.”
- Navigate to Printers & Scanners: Click on “Printers & Scanners” in the sidebar.
- Add Printer: If your printer is not listed, click the “Add Printer, Scanner, or Fax” button on the right.
- Select Your Printer: Your AirPrint printer should appear in the list of available printers. Select it.
- Add the Printer: In the “Use” field, make sure “AirPrint” is selected. Click “Add.”
With AirPrint, your Mac should automatically detect and configure the printer, allowing you to print without needing to install additional software.
2.4. Adding a Network Printer (Ethernet) on Mac
Question: How do I add a network printer via Ethernet when I add a printer on Mac?
Adding a network printer via Ethernet provides a stable and fast connection, ideal for environments with high-volume printing needs. Here’s how to set it up:
- Connect the Printer: Connect the printer to your network using an Ethernet cable.
- Ensure Network Connectivity: Make sure the printer is properly connected to the network and has an IP address. You may need to consult your printer’s manual or network administrator to configure its network settings.
- Open System Settings: Go to the Apple menu and select “System Settings.”
- Navigate to Printers & Scanners: Click on “Printers & Scanners” in the sidebar.
- Add Printer: Click the “Add Printer, Scanner, or Fax” button on the right.
- Select Your Printer: If your printer doesn’t appear automatically, click the “IP” tab at the top of the Add Printer dialog.
- Enter Printer Details:
- Address: Enter the printer’s IP address.
- Protocol: Select “Line Printer Daemon – LPD” or “Internet Printing Protocol – IPP” (try IPP first).
- Queue: Leave blank or enter “lp.”
- Name: Enter a descriptive name for the printer.
- Location: Optionally, add a location description.
- Use: Select the appropriate driver for your printer from the dropdown menu. If your printer is not listed, you can try selecting a generic PostScript or PCL driver.
- Add the Printer: Click “Add.”
macOS will attempt to connect to the printer using the provided IP address and protocol. If the printer doesn’t respond, double-check the IP address and network settings.
3. Troubleshooting Printer Connection Issues on Mac
Even with careful preparation, you might encounter issues when adding a printer to your Mac. This section provides troubleshooting steps to address common problems and ensure a successful printer connection.
3.1. Printer Not Appearing in the List
Question: What should I do if my printer is not showing up when I add a printer on Mac?
If your printer is not appearing in the list of available printers when you add a printer on Mac, there are several potential causes and solutions:
- Network Connection: Ensure that both your Mac and the printer are connected to the same network. For Wi-Fi printers, verify that the printer is connected to your Wi-Fi network and that the Wi-Fi signal is strong.
- Printer Power: Make sure the printer is turned on and not in sleep mode. Some printers go into a low-power mode that can prevent them from being discovered on the network.
- Bonjour Service: The Bonjour service, which allows macOS to discover devices on the network, might not be functioning correctly. To restart Bonjour:
- Open the Terminal application (found in /Applications/Utilities/).
- Type the following command and press Enter:
sudo killall -HUP mDNSResponder - Enter your administrator password when prompted.
- Firewall Settings: Check your firewall settings to ensure that they are not blocking printer communication. Go to System Settings, click “Network,” select your active network connection, and click “Firewall.” Ensure that “Block all incoming connections” is not enabled, or configure exceptions for printer-related services.
- Printer Drivers: Ensure that you have the correct drivers installed on your Mac. If you recently upgraded your operating system, you might need to reinstall the printer drivers.
- Printer Discovery: Some printers have a discovery setting that needs to be enabled. Refer to your printer’s manual for instructions on enabling network discovery.
3.2. Printing Errors and Problems
Question: What can I do to fix printing errors after I add a printer on Mac?
After you add a printer on Mac, you might encounter printing errors such as garbled output, incomplete prints, or error messages. Here are some troubleshooting steps:
- Check Ink/Toner Levels: Ensure that the ink or toner cartridges are not empty or low. Replace them if necessary.
- Paper Jams: Check for and clear any paper jams in the printer. Follow the printer’s manual for instructions on how to safely remove jammed paper.
- Driver Issues: Reinstall the printer drivers. Sometimes, corrupted or outdated drivers can cause printing errors. Download the latest drivers from the manufacturer’s website.
- Printer Queue: Check the printer queue for stuck or paused print jobs. To do this:
- Go to System Settings and click “Printers & Scanners.”
- Select your printer and click “Open Print Queue.”
- Delete any stalled print jobs by selecting them and clicking the “Delete” button (X).
- Printer Settings: Verify that the printer settings are correct for your document. Check settings such as paper size, orientation, and print quality.
- Restart Printer and Mac: Sometimes, simply restarting both the printer and your Mac can resolve printing errors.
- Run Printer Diagnostic Tools: Many printer manufacturers provide diagnostic tools that can help identify and fix printing problems. Download and run these tools from the manufacturer’s website.
3.3. Driver Compatibility Issues
Question: How do I handle driver compatibility issues when I add a printer on Mac?
Driver compatibility issues can arise when you add a printer on Mac, especially after upgrading your operating system. Here’s how to address them:
- Check for Updates: Regularly check the printer manufacturer’s website for updated drivers that are compatible with your version of macOS.
- Use AirPrint: If your printer supports AirPrint, try using it as an alternative. AirPrint often provides basic printing functionality without needing to install specific drivers.
- Reset Printing System: Resetting the printing system can resolve driver conflicts. To do this:
- Go to System Settings and click “Printers & Scanners.”
- Right-click (or Control-click) in the list of printers on the left.
- Select “Reset printing system…”
- Confirm the reset. This will remove all printers from your list, so you will need to add them again.
- Contact Support: If you’re unable to find compatible drivers or resolve the issue, contact the printer manufacturer’s support for assistance.
- Generic Drivers: As a last resort, try using a generic PostScript or PCL driver. While these may not provide all the features of a specific driver, they can allow you to print basic documents.
3.4. Wi-Fi Connectivity Problems
Question: What should I do if I’m having Wi-Fi connectivity problems after I add a printer on Mac?
Wi-Fi connectivity problems can prevent your Mac from communicating with your printer. Here are some troubleshooting steps:
- Check Wi-Fi Signal: Ensure that both your Mac and the printer have a strong and stable Wi-Fi signal. Move closer to the router or consider using a Wi-Fi extender.
- Restart Router: Restart your Wi-Fi router to refresh the network connection.
- Reconnect to Wi-Fi: Disconnect and reconnect both your Mac and printer to the Wi-Fi network.
- Check IP Address: Ensure that the printer has a valid IP address. You can usually find this information in the printer’s network settings. If the printer has an IP address of 0.0.0.0 or a similar invalid address, it may not be properly connected to the network.
- Update Firmware: Check for firmware updates for your printer and router. Updating the firmware can improve compatibility and performance.
- Disable Interference: Reduce potential sources of interference, such as microwave ovens, Bluetooth devices, and other electronic devices.
- Use a USB Connection: If you continue to experience Wi-Fi connectivity problems, consider using a USB connection as an alternative.
4. Managing Printers on Mac
Once you add a printer on Mac, managing your printers effectively ensures smooth and efficient printing operations. This section covers how to set a default printer, remove a printer, and manage print queues.
4.1. Setting a Default Printer on Mac
Question: How can I set a default printer after I add a printer on Mac?
Setting a default printer on your Mac streamlines your workflow by automatically selecting your preferred printer for all print jobs. Here’s how to set it up:
- Open System Settings: Go to the Apple menu and select “System Settings.”
- Navigate to Printers & Scanners: Click on “Printers & Scanners” in the sidebar.
- Select Default Printer: Use the “Default printer” dropdown menu to choose the printer you want to set as the default.
You can also set the default printer to be the last printer used. This option is useful if you frequently switch between multiple printers.
4.2. Removing a Printer from Mac
Question: How do I remove a printer from my Mac after I add a printer on Mac?
Removing a printer from your Mac is useful when you no longer need to use a particular printer or if you’re troubleshooting printer issues. Here’s how to remove a printer:
- Open System Settings: Go to the Apple menu and select “System Settings.”
- Navigate to Printers & Scanners: Click on “Printers & Scanners” in the sidebar.
- Select the Printer: Select the printer you want to remove from the list on the left.
- Remove Printer: Click the “Remove Printer” button (–) below the list of printers.
- Confirm Removal: Confirm that you want to remove the printer.
4.3. Managing Print Queues on Mac
Question: How do I manage print queues after I add a printer on Mac?
Managing print queues allows you to monitor, pause, resume, and cancel print jobs. Here’s how to manage print queues on your Mac:
- Open System Settings: Go to the Apple menu and select “System Settings.”
- Navigate to Printers & Scanners: Click on “Printers & Scanners” in the sidebar.
- Select the Printer: Select the printer for which you want to manage the print queue.
- Open Print Queue: Click the “Open Print Queue” button.
- Manage Print Jobs:
- Pause/Resume: To pause or resume a print job, select it and click the “Pause” or “Resume” button.
- Cancel: To cancel a print job, select it and click the “Delete” button (X).
- View Details: Double-click a print job to view its details, such as the document name, status, and number of pages.
5. Optimizing Printing on Mac
Optimizing your printing experience on Mac involves adjusting print settings to improve quality, save resources, and enhance efficiency. This section covers how to adjust print settings, use print presets, and troubleshoot common printing issues.
5.1. Adjusting Print Settings on Mac
Question: How can I adjust print settings to optimize print quality when I add a printer on Mac?
Adjusting print settings allows you to control various aspects of your print output, such as print quality, paper type, and color management. Here’s how to do it:
- Open a Document: Open the document you want to print.
- Go to Print: Choose “File” > “Print” from the menu bar.
- Show Details: If the print dialog is in simplified mode, click “Show Details” to access advanced settings.
- Adjust Settings:
- Printer: Select the desired printer from the “Printer” dropdown menu.
- Presets: Choose a preset or customize settings manually.
- Paper Size: Select the appropriate paper size from the “Paper Size” dropdown menu.
- Orientation: Choose the desired orientation (portrait or landscape).
- Paper Handling: Adjust settings related to paper feeding and destination.
- Media & Quality: Adjust print quality settings, such as resolution and print mode (e.g., draft, normal, best).
- Color Options: Adjust color settings, such as color mode (e.g., color, grayscale) and color profiles.
- Layout: Adjust the layout settings, such as number of pages per sheet and border options.
- Print: Click “Print” to start the printing process.
Experimenting with different print settings can help you achieve the desired print quality and optimize resource usage.
5.2. Using Print Presets on Mac
Question: How do I create and use print presets when I add a printer on Mac?
Print presets allow you to save frequently used print settings and apply them quickly to future print jobs. Here’s how to create and use print presets:
- Open a Document: Open the document you want to print.
- Go to Print: Choose “File” > “Print” from the menu bar.
- Show Details: If the print dialog is in simplified mode, click “Show Details” to access advanced settings.
- Adjust Settings: Adjust the print settings as desired (e.g., paper size, orientation, print quality).
- Save as Preset: Click the “Presets” dropdown menu and select “Save Current Settings as Preset…”
- Name the Preset: Enter a descriptive name for the preset and choose whether to make it available for all printers or only the currently selected printer.
- Create: Click “OK” to save the preset.
- Use the Preset: To use a saved preset, simply select it from the “Presets” dropdown menu in the print dialog.
Print presets can save you time and ensure consistent printing results for different types of documents.
5.3. Managing Color Profiles
Question: How do I manage color profiles to achieve accurate color reproduction when I add a printer on Mac?
Managing color profiles ensures accurate color reproduction when printing, especially for graphic-intensive documents. Here’s how to manage color profiles on your Mac:
- Open a Document: Open the document you want to print.
- Go to Print: Choose “File” > “Print” from the menu bar.
- Show Details: If the print dialog is in simplified mode, click “Show Details” to access advanced settings.
- Color Options:
- Select “Color Matching” or “Color Options” from the print dialog.
- Choose the appropriate color profile for your printer and paper type. If you’re unsure, try using the printer’s default color profile or the sRGB profile.
- Print: Click “Print” to start the printing process.
For professional printing, consider calibrating your monitor and printer to ensure accurate color reproduction.
5.4. Duplex Printing
Question: How do I enable duplex printing to save paper when I add a printer on Mac?
Duplex printing, or double-sided printing, helps save paper and reduce printing costs. Here’s how to enable duplex printing on your Mac:
- Open a Document: Open the document you want to print.
- Go to Print: Choose “File” > “Print” from the menu bar.
- Show Details: If the print dialog is in simplified mode, click “Show Details” to access advanced settings.
- Layout:
- Select “Layout” from the print dialog.
- Check the “Two-Sided” checkbox.
- Choose the binding method (e.g., long-edge binding for documents, short-edge binding for calendars).
- Print: Click “Print” to start the printing process.
If your printer doesn’t support automatic duplex printing, you may need to manually flip the pages and re-feed them into the printer to print on the second side.
6. Advanced Printing Techniques
Exploring advanced printing techniques can further enhance your printing capabilities on Mac. This section covers topics such as printing from the command line, using CUPS for advanced printer management, and network printing best practices.
6.1. Printing from the Command Line
Question: How do I print from the command line when I add a printer on Mac?
Printing from the command line offers a flexible way to automate printing tasks and integrate printing into scripts. Here’s how to print from the command line on your Mac:
- Open Terminal: Open the Terminal application (found in /Applications/Utilities/).
- Use the
lprCommand: Thelprcommand is used for printing files.- To print a file to the default printer, use the command:
lpr filename.pdf - To specify a printer, use the
-Poption followed by the printer name:lpr -P "Printer Name" filename.pdf
- To print a file to the default printer, use the command:
- Get Printer Name: To get the name of your printer, use the
lpstat -pcommand. This will list all available printers and their names. - Options: You can use various options with the
lprcommand to customize the printing process. For example:-o sides=two-sided-long-edge: Enables duplex printing with long-edge binding.-o media=A4: Specifies the paper size as A4.
Printing from the command line can be particularly useful for automating tasks, such as batch printing or printing from scripts.
6.2. Using CUPS for Advanced Printer Management
Question: What is CUPS and how can I use it for advanced printer management when I add a printer on Mac?
CUPS (Common Unix Printing System) is the underlying printing system used by macOS. It provides a web-based interface for advanced printer management. Here’s how to access and use CUPS:
- Enable CUPS Web Interface:
- Open the Terminal application (found in /Applications/Utilities/).
- Type the following command and press Enter:
cupsctl WebInterface=yes - Enter your administrator password when prompted.
- Access CUPS Web Interface:
- Open a web browser and enter the address:
http://localhost:631
- Open a web browser and enter the address:
- Manage Printers:
- Click the “Printers” tab to view a list of installed printers.
- Click on a printer to manage it, including setting options, modifying configurations, and troubleshooting issues.
CUPS allows you to configure advanced settings that are not available in the standard macOS print dialog, such as custom paper sizes, detailed color management, and access control.
6.3. Network Printing Best Practices
Question: What are some best practices for network printing after I add a printer on Mac?
To ensure reliable and efficient network printing, follow these best practices:
- Static IP Addresses: Assign static IP addresses to your printers to prevent them from changing and causing connectivity issues.
- Secure Printing: Use secure printing protocols, such as IPPS (Internet Printing Protocol over SSL/TLS), to encrypt print data and protect sensitive information.
- Printer Placement: Place printers in locations with strong Wi-Fi signals and minimal interference.
- Regular Maintenance: Perform regular maintenance on your printers, such as cleaning print heads and updating firmware, to ensure optimal performance.
- Monitoring: Use printer management software to monitor printer usage, track ink/toner levels, and identify potential issues before they cause downtime.
- Driver Management: Keep printer drivers up to date and use the latest versions recommended by the manufacturer.
- User Training: Provide training to users on how to properly use network printers, including how to troubleshoot common issues and follow printing policies.
7. Understanding Printer Types and Their Uses
Choosing the right type of printer is crucial for meeting your specific printing needs. This section provides an overview of different printer types, their advantages, and their ideal uses.
7.1. Inkjet Printers
Question: What are inkjet printers and what are they best used for?
Inkjet printers are popular for their versatility and ability to print high-quality documents and photos. They use liquid ink sprayed through tiny nozzles onto the paper.
Advantages:
- High-Quality Photo Printing: Inkjet printers excel at printing vibrant and detailed photos.
- Versatility: They can print on a wide range of paper types, including glossy photo paper, cardstock, and specialty papers.
- Low Initial Cost: Inkjet printers are generally more affordable than laser printers.
Disadvantages:
- Higher Cost Per Page: Ink cartridges can be expensive, leading to a higher cost per page compared to laser printers.
- Slower Printing Speed: Inkjet printers typically have slower printing speeds than laser printers.
- Ink Smudging: Ink can smudge if the print is handled immediately after printing, especially on glossy paper.
Ideal Uses:
- Home use for printing photos, documents, and occasional graphics.
- Small offices with moderate printing needs.
- Creative professionals who require high-quality color prints.
7.2. Laser Printers
Question: What are laser printers and what are they best used for?
Laser printers use a laser beam to create an image on a drum, which then transfers toner onto the paper. They are known for their speed and efficiency.
Advantages:
- Fast Printing Speed: Laser printers can print large volumes of documents quickly.
- Lower Cost Per Page: Toner cartridges typically yield more prints than ink cartridges, resulting in a lower cost per page.
- Sharp Text Quality: Laser printers produce crisp and clear text, making them ideal for document printing.
Disadvantages:
- Higher Initial Cost: Laser printers are generally more expensive than inkjet printers.
- Limited Photo Quality: Laser printers are not as good as inkjet printers at printing high-quality photos.
- Larger Size: Laser printers tend to be larger and heavier than inkjet printers.
Ideal Uses:
- Offices with high-volume printing needs.
- Businesses that require fast and efficient document printing.
- Users who prioritize text quality and low cost per page.
7.3. All-in-One Printers
Question: What are all-in-one printers and what are they best used for?
All-in-one printers combine printing, scanning, copying, and sometimes faxing capabilities into a single device.
Advantages:
- Convenience: They offer multiple functions in one device, saving space and simplifying tasks.
- Cost-Effective: Purchasing an all-in-one printer can be more cost-effective than buying separate devices for each function.
- Versatility: They can handle a wide range of tasks, from printing documents to scanning photos and making copies.
Disadvantages:
- Compromised Performance: The performance of each function may be compromised compared to dedicated devices.
- Single Point of Failure: If the all-in-one printer breaks down, you lose all functions.
- Larger Size: All-in-one printers tend to be larger than single-function printers.
Ideal Uses:
- Home offices and small businesses that need multiple functions in a single device.
- Users who want to save space and simplify their workflow.
- Individuals who need occasional scanning, copying, and faxing capabilities.
7.4. Photo Printers
Question: What are photo printers and what are they best used for?
Photo printers are specialized printers designed to produce high-quality photos with vibrant colors and fine details.
Advantages:
- Superior Photo Quality: Photo printers use advanced printing technologies and inks to produce stunning photos.
- Specialized Features: They often include features such as borderless printing, direct printing from cameras and memory cards, and automatic photo enhancement.
- Compact Size: Many photo printers are compact and portable, making them ideal for home use and on-the-go printing.
Disadvantages:
- Limited Functionality: Photo printers are primarily designed for printing photos and may not be suitable for document printing.
- Higher Cost Per Photo: Photo printing can be expensive due to the cost of specialized inks and papers.
- Slower Printing Speed: Photo printers typically have slower printing speeds than standard printers.
Ideal Uses:
- Photographers and photography enthusiasts.
- Users who want to print high-quality photos at home.
- Businesses that need to print marketing materials and promotional photos.
8. Future Trends in Printing Technology
The printing industry is continuously evolving, with new technologies and innovations emerging regularly. This section explores some of the future trends in printing technology, including sustainable printing, 3D printing, and smart printing solutions.
8.1. Sustainable Printing
Question: What is sustainable printing and why is it important?
Sustainable printing focuses on reducing the environmental impact of printing by using eco-friendly materials, conserving energy, and minimizing waste.
Key Trends:
- Recycled Paper: Using paper made from recycled content reduces deforestation and conserves natural resources.
- Eco-Friendly Inks: Switching to soy-based or water-based inks reduces the use of harmful chemicals and volatile organic compounds (VOCs).
- Energy-Efficient Printers: Using printers that are Energy Star certified helps conserve energy and reduce greenhouse gas emissions.
- Reducing Paper Consumption: Implementing strategies such as duplex printing, electronic document management, and print management software can significantly reduce paper consumption.
- Recycling Programs: Participating in printer cartridge recycling programs helps prevent cartridges from ending up in landfills.
According to a report by the Environmental Protection Agency (EPA), paper and paperboard account for a significant portion of municipal solid waste. Sustainable printing practices can help reduce this waste and promote a more environmentally friendly approach to printing.
8.2. 3D Printing
Question: What is 3D printing and what are its potential applications?
3D printing, also known as additive manufacturing, involves creating three-dimensional objects from digital designs by layering materials such as plastic, metal, or composite.
Key Trends:
- Rapid Prototyping: 3D printing allows manufacturers to quickly create prototypes and test designs, reducing development time and costs.
- Custom Manufacturing: 3D printing enables the production of customized products tailored to individual needs, such as medical implants, prosthetics, and personalized consumer goods.
- On-Demand Manufacturing: 3D printing facilitates on-demand manufacturing, allowing businesses to produce goods only when needed, reducing inventory costs and waste.
- New Materials: Advances in materials science are expanding the range of materials that can be used in 3D printing, including high-performance polymers, ceramics, and composites.
- Healthcare: 3D printing is revolutionizing healthcare with applications such as creating customized surgical guides, bioprinting tissues and organs, and producing personalized medications.
8.3. Smart Printing Solutions
Question: What are smart printing solutions and how can they improve printing efficiency?
Smart printing solutions leverage technology to improve printing efficiency, reduce costs, and enhance security.
Key Trends:
- Cloud Printing: Cloud printing allows users to print documents from any device and any location, using cloud-based printing services.
- Mobile Printing: Mobile printing enables users to print directly from their smartphones and tablets, improving convenience and productivity.
- Print Management Software: Print management software helps organizations track printer usage, enforce printing policies, and reduce printing costs.
- Secure Printing: Secure printing solutions require users to authenticate themselves at the printer before releasing their print jobs, preventing unauthorized access to sensitive information.
- Predictive Maintenance: Smart printers use sensors and analytics to predict when maintenance is needed, reducing downtime and improving reliability.
By embracing these future trends in printing technology, businesses and individuals can optimize their printing processes, reduce costs, and minimize their environmental impact.
In conclusion, adding a printer on Mac is a straightforward process that can greatly enhance your productivity and