
3D printers have revolutionized manufacturing and hobbyist projects, capable of bringing incredible designs to life. However, the journey isn’t always smooth. From frustrating failures to surface imperfections, 3D printing can present a range of challenges. The good news is that most of these issues are easily addressed with straightforward solutions, saving you from costly replacements or extensive technical knowledge.
This guide will walk you through seven common 3D printing problems, offering clear explanations and practical solutions to help you master your 3D printing process and achieve perfect prints every time.
Let’s dive in and troubleshoot!
1. Under and Over Extrusion
 An example of under extrusion in 3D printing, showing gaps between printed lines and layers.
Under extrusion and over extrusion are fundamental problems that directly affect the quality and structural integrity of your 3D prints. Under extrusion occurs when your 3D printer doesn’t push out enough filament, leading to noticeable gaps between printed lines, weak layers, and an overall flimsy structure. Conversely, over extrusion is when the printer pushes out too much material, causing excess plastic to build up, resulting in blobs, uneven surfaces, and a melted appearance.
The Cause
The primary culprit behind both under and over extrusion is often an incorrectly configured extrusion multiplier, a setting within your slicing software. This setting dictates the rate at which your printer extrudes filament. If it’s set too low, you’ll experience under extrusion; too high, and you’ll encounter over extrusion.
Another significant factor is incorrect filament diameter settings in your slicer. The printer needs to know the precise diameter of your filament (typically 1.75mm or 2.85mm) to calculate the correct extrusion volume. If this setting is wrong, it will directly impact the material flow and layer adhesion.
The Solution
Resolving under and over extrusion issues typically involves adjusting the extrusion multiplier in your slicing software. Small adjustments are key – increment or decrement the multiplier in small steps (e.g., 0.05 or 0.1) and test print to observe the effect.
Double-check your filament diameter setting in your slicer software and ensure it matches the filament you are using. Most filaments are labeled with their diameter, but it’s always good practice to verify with calipers for maximum accuracy, especially with new filament brands.
2. Stringing (Hairy Prints)
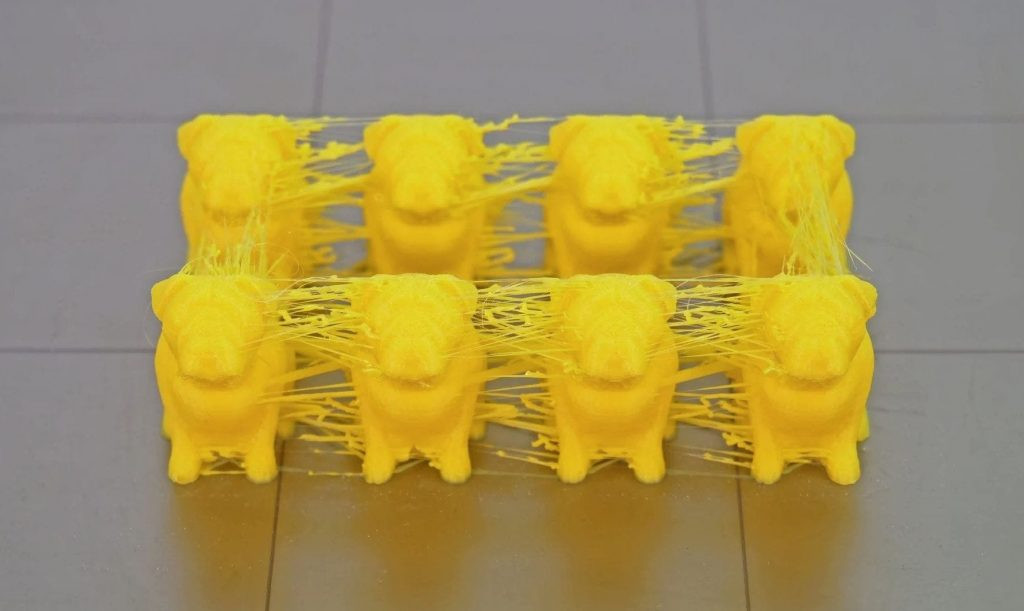 A 3D print exhibiting stringing, with thin strands of plastic stretched between different parts of the model.
Stringing, also known as “hairy prints,” is a common and visually annoying 3D printing problem. It manifests as thin, hair-like strands of plastic stretching between different parts of your print, particularly when the nozzle moves between separate sections of the model. Stringing is not only unsightly but also wastes filament and can increase printing time.
This issue is more prevalent when printing at higher temperatures or when dealing with models that have significant gaps or travel distances between printed parts.
The Cause
Incorrect retraction settings are the most frequent cause of stringing. Retraction is when the printer pulls the filament back slightly when moving between print sections to prevent oozing. Key retraction settings include retraction distance (how much filament is pulled back) and retraction speed (how quickly it’s retracted). If these settings are not optimized for your material and printer, stringing is likely to occur.
Another common cause is an extruder temperature that is too high. Excessive heat liquefies the filament, making it more prone to oozing out of the nozzle during travel moves, even with retraction enabled.
The Solution
Begin by fine-tuning your retraction settings in your slicing software. Experiment with increasing the retraction distance in small increments (e.g., 0.5mm or 1mm) and test print after each adjustment. Similarly, adjust retraction speed; sometimes, a faster retraction can be more effective.
If retraction adjustments don’t fully eliminate stringing, consider lowering your extruder temperature. Even if you are using recommended temperatures from the filament manufacturer, your specific printer setup might require slightly cooler settings. Decrease the temperature in small increments of 5°C and test.
Filament type also plays a role. PLA is known to be more prone to stringing than ABS. If stringing persists, consider trying different filament materials or brands, as some formulations are less susceptible to oozing.
3. Layer Separation and Splitting
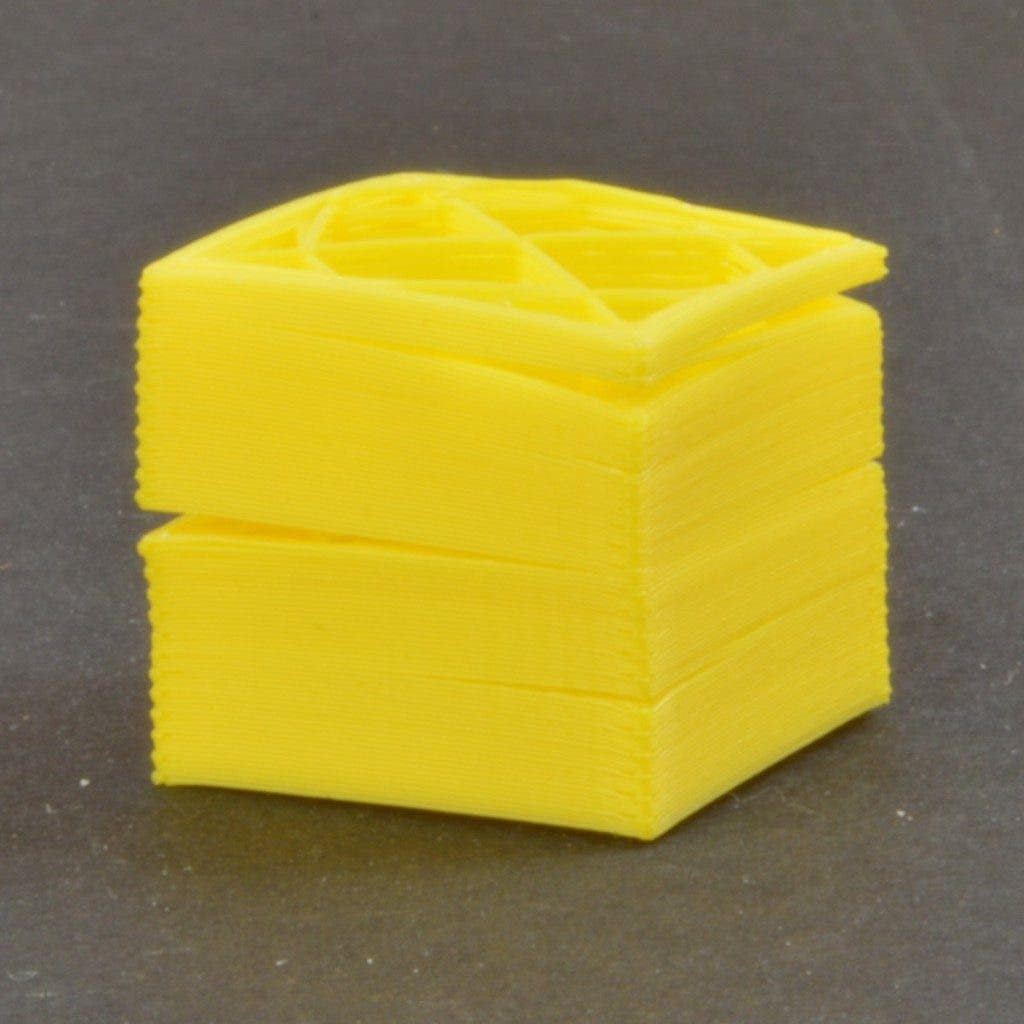 A 3D print showing layer separation, where distinct layers of the print are visibly pulling apart.
Layer separation, or layer splitting, is a critical 3D printing failure where the printed layers fail to properly adhere to each other, resulting in visible splits and weaknesses along the Z-axis. This issue can lead to structural failure of the part and often requires restarting the print, wasting time and material. Achieving strong inter-layer adhesion is crucial for robust and functional 3D prints.
The Cause
One of the most common causes of layer separation is an excessive layer height. If the layer height is too large relative to the nozzle diameter, the layers might not have sufficient contact area to bond effectively. Ideally, the layer height should be a fraction of the nozzle diameter to ensure proper squish and adhesion.
Insufficient print temperature is another major contributor to layer separation. If the printing temperature is too low, the thermoplastic material might not melt sufficiently to create a strong chemical bond between layers. This is particularly relevant when switching to new filament types or brands that may require different temperature settings.
The Solution
Refine your layer height settings in your slicing software. A general rule of thumb is to set your layer height to be around 20% to 25% of your nozzle diameter. For a standard 0.4mm nozzle, a layer height between 0.2mm and 0.3mm is usually a good starting point. Experiment with slightly reducing the layer height to improve layer adhesion.
Increase your print temperature in small increments, typically 3°C to 5°C at a time. Be mindful of the filament’s recommended temperature range and avoid exceeding it, as this could lead to other issues like over extrusion or warping.
Environmental temperature can also impact layer adhesion, particularly for temperature-sensitive materials like ABS. If you are printing in a cold room or experience drafts, consider using an enclosure to maintain a more consistent and warmer printing environment. If your printer has a heated chamber, increasing the chamber temperature by 5°C to 10°C can significantly improve layer adhesion.
4. Blobs and Zits on the Surface
 A 3D printed surface showing blobs and zits, small bumps and imperfections scattered across the surface.
Blobs and zits are surface quality issues that appear as small, unwanted bumps or protrusions on the surface of your 3D prints. These imperfections can detract from the aesthetic appeal and perceived quality of your prints. While they might seem minor, blobs and zits can be frustrating, especially when striving for smooth and professional-looking results.
These surface defects are often related to inconsistencies in material flow, particularly at the start and end points of layers or perimeters.
The Causes
Retraction and coasting settings are often implicated in the formation of blobs and zits. If retraction is not properly tuned, it can cause a slight buildup of material at the points where the nozzle stops and starts extruding, especially at layer changes.
Coasting, a setting that stops extrusion slightly before the end of a perimeter line to relieve pressure in the nozzle, can also contribute to blobs if not configured correctly. If coasting is too aggressive, it can lead to material accumulation at the coasting point, creating zits.
The Solutions
Adjusting retraction settings is the primary approach to minimize blobs and zits. Experiment with slightly reducing the retraction distance or speed to see if it smooths out the start and stop points of extrusion.
Fine-tune your coasting settings. If blobs or zits appear at the beginning or end of perimeter lines, try adjusting the coasting distance or disabling coasting altogether to observe the effect.
Another helpful setting is “wipe” or “outer wall wipe,” which moves the nozzle slightly after completing a perimeter to smooth out any potential material buildup. Experiment with enabling or adjusting the wipe distance in your slicer.
5. Curling and Rough Corners
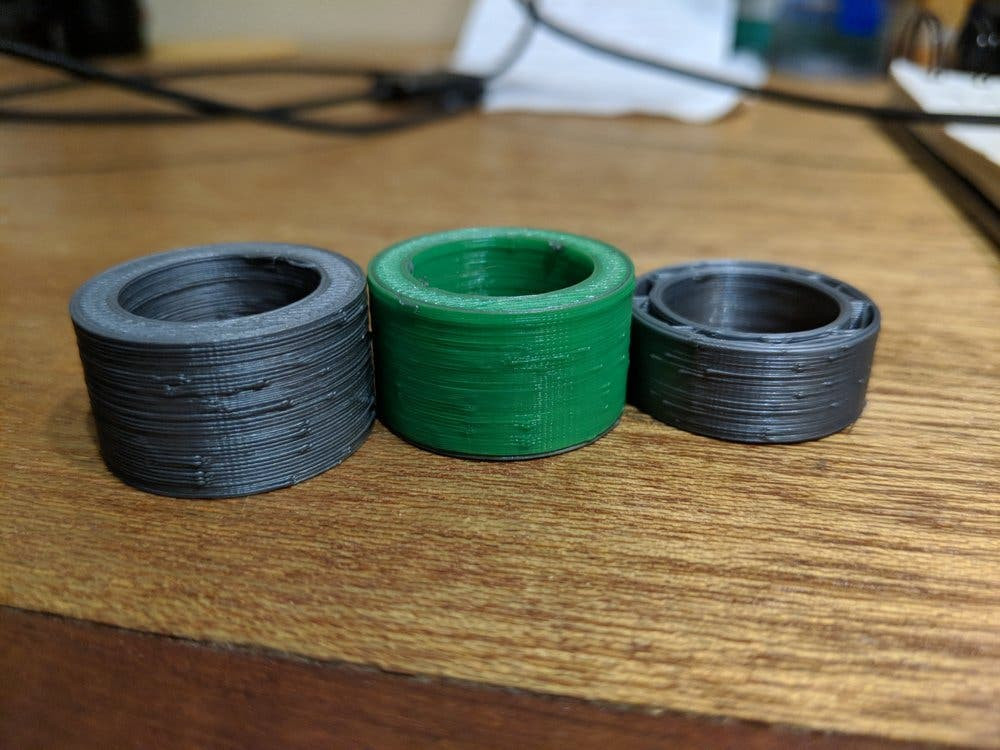
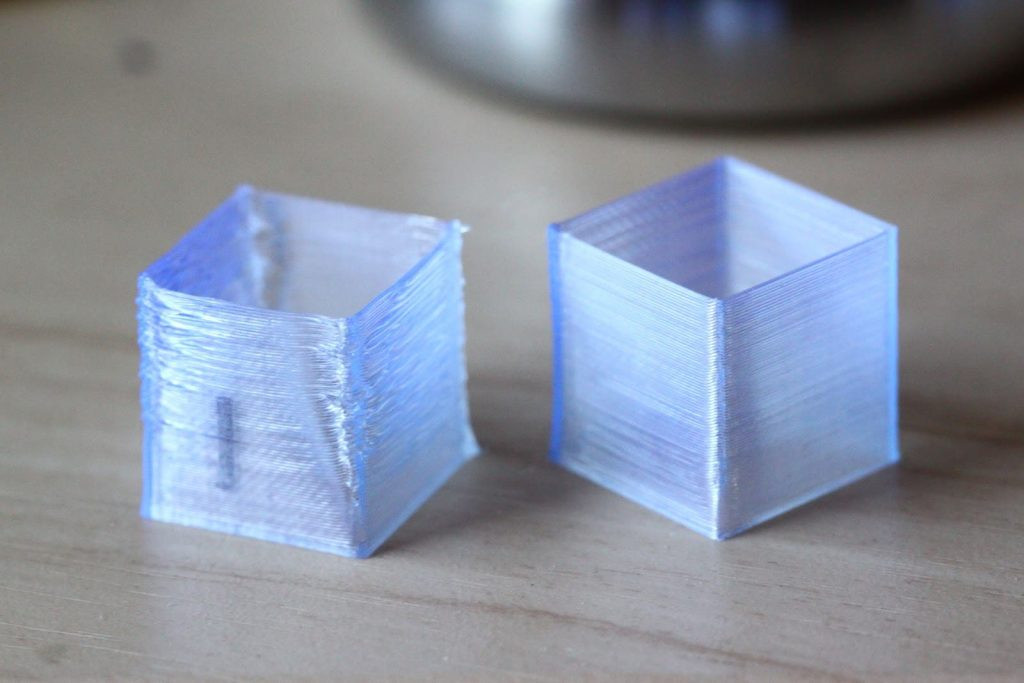 A 3D print exhibiting corner curling, with the edges and corners of the print lifting and warping upwards.
Curling and rough corners are warping issues that commonly occur during 3D printing, particularly with materials that shrink significantly as they cool, such as ABS. This problem is characterized by the edges and corners of the print lifting up from the build platform, resulting in deformed and inaccurate parts. Curling not only affects dimensional accuracy but can also lead to print failures if the warping becomes severe.
The Cause
Inadequate cooling is a major factor in curling and rough corners. When printing materials that contract upon cooling, the upper layers cool and shrink faster than the lower layers still attached to the heated bed. This differential cooling creates internal stresses that can cause the corners and edges to lift.
Poor bed adhesion is another significant cause of curling. If the first layer doesn’t adhere strongly to the build platform, the corners are more likely to detach and warp upwards as the print progresses.
The Solution
Enhance cooling, especially for materials prone to warping. Ensure your printer’s cooling fan is functioning correctly and consider increasing fan speed, particularly for the initial layers and overhangs. However, for materials like ABS, excessive cooling can exacerbate warping, so finding the right balance is important.
Improve bed adhesion. Ensure your build platform is properly leveled and clean. Applying adhesion aids like hairspray, glue stick, or specialized bed adhesion solutions can significantly improve first-layer adhesion and reduce curling. For materials like ABS, using a heated bed at the recommended temperature is crucial for preventing warping.
Consider using a brim or raft in your slicing software. A brim adds a single-layer outline around the base of your print, increasing the contact area with the bed and improving adhesion. A raft creates a sacrificial base layer underneath your print, providing a larger, more stable foundation and reducing warping.
6. Weak Infill
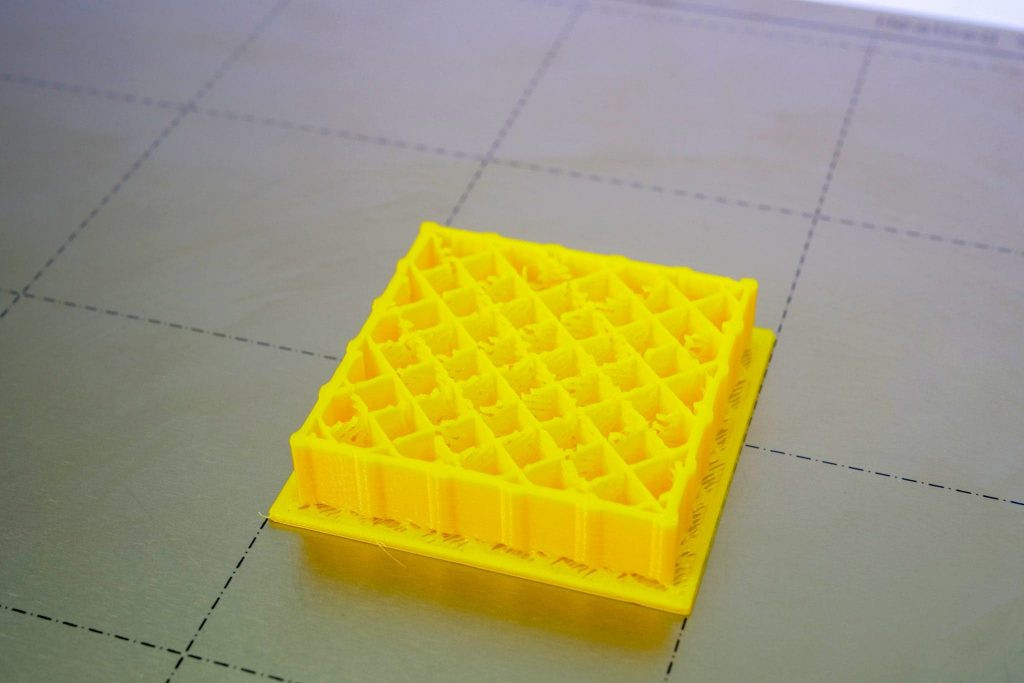 A diagram illustrating weak infill in a 3D print, showing sparse and fragile internal support structure.
Infill is the internal support structure within a 3D print that provides strength, rigidity, and stability without making the part completely solid. Weak infill compromises the structural integrity and dimensional accuracy of your prints, making them fragile and prone to failure under stress. Ensuring strong and well-formed infill is essential for functional and durable 3D printed parts.
The Cause
Printing infill too fast can lead to weak infill. When the print speed is too high, the extruder might struggle to keep up with the required material flow, resulting in under extrusion within the infill structure.
Thin infill walls can also contribute to weak infill. If the infill wall thickness is set too low in your slicing software, the infill structure will be sparse and fragile, offering minimal support.
The Solution
Reduce your infill print speed. Slowing down the print speed for infill layers allows the extruder more time to extrude the material properly, resulting in a denser and stronger infill structure.
Increase your infill wall thickness or line width. In your slicing software, adjust the infill settings to increase the thickness of the infill lines or walls. This will create a more robust and supportive internal structure.
Experiment with different infill patterns. Some infill patterns, like grid or rectilinear, can be more challenging for some printers, especially at higher speeds. Consider switching to more robust patterns like honeycomb, triangular, or cubic infill, which are often more forgiving and can provide better strength.
7. Gaps Between Infill and Outline
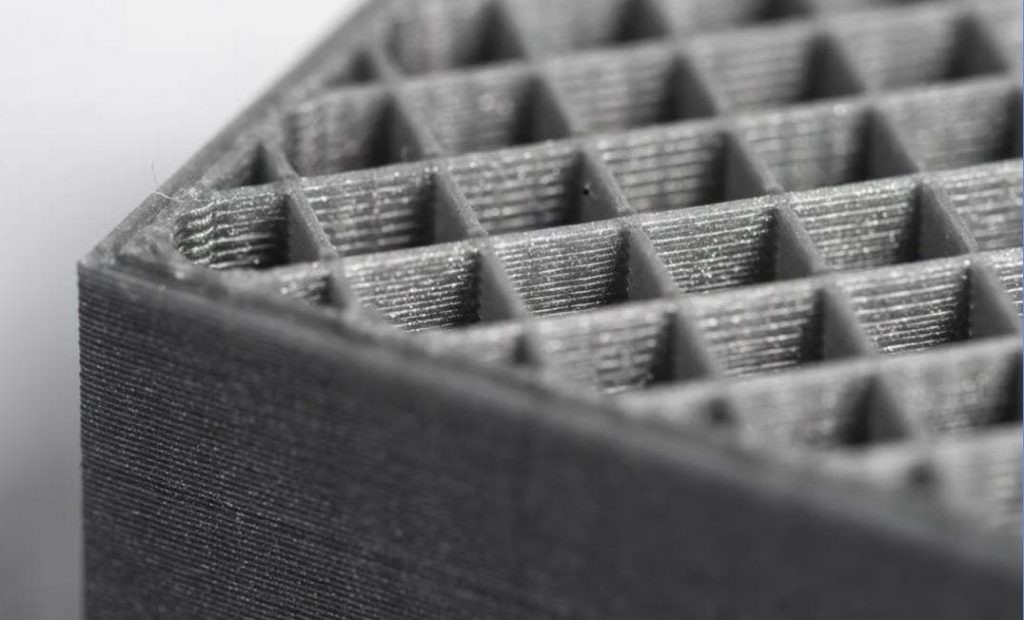 A close-up view showing gaps between the infill and outline of a 3D print, indicating poor bonding at the edges.
Gaps between the infill and outline (perimeter) are unsightly and structurally detrimental defects in 3D prints. These gaps indicate poor bonding between the outer walls and the internal infill structure, creating weak points and reducing the overall strength and aesthetic quality of the print. Proper bonding between the infill and outline is crucial for both visual appeal and mechanical performance.
The Cause
Incorrect infill overlap settings are the most common cause of gaps between infill and outline. The infill overlap setting in your slicing software determines how much the infill lines should overlap with the inner perimeter walls. If this overlap is too low, there will be insufficient contact and bonding between the infill and outline, leading to gaps.
Excessive print speeds, particularly when the infill is printed significantly faster than the outline, can also cause gaps. High print speeds can reduce the time available for proper bonding between the infill and outline, resulting in separation as the material cools and shrinks.
The Solution
Increase your infill overlap percentage in your slicing software. The infill overlap is typically expressed as a percentage. A value of around 15% to 20% is generally recommended as a starting point. Experiment with increasing this percentage in small increments to improve bonding and eliminate gaps.
Reduce your print speed, especially for the infill layers or the overall print speed. Slowing down the print speed allows more time for the infill and outline to bond together effectively, minimizing gaps. Ensure that the infill and outline print speeds are reasonably similar to promote proper adhesion.
By understanding these common 3D printing problems and applying the suggested solutions, you’ll be well-equipped to troubleshoot issues, improve your print quality, and consistently achieve successful and impressive 3D prints. Happy printing!
Find out more
For further assistance and expert guidance, consider reaching out to our team for 3D printer training and advice. Contact us at 01765 694 007 or via email at [email protected]. You can also Book an appointment with Elaine for personalized support.