The democratization of 3D printing technology is an exciting prospect. While 3D printers are becoming more accessible, the cost can still be a barrier for many, especially educational institutions and hobbyists. However, ingenuity and a DIY spirit can often bridge the gap where budgets fall short. One compelling example of this is the project to construct a functional 3D printer using a 3D printing pen, proving that financial constraints don’t have to limit access to the fascinating world of 3D printing.
Daniel from Tinkernut, a well-known DIY enthusiast, demonstrated a resourceful approach to creating an ultra-affordable 3D printer by ingeniously repurposing a 3D printing pen. This project, while having understandable limitations in print resolution and size, offers a fantastic entry point into 3D printing and highlights the core mechanics involved. Let’s delve into how Tinkernut achieved this impressive feat.
Every standard 3D printer operates with four essential components: a print bed, an extruder, a hot end, and filament. These are the fundamental building blocks of additive manufacturing.
In his informative video tutorial, “How to Make a Cheap 3D Printer,” Tinkernut guides viewers through the step-by-step process of assembling this innovative machine.
 3d pen printer
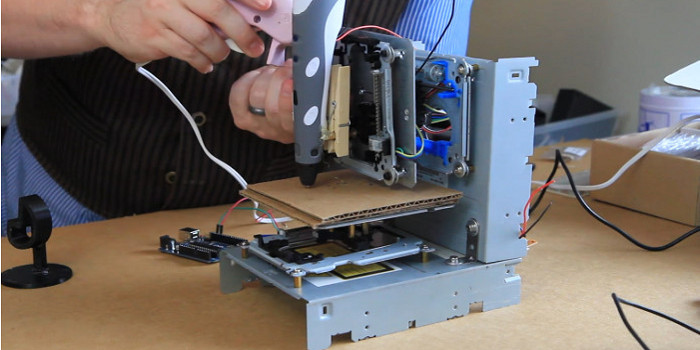
Initially considering a hot glue gun for the project, Tinkernut opted for a 3D printing pen despite the slightly higher cost. His reasoning was practical: a 3D printing pen already incorporates built-in extruder functionality. Using a hot glue gun would have necessitated creating a motorized extruder from scratch, adding complexity and potentially cost to the project. The integrated extruder in the 3D pen simplified the build considerably.
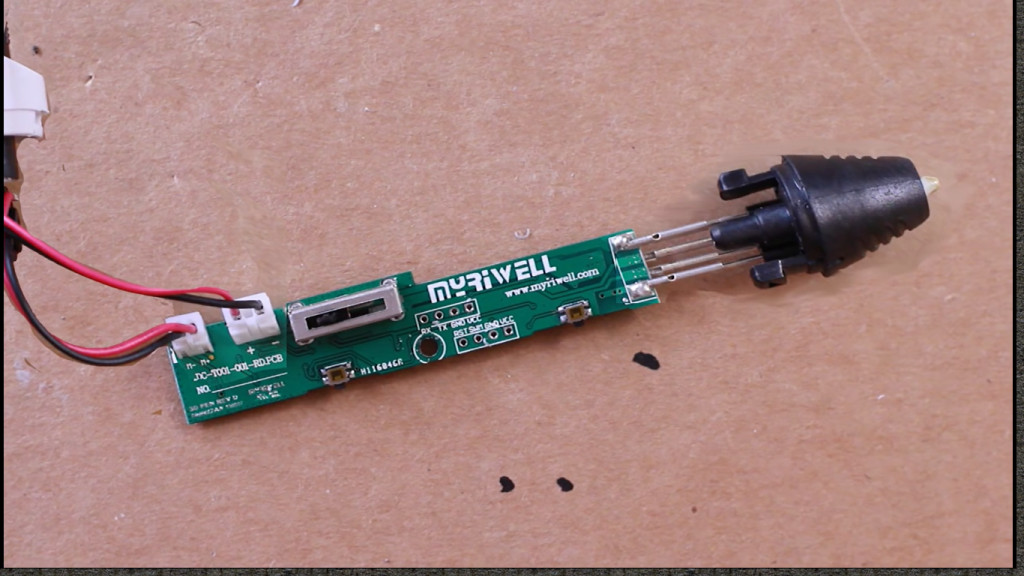
To automate the 3D printing pen, Tinkernut disassembled the pen unit – a process clearly illustrated in his video. 3D pens come equipped with buttons to control filament extrusion, typically “extrude forward” and “extrude backward.” The key to automation was to control the “extrude forward” function of the pen using an Arduino microcontroller.
 Screenshot (149)
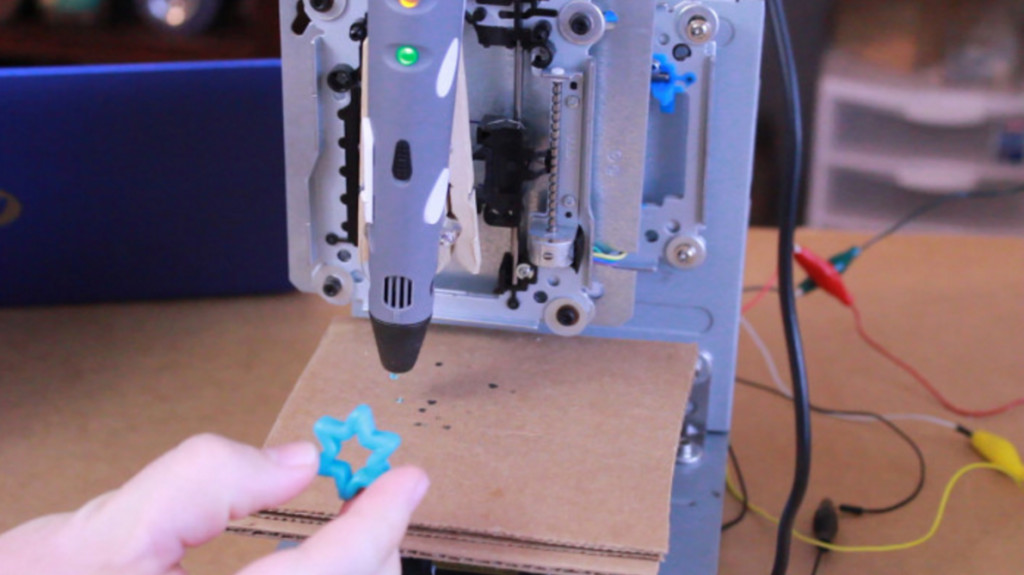
For those unfamiliar with electronics and microcontrollers, Tinkernut’s video is an indispensable resource. It provides clear, easy-to-follow instructions for each stage of the build. As Hackaday accurately pointed out, simply attaching a 3D printing pen to a CNC machine isn’t sufficient. Effective communication between the pen and the CNC machine is crucial, ensuring the pen extrudes filament precisely when and where the CNC machine dictates movement. This synchronization is achieved by the Arduino, which acts as the control interface, switching the pen’s extrusion on and off in coordination with the CNC machine’s movements. Once properly configured, the system is ready to begin printing.
 tink2
tink2
As 3D printing pens become increasingly accessible and affordable, we can anticipate more innovative projects emerging within the DIY 3D printing community. Tinkernut’s project is a prime example of this ingenuity, successfully realizing his goal of constructing a functional and budget-friendly 3D printer. While it may not match the resolution or build volume of commercial 3D printers, it serves as a powerful demonstration of accessible technology and creative problem-solving.
Are you inspired to embark on a similar DIY 3D printer project? Share your experiences and insights in the Under $100 3D Printer Hack forum on 3DPB.com. Explore the possibilities and contribute to the growing community of DIY 3D printing enthusiasts.