
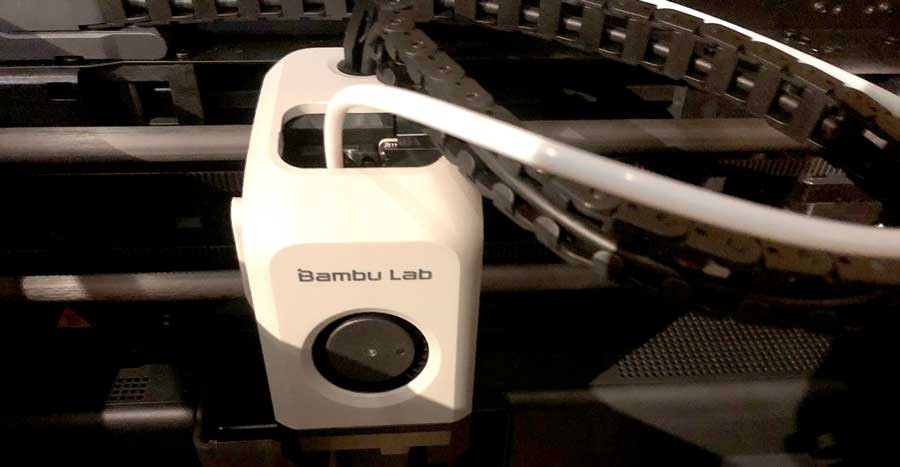
 Bambu Labs P1S printer head
While books are primarily seen as text-based, they ignite vivid imagery in our minds. Reading and writing are deeply visual processes, where imagination conjures scenes unseen by others. It’s true that sometimes, a single word can indeed be worth a thousand pictures, especially when it comes to visualizing fictional worlds and objects.
Even before writing the first word of The Swordspeaker Saga, I had a clear image of Truesilver, the enchanted sword at the heart of my story. During the outlining phase, I sketched a pencil design, which later served as the foundation for my cover artist’s final rendition. My fascination with swords and weaponry, both real and imagined, runs deep. If space and budget allowed, I would gladly fill my home with an armory. Beyond historical weapons, the idea of an enchanted sword, like Excalibur or blades that react to magic, has always captivated me.
The Vision of a Tangible Truesilver
Writing The Swordspeaker Saga has been a way to wield enchanted weapons in my imagination. However, the desire to hold a physical representation of such a blade lingered. The thought of bringing Truesilver to life as a real object became a compelling endeavor. Unlike some authors who are skilled in traditional crafts, I’m not a blacksmith. However, my long-standing interest in 3D printing presented a unique opportunity. Creating a 3D printed fantasy sword seemed like the perfect path to realize my vision.
When I learned about RiseUp Con and my participation as an author, it sparked an idea. This event became the perfect motivation to finally attempt creating my own Truesilver replica. It was a chance to blend my passion for fantasy with the exciting possibilities of 3D printing technology, aiming to craft a tangible piece of my fictional world.
3D Modeling the Dream
The first crucial step was creating a digital model. The beauty of 3D printing lies in its ability to materialize any design, provided it can be modeled digitally. Owning a 3D printer is akin to having a personal fabrication factory right on your desk, capable of turning digital blueprints into physical objects.
Although I had some experience with 3D modeling in the past, my skills were a bit rusty. Recognizing this, I sought assistance. After some online searching, I found a 3D modeler who agreed to collaborate. I provided him with the book cover art and tasked him with creating a 3D model of Truesilver based on that visual reference.
The modeling process involved considerable back-and-forth communication and revisions. However, the modeler expertly refined the design until it was perfectly ready for the next stage: 3D printing.
 3D model of Truesilver fantasy sword in Blender.
Alt text: Digital rendering of the Truesilver 3D printed sword model in Blender software, showcasing the intricate design before printing.
This image shows a screenshot from Blender, displaying the completed 3D model of Truesilver, ready to be translated from digital design to a physical 3d Printed Sword.
The 3D Printing Process
My 3D printer, a Bambu Lab P1S, has a print volume limit, with a maximum length of approximately 10 inches. To overcome this, the Truesilver model had to be divided into five separate sections for printing. This modular approach allowed me to create a sword much longer than the printer’s single-piece capacity by joining printed parts.
Having a 3D printer is like having a factory on your desk.
For the printing material, I chose PLA Tough, also known as PLA+, due to its enhanced strength compared to standard PLA. PLA, or polylactic acid, is the most commonly used plastic in 3D printing, favored for its ease of use and biodegradability. In 2024, a spool of PLA typically costs between $15 and $20. Printing the entire 3d printed sword used roughly two-fifths of a spool, making the material cost around $5-$6. While 3D printers themselves can be a significant investment, the cost of materials for individual projects like this 3d printed sword is quite economical.
The following image shows the tip of the 3d printed sword as it finished printing, still on the printer bed.
 3D printed sword, Truesilver, from the fantasy book by DJ Edwardson. Photo shows the tip on the print bed of a Bambu Labs printer.
Alt text: Close-up of the 3D printed sword tip, Truesilver, emerging from a Bambu Labs 3D printer, highlighting the detail achieved in the initial printing phase.
Each blade section required about 1.5 hours to print, and the handle top took an hour. The crossguard, however, proved to be the most time-consuming part. It took a full ten hours to print, and my first attempt failed due to incorrect support settings, necessitating a reprint.
For those new to 3D printing, supports are sacrificial plastic structures printed alongside the model to provide stability to overhanging parts during the printing process. These supports are removed and discarded after printing is complete.
The image below showcases the successfully printed crossguard, illustrating the intricate details achieved after overcoming printing challenges.
 3D printed sword, Truesilver, from the fantasy book by DJ Edwardson. Photo shows the crossguard on a glass desk.
Alt text: The intricately designed crossguard of the 3D printed sword, Truesilver, resting on a glass surface, displaying the successful outcome of a complex 3D print.
The final crossguard was well worth the effort and time, showcasing the potential for detailed and complex shapes achievable with 3D printing technology in creating a 3d printed sword.
Assembly Challenges and Solutions
Up to this point, the project had progressed smoothly. However, assembling the 3d printed sword pieces presented unexpected hurdles. This is where the real test of craftsmanship and problem-solving began.
Inspired by videos demonstrating internal support in 3D printed swords using metal rods, I incorporated a hollow channel within the printed sections to accommodate one. This also added satisfying weight to the 3d printed sword replica.
My initial approach to joining the sections was using superglue, but this proved to be a significant misstep. Superglue simply lacked the structural strength needed to hold the plastic sections together, especially with the added weight of the internal metal rod and the length of the blade. The joints were too weak to withstand any stress.
To reinforce the seams and hopefully improve structural integrity, I applied bondo, a type of body filler. Despite multiple applications of bondo and even trying wood filler in one attempt, neither material provided sufficient strength. The 3d printed sword kept showing cracks and weaknesses at the joints.
The image below shows the blade sections assembled with the metal support rod visible, before attempts to fill the seams with bondo.
 3D printed sword, Truesilver, from the fantasy book by DJ Edwardson, showing the metal rod inserted for support and weight.
Alt text: Assembled sections of the 3D printed sword, Truesilver, with a metal rod inserted for internal support and added weight, before seam filling and painting.
Ultimately, I resorted to using a wood burner to essentially “solder” the sections together. Even with this more robust method, achieving a solid, seamless bond required multiple attempts and extensive sanding. The resulting 3d printed sword, while visually complete, was never as structurally sound as I had hoped.
Painting and Finishing Touches
Aside from the recurring issue of cracks reappearing in the seams, which necessitated repeated priming and painting, the painting process itself was relatively straightforward. The crossguard required significant sanding to smooth out areas where supports had been removed, but after a couple of coats of primer, the 3D printed texture became virtually undetectable.
 3D printed sword, Truesilver, from the fantasy book by DJ Edwardson, leaning against book shelves.
Alt text: Truesilver 3D printed sword after priming, leaning against a bookshelf, showcasing the smooth surface achieved through priming and sanding, ready for final painting.
I used a sandable filler primer, which worked wonders in creating a smooth base. Over this, I applied a high-gloss black paint.
Incredibly, I was still addressing cracks in the blade right up until the night before the convention. Deadlines, however, are powerful motivators. With RiseUp Con imminent, I worked into the early hours of the morning to apply the final colors to the 3d printed sword.
A word is worth a thousand pictures
For the final detailing, I used acrylic paints for the gems and handle accents. But for all the metallic parts of the 3d printed sword, I used Rub ‘n Buff. This wax-based paste contains metallic filaments and, while somewhat challenging to apply perfectly smoothly, provides an incredibly realistic metal-like finish to the blade.
The final image captures the completed 3d printed sword, Truesilver, after painting and finishing, showcasing the metallic sheen and overall aesthetic.
 3D printed sword painted against a brick wall, Truesilver, from the fantasy book by DJ Edwardson
Alt text: Finished 3D printed sword, Truesilver, painted and detailed, photographed against a brick wall to highlight the metallic finish and craftsmanship.
While the photo is good, it doesn’t fully capture the sword’s appearance in person. The blade gleams in sunlight, resembling real steel, and is even reflective. After weeks of dedicated work and numerous learning experiences, I finally held my own 3d printed enchanted blade.
Lessons Learned and Future Improvements
The 3d printed sword, Truesilver, was a hit at my booth during RiseUp Con, and it now proudly stands in my office. Despite the success, I’ve identified several improvements for future 3D printing projects.
Next time, I plan to experiment with ABS plastic, known for its superior strength and durability – the same material used for Legos. Although I haven’t printed with ABS before, it’s reputed to be stronger than PLA. If I do use PLA again, I will definitely use 3D Gloop to join the sections. I used 3D Gloop to attach the pommel, and the bond seems significantly stronger than superglue.
I might also opt for a wooden dowel instead of a metal rod for internal support. This would reduce the overall weight, making the 3d printed sword less realistic in feel but also reducing stress on the blade joints. For me, this trade-off seems worthwhile for improved structural integrity.
Increasing the infill percentage and using the gyroid infill pattern are other potential improvements. I discovered gyroid infill after completing this project, but it is known to create stronger 3D prints.
Despite the mistakes and challenges, I’m incredibly pleased that I embarked on this 3D printed fantasy sword project. This is just the beginning of my 3D printing journey. Rimewinter and Grimbriar-themed projects are already on my radar. My quest for 3d printed enchanted weapons has only just begun!
Perhaps that armory might become a necessity after all.
NOTE: Some of the links here are Amazon affiliate links and I will receive a small amount from any purchases made.
0 Shares