As a guitar player, I know the struggle is real: guitar picks vanish into thin air. Despite owning what feels like hundreds, finding one when you need it most can be an epic quest. Just the other day, ready to jam, I spent a frustrating twenty minutes searching high and low – guitar case, amp crevices, even inside the acoustic guitar itself – only to come up empty-handed.
The thought of 3D printing a guitar pick had crossed my mind before, usually dismissed as a novelty, unlikely to be practical. But desperation breeds innovation. I quickly downloaded a guitar pick model online, loaded it into my Prusa MINI, and hit print. Five minutes later, I held a freshly 3d Printed pick in my hand. And to my surprise… it actually worked. Not just as a last resort, barely usable option, but as a genuinely good pick, indistinguishable from store-bought ones. Printed in standard PLA, it was a revelation. This had to be the smallest, fastest, and most incredibly useful 3D print I had ever encountered.
This simple act of creation opened up a world of possibilities. Suddenly, questions flooded my mind. What pick thickness truly suits my playing style? Which 3D printing material would be ideal? Beyond the standard shapes I was used to, what other pick designs might enhance my music? Let’s dive into these questions and explore the exciting realm of 3D printed guitar picks.
Finding Your Perfect Pick Thickness with 3D Printing
Even minute variations in a guitar pick’s thickness – as small as a tenth of a millimeter – can significantly alter its feel and performance. Generally, for acoustic strumming, thinner, more flexible picks in the 0.4 – 0.6 mm range are preferred. Conversely, for lead guitar and solos demanding a crisp, articulate sound, thicker picks, around 0.8 – 1.2 mm, are the go-to. Many guitarists, especially beginners, find a comfortable middle ground with versatile 0.6 – 0.8 mm picks.
Traditionally, you might buy variety packs with multiple picks of each thickness. This often leads to a drawer overflowing with unwanted picks and only a handful that you actually like. 3D printing offers a smarter approach. You can easily experiment with a range of thicknesses by simply rescaling the 3D model in your slicer software. Print a few test picks, identify your ideal thickness, and then produce as many as you need. In PrusaSlicer, remember to create actual copies (Ctrl+C, Ctrl+V) rather than instances (+ key), to ensure each copy can be scaled independently. To precisely adjust the height, unlock the uniform scaling by clicking the lock icon in the right panel, and then edit the Z-axis height.
When selecting your layer height, ensure it’s fine enough to accurately represent your desired pick thickness. For example, aiming for a 0.7 mm pick with a 0.2 mm layer height will result in a printed thickness rounded up to 0.8 mm. PrusaSlicer conveniently displays the actual printed height next to the slider in the preview, allowing you to adjust the layer height as necessary for precision.
This exploration into 3D printed guitar picks builds upon our previous adventures in musical instruments. As we demonstrated in our first article, 3D printing opens up exciting possibilities for creating recorders, ocarinas, and kazoos. We even created a video showcasing these 3D printed musical instruments. If you have more ideas for musical applications of 3D printing, we’d love to hear them in the comments!
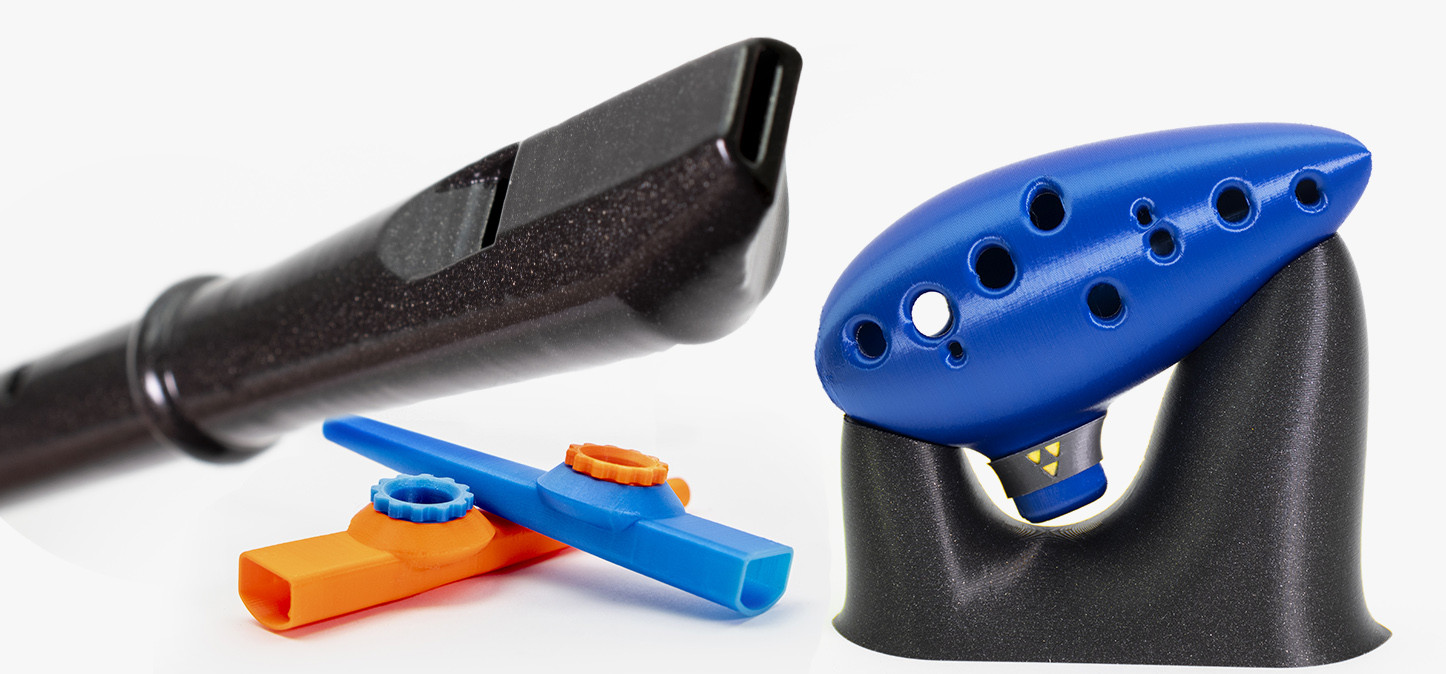 A vibrant thumbnail showcasing various 3D printed musical instruments like a recorder, ocarina, and kazoo, highlighting the creative potential of 3D printing in music.
Unleash Your Creativity: Customize Your 3D Printed Picks
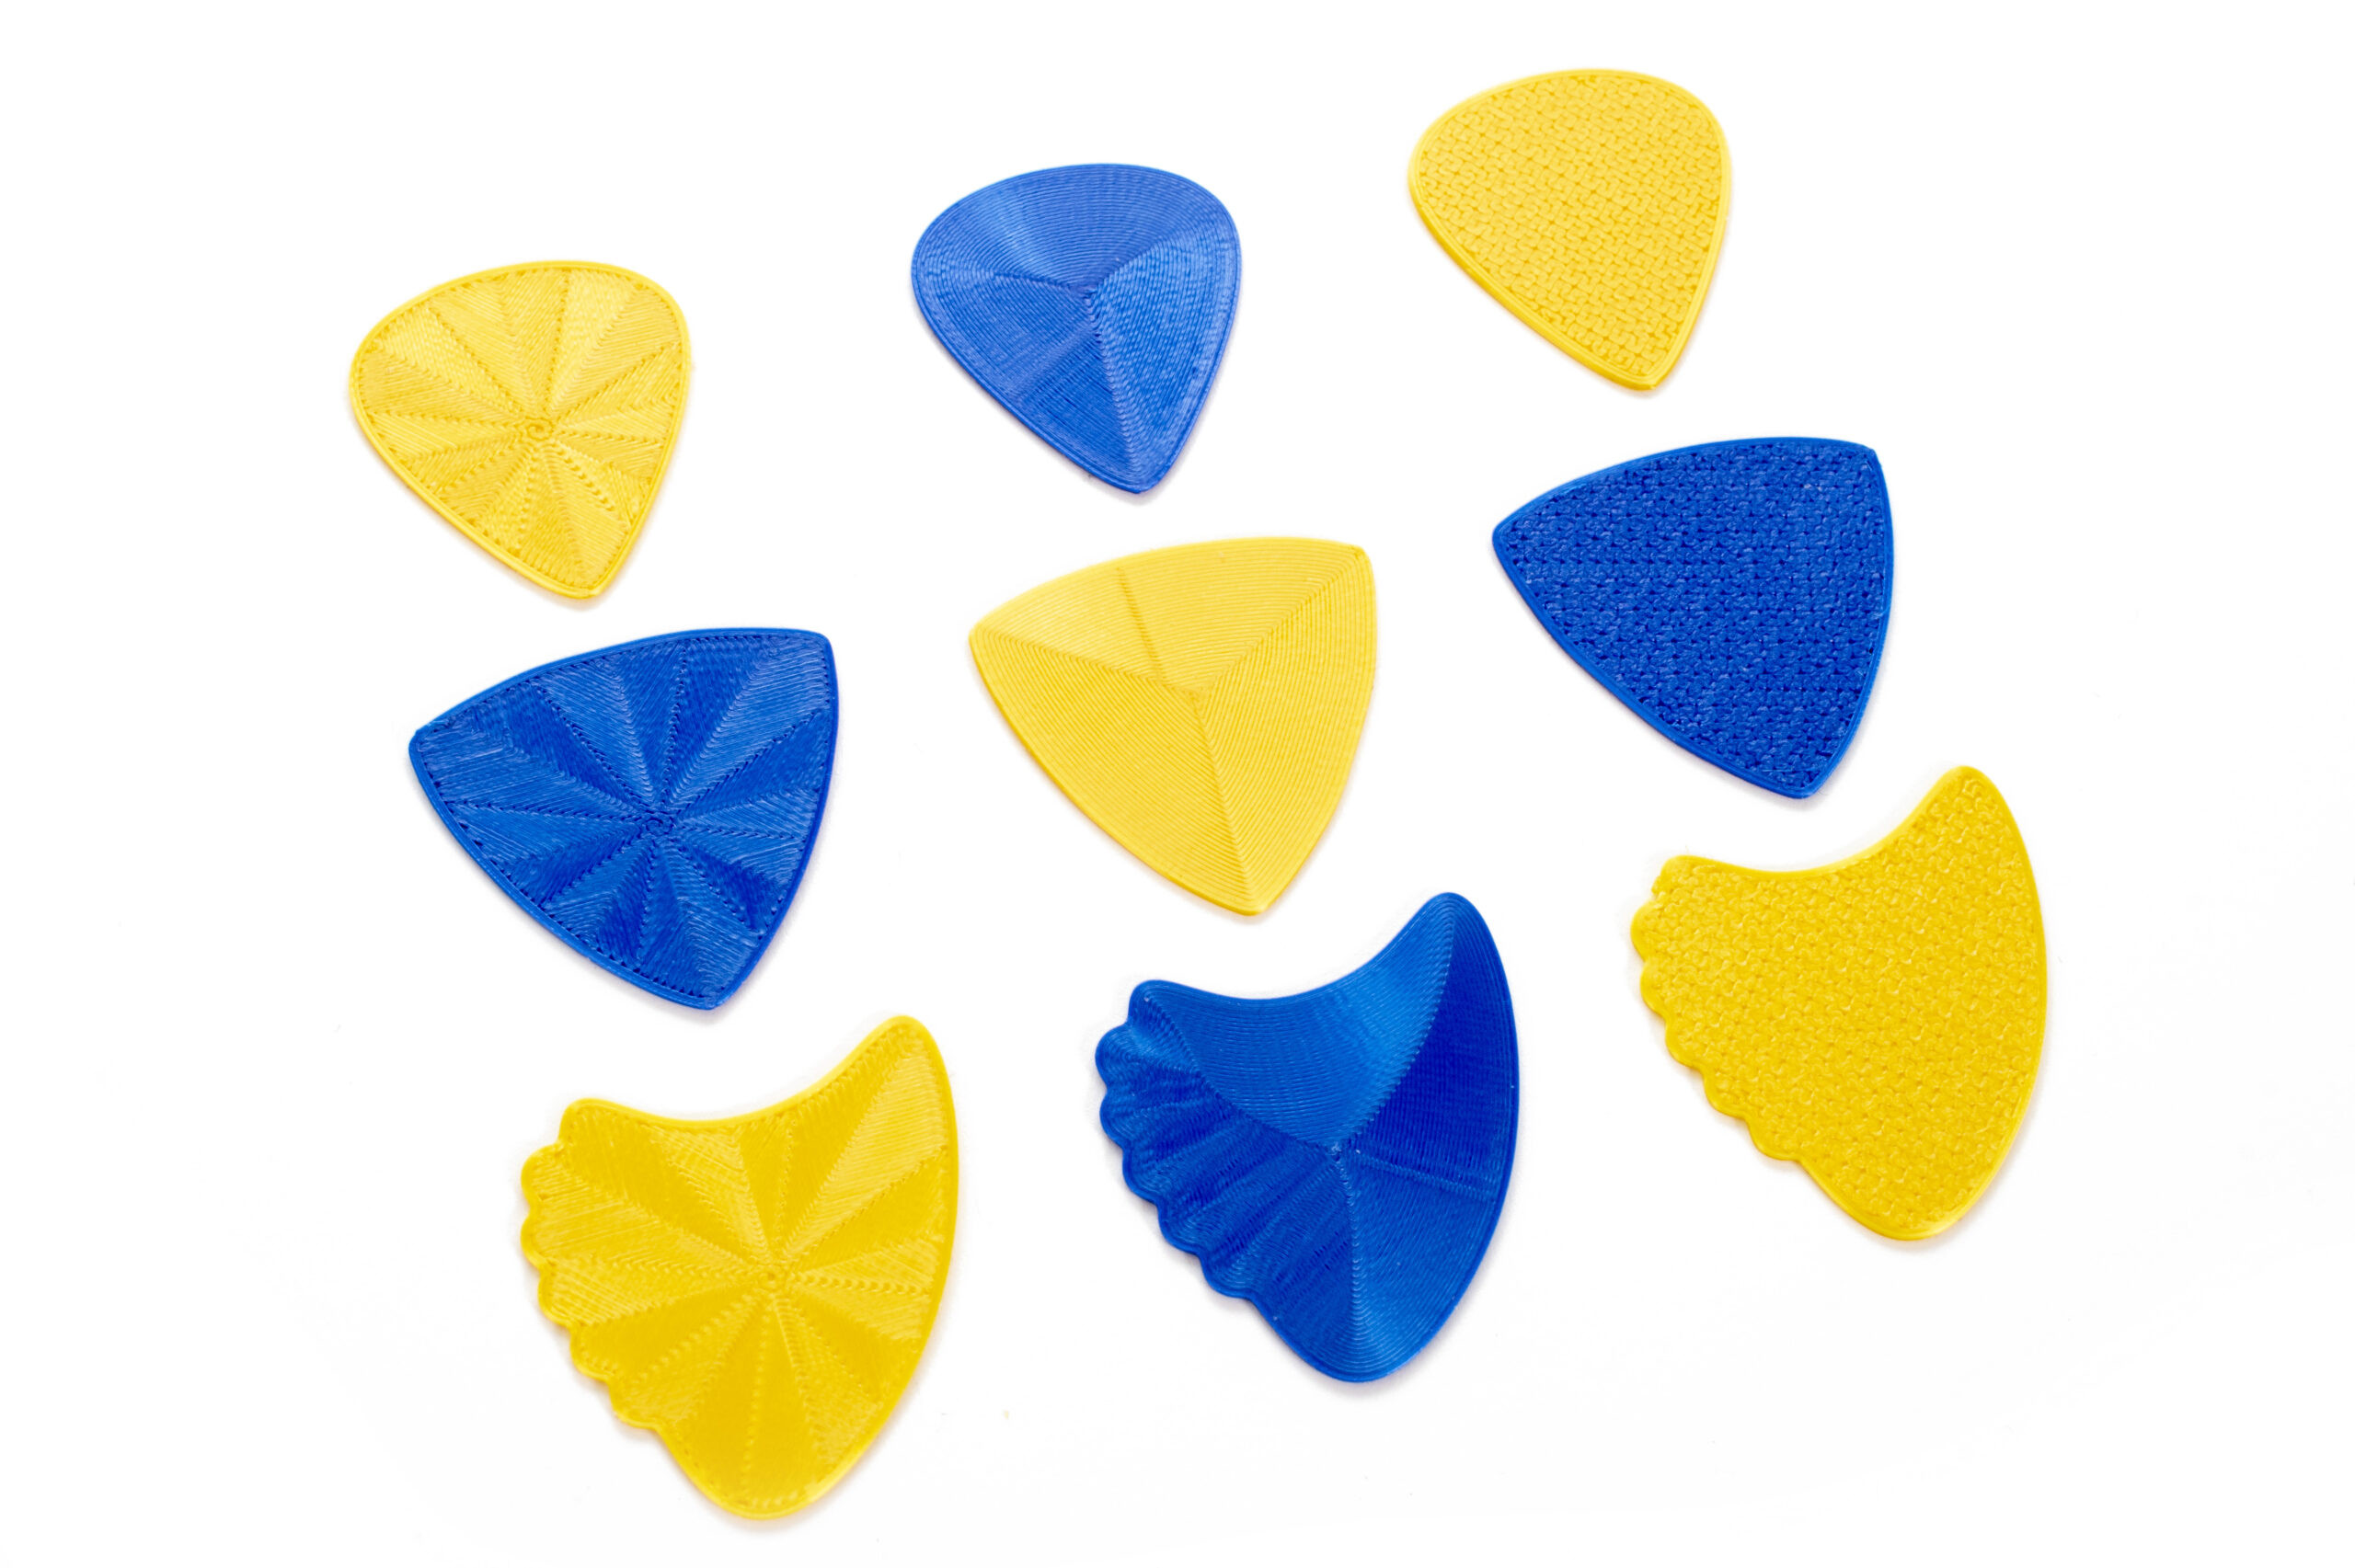
Guitar picks come in a surprising variety of shapes beyond the standard classic design. There’s the jazz pick, favored for its precision and speed; the tri-tip, offering a broader grip and three playing edges; and the distinctive sharkfin, popularized by The Beatles, with each corner producing a unique tone. The sharkfin’s curved design also allows for quick transitions between pick and fingerstyle playing. I’ve digitally recreated these diverse pick shapes in Fusion 360, and you can download them ready for 3D printing from PrusaPrinters.org.
But why stop there? 3D printing empowers you to go far beyond conventional shapes. Want to 3D print the legendary “Pick of Destiny”? Go for it! Inspired by the movie “Pick of Destiny,” a must-watch for rock enthusiasts, I decided to create my own replica of this mythical pick, rumored to bestow god-like guitar skills. I sculpted it in Blender (yes, we have a guide on 3D sculpting too!), utilizing PrusaSlicer’s color change feature to layer Prusament PLA Galaxy Black, Lime Green, and Mystic Green. The result? A 3D printed Pick of Destiny that closely mirrors the movie prop. You can find the model on PrusaPrinters.org.
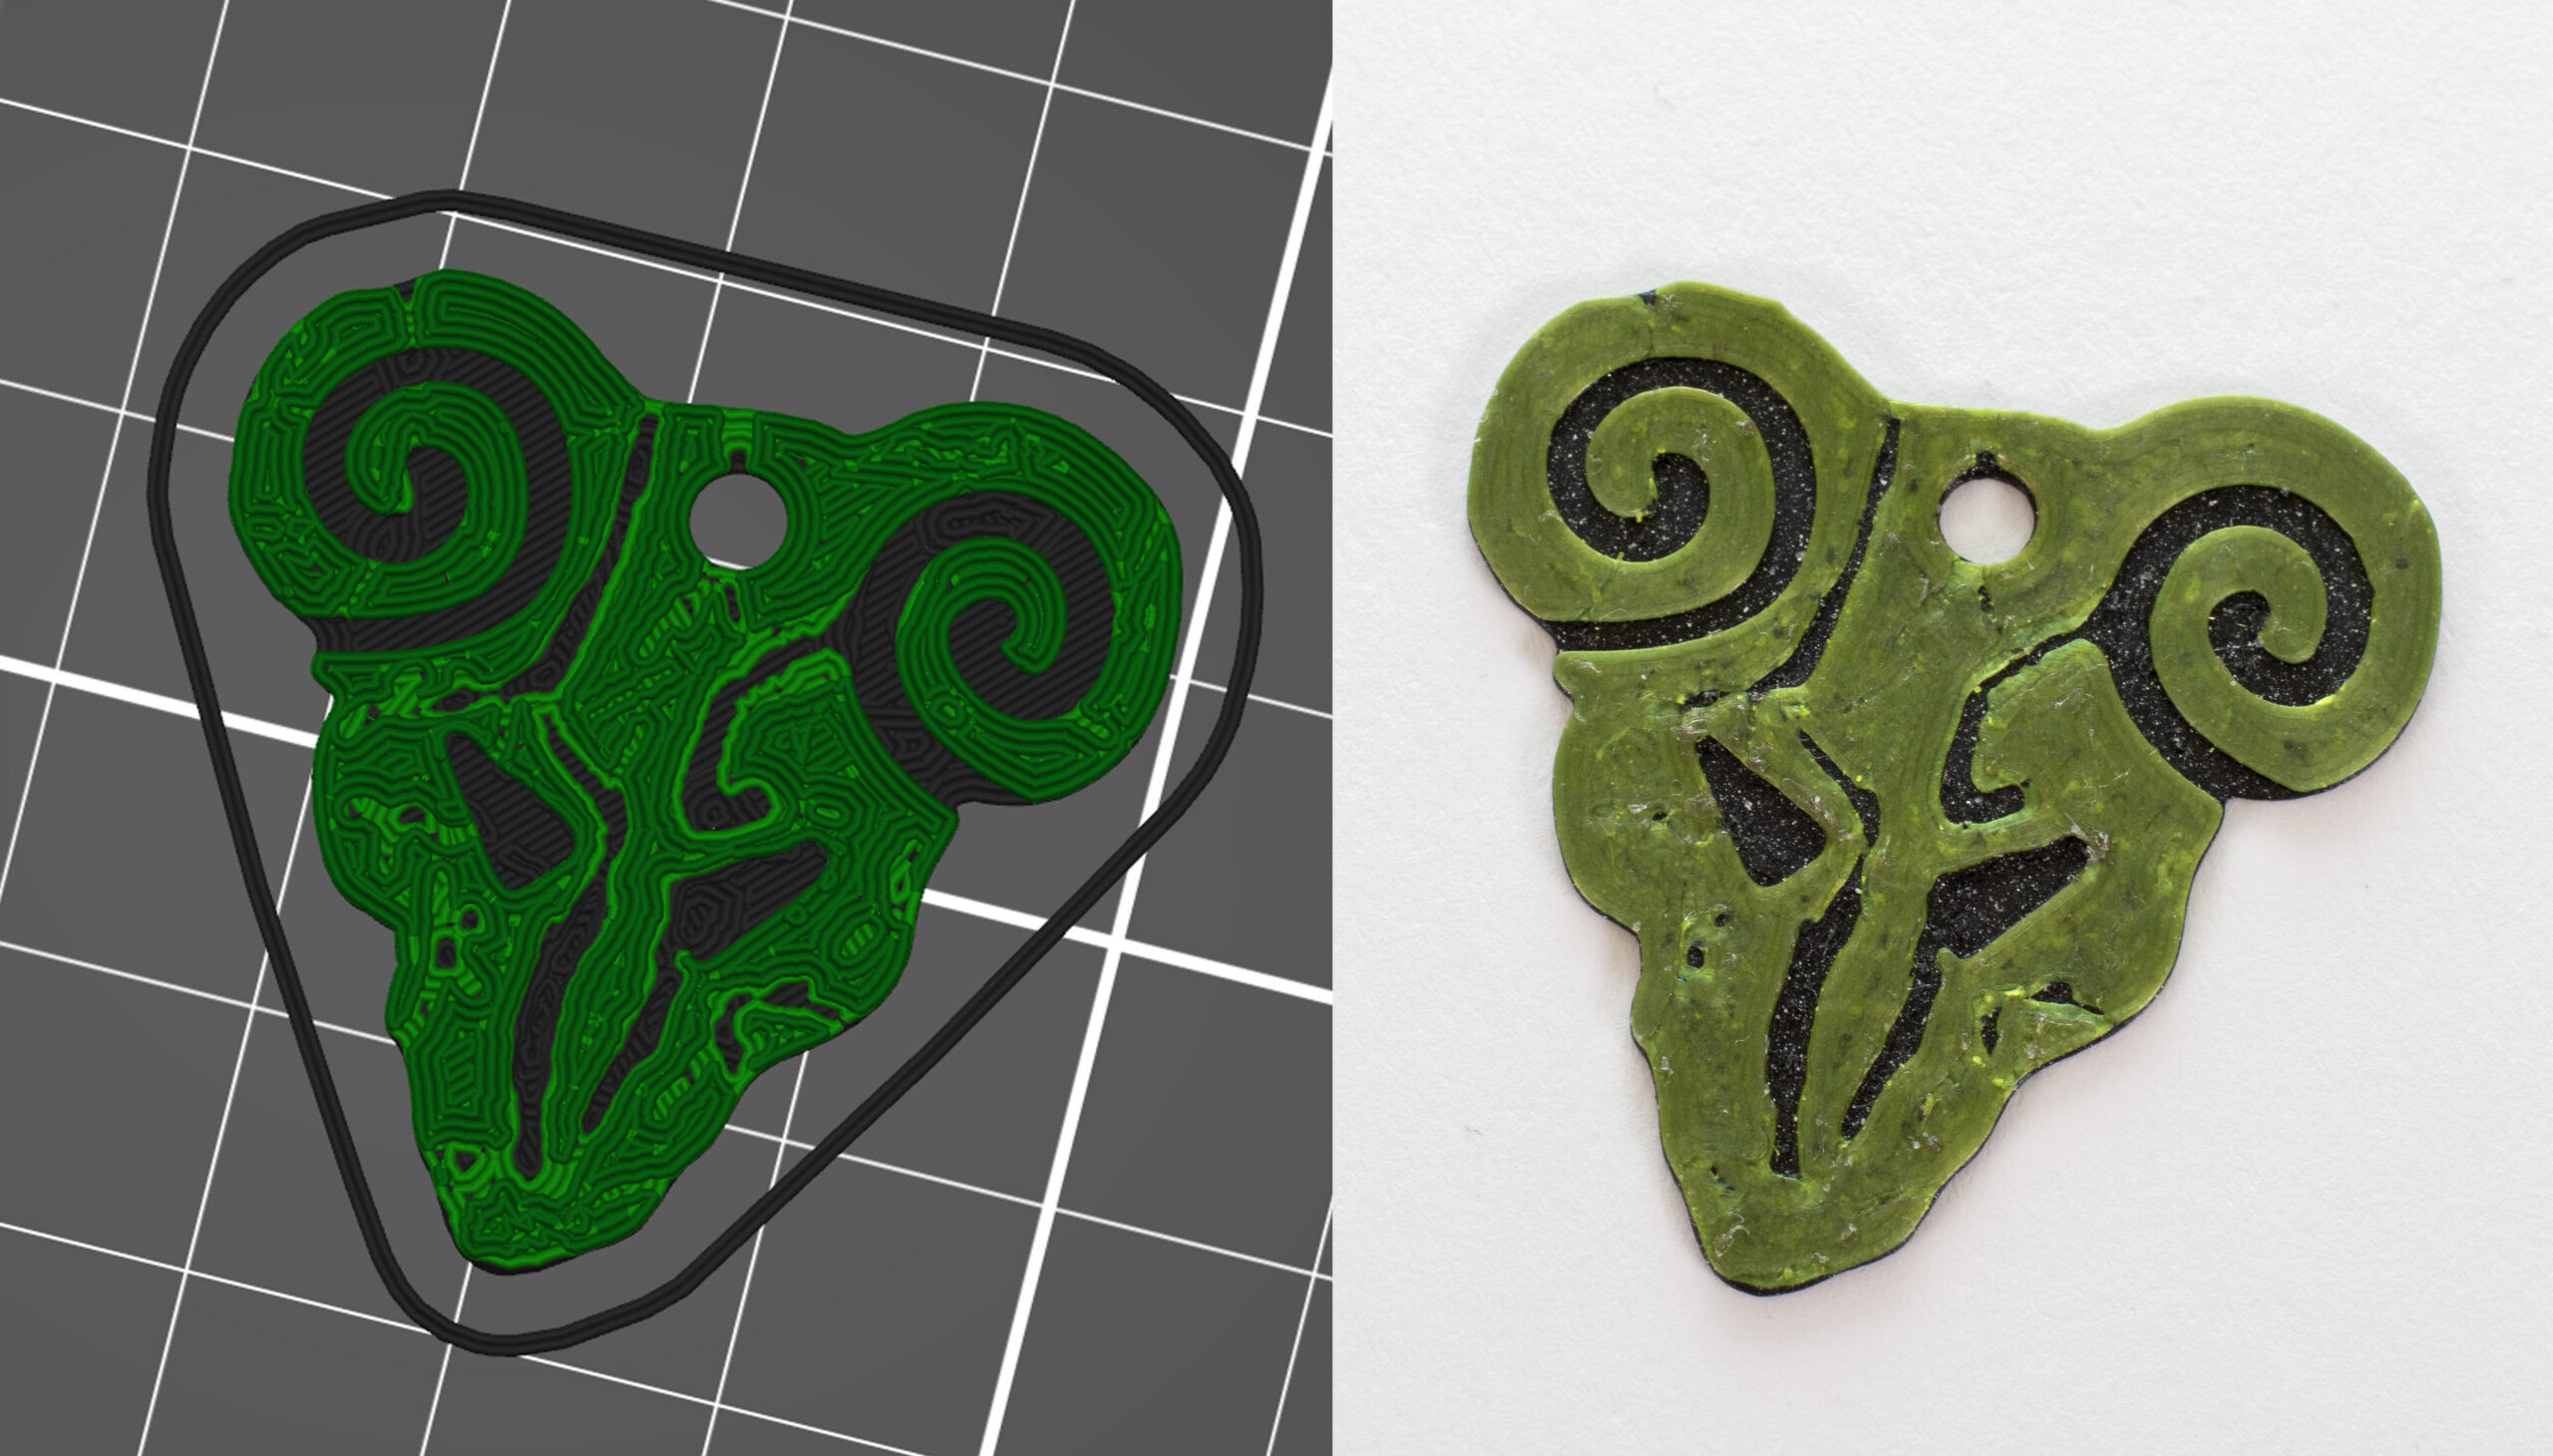 A vibrant, multi-colored 3D printed replica of the Pick of Destiny, showcasing the detail achievable with color changes in 3D printing.
Color customization is another simple yet impactful aspect of 3D printed picks. Match your pick to your guitar’s finish, your band’s color scheme, or simply your favorite hue. The possibilities are as broad as your filament collection.
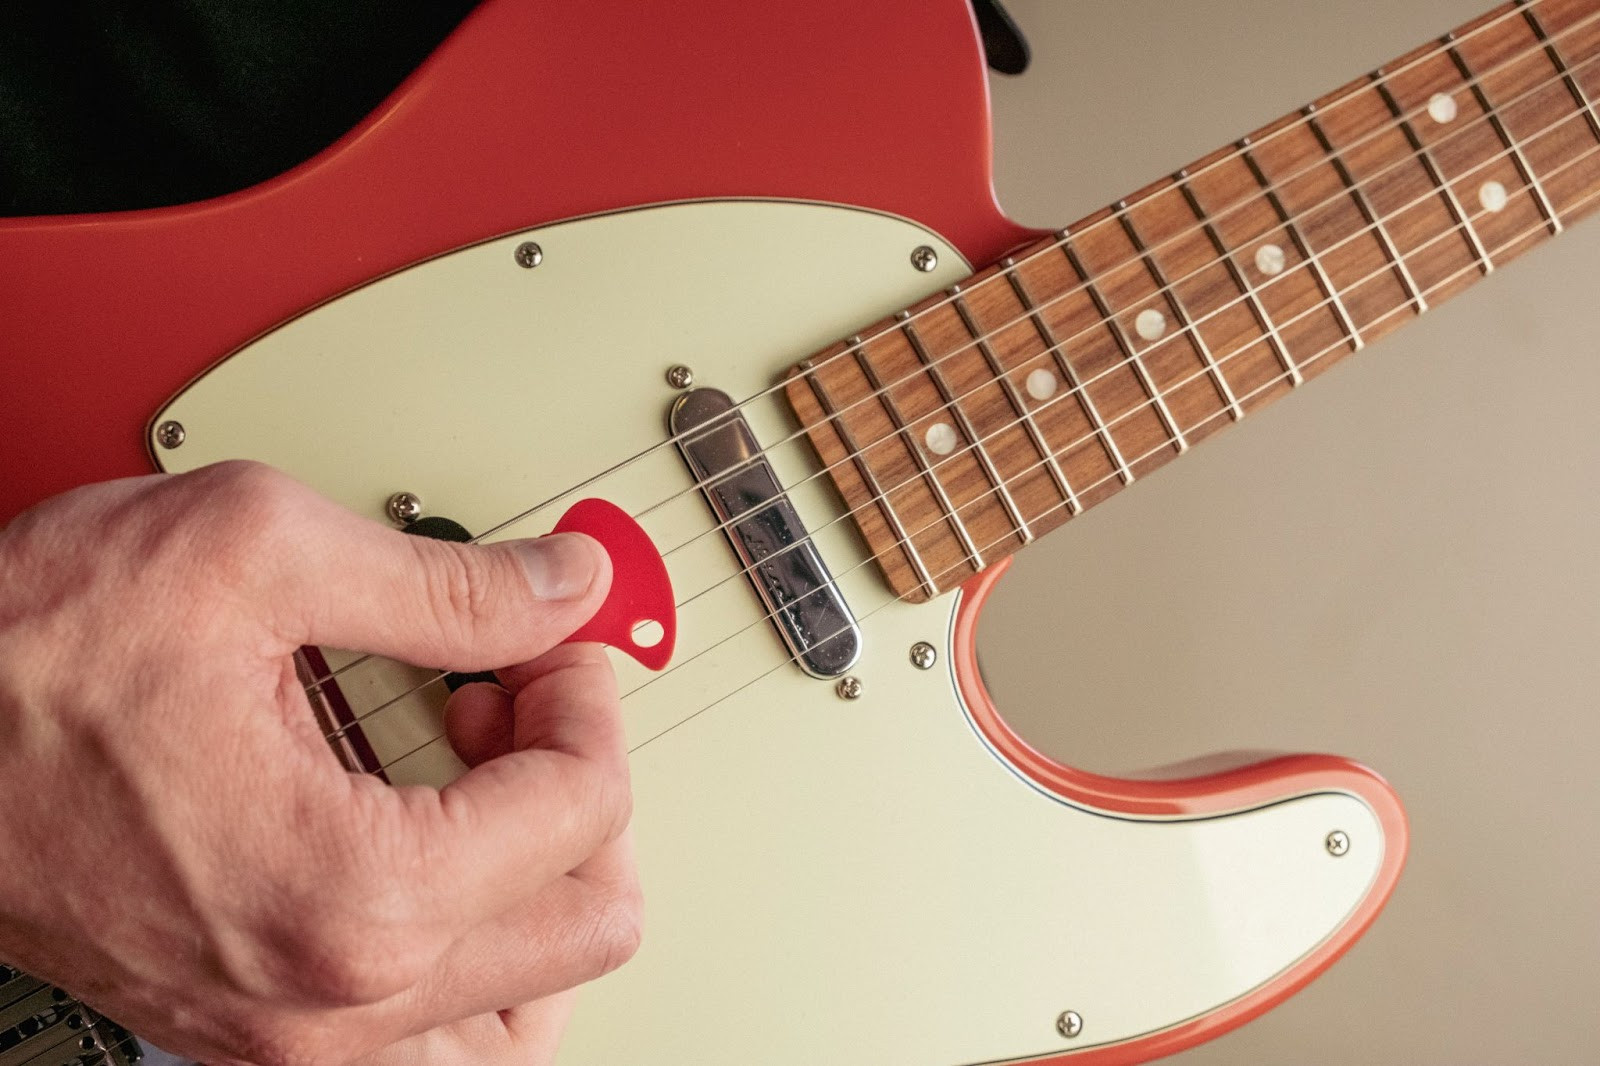 A close-up shot of a red 3D printed guitar pick perfectly matching the vibrant red finish of a Fender guitar, demonstrating color customization.
A 3D printed pick perfectly matching the Fender Fiesta Red guitar using Prusament Lipstick Red filament.
While some prefer smooth picks, a textured grip can provide enhanced control. 3D printing allows you to easily emboss patterns, short text like your band’s name, or even a simplified band logo onto your picks. Use color changes to make these details pop, or create debossed shapes for a unique feel.
With 3D printed picks this personalized and cool, they become incredibly affordable and practical merchandise for gigs. I now keep a stash of 3D printed picks in my wallet, ready to share. They are always a conversation starter, and fellow guitarists are thrilled to receive such a unique and functional gift.
Exploring Infill Patterns for Unique 3D Printed Picks
For simple, angled lines, monotonic infill works perfectly for 3D printed guitar picks. However, experimenting with more intricate infill patterns, especially with metallic or shiny filaments, can yield stunning visual effects. Octagram Spiral, Hilbert Curve, and Concentric infill patterns are particularly well-suited for adding a touch of flair.
 A comparative image showcasing three 3D printed guitar picks with different infill patterns: Octogram Spiral, Concentric, and Hilbert Curve, highlighting the visual diversity achievable with infill.
From left to right: Octogram Spiral, Concentric, and Hilbert curve infill patterns in 3D printed guitar picks.
If you opt for an infill pattern that remains consistent across layers, like Concentric, incorporating at least one rectilinear infill layer in the pick’s core is recommended. This can improve durability by reducing the chance of the pick splitting along extrusion lines.
Add Practicality: Keyring Holes and Tuner Peg Holders
A backup pick readily accessible is always a smart move. By adding a small hole to the grip of your 3D printed pick, you can easily attach it to your keyring – always within reach! Sizing the hole to match your tuner peg diameter (typically 6 mm) allows you to store a pick directly on your guitar headstock. This integrated solution avoids the need for adhesive pick holders. While you can incorporate a hole in your pick design using CAD software, PrusaSlicer offers a more versatile approach. Using modifiers directly in PrusaSlicer allows you to add a hole to any downloaded pick design without altering the original file, eliminating the need for separate versions. We have a comprehensive tutorial on PrusaSlicer modifiers to guide you.
In PrusaSlicer, simply right-click on your pick model, select “Add modifier,” and choose a shape or load a custom mesh. Set infill, top & bottom layers, and perimeters to 0 to create a hole. An upcoming PrusaSlicer version will streamline this process with a dedicated “Negative volume” modifier.
The same modifier technique can be used to add band logos or names to your 3D printed picks. Extrude an SVG file to create the modifier shape – most 3D modeling software supports this. A vast library of logos and basic shapes in SVG format is available on sites like flaticon.
Thumbpicks: Expanding Your Playing Style with 3D Printing
For blues or jazz guitarists who enjoy playing bass lines and melodies simultaneously, thumbpicks are worth exploring. While they may feel unusual initially, thumbpicks enhance bass note clarity and unlock a unique playing style. A snug fit is crucial for thumbpicks to prevent slippage. 3D printing allows you to easily experiment with different sizes to find your perfect fit. You can download a thumbpick model from PrusaPrinters.
Material and Durability of 3D Printed Guitar Picks
After six months of regular use, I was surprised by the resilience of 3D printed picks, initially thinking I might never break one. Eventually, after some heavy strumming on an acoustic guitar, a very thin 0.5 mm PLA pick finally succumbed. However, generally speaking, 3D printed picks, especially medium and thick gauges, are remarkably durable regardless of the material.
The primary difference between 3D printing materials lies in stiffness. PLA picks feel similar in flexibility to PETG or ASA picks that are 0.1-0.2 mm thicker. Prusament PC Blend filament produces exceptionally strong picks with a medium flex. Unless you have very specific material preferences, there’s no need to buy a dedicated spool just for picks. Even a small 50g sample filament provides enough material to 3D print dozens of picks.
Optimizing Print Orientation and Perimeters for Strength
Using at least the default setting of 2 perimeters is recommended for 3D printed guitar picks. This helps prevent edge tearing during playing. For advanced customization, PrusaSlicer’s seam painting feature allows you to ensure a continuous perimeter loop along the string-contact edge of the pick. Note that the edge of the outermost perimeter will naturally smooth out slightly with use.
While tempting to add intricate designs to the pick’s underside, bevel edges, or print vertically for finer resolution, printing picks flat on the print bed is the most practical approach. This simplifies printing and maximizes durability, as the forces exerted during playing are unlikely to cause layer separation in this orientation.
Final Strum: Endless Picks at Your Fingertips
Once you discover your ideal 3D printed guitar pick – thickness, shape, material, and design – a few prints will equip you with a lifetime supply. Sharing these personalized picks is a fantastic gesture that fellow musicians will appreciate. For bands, 3D printed picks offer a unique and cost-effective merchandise option. So, rock on, and happy printing!